What I love about this bread
- It’s so easy to make. This dough can be made in less than 5 minutes.
- The basic dough recipe can be enhanced with many different flavor varieties.
- Very little hands-on time.
- Crusty bread never ceases to impress family and friends.
- My 12-year-old grandson can make it.
Let’s make No-knead crusty bread:


- In a large mixing bowl, add flour, kosher salt, and yeast. Whisk together.
- Add water. Mix just until all of the flour has combined with the water. The dough will look like a shaggy mess. That’s ok.
- Cover the bowl with plastic wrap and let it sit for 12 – 18 hours on the countertop. DO NOT REFRIGERATE. This is not optional. It takes that much time to proof the dough. The reason why you need a large bowl is that the dough will start to rise.
- After 12 hours the dough will look like this. It’s pretty sticky, but that’s ok it’s supposed to be.
Shaping and baking the bread:


- Preheat oven to 450 degrees. As soon as it has heated to 450 degrees place your pot with the lid in the oven and preheat the pot for 30 minutes.
-
Right after you put the pan in the oven to pre-heat, dump the dough out onto a HEAVILY floured surface. Shape it into a round ball and place on a sheet of parchment paper. Parchment makes it so easy to transfer the dough into a hot pot and then remove it after baking. The parchment paper stays in the pot. This will rest for 30 minutes while the pan is heating. Cover with plastic wrap. Note: Use silicone coated parchment paper. The regular non-coated paper will stick terribly. Don’t chance it.


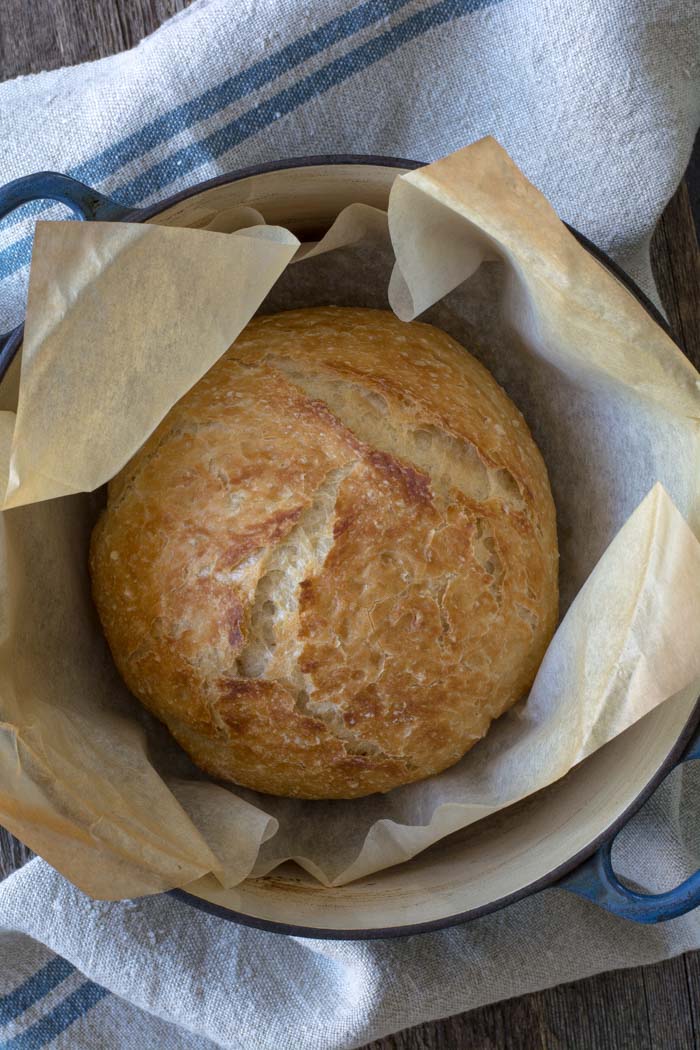
- Remove pot from the oven and carefully pick up the parchment and drop dough into the pot. Be careful the pan is HOT. Put the lid on the pot and return it to the oven for 30 minutes.
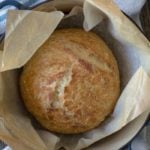
- After 30 minutes remove the lid from the pan. Bake for an additional 15 minutes or until nicely browned. You can test with an instant-read thermometer to make sure the bread is fully cooked on the inside. The temp should be between 190F and 200F degrees. Remove from the oven and carefully remove bread from the pot by lifting the edges of the parchment paper.
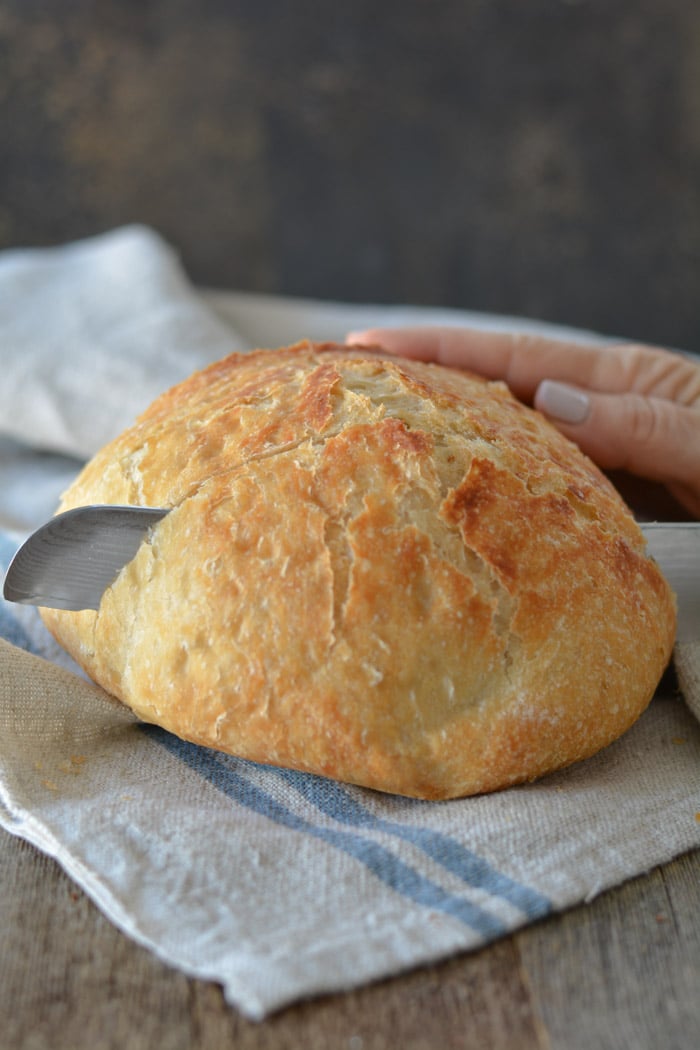
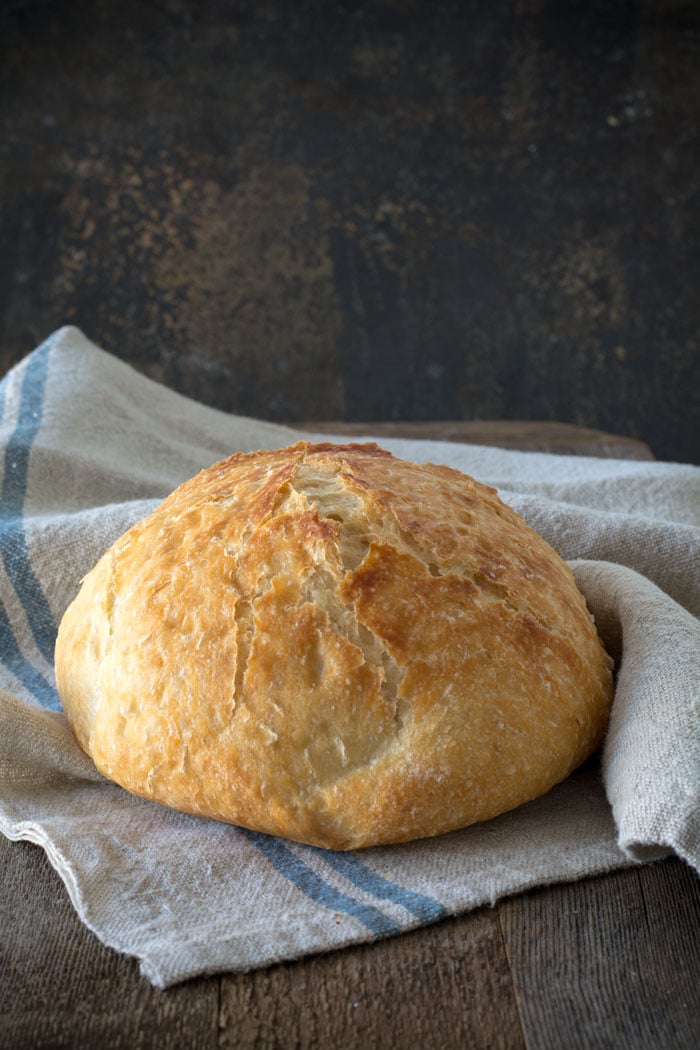
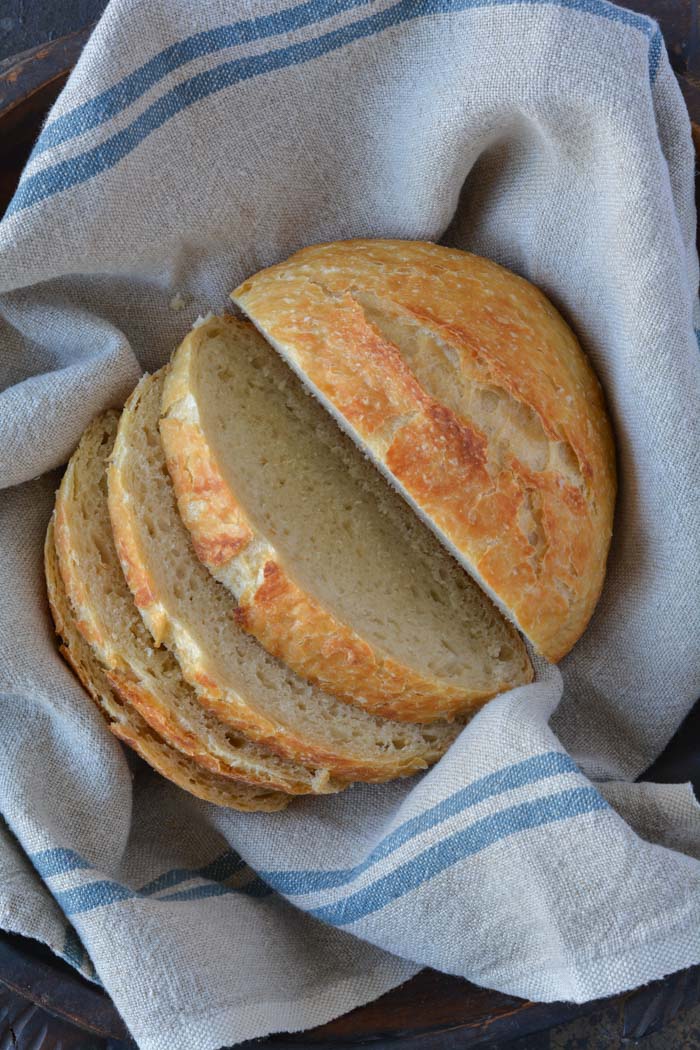
Holy cow! Can you believe how gorgeous that is? It’s best to wait for the bread to cool before slicing. Because I love warm bread I sliced it right away.
FAQ’s
Q: Do I have to use an enamel covered cast iron pan?
A: NO. You can use anything that can take the heat. The following have been used that I know of:
Clay pots with lids, Pizza stone with a bowl to cover the bread, insert from a crockpot, pyrex baking dish with a lid, stainless steel pot with a lid, baking dish covered with aluminum foil, old cast iron dutch oven.
Q: Do I have to use unbleached flour?
A: I always use unbleached flour. You can try bleached flour.
Q: Can I use self-rising flour?
A: I don’t know. I would just stick to all-purpose.
Q: What size is my pan?
A: My smallest pan is 5.5 quart. You can use as small as a 3 quart.
Q: What type of yeast do I use?
A: I use SAF instant yeast. Any yeast should work.
Q: Why is my bread turning out flat?
A: You could try using less 1/4 cup less liquid. Or add 1/4 cup additional flour. Make sure your dough appears to be dry when you first mix it. It will have more moisture during the rising time.
Q: Can my dough sit out longer than 18 hours? Does it HAVE to be between 12-18 hours?
A: I have let some dough sit as long as 24 hours and the bread was beautiful.
Q: Have you tried Gluten-free?
A: From what I hear the best GF is from King Arthur Flour https://shop.kingarthurflour.com/items/gluten-free-measure-for-measure-flour-3-lb
Q: Do I have to grease or oil the pan? Will my breadstick?
A: No you don’t need to grease the pan. I have never had the bread stick when using a cast iron pot. I haven’t tried anything else. The best way to be certain that the bread won’t stick is to form the loaf on a sheet of parchment paper and lift the bread into the pan using the sides of the parchment. Leave the paper in the pan. It’s won’t burn. When the bread has baked, just lift the sides of the parchment out of the pan. Voila! HOWEVER: Not all parchment paper is created equal. I use a silicone coated parchment paper. Regular parchment paper can stick something terrible. Don’t chance it.
No-Knead Crusty Bread
Wonderful yet easy artisan bread with a crisp crust. Prep takes just a few minutes with an overnight rise. Baked in a pot with a lid to create a steam oven. Bread can be made with many flavors and variations.
Ingredients
- 3 cups + 2 tablespoons unbleached all purpose flour (450 gr)
- 1 3/4 teaspoons Kosher salt (10 gr)
- 1/2 teaspoon Instant or Rapid-rise yeast (3 gr)
- 1 1/2 cups water cool (315 gr)
Instructions
-
In a large mixing bowl, whisk together flour, salt and yeast.
-
Add water and mix until a shaggy mixture forms.
-
Cover bowl with plastic wrap and set aside for 12 - 18 hours. Overnight works great.
-
Heat oven to 450 degrees. When the oven has reached 450 degrees place a cast iron pot with a lid in the oven and heat the pot for 30 minutes. OR pot can be placed in cold oven while oven is preheating leave in oven for 30 minutes.
-
Meanwhile, pour dough onto a heavily floured surface and shape into a ball. Cover with plastic wrap and let set while the pot is heating.
-
Remove hot pot from the oven and drop in the dough. Cover and return to oven for 30 minutes. After 30 minutes remove the lid and bake an additional 15 minutes. Remove bread from oven and place on a cooling rack to cool.
Recipe Video
Recipe Notes
FAQ's
Q: Do I have to use an enamel covered cast iron pan?
A: NO. You can use anything that can take the heat. The following have been used that I know of:
Clay pots with lids, Pizza stone with a bowl to cover the bread, insert from a crockpot, pyrex baking dish with a lid, stainless steel pot with a lid, baking dish covered with aluminum foil, old cast iron dutch oven.
Q: Do I have to use unbleached flour?
A: I always use unbleached flour. You can try bleached flour.
Q: Can I use self-rising flour?
A: I don't know. I would just stick to all-purpose.
Q: What size is my pan?
A: My smallest pan is 5.5 quart. You can use as small as a 3 quart.
Q: What type of yeast do I use?
A: I use SAF instant yeast. Any yeast should work.
Q: Why is my bread turning out flat?
A: You could try using less 1/4 cup less liquid. Or add 1/4 cup additional flour. Make sure your dough appears to be dry when you first mix it. It will have more moisture during the rising time.
Q: Can my dough sit out longer than 18 hours? Does it HAVE to be between 12-18 hours?
A: I have let some dough sit as long as 24 hours and the bread was beautiful.
Q: Have you tried Gluten-free?
A: No. I'm still waiting for someone to venture into the realm of Gluten-free. If you try it, let everyone know.
Q: Do I have to grease or oil the pan? Will my breadstick?
A: No you don't need to grease the pan. I have never had the bread stick when using a cast iron pot. I haven't tried anything else. The best way to be certain that the bread won't stick is to form the loaf on a sheet of parchment paper and lift the bread into the pan using the sides of the parchment. Leave the paper in the pan. It's won't burn. When the bread has baked, just lift the sides of the parchment out of the pan. Voila! HOWEVER: Not all parchment paper is created equal. I use a silicone coated parchment paper. Regular parchment paper can stick something terrible. Don't chance it.
More Notes:
Regular active yeast can be used in place of the instant or rapid-rise yeast. It will need to be activated in 1/4 cup warm water. Stir and let sit for 5-10 minutes. However, most of the comments I have received state that the rapid raise works the best. You choose. Whisk the flour, salt, and yeast together.


two words: THANK YOU.
three words: NOW I'M FAT.
I just baked a loaf using half bread flour and half spelt flour. I baked it in a Corningware dish. I did not know it should rise another 2 hours on the counter, so I didn't do that. I had to add another 1/2 cup spelt flour. The bread looks fabulous but it won't come out of the dish for the life of me! Any hints?
While baking, the smell kind of worried me. It smelled bitter. However, the second I removed the lid it smelled AMAZING! My first attempt went beautifully! While baking I whipped up a couple more batches to sit overnight. I did change the recipie a bit. After the first 30 minutes of the bread baking in the oven, when i took off the lid I squeezed a lemon over the top and continued baking. It added a wonderfully fresh 'zing' to it! I cannot wait to try other flavors! Next one i think will be lemon poppyseed!
I made this bread yesterday for the first time and it was amazing!!! I tried it again today with Parmesan cheese and the dough smells like alcohol. Is that normal?
Baking soda works great on pots, ovens, stove tops, etc. Use it dry with a paper towel or cloth and a little elbow grease. Works wonders
To clean my pots, I use spray on oven cleaner. I even use oven cleaner on glass. It's fast and works great. I don't use it on the inside of my dutch oven. I use a small amount of bleach and water (I don't do that very often).
It didn't rise as high as yours but it wasn't flat. Tastes amazing!! I used a large soup pot. I put the dough on parchment and put it in the pot. It is divine!!
I made this bread but mine seems to be very dense and maybe even a little undercooked. Any suggestions. I do have to say that's it looks beautiful! Want to try again with some tips you might have.
Val
The bread is a bit denser than normal bread. You could try cooking the bread longer with the lid on. Then remove the lid until golden brown. Try 5-7 minutes longer with the lid on. I hope this solves the problem.
My bread did not rise or get brown..it's just a big lump of white hard goo:( So disappointed! What did I do wrong? I used ovenproof Longaberger stoneware with foil over it. But it never seemed to rise and when I took it out of the bowl, while waiting for the stoneware to heat up, it was a flat sticky mess that would not form into a ball at all. Help! I was so excited about this recipe..
The only thing I can think of is that maybe your yeast has issues. Add 1 teaspoon of yeast into 1/4 cup lukewarm water with a pinch of sugar, stir, then let stand for about 10 minutes. If the yeast foams up, it's good yeast. If it does nothing then you need to get some new yeast. Remember if at first you don't succeed….. Other than a yeast issue, I'm perplexed.
Hey I wouldn't be sad about dirty pots. They aren't dirty they are seasoned. Seasoned means loved in my kitchen. Do you really want to be known as the person who doesn't use all those fantastic gadgets…I can tell that isn't you. So enjoy your loved pots and pans. Trying your bread recipe right now and I'm excited to see the result. Thanks.
I am so glad I found this recipe, although I am now obsessed. My house has smelled like freshly baked bread now for a week. I have a new flavor for you: sundried tomato and feta. Delicious! Thank you so much for sharing this recipe and prompting me to take up running again, since I am sure I have gained 5 lbs.
I am going out tomorrow and looking for enameled cast iron pots!!!
To clean the outside of your dutch oven, tip upside down outdoors on newspaper and spray with oven cleaner. It will completly take off all the brown/greasy stains. I've done this for years and my enamel cast iron still looks like new. I don't spray anything inside due not only to chemicals but I like the golden look from all the recipes made in it.
Janet, you are a blessing! Thanks for your wisdom and creativity!
Oh Janet….my family thanks you for your kindness and superb directions!
i can't wait to try this, i have one of those pans like yours, but have not used it yet, this will be the perfect first experience with it. i got thinking, i have a fabulous rosemary asiago cheese, that i think would be FABULOUS in this bread. will keep you posted
Awesome, awesome recipe! Since I love wheat bread and have made it the traditional way for years, I really wanted to try a wheat version. For my first batch, I reduced the flour and upped the water like an earlier commenter suggested. The dough was really sticky. It turned out beautifully, but it didn't taste quite right to me. Most wheat breads have a kind of sweet undertone that my first batch lacked. I made it again replacing 1/2 cup all purpose flour with 1/2 cup of wheat flour and I added a 1/2 cup of brown sugar. I also used the full amount of water. Success! This is the best wheat bread I've ever made!
Janet,
While I love white bread, it is a treat, not a staple in my household, my preference being whole wheat. I'm game to try making this recipe with whole wheat flour and reporting on my results, but I'm truly (at the tender age of 50-something) a "baby" baker just taking my first steps, especially where baking bread is concerned.
My questions are – in what circumstances would you add a little more flour or a little more liquid or a little more yeast? What is the wheat gluten additive you mentioned somewhere in a reply above? This knowledge isn't intuitive to me yet so I'd be grateful for any advice you can offer.
My thanks as well to all you creative bakers out there who so generously contribute to the conversation. I'm sure I'm not the only one who has benefited from others sharing their experiences with cookware, ingredient substitutions, etc.
Does anyone know if King Arthur flour is only available in the US? I'm in Canada. Also, should alterations be made for humid conditions? If so, what changes should be made? It's hot here these days and although we're experiencing a dryer than usual summer in Ottawa, Canada's capital, the humidity sometimes hits 80-90%. And when you factor in what I think my hot flashes must contribute … 🙂
Hi Wendy, I'm at your same "tender age". I totally get the "hot flash" thing contributing to just about everything that seems a little abnormal in my life right now. Vital Wheat Gluten helps lighten wheat bread. I can find it in most grocery stores where I live. Look for it by the flour. It will help lighten up that heaviness that wheat can produce. I would also use "winter white whole wheat" if available. I love King Arthur flour. It's not easy to come by in Utah and it has been making an appearance a little more in my local stores. I'm not sure about Canada. You can go to their website to find a location near you.
Your humidity will make it so your crust doesn't stay crisp as long as mine will. I live in a dessert. One thing you will notice with the whole wheat flour is that it doesn't soak up the water and it will appear to have a watery texture. After sitting a bit it seems to absorb the liquid a bit more. I would say to use less flour than you think it may need. It will be a sticky mess, but just knead the dough a bit after the 12 hours sitting time with some white flour to help make it not so sticky. Just play with it. I'm sure I haven't been a lot of help. It's pretty forgiving. My first two loaves of using wheat flour produced lovely bricks. I hope you have great success.
Ran across this at the perfect time. The store didn't have the bread I usually buy today. Made my dough and baking it in the morning.
Once again I thank you for all your great comments, cleaning tips and fabulous recipe ideas.
I've read all posts & 1 person mentioned letting the bread sit for 2 hrs. after you remove it from the bowl & cover with plastic wrap. Couldn't find this in your instructions. So, how long is it supposed to sit before going into the oven? Can't wait to make it….sounds great! Thanks for your help.
I just let the dough rest while the pan is heating. I have never let it rest for 2 hours. I don't think there is a need to do that.
Thanks so much for sharing this! I LOVE being ale to make fresh bread daily! and it is so yummy
Omg this is amazing. I just finished making this for the first time. I did extra sharp cheddar and roasted garlic, and it turned out amazing. I'm in love!! Thank you!!
Stacy
I found this via Pinterest. A fabulous recipe that I'll definitely make again! Cheers!
Love this, I make sourdough bread in my Le Crueset and it is fabulous, but now I want to add stuff to it! You an buy a special cleaner that le crueset sells and it works very , very well, but half the time I leave my pans looking like yours because next time I use them, they are going to look the same! Love your blog and am going to keep following your cooking adventures!
You could try heating your pot with water in it, dumping the water and drying it out before putting your dough in it. I would extend the time to heat the pan just because the water will make it take longer to achieve the same tempeture.
I have made two loaves and really like the flavor of the bread. My problem is the texture. My bread has lots of large holes – not an even texture. What do you think is the problem?
I think that means you perfected artisan bread. That's the texture I go for. We like the larger holes. If that bothers you, just knead the dough a bit when you shape it into a loaf. That should take care of larger holes. I hope this helps. Let me know if it makes a difference.
I understand preheating the oven, and I understand preheating the French oven. What I don't get is why you can't put the French oven into the cold oven, and preheat both to temp. Seems to me it would be less traumatic to the container if it comes slowly up to temp… Since I only have a Pyrex Dutch oven, you can bet I will put it cold into a cold oven, and heat them up gradually together! (then proceed according to recipe)
I just used whatever I had from my herb garden! Fresh rosemary, basil, oregano and some aged parmesan. Delicious!!! Thanks so much!
– You can use any yeast regular or instant. Both work the same. I have never used warm water…soooooo. I'm assuming it doesn't matter, but if you are concerned by all means add the warm water. It's a pretty forgiving recipe. Everything just seems to work.
– using a bread machine probably wouldn't give the bread the crispy crust. The pot acts as a steam oven. I'm not sure if a bread maker would do the same, but anything is worth a try.
Once again I thank you so all of your fabulous tips and comments.
For the LeCreuset pot try Marshalls, TJ Maxx or HomeGoods which are all really the same. They will have the large pots on sale sometimes at quite a savings. Also at an outlet mall remember to register long before you know you are going and get on the mailing list for coupons. This will help defray the cost of the pots but any cost is well worth the investment.
I spent almost 30 minutes trying to find an answer to my question but then gave up… Can I use non-instant yeast? And does the water need to be warm for either kinds of yeast? In most breads they give specific temperature. I hate that…
Thanks! Especially if you've already answered this…
Respectfully,
Addison
THANK you for this. I am a new cook who wants my sons to experience real bread and the "fresh baked bread" smell on a Saturday morning without having to knead and wait and wait and knead. And thanks everyone else for sharing your tweaks to the recipe. #luvthecooks
Our oven is broken – any way to adapt this to a bread machine?
LOVE this recipe!
We also use it to make dessert-plate sized custom pizza's (LOT'S of flour on hands & cutting board to shape into round pizza dough). Our family favorite!
This dough is so versatile for anything.
Janet this worked great in the dutch oven, Im addicted going to add asiago cheese to a patch tonight. Thank you for sharing 🙂
If you've never had chocolate bread, you should try making it with this recipe. I added a couple handfuls of chocolate chips, some cocoa powder and some hot cocoa mix (trying to use up some of the stuff in my cupboard so I don't know the exact amounts). It was not very sweet, but very very yummy. I
I also add a tablespoon of sugar to this recipe no matter what kind of bread I plan to make (yeast loves sugar!). I just like the results of the rise better when I do this.
I have tried this chocolate version. I added some pecans because we are nut lovers. You are right, it is AMAZING. My daughter made French toast with it and topped it with strawberries and whipping cream. She said it was to die for. I really want to try it, but know that I'll eat way more than I should. We polished off a loaf of the chocolate, chocolate chip in hours! thanks for passing on your additions. Hot cocoa mix…what a great idea!
If you use your Le Creuset as often as I use mine you may not want to wait 36-48 hours, for the ammonia method. Le Creuset makes a cleaner for their pots it does take a little scrubbing, no more than cleaning any pot. It reminds me of liquid Bon-ami, which I plan to use in the future since it safely removes the metal marks on my china without scratching.
Whaaa?!! Loving this idea, another super use for my mom's coveted Le Creuset. I don't think I would ever clean that wonderful used look off of them, reminds me of all the amazing things that came out of them as a kid, or now as a chef myself. Thanks so much for sharing, I'm really excited to try a new way of bread baking….also, love your photos and can't wait to start following your blog.
I'm gong to try to answer recent questions. I have a daughter getting married in three weeks!!!! I'm swamped with wedding plans and have completely neglected you! I'm so sorry. I hope to get my life back again. Be patient with me during this MAJOR event in our lives.
– Yes you can use a chipped enamel cast iron pot. My pot has a chip and a crack. It works just great.
– Way to be creative Sue W. I have used my BBQ for many things during the hot summer months. I hope you baking dish survived 🙁
– Yes you can use whole wheat. Decrease the amount of water by 1/3 cup according to a comment received. The bread will be heavier and dense. You can play with the recipe and many different blends of grains. I have produced a few "bricks", but most of the time the whole grain works just great.
– You do not have to let the dough rest for 2 hours after the 12-18 hour rising time. 10-15 minutes is plenty of time.
Thanks to everyone for posting so many GREAT ideas and helpful tips and hints. You are all just amazing bakers. I'm so glad you found me and my blog because I have learned so much from you. If you would like a direct response to questions, please send me your email address and I'll respond to you and will not post your address. Much love.
Looks like a fabulous recipe. Can't wait to try it. You asked for ideas of how to clean your Le Creuset pots. There is an L.C. outlet about 2 miles from my house (don't hate me!). They sell a liquid cleaner that works fabulously! It is non abraisive and cleans every hint of anything off of my pots. Other than one having a chip from where I dropped the lid onto the pot, my 15+ year old pots look brand new!
This is just like ARTISAN BREAD IN 5 MINUTES A DAY …the book by Hertzberg and Francois. Love the flavors you used!
This is an excellent bread recipe, my family loves it. Thanks
so, I am trying this out tonight…added some fresh chopped basil from my garden, diced sundried tomatoes (reconstituted & dried w/paper towel) & an italian cheese blend…can't wait to bake it tomorrow!
yes, can't wait to make the bread, wondering if a chipped enamel cast iron is ok to use. nancy
Hi Janet, thank you so much for posting this and also for all your diligent responses to questions!
I didn't see anything about this, so I just wanted to let you know that I tried it tonight in my BBQ, in corelle cookware. Yes, I burned the bread on the bottom because it was not cast iron, but I can just scrape that part off, and yes, I have a lot of smoke damage to my correlle dishes, but…. IT WAS DELICIOUS!!! I am particularly happy that I can make fresh yummy bread without heating up my house. (It was 31 degrees Celcius today.) Thanks again – my family is loving this bread!
Sue.
I'm reviving this comment thread 🙂 I just found this recipe on Pinterest and WOW!!! It was so easy and super yummy! My husband has eaten almost the whole loaf in one day. For all of you who are wondering if it's supposed to be gummy and super wet, the answer is YES. Don't worry, it's supposed to look sloppy, but it cooks up beautifully. I used bleached flour, it was all I had, and it didn't come out gummy in the center as another person commented. From this bread, I made my hubby a grilled ham, cheese, and egg sandwich for dinner, ohhhh it looked and tasted good. I can't wait to try the different variations. BTW, I used my Analon hard anodized titanium stock pot and it worked just fine. The base of my pot was much larger than a 5 qt dutch oven so the bread spread out more and wasn't as round. I'm buying the Cost Plus version of the Le Creuset in a couple of days and I'll try it out again to see if I get a rounder bread.
Also, to the Anonymous commenter who accused Janet of stealing the recipe and then calling it her own; she states in her blog post that she retrieved this recipe from the Le Creuset website, she never claimed to be the creator.
Thanks Janet!
Hi Janet!
So glad I pinned this. I have had awful luck with breads in the past – but went out on a mission to find an enameled pot – I have been coveting a LeCreuset for some time, but happened to hit a Kohl's super duper sale on Food Network items and brought home the 5.5 qt dutch oven. I was worried when I put my dough in the pot as it had flattened out quite a bit on the floured surface – however, I dumped it in and when I opened the oven – Holy Cow is RIGHT!!! I do have to admit that I couldn't wait for it to cool completely. It was delicious and gorgeous. Thank you so much. I can't wait to try some other variations AND some of your other recipes!!! I am definitely going to try your cinnamon twists next.
Thanks for such a great job explaining and photo journaling!!! It is much appreciated!! Happy Baking!!!
Love love this bread…….I made the cranberry, almond & orange zest….OMG I ate most of the loaf! The cheese/rosemary/lemon loaf I shared with friends & a bottle of wine….experimented and tried roasted garlic/parmesan/parsley…my new favorite…made it twice…family loves it and friends too….served with Italian cuisine…..Thanks so much for sharing your recipe
Hello :)…I DID scan thru most all of the comments, I really did. Can I use WHOLE WHEAT flour? Has anyone else tried it? I've never made bread and am actually going to give this a shot! Thank you for the recipe, easy instructions and the fab pics! Mike in Indiana 🙂
Thank you so much for sharing this! We've been having fresh bread everyday. 🙂 This morning I mixed up rye flour with saurkraut, onion and caraway seeds. I haven't had a bad loaf yet!
Turned out really great. This is really a fool proof recipe. 😀
Here's my first attempt – I slathered it in Olive Oil
http://pinterest.com/pin/78250112246407448/
Baking my first loaf right now, but not sure how it will turn out – I missed the instructions about covering the bread until it had been in the oven for 10 minutes, so we'll see.
I added rosemary, parmesan and olive oil (about 1 1/2 tbsp rosemary, 1/2 c parm and about 2 tbsp olive oil)
My dough more than doubled in size in 7 hours, so I started baking it.
I'll let you know how it goes – since I followed nearly none of the directions, this will be a good test of how versatile the recipe is! LOL
My 2 cents:
I put the pan in the oven AS the oven preheats. By the time the oven reaches 450, so does the pot and I save time and energy. Because I don't have the directions in front of me, I skipped the step of flouring/shaping and just dumped the dough into the preheated pot.. The bread DID stick to the pot and was difficult to remove. Perhaps flouring helps that? Also, I find the finished product to be a bit bland. Perhaps because there is no sweetener in this recipe? The other difference, for me, is that I used freshly ground wheat which may have lent an extra stickiness to the dough. I will use this again, as it is a very easy and convenient recipe, but I may tinker with it. 🙂
So awesome, so easy, so beautiful, so delish! Thanks!
Saw this blogpost at Pinterest! Thanks for sharing – do you know if it works with whole wheat flour?
I made this bread today, as my first attempt at bread making. I made some freshman mistakes, but it still turned out great. Very sticky, lol, but easy.
Ok, maybe I am the only one who wondered about this, but I wasn't clear on the step from pouring the dough onto a heavily floured surface, shaping and covering with plastic wrap. So I checked out some other versions of the "Le Cruset Bread" and the others that I saw specified letting the dough rest for 2 hours after being poured out & shaped. Your recipe didn't really expound much on that; my first two attempts I just dumped it out, shaped it and covered it while I got the hot pot out of the oven (sum total of 3 minutes). So did you omit that second rising on purpose? The bread tastes great regardless, but I was just wondering!!
I'm so obsessed with this bread!! I had a bottle of dried tomato and garlic pesto seasoning from Tastefully simple that I never used, so I added a palmful of it, with a little parmesean cheese and lemon zest! Sounds a little odd, but it was absolutely amazing!! I served it with a penne pasta with shrimp and pesto dish! It was heavenly!!!
Hi Janet,
Thanks so much.. this has given my kitchen new inspiration and now I'm obsessed with all the variations! One question: have you made any of your breads sweet? How has that turned out and how did you do it? I wanted to try a cinnamon pecan but wasn't sure how sugar would affect this.
I have not added sugar to the bread. I'm sure you could add a tablespoon or two without any problems.
Janet,
You are my HERO! My 8 year old daughter and I made this bread tonight and it is simply amazing! This was a first for both of is and we are very excited to make more in different favors and already have been planning bread gifts for the holidays. Thank you so much for your simple instructions and for sharing this fabulous recipe!
Thanks so much for this fabulous looking recipe! I will be trying it tomorrow! I will return with my review.
A tip for Canadian readers… KitchenAid enameled cast iron pots (Le Creuset knockoffs) are regularly on sale at Canadian Tire at huge discounts. For example, I got my 7qt for $69.99, and there is currently a sale on the 3qt oval for $29.99!
This recipe looks fabulous! I will be putting the dough together tonight to have tomorrow! Thanks! I will return with results!
KitchenAid makes enameled cast iron pots at a fraction of the price as well. If there are any Canadians reading, Canadian Tire often has the KitchenAid versions on for less than half of the regular price!
I'm really excited to try this. I need to get a cast iron dutch oven first. I have seen them at HomeGoods, but hit or miss if they have dutch ovens, soemtimes they do and soemtimes they don't – but they usually are discounted at Homegoods 😉 Thanks!
OK, trying this right now. If it works, we're having it with spaghetti no matter how hot it is tomorrow.
I just made the bread!!! So delish even though I used the wrong flour (bleached) and the wrong yeast (regular..just threw it in). I can't believe how easy and good it is. The crust is crunchy and it tastes like sour dough. Thank you so much for posting the recipe and the step-by-step pics!!! I can't wait to add stuff now!
I made this several weeks ago. This was the easiest bread recipe I've ever made not only that ( and that's certainly a bonus) but it straight up devine. Crusty and great with the stew I've made also. ….thanks and keep em coming….Sherry
I added a cup more water and usedbread flour rather than all purpose. Also just used a stockpot covered in foil. Turned out great!
Woo Hoo – bread was AWESOME!!! We had a piece left this morning took it to work. Put the slice in the toaster oven with olive oil and topped it off with fresh tomatoes/basil. It was such a wonderful simple lunch. Cannot wait to make some more!!!!
Made my first loaf today. Flavor was really good but didn't rise like I thought it would. Could have been because I substituted pineapple juice and coconut milk for the water. lol. Pina Colada Bread!!!!! Making a loaf of cheddar today. I'm hooked! Thanks for posting!
Two things – try Barkeepers Friend to clean them. Second thing – is a 13 qt pot too large (I assume yes – the bread will spread out too much) – it's the only size cast iron enamel pot I have 🙁 I really want a 9 qt but as you say, they are pricey!
I just tried this recipe with a magnalite pot, I had to cook it an extra 30 minutes to get it golden brown. The bread looked really awesome when I took it out, but when I cut it the middle was a little gummy. My brother and sister liked it, and it honestly didn't taste bad. I was just a little disappointed in the texture. I'm guessing the cookware I used was the culprit? I'm not giving up though! I'm going to try again when I have the right pot to make it in.
I wanted to try you recipe but had no pots that would work. I went to an outlet store to get Le Creuset but they were so heavy. I ended up with a Calphalon pan that is safe in the oven up to 500 degrees. It is nonstick. I only paid 49.00. Yea. I tied it out an WOW! Amazing! My family ate the entire bread in one sitting. In fact they ate the bread instead of the meal. I can't wait to try out the other recipes.
I am using my corningware dish with lid and the bread it turning out fantastic…I think I paid $30 for all 3 pieces and lids so they are not too expensive. I have also used the insert to my crockpot covered with foil and again the bread turned out fantastic.