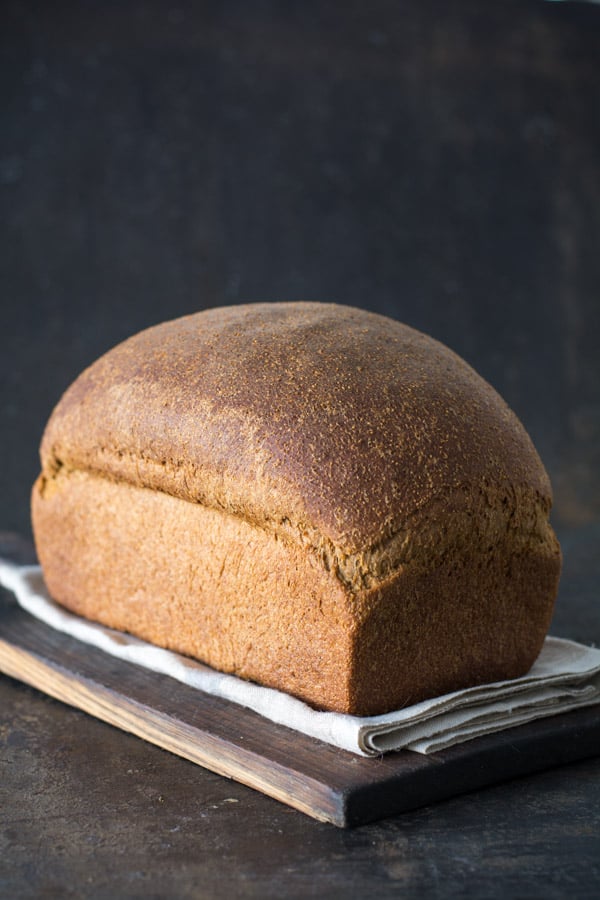
This simple New England Anadama bread made from flour, cornmeal, yeast, and molasses. The molasses and cornmeal make for a sweet and nutty aroma while it bakes, which carries over into the flavor.
What is Anadama Bread?
How to make Anadama Bread
 1
1 4
4 7
7 2
2 5
5 8
8 3
3 6
6 9
9- Sprinkle yeast over warm water. Stir to dissolve. Let sit for 5 minutes.
- In the bowl of an electric mixer fitted with the paddle attachment. Add 2 1/4 cups warm water.
- Stir in molasses, sugar, salt, and melted butter. Stir to combine.
- Add dissolved yeast.
- Add the white flour.
- Mix until somewhat smooth. The dough will be a little lumpy.
- Add cornmeal and mix well.
- Remove paddle attachment and use the dough hook. Add wheat flour 1 cup at a time just until the dough is soft, but not sticky.
- Continue to mix/knead until the dough is smooth and pulling away from the sides of the bowl. You may need to add a bit more flour OR you may not need to add all of the flour. That’s why you add 1 cup at a time. The amounts vary from the flour you use to the humidity in your area.
Proofing, shaping, and baking
 1
1 4
4 7
7 2
2 5
5 8
8 3
3 6
6 9
9- Drizzle 1-2 tablespoons of oil into a large bowl.
- Add the dough to the bowl and turn it to oil the top of the dough.
- Cover with a clean cloth and set aside for 1-2 hours or until the dough has doubled in size.
- Now that the dough has doubled in size, lift the dough from the bowl and gently press out the air.
- Divide the dough in half. Form the two halves of dough into nice round balls of dough.
- Grease or oil two bread pans.
- Place the loaves into greased pans and cover.
- Allow rising for a second time until doubled in size or about 1 hour.
- Bake in preheated oven for 30-40 minutes or until golden brown. Tip: To make sure the bread is completely baked an instant-read thermometer can be inserted into bread and should read 190℉.


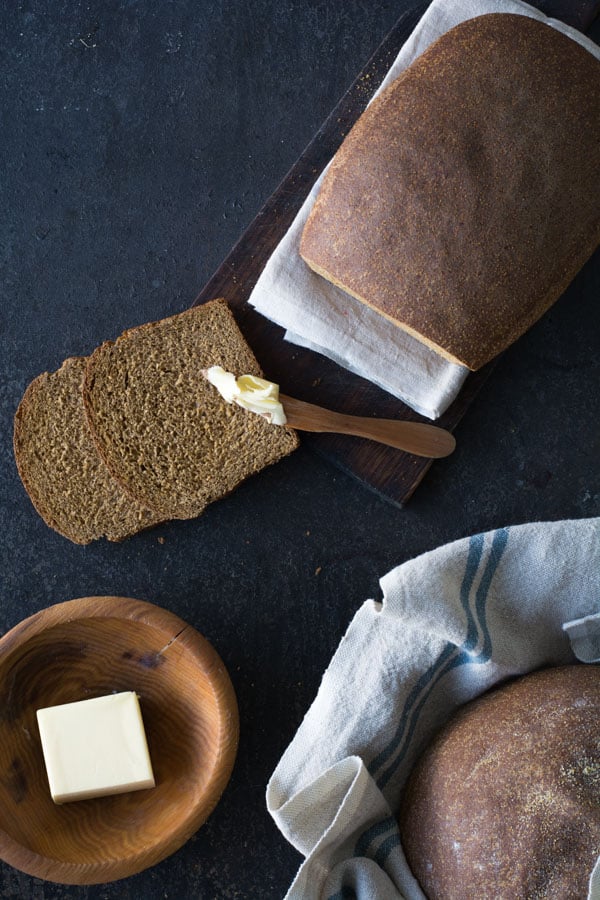
Enjoy Anadama bread warm from the oven, toasted with butter, or as a sweet alternative to your everyday sandwich bread, or with a hot bowl of soup.
Anadama Bread
This simple bread is made from flour, cornmeal, yeast, and molasses. The molasses and cornmeal make for a sweet and nutty aroma while it bakes, which carries over into the flavor.
Ingredients
- 1/4 cup warm water
- 2 packets yeast 4 1/2 teaspoons
- 2 1/4 cups warm water
- 1/2 cup butter melted
- 1/2 cup molasses
- 1 tablespoon sugar
- 2 teaspoons salt
- 3 cups white flour
- 1 1/4 cups cornmeal
- 4 cups white whole wheat flour
Instructions
-
Sprinkle yeast over 1/4 cup warm water. Stir to dissolve. Let sit for 5 minutes. Water temperature should be between 105 to 110℉.
-
In the bowl of an electric mixer, add 2 1/4 warm water, molasses salt, sugar, and melted butter and stir to combine. Mix in the white flour. Then pour in the yeast. Add cornmeal and mix well. Slowly mix in wheat flour 1 cup at a time until the dough pulls away from sides of the bowl.
-
Place in a lightly oiled bowl. Cover with a cloth or plastic wrap. Let rise until double in size. About 1 hour.
-
Punch down and divide dough in half. Shape each half into a ball. Let dough rest while preparing pans. Grease two 9 x 5-inch bread loaf pans. Roll on the countertop to make sure there are no air bubbles under the surface of the dough.
-
Shape dough into loaves and place into prepared pans. Cover and let rise until a little less than double the size.
-
Bake in a 375℉ oven for 30-40 minutes or until golden brown. Makes 2 loaves.
Recipe Notes
When adding yeast to warm water, the water temperature should be between 105-110℉. No warmer.
The internal temperature of baked bread should be about 190℉. The internal temp can be checked by inserting an instant-read thermometer.
More bread recipes you might like


Update notes: This recipe was originally posted in 2012, but was published again in 2018 with a printable recipe card and nutritional information.
I tried this bread yesterday, unsure of what to expect. It turned out very well and I’ll be including it in my bread rotation.
I’m so glad you liked the Anadama bread recipe. It’s one of my favorite breads. Thank you so much for your comment and 5-star rating. It is greatly appreciated.
Hi there,
love this recipe! Currently, I’ve been experimenting with Anadama and this is one of my favorites so far! I’m curious if this dough can be left overnight in the fridge and then baked the next day? Looking to bring this fabulous bread to a family gathering but want it to be hot and fresh the day of!
I’m so glad you like this bread recipe. I love it! I would think you could easily refrigerate the dough overnight, however, I would definitely reduce the amount of yeast by at least 1/2 so that the dough doesn’t have a yeasty/sour taste. Please let me know how it turns out. I’d love to hear about the results. I agree bread is always amazing HOT! Yum!
I just pulled these out of the oven. In Hindsight, I should’ve halved the yeast. But the flavor is still wonderful! They didn’t rise as great as normal. But I did leave them out for quite a while yesterday, so I think that’s partially the issue. I think this bread will be a huge hit today! Thank you! 🙂
is 2 tablespoons the right amount of yeast?
That should be 2 packets (4 1/2 teaspoons)!!! Yikes! Thank you so much for bringing it to my attention. I have made the corrections on the recipe card.
This bread with homeMade jam is absolutely amazing!
Looks amazing!! will regular wheat flour affect the texture/taste/cooking time?
If you use regular red wheat flour the bread will be a bit denser. I personally love red wheat flour in bread especially toasted. 😋
I had never heard of Anadama bread until recently and it's delicious! I've now made the same recipe 3 times and it's time to try a different recipe. Your beautiful loaves are irresistible! I've only been baking bread for a few months and am not too happy with how I shape a loaf when using a rectangular bread pan. I love your step-by-step photos but wondered if you could clarify something for me. Do you squish your round loaf into a rectangular pan to create an oblong shape? Also, to form the round loaf do you pull the surface of the dough tight and tuck it under the loaf rotating as you go? I've used the envelope method of shaping loaves with varied results. In the photos your unbaked loaf touches the sides of the pan but not the ends. A few of the tutorials on shaping a loaf for a rectangular bread pan instruct you to shape the dough into an oblong about the same size as your pan, then press down firmly on the top of the loaf after it's in the pan. I find that the bread doesn't dome nicely when you do this. One final question, do you knead your dough by hand at any point when preparing the dough for the first rise, or does the mixer do all the work? Any helpful tips are most definitely appreciated!
This bread IS amazing. I love it. to answer your questions: 1) I don't do anything special to the dough to shape it. I form it into a ball trying to get out larger air bubbles. I place the round into the loaf pan and leave it just like that. I don't press or form the dough in anyway. As the dough rises it will touch the ends of the pan creating a nice dome. Simple. 2) I let the mixer to all the work. I don't hand knead. Some people love the kneading process, so if you do, by all means give it a few turns by hand. I just let the mixer do the kneading then I plop the dough into a bowl and let it rise. I hope this helps. Happy baking.
Thanks so much for your quick response. I'm off to try your recipe. I love that it has a combination of white and whole wheat flours. If I can produce loaves that look half as good as yours I'll be delighted! I'm guessing the white flour is unbleached all-purpose flour, not bread flour.
Yes, all purpose unbleached. Your loaves will look and taste awesome. This bread makes fabulous toast. xo
I love your story and the bread.
I'm cooking for one, do you have recipe for 1 loaf. I was thinking of cut the recipe in half, but afraid I will get it wrong.
thanks in advance.
Sorry to respond so late. I have been out of town. You can half the recipe without any trouble. This bread, also, freezes great. It will keep well in the freezer for about 2 weeks or longer. A frozen loaf stashed away comes in handy every now and then. Happy baking.
Hello. As always I love reading your posts. I clicked on this link b/c I had an older friend over last week teaching me how to make this bread (a genuine New Englander 🙂 and I was curious what might be different about your recipes. Three leap out at me and I'll share them in case you're interested:
1. My friend told me to mix the cornmeal w/ lukewarm water the night before and to soak all night. Not sure why. Maybe b/c we were using coarse grain corn meal (polenta).
2. just before the loaves go into the over, she spritzed the top of the loaves with water and sprinkled on some of the cornmeal. It came out very pretty and had just a little crunch on top as a result.
3. she told me that the story was that a wife had left her husband with a pot of cornmeal and some bread both being made and the husband threw them together when he found out she'd left him, shouting "anna, damn her!"
I used this bread for everything this week! Sandwiches, french toast, just w/ butter and honey.
wonderful.
Thank you Jennifer for your helpful tips and ideas. Either way the story is pretty funny. You are right this makes fabulous sandwiches, french toast, etc.
Hi Janet,
of course I baked the bread! I omitted the second try the molasses. It tastes better to me.
Greetings from Germany
Hermann
This story is awesome. Thanks for the chuckle 😀 And the bread looks amazing! Just beautiful!
Janet,I made a couple of loaves of this bread and it is delicious. Thank you so much for sharing your recipe. We had a cold rainy day and this was the perfect treat to have with hot butter bean and ham soup….thank you!
Oh yum that sounds delicious. thanks for sharing.
I made this bread today. I love your blog, and I trust your recipes. It was delicious…! So good! I used all-purpose flour….I didn't have any wheat. I love the tang the molasses adds to it. I'll be making this again and again. Thanks for the great recipe. Once again, I love your blog.
Oh you just made my day. Thank you so much for your kind comment. I'm happy you loved the bread. It makes great toast, by the way.
I'd love to make this! How much salt is required? Thank you.
Thank you for catching that error. I have made the correction and the amount of salt is 2 teaspoons. Now you can make the bread. Enjoy!
Hi Janet, it's my maiden comment here. Don't know how I stumbled across to your site a while ago but I'm glad I did 🙂 Love your all step-by-step picture tutorials in every post. Very helpful to us. Great site with great recipes! Can't take off my eyes from Anadama bread 🙂
Hi Sonia, I'm so glad you stumbled upon me. I hope you will be back. Thank you for your kind comment.
Hi Janet, again a great blog post, and a great recipe. I'll try, of course, in the coming days.
Greetings from Germany!
Hermann
Another kind comment from Germany. I thank you once again. I hope your bread is a success.
Looks like another winner – I'm in bread-baking-mode so I'll add this to my list! Thanks – and I love the story of how it got it's name, too!
Good to hear from you as always. I hope you get a day to stay home and bake.
Your pictures are so nice. I love how you include a picture of each step. Thank you! I would love to try this bread recipe.
Thank you, Brandi. I appreciate your comment. I hope you get a chance to try the bread.
I love hearing your stories behind the recipes! Thanks for sharing!!
Why thank you Tiffany Hilton. Every now and then I actually HAVE a story. Love you.
Yum…on my to-do list for tomorrow. I have had this bread form my local baker and love it. Will be fun to try it on my own.
I hope its as good or better than your baker. I have never seen this bread at a bakery out west. You are so lucky.