What I love about this bread
- It’s so easy to make. This dough can be made in less than 5 minutes.
- The basic dough recipe can be enhanced with many different flavor varieties.
- Very little hands-on time.
- Crusty bread never ceases to impress family and friends.
- My 12-year-old grandson can make it.
Let’s make No-knead crusty bread:


- In a large mixing bowl, add flour, kosher salt, and yeast. Whisk together.
- Add water. Mix just until all of the flour has combined with the water. The dough will look like a shaggy mess. That’s ok.
- Cover the bowl with plastic wrap and let it sit for 12 – 18 hours on the countertop. DO NOT REFRIGERATE. This is not optional. It takes that much time to proof the dough. The reason why you need a large bowl is that the dough will start to rise.
- After 12 hours the dough will look like this. It’s pretty sticky, but that’s ok it’s supposed to be.
Shaping and baking the bread:


- Preheat oven to 450 degrees. As soon as it has heated to 450 degrees place your pot with the lid in the oven and preheat the pot for 30 minutes.
-
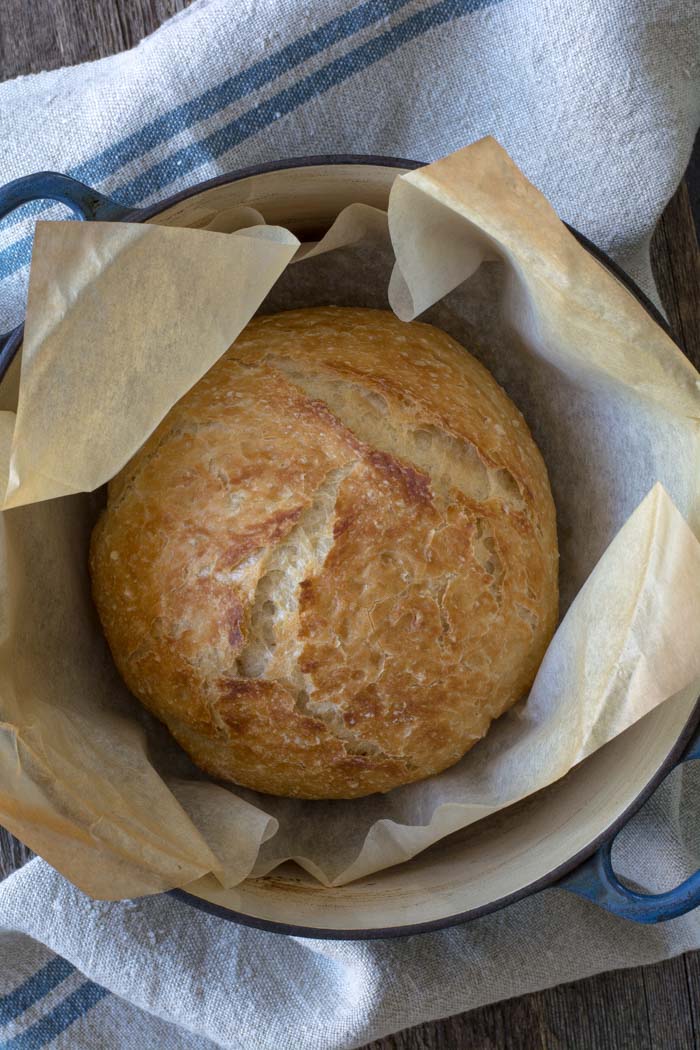
Right after you put the pan in the oven to pre-heat, dump the dough out onto a HEAVILY floured surface. Shape it into a round ball and place on a sheet of parchment paper. Parchment makes it so easy to transfer the dough into a hot pot and then remove it after baking. The parchment paper stays in the pot. This will rest for 30 minutes while the pan is heating. Cover with plastic wrap. Note: Use silicone coated parchment paper. The regular non-coated paper will stick terribly. Don’t chance it.


- Remove pot from the oven and carefully pick up the parchment and drop dough into the pot. Be careful the pan is HOT. Put the lid on the pot and return it to the oven for 30 minutes.
- After 30 minutes remove the lid from the pan. Bake for an additional 15 minutes or until nicely browned. You can test with an instant-read thermometer to make sure the bread is fully cooked on the inside. The temp should be between 190F and 200F degrees. Remove from the oven and carefully remove bread from the pot by lifting the edges of the parchment paper.
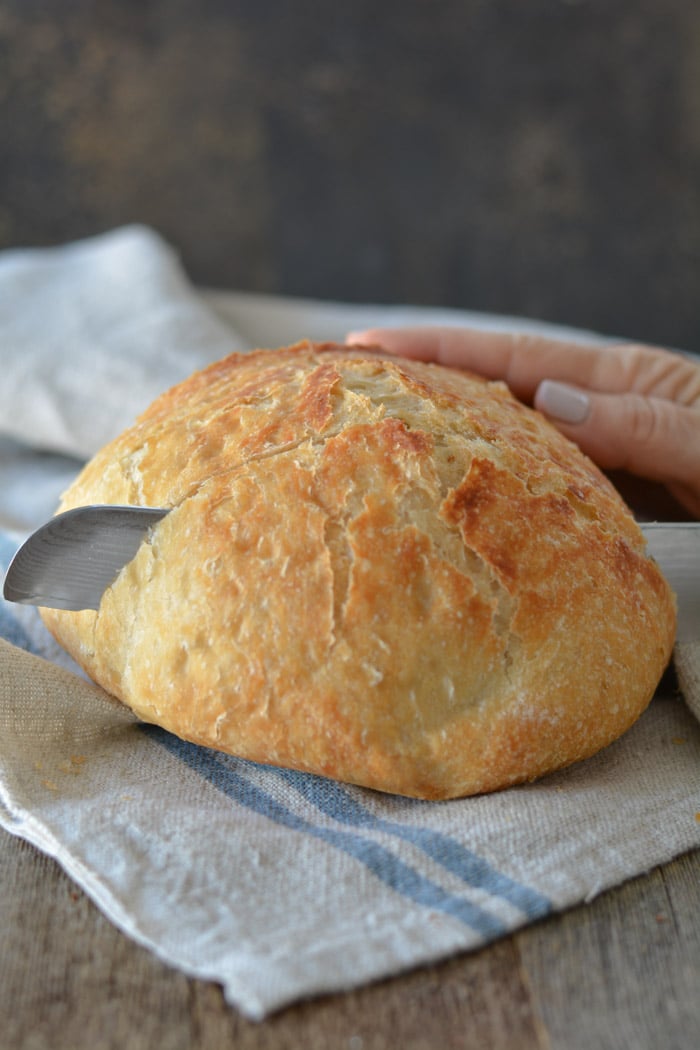
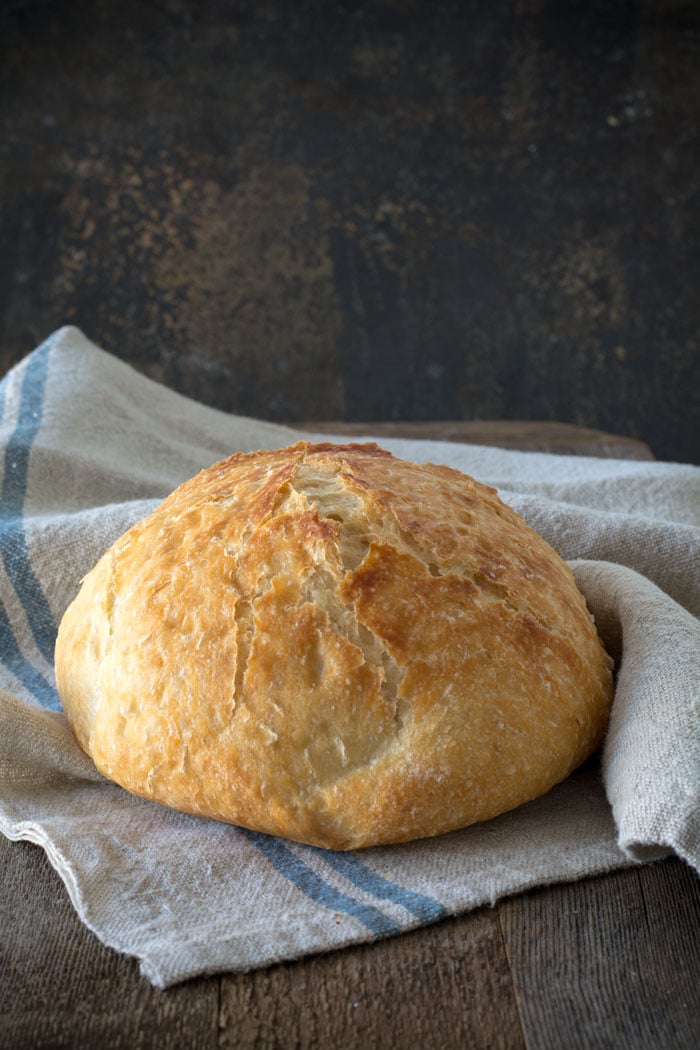
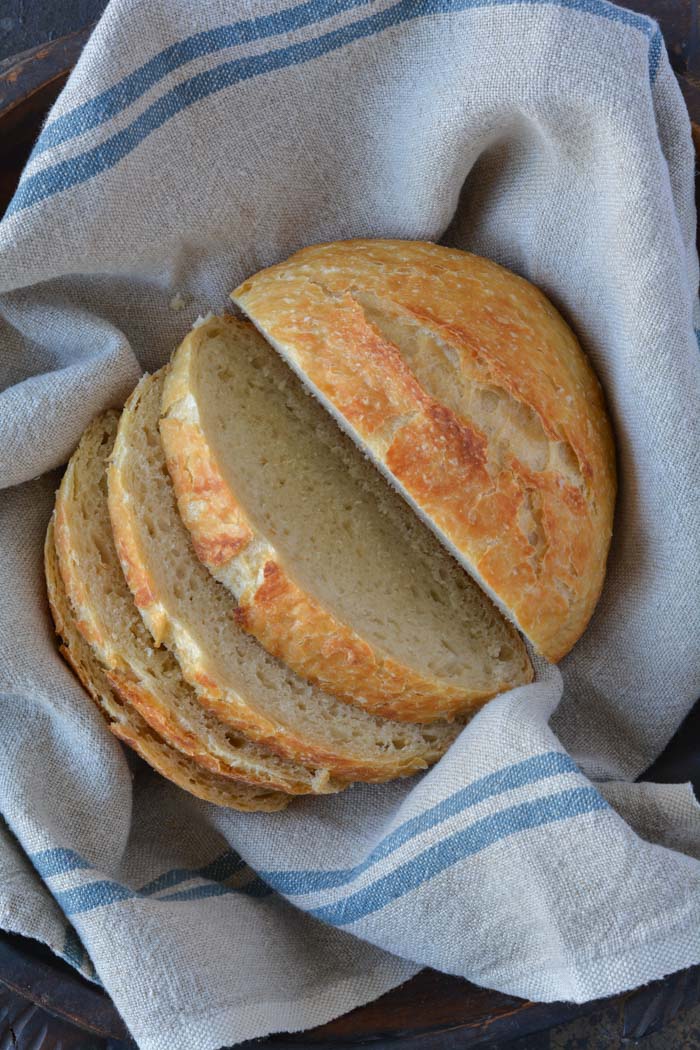
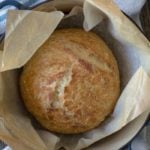
Holy cow! Can you believe how gorgeous that is? It’s best to wait for the bread to cool before slicing. Because I love warm bread I sliced it right away.
FAQ’s
Q: Do I have to use an enamel covered cast iron pan?
A: NO. You can use anything that can take the heat. The following have been used that I know of:
Clay pots with lids, Pizza stone with a bowl to cover the bread, insert from a crockpot, pyrex baking dish with a lid, stainless steel pot with a lid, baking dish covered with aluminum foil, old cast iron dutch oven.
Q: Do I have to use unbleached flour?
A: I always use unbleached flour. You can try bleached flour.
Q: Can I use self-rising flour?
A: I don’t know. I would just stick to all-purpose.
Q: What size is my pan?
A: My smallest pan is 5.5 quart. You can use as small as a 3 quart.
Q: What type of yeast do I use?
A: I use SAF instant yeast. Any yeast should work.
Q: Why is my bread turning out flat?
A: You could try using less 1/4 cup less liquid. Or add 1/4 cup additional flour. Make sure your dough appears to be dry when you first mix it. It will have more moisture during the rising time.
Q: Can my dough sit out longer than 18 hours? Does it HAVE to be between 12-18 hours?
A: I have let some dough sit as long as 24 hours and the bread was beautiful.
Q: Have you tried Gluten-free?
A: From what I hear the best GF is from King Arthur Flour https://shop.kingarthurflour.com/items/gluten-free-measure-for-measure-flour-3-lb
Q: Do I have to grease or oil the pan? Will my breadstick?
A: No you don’t need to grease the pan. I have never had the bread stick when using a cast iron pot. I haven’t tried anything else. The best way to be certain that the bread won’t stick is to form the loaf on a sheet of parchment paper and lift the bread into the pan using the sides of the parchment. Leave the paper in the pan. It’s won’t burn. When the bread has baked, just lift the sides of the parchment out of the pan. Voila! HOWEVER: Not all parchment paper is created equal. I use a silicone coated parchment paper. Regular parchment paper can stick something terrible. Don’t chance it.
No-Knead Crusty Bread
Wonderful yet easy artisan bread with a crisp crust. Prep takes just a few minutes with an overnight rise. Baked in a pot with a lid to create a steam oven. Bread can be made with many flavors and variations.
Ingredients
- 3 cups + 2 tablespoons unbleached all purpose flour (450 gr)
- 1 3/4 teaspoons Kosher salt (10 gr)
- 1/2 teaspoon Instant or Rapid-rise yeast (3 gr)
- 1 1/2 cups water cool (315 gr)
Instructions
-
In a large mixing bowl, whisk together flour, salt and yeast.
-
Add water and mix until a shaggy mixture forms.
-
Cover bowl with plastic wrap and set aside for 12 - 18 hours. Overnight works great.
-
Heat oven to 450 degrees. When the oven has reached 450 degrees place a cast iron pot with a lid in the oven and heat the pot for 30 minutes. OR pot can be placed in cold oven while oven is preheating leave in oven for 30 minutes.
-
Meanwhile, pour dough onto a heavily floured surface and shape into a ball. Cover with plastic wrap and let set while the pot is heating.
-
Remove hot pot from the oven and drop in the dough. Cover and return to oven for 30 minutes. After 30 minutes remove the lid and bake an additional 15 minutes. Remove bread from oven and place on a cooling rack to cool.
Recipe Video
Recipe Notes
FAQ's
Q: Do I have to use an enamel covered cast iron pan?
A: NO. You can use anything that can take the heat. The following have been used that I know of:
Clay pots with lids, Pizza stone with a bowl to cover the bread, insert from a crockpot, pyrex baking dish with a lid, stainless steel pot with a lid, baking dish covered with aluminum foil, old cast iron dutch oven.
Q: Do I have to use unbleached flour?
A: I always use unbleached flour. You can try bleached flour.
Q: Can I use self-rising flour?
A: I don't know. I would just stick to all-purpose.
Q: What size is my pan?
A: My smallest pan is 5.5 quart. You can use as small as a 3 quart.
Q: What type of yeast do I use?
A: I use SAF instant yeast. Any yeast should work.
Q: Why is my bread turning out flat?
A: You could try using less 1/4 cup less liquid. Or add 1/4 cup additional flour. Make sure your dough appears to be dry when you first mix it. It will have more moisture during the rising time.
Q: Can my dough sit out longer than 18 hours? Does it HAVE to be between 12-18 hours?
A: I have let some dough sit as long as 24 hours and the bread was beautiful.
Q: Have you tried Gluten-free?
A: No. I'm still waiting for someone to venture into the realm of Gluten-free. If you try it, let everyone know.
Q: Do I have to grease or oil the pan? Will my breadstick?
A: No you don't need to grease the pan. I have never had the bread stick when using a cast iron pot. I haven't tried anything else. The best way to be certain that the bread won't stick is to form the loaf on a sheet of parchment paper and lift the bread into the pan using the sides of the parchment. Leave the paper in the pan. It's won't burn. When the bread has baked, just lift the sides of the parchment out of the pan. Voila! HOWEVER: Not all parchment paper is created equal. I use a silicone coated parchment paper. Regular parchment paper can stick something terrible. Don't chance it.
More Notes:
Regular active yeast can be used in place of the instant or rapid-rise yeast. It will need to be activated in 1/4 cup warm water. Stir and let sit for 5-10 minutes. However, most of the comments I have received state that the rapid raise works the best. You choose. Whisk the flour, salt, and yeast together.


Question: Is sitting the dough with cheese in it over night ok?! Does the cheese not spoil?!
We LOVED the plain version of this bread – just venturing out into the different flavours!
hi. cindy from honolulu. i was having a problem getting my dough to rise. the texture of the crumb was very much like mochi if you've ever had it, if not, it was rather wet. not raw, just wettish. i decreased my water by 1/4 cup because of our humidity and switched to rapid rise yeast. it came out MUCH better. i think i will try decreasing the water by another 1/4 cup and see how that works.
mahalo nui loa!
I purchased my tea towels from Ikea a couple of years ago. Super cheap.
Can't wait to try this! Thank you for all your wonderful instruction! Also, where do you get your tea towels? they are beautiful! Thank you!
My bread did not come out as nice as yours. Reviewing the pictures you posted I have to wonder if I should have had more flour so that it would hold it's shape more like a ball before putting in the pot. My dough was still pretty loose, is it possible that if I wait 18 hours that might help? I followed your instructions to the letter. Has this recipe ever been tried in a regular loaf pan? Thank you Debbie
I'm sorry you didn't have the results you wanted. I don't think that the 18 hours makes that much difference. Perhaps adding a bit more flour, maybe 1/4 cup could help remedy the problem. I'm not sure if anyone had used a regular loaf pan or not. The cover on the pot creates a steam oven, which creates the crisp crust. I think it's worth a try. I'm sure someone out there has already tried it. Good luck.
To clean it, try a paste of baking soda and hydrogen peroxide…works on everything!!!
Donna – I don't know where the second rise of 2 hours came in. I have never done that for the bread. Don't worry about it. I only let mine rise on a floured surface while the pot is heating. Mine works every time. Good luck.
Brandi – I have not used sprouted grains, but I think it's worth a try.
Lemon, rosemary and moz! Wow! Sounds amazing!
Can you use sprouted grains instead of flour?
OMG the house is smelling amazing!! Just took the lid off now waiting the last 15 minutes. Its looking great so far! :):)
So good! I made lemon, rosemary, and mozaarella. Couldn't believe how easy it was. Just toasted it and made a BLT with it. Without a doubt, the best sandwich I have ever had!!!!!
Way back in the beginning of the comments, someone said she had trouble because it deflated when she made it into the ball and didn't rise much (if at all) while baking. Then she said she re-read the directions and found she forgot to let it rise for 2 hrs AFTER she made it into a ball. I cannot find the instructions for the second rise anywhere in your directions. Could you please clarifY?
I'm so impressed with all of your baking skills and the genius creations you are baking. Keep it up.
Hi
Im making this bread now but just want to know if you bake with fan forced oven or convection? Im from Australia so need to convert 450F to celcius bet also need to know if you use fan.
You can use either. My oven can do both radiant bake and convection. I generally use the radiant bake. When using convection or fan forced air just lowed the temperature 25 degrees. So you would bake the bread at 425F or about 218 Celsius.
OMG the house is smelling amazing! Just took the lid off and its looking great. Now to wait the last 15 minutes. Cant wait!!! :):)
seriously thank you sooo much for sharing this recipe i made it 2 days in a row second day i made it into garlic bread oo and 3rd day in a row i made cinnimon and raisions(should of added more sugar though i just tossed in a few palm fulls—i feel like i am a genius bread maker now:)
I am in waiting mode, letting the yeast do its thing, all the comments are making me hungry! Any tips for using a non-enamel dutch oven, will it still release?
If you are nervous about the bread sticking, you can place the bread on a piece of parchment paper and just drop the parchment into your baking dish. Bake the bread on the parchment. When the bread it done, just lift the parchment out of the baking dish. Works great. Yes, the parchment browns a bit, but not much.
I made this for the first time tonight and it turned out awesome! I don't have a Le Creuset (yet!) so I used my Pampered Chef Deep Covered Baker. It worked perfectly. Will absolutely be making this more often! Thanks!!
Madhu, I would love you to start your day with me and you would not have to color your hair blonde. You make me smile.
Anon – I have used fresh basil in the bread before, but I also added other herbs with it, like thyme, chives, basil and parsley. I don't remember the basil looking dark. It was fabulous regardless. Give it a shot I think your combo sounds divine.
Good heavens! I am so glad to have bumped into you! The next thing I have to do would be to colour my hair blonde, get an air ticket (am from Kuala Lumpur, Malaysia!) and join you when you start your day! :-)………..thanks so much for sharing this X
Wondering if adding chopped basil would work? I would like to try basil, sun dried tomato and roasted garlic but dont want the basil to turn brown during the rising time.
here's my finished product!
http://distilleryimage2.instagram.com/9c69a822a14b11e1be6a12313820455d_7.jpg
Oh my gosh! What fabulous looking bread. The giant air holes and texture look amazing. I hope you are patting yourself on the back right.
I just made this bread today for the first time, and everything turned out as the recipe instructed. However, the bottom of the bread is very dark…almost tasted burned. Have you had this happen? Thanks for any help you can offer! My husband is loving it regardless 😉
The bottom does seem to darken more, but I haven't had it burn. I had a similar comment about the bottom darkening too much. Their solution was to put the pot on a baking sheet. I hope that helps.
Would putting a pizza stone under the pan help – just going creative here. I have yet to try this recipe, but I've baked breads for years.
I'll probably wait till fall to bake some more – its 105 degrees here in the shade. Just can't commit to turning on the oven, but might try my Volcano stove if I can't wait.
I just pulled my first loaf out of the oven and it is beyond wonderful! I made an Asiago and Italian herb blend and the taste is perfect! Chewy and tender, just wonderful. I knew it was going to be something special when I pulled the saran wrap off this morning and that wonderful yeasty smell hit me. I can't wait to make my next batch! Thank you so much for the step by step instructions.
Donna – I have no idea why your bread didn't brown. I'm perplexed and no help. I hope you had some browning once the lid was removed.
Hermann from Germany – I feel so international! Thank you for commenting I hope you have great success with your bread. Let me know if you bread compares to the wonderful breads of Germany.
Maxine – I think you are right on your additional cooking time. Just keep peeking in your oven. Once it hits a beautiful golden brown you can remove from the oven and enjoy.
Thank you, again, to all the wonderful ideas and comments. You just make my day.
Looking forward to making this bread. I have a question about the cooking temperature. The enamel cast iron pan I have has a 425-degree maximum. Any recommendation on extra cooking time? I was thinking 5 – 10 minutes. Thanks for your help.
To clean your pots, use Bon Ami cleanser. That's what I use on mine. There's no chemicals in it. It works great!!!
Wow what a fun, easy, delicious recipe!!! This was my first attempt at baking bread and now I'm hooked! Thank you for sharing! BTW I used a Pampered Chef stone Dutch oven….worked great! I'll be baking two more loafs in the morning 🙂
Also, I am thrilled with this recipe. I bought myself a Dutch Oven. Works fine. Thank you!
Greetings from Germany
Hermann
I just made this for the first time, but had a problem. It wouldn't brown; I cooked it an extra 15 minutes then finally took the top off the pan and browned. I am thinking it is the dutch oven I used, the only pan I own that came close the pan you used. This all being said, the bread is delicious. I added a cup of cheddar cheese! I couldn't wait for it to cool, so just had a big slice of hot bread with butter. I love the thick crust and the light airy bread inside! Yum. Going shopping for a new pan.
Love te recipe, having so much fun. Only change I made was to add four tsp of brea gluten, just because! Now I am on to experimenting with different flavors. I am doing sharp cheddar and salsa. I mixed everything but the salsa, and will add that in tomorrow just before baking. Then I am doing blck kalmata olive bread. Then I will do the lemon one you posted, but will add a bit of lemon oil and reduce the zest. So excited! LW
Can you use bleached flour or does it need to be unbleached? Can't wait to try it. Looks so darn good….
I don't have the LeCreuset pot, I just tried with a deep dish Pampered Chef Baker (Stoneware with enamel coating). Baker is a little smaller than 5 qts. so I only put in half the mixture. Came out beautiful. I think I may try the whole recipe next time, seemed to be plenty of room in baker.
No this bread is not gluten-free. Someone was going to try it, but we haven't heard back on how it turned out.
I have tried Rye, but not pumpernickel. The Rye had great flavor but was quite flat.
Congrats on all you fabulous bakers out there. You flavor combinations blow me away. Bacon…shut the door!
Does anyone have a gluten-free or somewhat gluten-free version?
Okay, here's what I do. I call this a "meal loaf" 'cause it's got everything ya need! I add 1/2c COOKed bacon, 1/4c sundried tomatoes, 1/4c cheddar, 1/4c mozzarella, 2tsp italian seasoning and then sprinkle the top with garlic butter right before the last 15 minutes. WIN!
THIS BREAD IS FANTASTIC!! I have made three kinds already, and am ready to try more. I am using a STAUB cast-iron 2.75 qt. dutch oven, and one recipe of bread fits perfectly! Since the bread doesn't stick to the pan, just turn it upside down to remove it. Simple to do, very little time involved, the family loves it!!
I just wanted to tell you that I just made this. I just blogged about how wonderful it is too! Now I hope that it'll last until dinner.
http://raisingoranges.blogspot.com/2012/05/crusty-bread.html
Does anyone know if this recipe is gluten-free? Or if it's possible to make this bread gluten-free? Any thoughts are appreciated!
What about pumpernickel? Think it would bake OK?
Thanks for posting this super simple recipe. At age 37, I just made my first loaf of bread, and it is so yummy!
As far as my quantities go, I just throw them in. I should stop to measure. Just give it your best eye and experiment. Do you like your bread loaded and just sparsely dotted with cheese or herbs. I just take a handful and throw it in the flour.
Hi Joy, thank you for sharing your emotional moment with your new dutch oven. I have been seen caressing my Le Creuset – seriously. HAZELNUTS? Why didn't I think of that? I'm going to try your variation. It sounds amazing.
I know you have so many comments,but I just want to say thank you for bringing this great recipe to all of our attention. This is life changing for a girl like me who loves Parisian Bakery crusy bread. I've always wanted a Le Creuset dutch oven and now I had a really good reason to splurge and get one. Thank you for that too! Using the dutch oven alone for the first time I literally wept. I couldn't believe how good my house smelled while the bread was baking and when it was done it looked just like yours. I'm truly amazed. Thank you so much! My favorite french bakery bread has apricots, almonds, raisins,hazelnuts, etc. I really want to figure out how to add these ingredients. Except then I will be eating the whole loaf. Seriously.
Hi Janet, I've just mixed up my first loaf and can't wait to cook it tomorrow! I'm already looking ahead to making a flavoured loaf next…do you have any advice on quantities for the add ins? I see you have it listed for the cranberry one…do you have quantities for the ideas you mention? Thx
Thank you all for such great comments. Your bread creations sound amazing and inspire me. I'm so happy so many of your received pots for Mother's Day. Now did YOU purchase the pan or did your wonderful husbands and children?? You have all made my day. Keep the comments and ideas coming.
I can't wait to hear how the gluten-free bread turns out.
This is such a wonderful and easy recipe. i've already made three and plan on putting together a double batch to set over night. i am in love with this. thank you thank you for showing me what i've been spending years trying to figure out!
Fantastic, thank you for sharing. I bought the enameled Dutch oven specifically to try this recipe. That said, I did add bread gluten, four tsps, and because I decided to go shopping, the dough sat since last night, till this afternoon, perfect results! Foolproof!
I'm making my second cranberry loaf and can't believe how easy this is and how totally amazing the texture and taste is of something that is not supposed to be this easy. I am a bread maker and I owe you all the credit. Thanks for sharing what has to be a love of cooking. Also, made your muesli and we loved it. Keep bring us these fabulous recipes!
I made this bread last night! So easy and amazing! I made an Olive and Oregano loaf. I posted my outcome on my blog: http://lemoninlove.blogspot.ca/ and was sure to give you all the credit! Can't wait to make this again!!!
I tried your recipe and it's absoulutely great! I have another one waiting to be baked. Great with homemade soup. The easiest bread recipe ever, thank you.
I have been making this bread in my 5 quart and just got a beautiful 7 qt pan. Do I use the same recipe (amounts) in the 7 vs 5 qt pan??? We love the bread and have added a cup of sour dough starter when I make it, best bread ever.
Guess what I got for Mothers day- A cast iron pot so I can make your bread. I am soooo excitted! Thanks.. Cheryl from Oklahoma
I'M GOING TO TRY USING QUINOA FLOUR FOR MY GLTON INTOLERANT SON PLUS A BIT OF CORN MEAL FOR TEXTURE – I'LL LET YOU KNOW HOW IT TURNS OUT
An excellent product for removing baked-on grease on your Le Creuset is a product called Dawn Power Dissolver. Just spray it on and let it sit for a while and then rinse the baked-on grease away. It is a very handy product to keep on hand. You can find this product in the dish detergent section of your grocery store.
I have been making this bread in two terracotta roasters..one is round and the otheer is oval. Found them both at thrift stores for $4 apiece. They work great and the bread is fabulous!!
It's Sabatier. Here's a link to Amazon. Sam's sounds cheaper. http://www.amazon.com/s/?ie=UTF8&keywords=sabatier&tag=googhydr-20&index=garden&hvadid=3093194475&hvpos=1t1&hvexid=&hvnetw=g&hvrand=8985295971379237045&hvpone=&hvptwo=&hvqmt=e&ref=pd_sl_12bjj5y9lg_e
This is a wonderful recipe. I have made this bread 3 times already. I never for one moment thought that you were taking credit for this recipe. I have a problem with someone that goes by "Anonymous" seemingly taking a shot. If you want to criticize by all means use your name.
Thank you for sharing this recipe.
JudyC
– I think someone used aluminum foil to cover the pot and the bread worked out just fine.
– 20 loaves?? Holy cow. That's awesome. It's so addicting. My son has made the Jalapeno-pepper jack. It's amazing.
– Thanks for the advice on Pampered Chef and all your kind comments.
There is one problem with this bread! It disappears!!! My family and friends love it! I also wanted to let you know that if anyone has a Pampered Chef Stone baker with lid, it works beautifully too. I have one pot like yours and I took a chance and tried my stone baker because I doubled the recipe and it came out great!!!
I absolutely LOVE this bread! I've made about 20 loaves so far (lots of gifts to neighbors & family). I usually make up 3 bowls of batter the night before & bake them one at a time, one right after the other. My house smells wonderful on baking day! I have made Jalapeno-Pepper Jack using 1-2 sliced whole, fresh jalapenos & 1/2 cup shredded pepper jack cheese. Also, Onion-Dill, using 3 T dried onion & 2 T dried dill. I made a Cinnamon-Raisin, but I waited to put the cinnamon in until right before baking. When I placed the batter on a floured board, I covered the top of the dough with cinnamon, then rolled & shaped into a ball. It gave the bread a 'cinnamon swirl'! But your Cranberry-Orange is still the all-time favorite. THANK YOU for posting this recipe!!
Baking temp is Fahrenheit.
I found a book called Artisan Bread in Five Minutes a Day. It is great! You can cook it on a stone, and make enough dough for four loaves at a time and keep it in the refrigerator.. I am going to try adding nuts, cranberries, chocolate,etc. It is very similar to your bread, but you don't need a pot.
Hi
This looks AMAZING – I'd love to try it. but…
When you say "450 degrees" – do you mean Fahrenheit or Celsius?
Jax
I can't wait to try this bread, but thought I would pass on a tip someone gave me to clean my stove burner pans that was amazing and probably would work on the pots too. I put them in a sealed 2 gallon plastic baggie for about 12 hours with a tiny bit of ammonia. All that gunk that I used to have to scrub (and still never really got off) literally just wiped away! It is the ammonia fumes that do the work so I probably had less than 1/4 cup in the bag.
Regarding High Altitude: I live at 5500 feet above sea level. I have not made any adjustments and the bread works just great.
Do I have to make changes to the recipe if I live at a higher altitude? Forgive me if you already answered this. I live at about 5000 ft.
Janet – does this work in high altitudes? I am at 6,ooo feet and baking can sometimes be tricky!
I discovered this recipe about a year ago. Loved it but revised it a bit. After it has risen I form it into a ball and pull the dough to the bottom so the top is smooth and tight. I also put a few slits on the top which lets it rise higher. the bottom was way hard so the slits let it expand more and the bottom wasnt as tough. Also my recipe said put it in a cold oven at 450 for 40 minutes. Take off the lid and turn off the oven and let it cook 20 more minutes. The top is smooth and super crusty. Absolutely wonderful!!! LOVE this bread!
1. Thank you so much for your advice with the wheat flour. I like using vital wheat gluten in my whole wheat breads as well. Interesting facts about King Arthur flour. I will try their whole wheat. I usually grind my own, but I can find 5 lb bags of King Arthur whole wheat in local stores. Thanks again for help tips.
2. I would use brine cured olives such as Kalamata. Mmmmm
3. Wow an exploding black knob…that's a new one. Next time try covering it with aluminum foil. Sorry about your lid 🙁
4. Vital wheat gluten is always a good idea when using whole wheat flour.
5. Pampered chef covered stoneware has worked from one of the many comments.
6. Great tip for inexpensive pot at Walmart. Thanks to all the fabulous comments.
I've had some success with using wheat in a bread that is very similar to this. What I've learned is that it is important to use a fine-milled whole wheat flour like King Arthur brand. I know– it's expensive– but the way they grind the flour minimizes the 'sharpness' of the wheat kernel pieces so they don't rip through your strands of gluten. That's one reason why wheat bread doesn't rise so well. Also, when using a whole wheat flour or other flour such as rye or spelt, I ALWAYS add at least 2 Tbsp vital wheat gluten to the recipe. Again, this helps with the gluten formation that traps the air bubbles giving the bread a fantastic rise. Happy baking!
I want to add olives to this recipe. What kind would be best for this?
Hi!!!
Did anyone experience exploding top of the lid (this black thing) in the oven???
Well, I just had! Bread is perfect but lid is injured!
Great recipe!
Awesome recipe! (I got here through SuburbanCorrespondent) I tried this bread several times, and it was awesome every time. Kids love it too. But I had to try whole wheat. I find the key to successful (i.e. edible to kids and not too heavy) whole wheat bread is vital wheat gluten. Also, white whole wheat flour, but that is not as critical as vital wheat gluten. I just took my new experiment out of the oven about an hour ago and it's delicious. Not as crusty as white bread (and not as awesome, have to admit that whole wheat will always taste inferior to white), but quite good, especially for those of us who prefer to consume whole grains most of the time. I will still be making white bread from time to time, but I want to play with whole wheat variations. Have you ever tried baking whole wheat with vital wheat gluten?
I don't have an enamel pot, but I'm curious to know if anyone has tried baking this recipe with a Pampered Chef covered baker? It's stoneware, not cast iron. I may experiment this week to see if it works. I'll let you know the results.
Made the cranberry,orange zest,walnut ones.One on a pate Le Creuset pot and another on a small round one. They turned out delicious. I have now bought a 3.5 qt Tramontina cast iron enameled pot at Walmart for $27.oo, as good as the French one, and not payed extraordinary prices.
Thanks for the recipes.
1. I haven't had any problems using my Le Crueset and baking the bread. One suggestion is to preheat the oven to 450 degrees with the pans in the oven and omit the 30 preheating time. When the oven heats to 450 pop the bread in the pans. It works just as well. My pots have not cracked, or chipped. The look great. In fact in put them through a cleaning cycle in my oven to clean them…they look brand new without any damage to the pots.
???? I have never oiled my Le Crueset. ????? Your choice.
2. I have not used bread flour. It contains baking powder. You can try it…why not.
3. I don't know whay you are having problems with your bread. It is a very dense bread, but not heavy like a brick. It's generally very crisp on the outside and soft on the inside, but no light and airy.
4. Thanks for all your kind comments. Happy Baking.
I just took a loaf of bread out of my oven. It smells glorious. This recipe is a keeper. I don't know what I ever did without Pinterest. So many wonderful ideas and recipes. I plan on buying a pot for each of my children for Christmas and I'm adding this wonderful recipe. It will be a wonderful gift. Thanks so much for sharing. I plan on adding a link to your blog from mine. Thanks again!!!!