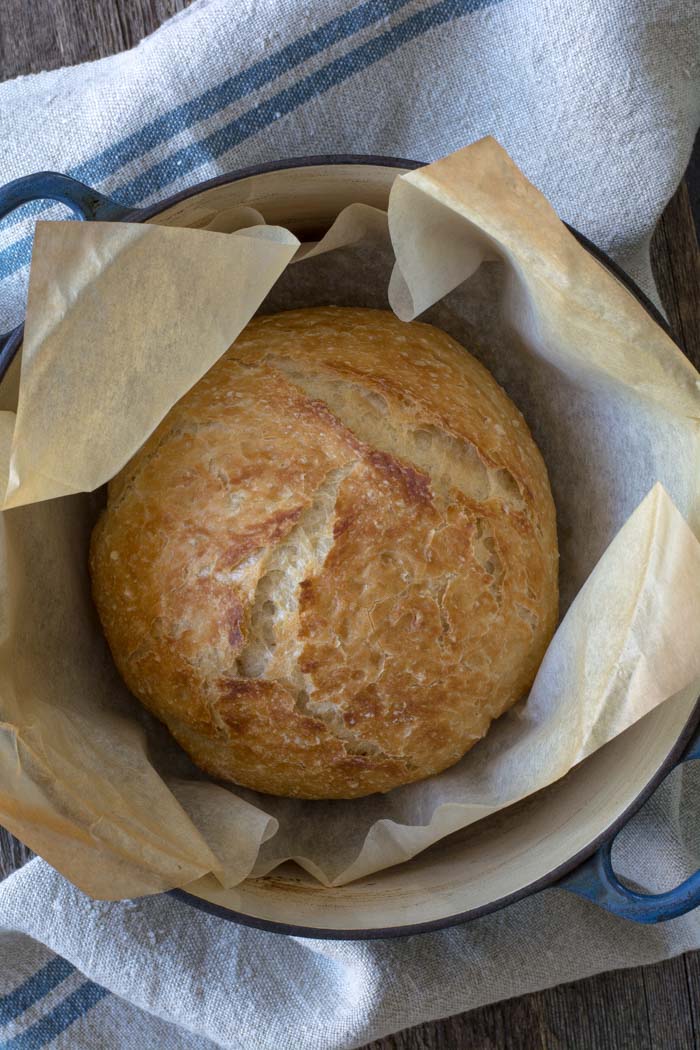
What I love about this bread
- It’s so easy to make. This dough can be made in less than 5 minutes.
- The basic dough recipe can be enhanced with many different flavor varieties.
- Very little hands-on time.
- Crusty bread never ceases to impress family and friends.
- My 12-year-old grandson can make it.
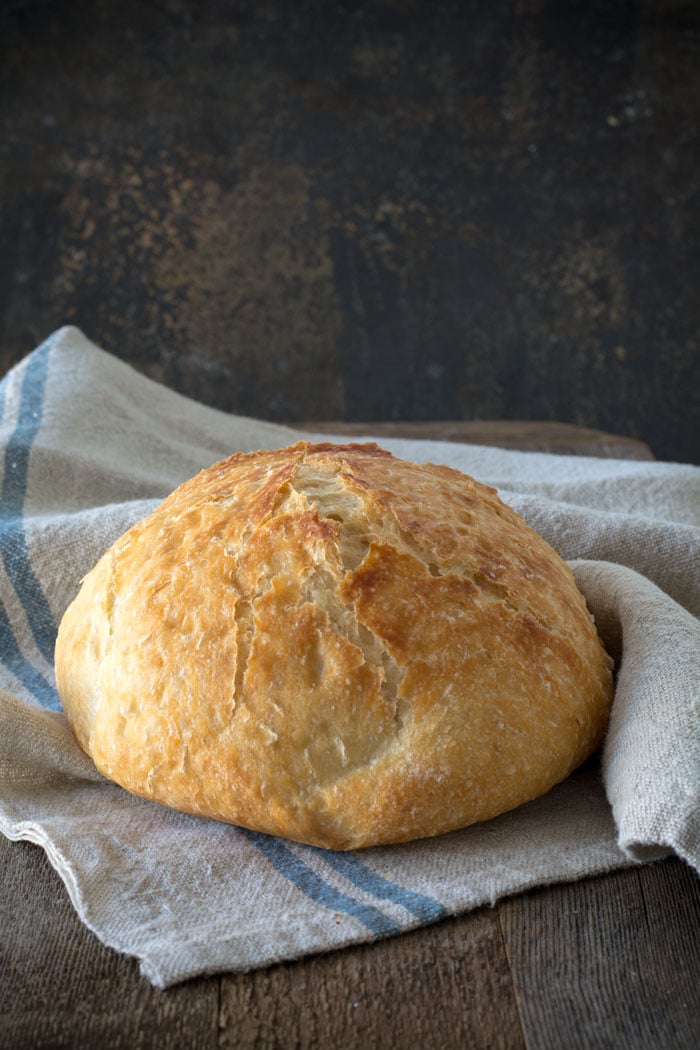
Let’s make No-knead crusty bread:
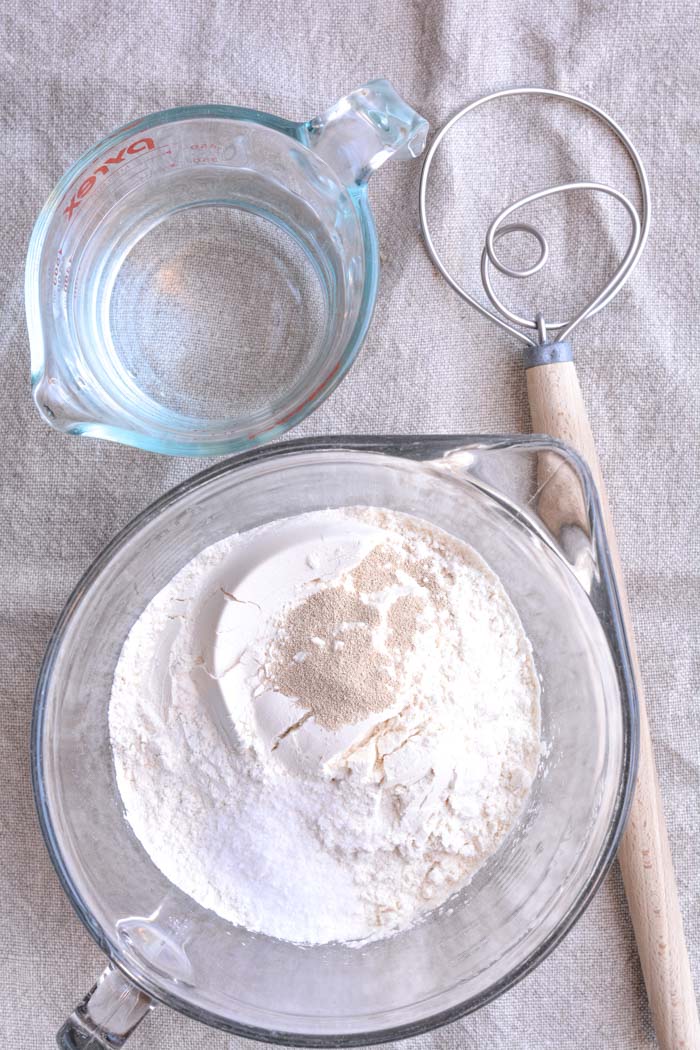
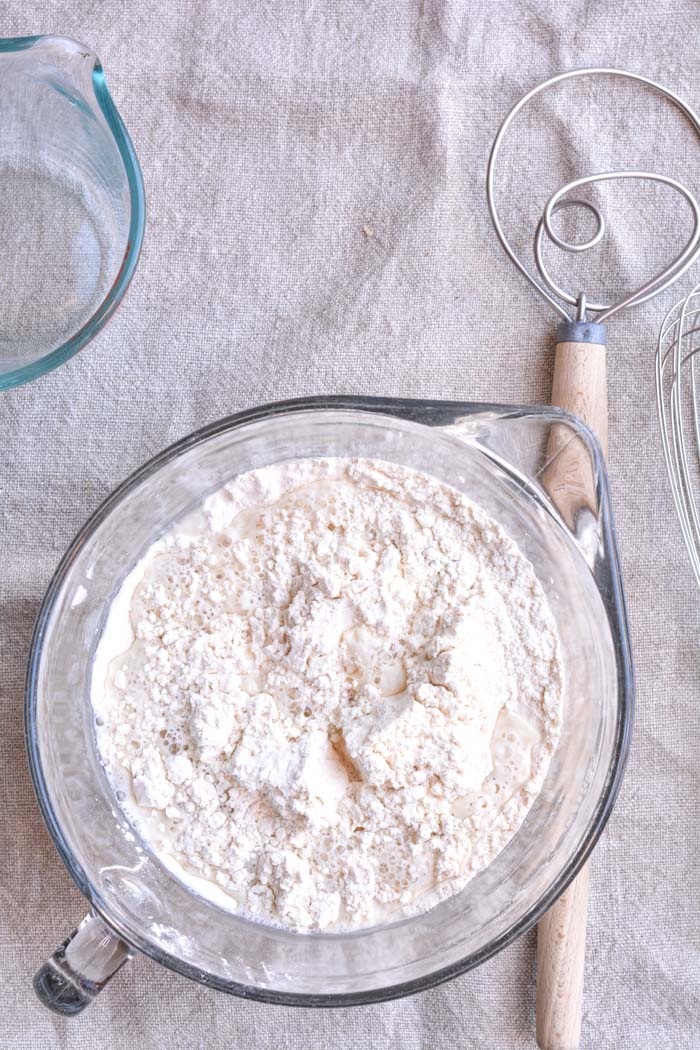
- In a large mixing bowl, add flour, kosher salt, and yeast. Whisk together.
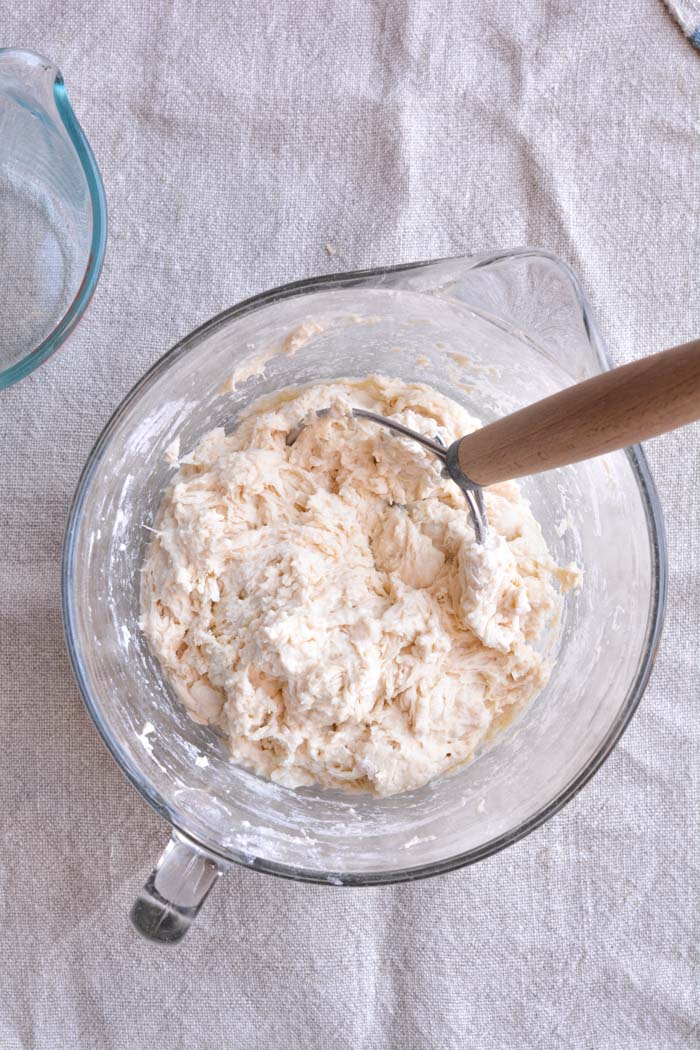
- Add water. Mix just until all of the flour has combined with the water. The dough will look like a shaggy mess. That’s ok.
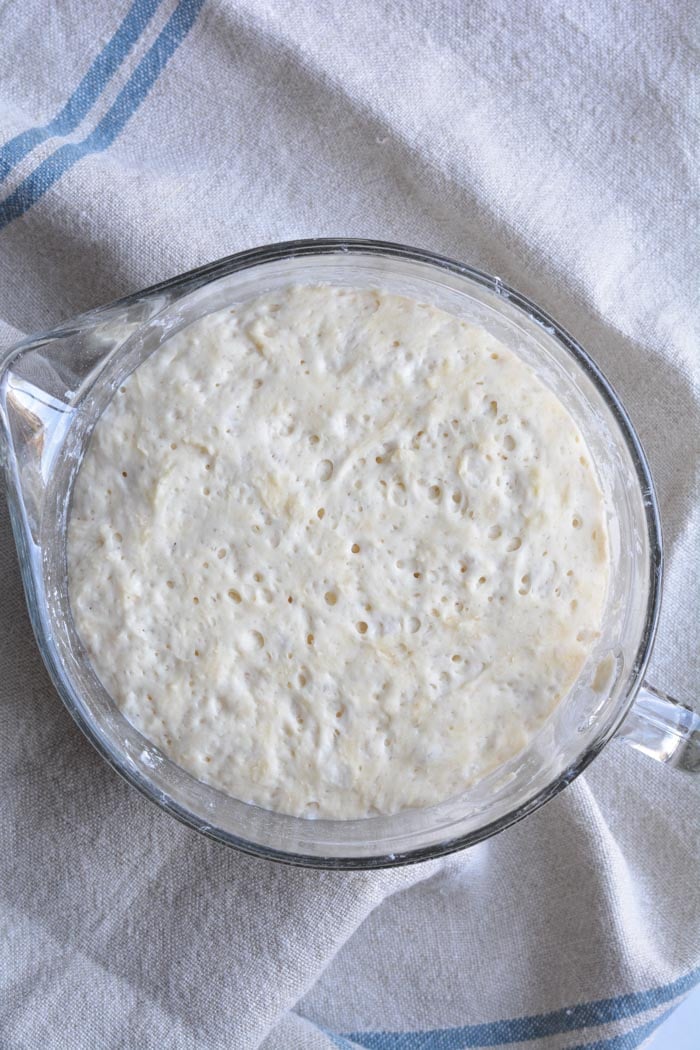
- Cover the bowl with plastic wrap and let it sit for 12 – 18 hours on the countertop. DO NOT REFRIGERATE. This is not optional. It takes that much time to proof the dough. The reason why you need a large bowl is that the dough will start to rise.
- After 12 hours the dough will look like this. It’s pretty sticky, but that’s ok it’s supposed to be.
Shaping and baking the bread:
- Preheat oven to 450 degrees. As soon as it has heated to 450 degrees place your pot with the lid in the oven and preheat the pot for 30 minutes.
-
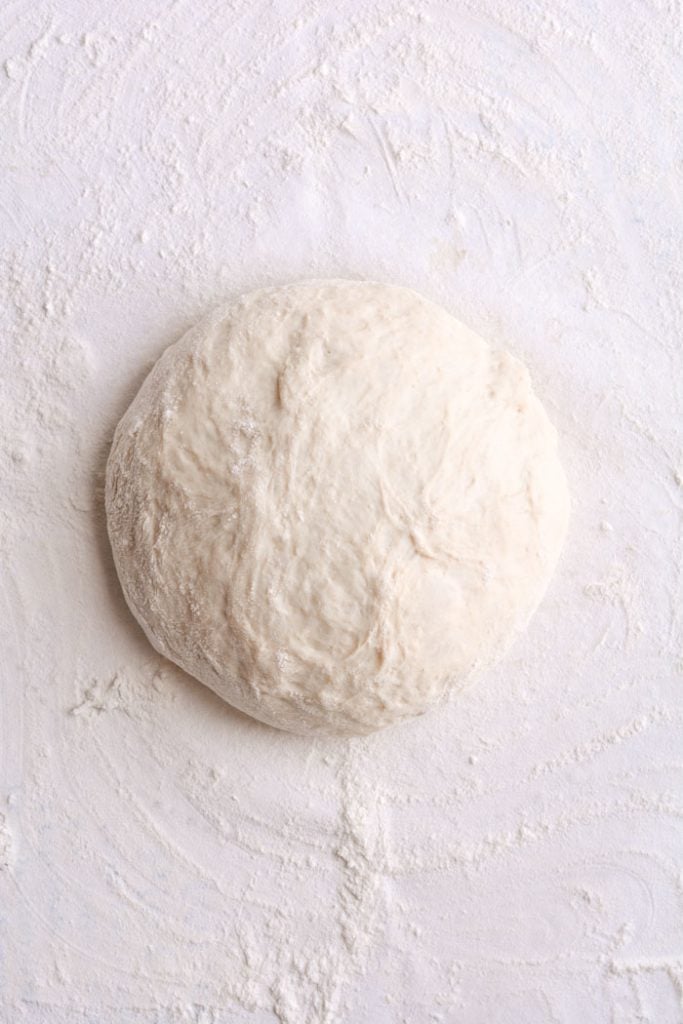
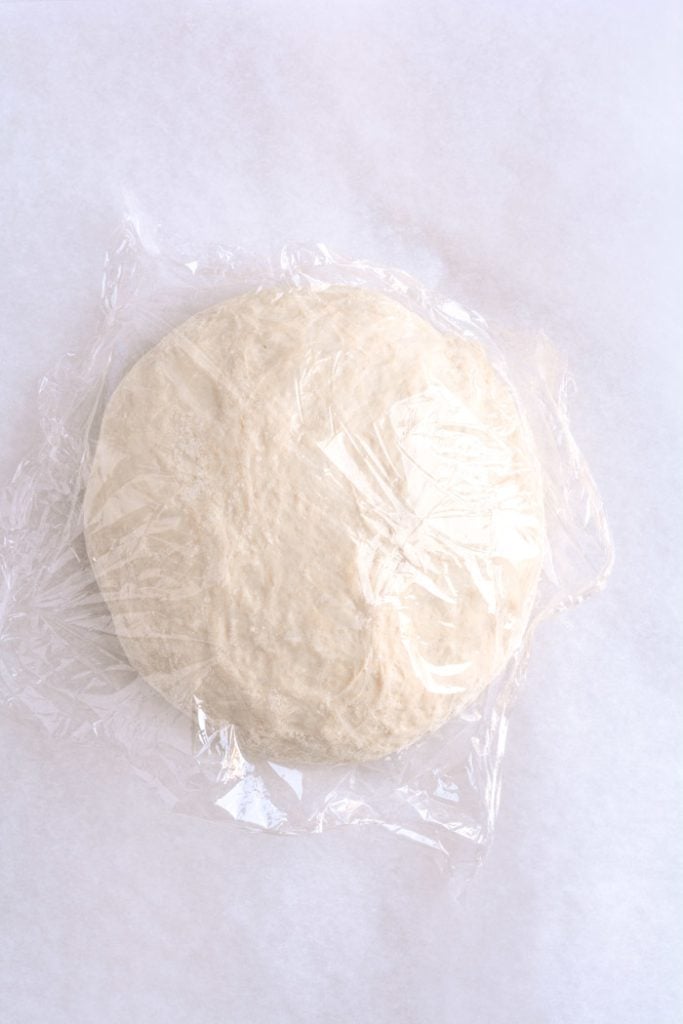
Right after you put the pan in the oven to pre-heat, dump the dough out onto a HEAVILY floured surface. Shape it into a round ball and place on a sheet of parchment paper. Parchment makes it so easy to transfer the dough into a hot pot and then remove it after baking. The parchment paper stays in the pot. This will rest for 30 minutes while the pan is heating. Cover with plastic wrap. Note: Use silicone coated parchment paper. The regular non-coated paper will stick terribly. Don’t chance it.
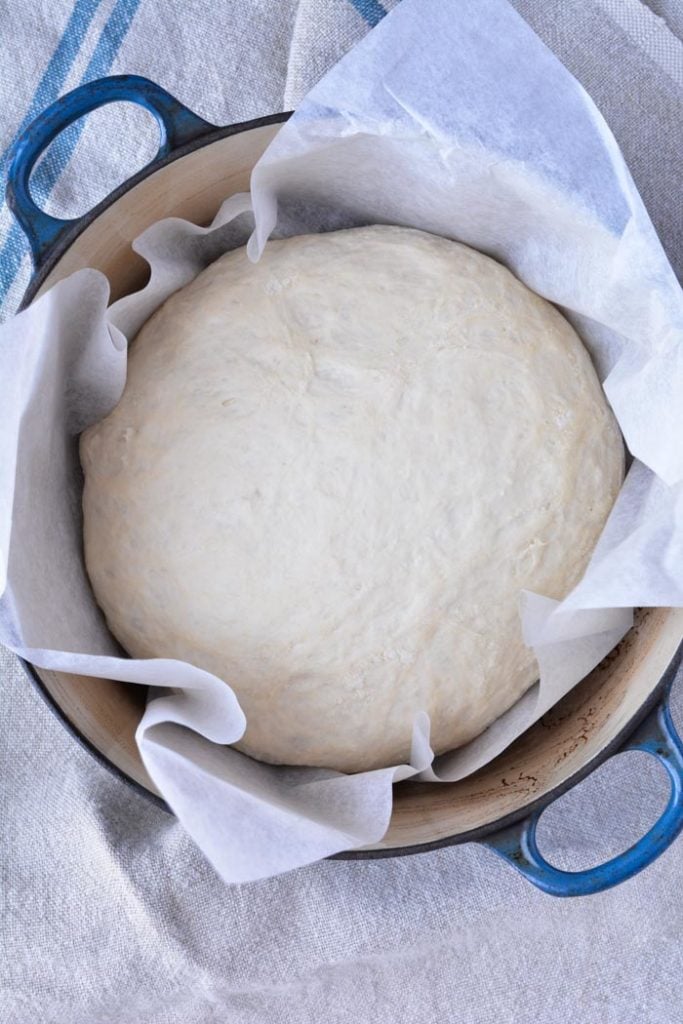
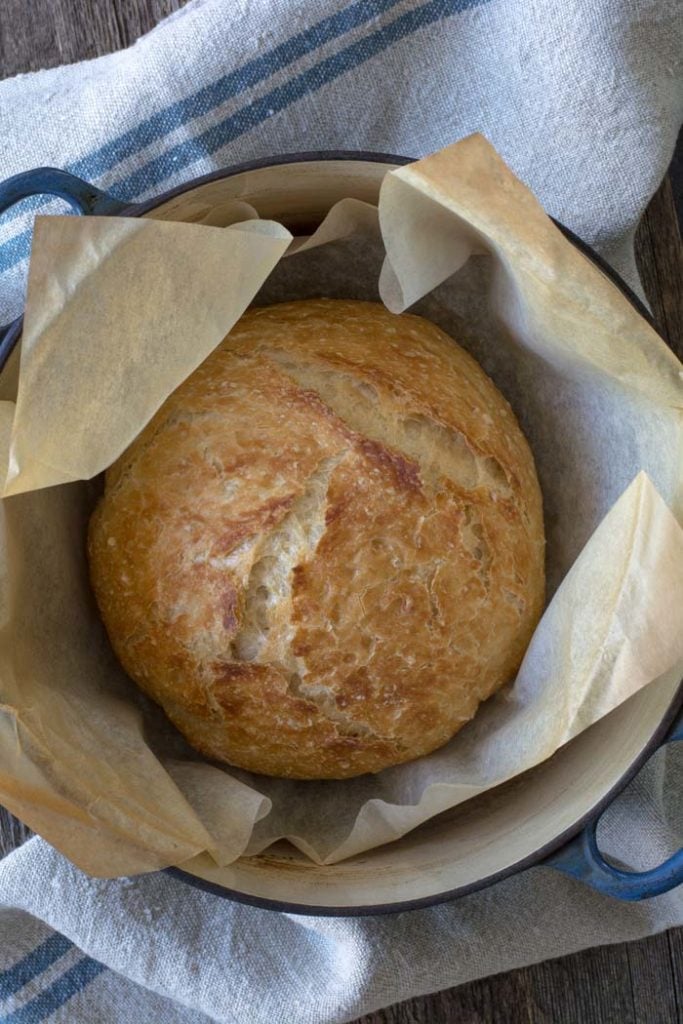
- Remove pot from the oven and carefully pick up the parchment and drop dough into the pot. Be careful the pan is HOT. Put the lid on the pot and return it to the oven for 30 minutes.
- After 30 minutes remove the lid from the pan. Bake for an additional 15 minutes or until nicely browned. You can test with an instant-read thermometer to make sure the bread is fully cooked on the inside. The temp should be between 190F and 200F degrees. Remove from the oven and carefully remove bread from the pot by lifting the edges of the parchment paper.
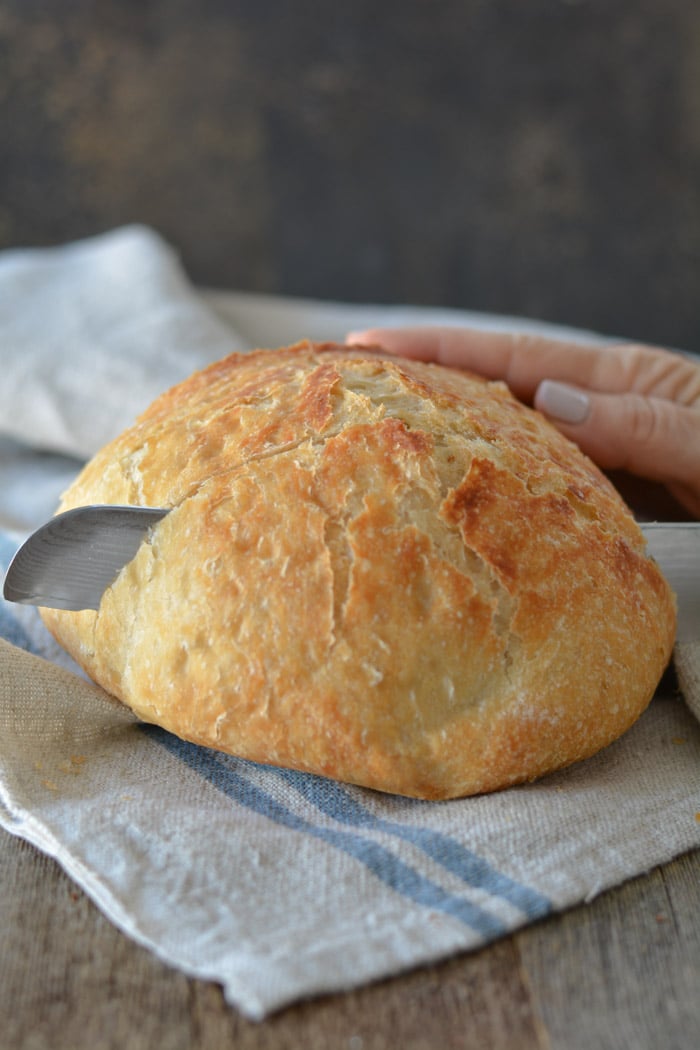
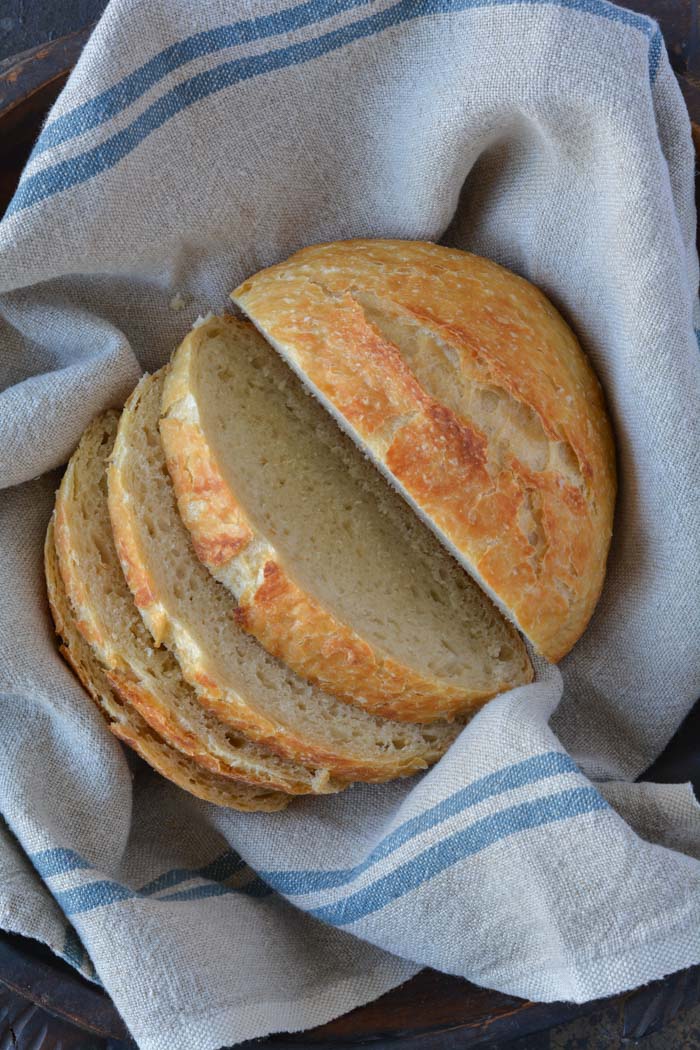
Holy cow! Can you believe how gorgeous that is? It’s best to wait for the bread to cool before slicing. Because I love warm bread I sliced it right away.
FAQ’s
Q: Do I have to use an enamel covered cast iron pan?
A: NO. You can use anything that can take the heat. The following have been used that I know of:
Clay pots with lids, Pizza stone with a bowl to cover the bread, insert from a crockpot, pyrex baking dish with a lid, stainless steel pot with a lid, baking dish covered with aluminum foil, old cast iron dutch oven.
Q: Do I have to use unbleached flour?
A: I always use unbleached flour. You can try bleached flour.
Q: Can I use self-rising flour?
A: I don’t know. I would just stick to all-purpose.
Q: What size is my pan?
A: My smallest pan is 5.5 quart. You can use as small as a 3 quart.
Q: What type of yeast do I use?
A: I use SAF instant yeast. Any yeast should work.
Q: Why is my bread turning out flat?
A: You could try using less 1/4 cup less liquid. Or add 1/4 cup additional flour. Make sure your dough appears to be dry when you first mix it. It will have more moisture during the rising time.
Q: Can my dough sit out longer than 18 hours? Does it HAVE to be between 12-18 hours?
A: I have let some dough sit as long as 24 hours and the bread was beautiful.
Q: Have you tried Gluten-free?
A: From what I hear the best GF is from King Arthur Flour https://shop.kingarthurflour.com/items/gluten-free-measure-for-measure-flour-3-lb
Q: Do I have to grease or oil the pan? Will my breadstick?
A: No you don’t need to grease the pan. I have never had the bread stick when using a cast iron pot. I haven’t tried anything else. The best way to be certain that the bread won’t stick is to form the loaf on a sheet of parchment paper and lift the bread into the pan using the sides of the parchment. Leave the paper in the pan. It’s won’t burn. When the bread has baked, just lift the sides of the parchment out of the pan. Voila! HOWEVER: Not all parchment paper is created equal. I use a silicone coated parchment paper. Regular parchment paper can stick something terrible. Don’t chance it.
No-Knead Crusty Bread
Wonderful yet easy artisan bread with a crisp crust. Prep takes just a few minutes with an overnight rise. Baked in a pot with a lid to create a steam oven. Bread can be made with many flavors and variations.
Ingredients
- 3 cups + 2 tablespoons unbleached all purpose flour (450 gr)
- 1 3/4 teaspoons Kosher salt (10 gr)
- 1/2 teaspoon Instant or Rapid-rise yeast (3 gr)
- 1 1/2 cups water cool (315 gr)
Instructions
-
In a large mixing bowl, whisk together flour, salt and yeast.
-
Add water and mix until a shaggy mixture forms.
-
Cover bowl with plastic wrap and set aside for 12 - 18 hours. Overnight works great.
-
Heat oven to 450 degrees. When the oven has reached 450 degrees place a cast iron pot with a lid in the oven and heat the pot for 30 minutes. OR pot can be placed in cold oven while oven is preheating leave in oven for 30 minutes.
-
Meanwhile, pour dough onto a heavily floured surface and shape into a ball. Cover with plastic wrap and let set while the pot is heating.
-
Remove hot pot from the oven and drop in the dough. Cover and return to oven for 30 minutes. After 30 minutes remove the lid and bake an additional 15 minutes. Remove bread from oven and place on a cooling rack to cool.
Recipe Video
Recipe Notes
FAQ's
Q: Do I have to use an enamel covered cast iron pan?
A: NO. You can use anything that can take the heat. The following have been used that I know of:
Clay pots with lids, Pizza stone with a bowl to cover the bread, insert from a crockpot, pyrex baking dish with a lid, stainless steel pot with a lid, baking dish covered with aluminum foil, old cast iron dutch oven.
Q: Do I have to use unbleached flour?
A: I always use unbleached flour. You can try bleached flour.
Q: Can I use self-rising flour?
A: I don't know. I would just stick to all-purpose.
Q: What size is my pan?
A: My smallest pan is 5.5 quart. You can use as small as a 3 quart.
Q: What type of yeast do I use?
A: I use SAF instant yeast. Any yeast should work.
Q: Why is my bread turning out flat?
A: You could try using less 1/4 cup less liquid. Or add 1/4 cup additional flour. Make sure your dough appears to be dry when you first mix it. It will have more moisture during the rising time.
Q: Can my dough sit out longer than 18 hours? Does it HAVE to be between 12-18 hours?
A: I have let some dough sit as long as 24 hours and the bread was beautiful.
Q: Have you tried Gluten-free?
A: No. I'm still waiting for someone to venture into the realm of Gluten-free. If you try it, let everyone know.
Q: Do I have to grease or oil the pan? Will my breadstick?
A: No you don't need to grease the pan. I have never had the bread stick when using a cast iron pot. I haven't tried anything else. The best way to be certain that the bread won't stick is to form the loaf on a sheet of parchment paper and lift the bread into the pan using the sides of the parchment. Leave the paper in the pan. It's won't burn. When the bread has baked, just lift the sides of the parchment out of the pan. Voila! HOWEVER: Not all parchment paper is created equal. I use a silicone coated parchment paper. Regular parchment paper can stick something terrible. Don't chance it.
More Notes:
Regular active yeast can be used in place of the instant or rapid-rise yeast. It will need to be activated in 1/4 cup warm water. Stir and let sit for 5-10 minutes. However, most of the comments I have received state that the rapid raise works the best. You choose. Whisk the flour, salt, and yeast together.
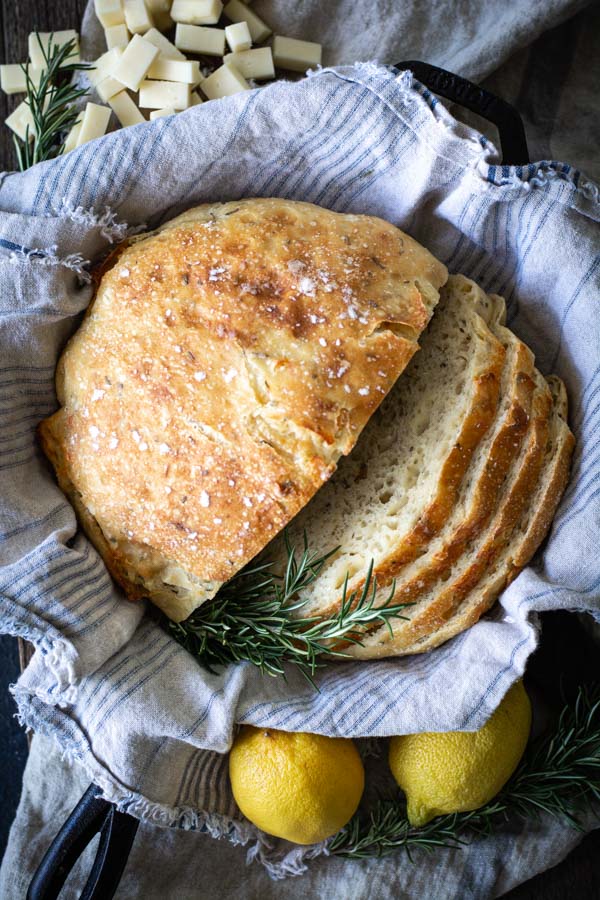
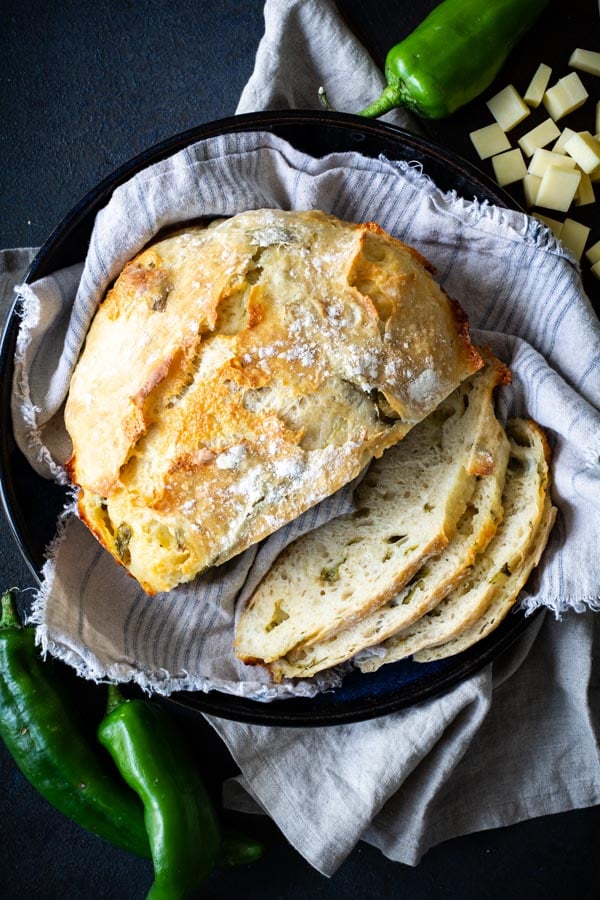
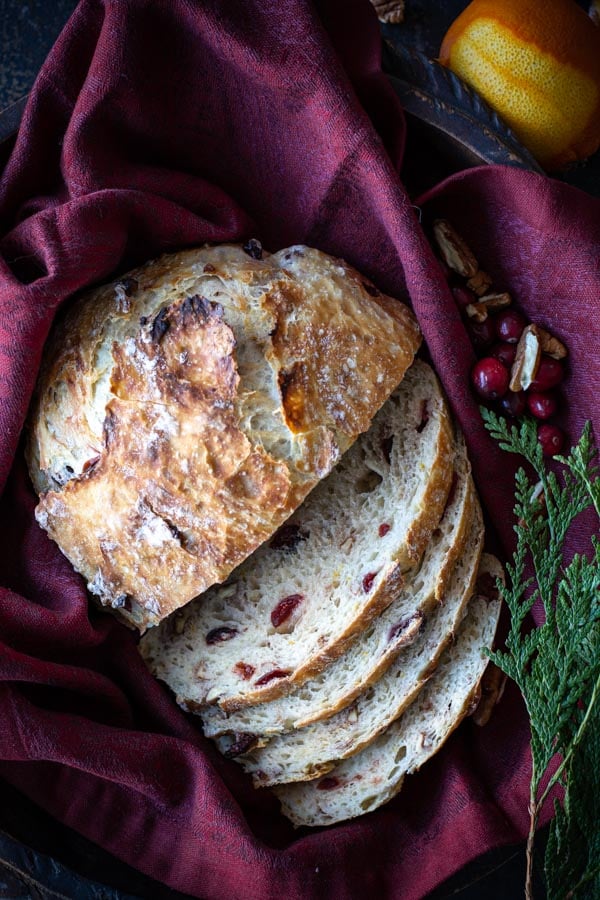









Oh my goodness…this bread is incredible and to think I made it…and it was like you said, soooo easy! I made the cranberry recipe and plan on trying them all. I also made the muesli last night and had it for breakfast and loved it. Thank you, thank you, thank you for being an amazing cook and sharing your recipes with us.
I am soo sad! I have tried this twice now….very carefully followed the instructions and it is very dense and heavy….I have no idea what I am doing wrong.
What temperature water are you using? I use warm water but not too hot. If it's too hot, it will kill the yeast and if it's too cold, it won't rise well.
Is it ok to use bread flour, rather than all purpose?
My bread is in the oven right now and smells soooo good! Can't wait for it to be finished! One question, I see you've answered it a few times but Le Crueset makes it very clear to not heat the dry pot. I decided to follow their instructions and I lightly oiled the pot, however even with that, after the 30mins pre heat when I pulled it out there was a strong smell of burnt enamel. I figure this can't be good for the pot or the food that's in it. Any thoughts?
I didn't read all the comments ,so I hope this is not a repeat…
To clean your pots use baking soda on a plastic scrubber or green (3M) scouring pad. Add a drop of dish detergent if it is very greasy. Voila!
After reading all of the posts, I wonder whether it would be wise to put boiling hot water into the porcelain enamel coated dutch ovens when preheating them to help prevent damage to the coating?
That seems like a good idea. I'm really concerned about heating mine dry, Le Crueset makes it very clear NOT to do that in an enamel coated pot. Also, it seems like oiling it first couldn't hurt.
I would think if you oiled it first, you'd have burned oil. As for heating the pan – I believe the directions say don't put a cold pan into a hot over. (It's been a while since I read mine, so might have changed) so putting a cold pan in a cold oven seems like it would work.
I make my bread in a retired "VISIONS" sauce pan with a lid….you know, one of those brown glass sauce pans that you always see in Goodwill. I have to spray it with veggie oil after heating it up during the preheat and BEFORE putting the dough in it. I am very happy with it while I wait on affording a Le Creuset.
This looks so VERY fabulous! In terms of cleaning, I don't know if no one has recommended Bar Keeper's Friend yet, but this is what I use to clean all my pans, Le Creuset cast iron and stainless steel alike. It makes them look brand new!
My family and I lived in Germany for 2.5 years and moved back to Texas last April. It was quite an experience but one of the most wonderful parts was the bakeries and fresh bread. The flavors you have here were some of the flavors they had, I am so excited to make this for my husband. They also had olive bread (which was to die for), walnut bread with whole chuncks of walnuts and sweet onion bread. I am so excited to make your bread now, thank you!!!
What size Le Crueset dutch oven are you using? I was going to purchase one but I didn't know what size you used.
I use Fairy power spray to clean off stained pans and dishes espcially casserole dishes that have been left whilst eating tea, I hope you can get this where you are have a good day p.s. I am starting my loaves tonight thanks for the awesome recipe x
You are an angel, thank you for your wonderufl recipe that I have not tried yet, but having been baking and cooking, catering for umpteen years, I can see you're a wonderful baker. I wish you were near me, we'd be the greatest friends.
I have a rectangular Le Creuset. I will use your recipe and bake in it,but I think it's going to be too large for it. I do have a question, I make orange/cranberry breads for breakfast/tea adding sugar to the dough. Have you tried that? Hope to hear from you. Tanvel
What was the size of the oven you used? I noticed they come in various quart sizes.
I have a 2.5 le creuset is this big enough or should I halve the dough? I'm excited to try this!
sounds and looks amazing! my fave thing to clean my enamelled cast iron is barkeepers friend, works great inside and out!
This recipe looks delightful and I am planning on using my Wilton Armetale stew tureen.Will keep you posted how it turns out.
Very easy bread to make i will try it hope it looks just like yours.
Liana in South Africa. Your gas oven should work just fine and YES you can try baking in a glass dish with a lid as long as it can take 450F temp. Other's have had success with glass baking dishes. I hope it works for you.
Zesti – I can't believe the parchment was sticking???? That's crazy. I just bake a plain and a cheddar loaf. The plain needed a bit more fussing with. I think adding goodies to the dough gives it more stability and substance.
For Pizza dough – make the dough just like you were making a loaf of bread. Let it sit out for 12-18 hours. Divide into 4 individual balls of dough. Place on a heavily floured surface and let rest for 30 minutes or up to 3 hours. Just gently pull and shape the dough into whatever pizza shape you want. I use a pizza stone. You can see this on my recipe for Potato Rosemary Pizza post.
Best of luck to all you bakers…don't get too fat from all that bread!
Hi, Wonderful recipe and an amazing job of laying out the steps!
I haven't read all the comments, so forgive me if this is a duplicate, but I use Bon Ami cleaner on my enameled Lodge dutch oven and it works extremely well. it's gentle enough that it hasn't scratched the enamel but it gets the piece clean!
Thanks again,
Allen
You asked about cleaning your LeCreuset pot. I tried many things and cleaners. Nada. Then just decided to try actual oven cleaner. Be sure tomuse the type for a hot oven. I heat the pot and lid then take to my garage and spray inside and out with the oven cleaner. Let it sit as would I'd cleaning an oven. Wipe and rinse. They came out like brand new.
Also found the recipe on pinterest. Had to go to Sears and bought a Tramontina enameled cast-iron dutch oven. Used it for the first time on this bread. Wonderful! Thank you!
I have had some comments of people baking in glass pyrex. I'm assuming it will work.
Honolulu – try adding 1/4 cup more flour. I hope that does the trick.
I use Saf-instant yeast, as well. I can find it in my local grocery store.
Hello Janet I was wondering if you can use a glass baking bowl
Hello. I'm in Honolulu and am having a difficult time getting this bread nice and round. It looks like it rises well, but my finished product is somewhat spread out and the inside of the bread is quite dense and sticky (not raw). The crust is gorgeous. I have made this twice now following the directions to a tee in my new Martha Stewart 6qt enamel coated cast iron pot. Do I need to make any adjustments in the ingredients because of our warmth and humidity here or am i just a failed baker? I'll take any suggestions.
Mahalo,
Cindy
Thank you for clarifying my "instant yeast". You all sound like baking professionals now. Congrats on your fine baking skills.
I'm sorry we are still waiting for a gluten-free recipe. Anyone? Anyone?
Curious as to if anyone has tried a gluten free version of this type of bread… With two children GF, it seems unfair to have this baking all the time… I loved the first loaf is I. Sure I'll be making this often… Thank you!!
Oh My WORD this is the best ever bread, EVER!!! <3 I will have to throw all those other recipes away now. I went out to Kohl's this morning to get a pot to cook it in, I had nothing here that would work and I wanted it to be successful. Thank you so much for sharing this AWESOME recipe…
This loaf of bread is baking in the oven still, but I can tell already that it's going to totally rock! Thank you for the best recipe, and so simple! Now I have something I can always go to forever.
thanks for you great comment. I love King Arthur flour and wish it was more available. It's so pricey in the west 🙁
Thanks for the great instructions. I've been making this bread (Sullivan Bakery recipe) for some time. I also use my Le Creuset pot. The only thing I do differently is place the dough on a large parchment paper before I put it into the pot. I leave the parchment exposed beyond the lid, and it does get a little crispy, but once it's finished baking, I can pull out the bread easily using the parchment. One other thing, I only use King Arthur flour. I've tried several different flour brands, but this makes the best loaf. Thanks again for all the great pictures. Cheers, K
You bread bakers are all SO amazing, creative, and innovative. I tip my hat to all of you. Over the weekend I tried a chocolate loaf. I had a comment sent in using cocoa powder and nuts. I jumped out of my chair and in less than 5 minutes had a chocolate, chocolate chip, pecan loaf on the counter rising. It was amazing and was gone before it had a chance to cool off. Thanks for the wonderful suggestions and helpful hints from all of you.
** We're looking for anyone that has tried making this recipe gluten-free. Any takers?????
it's a grate recipe and so delicious I use the turkey baking pan with the lead it works perfect…
I didn't have the tools you mentioned so here's what I did. I poured the dough out on a cotton tea towel covered with flour, formed it into a round mound, put that on a round of parchment paper I'd cut slightly larger than the top of my crock pot. I heated a large Pampered Chef round pizza stone and the inside crock of my very old crock pot. I misread the directions and only heated the stone and crock for 10-15 minutes but that may have worked out for me. I was concerned about the crock getting that hot. Anyway, I put the parchment paper with the dough on the heated pizza stone and covered it with my heated crock turned upside down, like a cake cover. Removed the crock after 30 minutes as you would normally remove the lid of the dutch oven. Worked out GREAT!
I am very excited to try this recipe and will post how it turns out for me when i am done. I bought the pretty blue pot just to try this.
I am envisioning roasted garlic cloves in the loaves I create. Thanks for the recipe! Can't wait to try it!
I'm letting my bread baby rise right now. Every hour, I pop up and look in on it, like an anxious mother checking on a sleeping newborn! Can't wait until tomorrow to bake and eat it!!! Janet, you are truly sweet to answer all these comments and questions! God bless!
I made this wonderful bread today without any kind of a Le Creuset or Dutch oven. I put it in a baking dish and it turned out great! The only thing is I should have baked it longer. I had it in there for 36 minutes but it wasn't quite cooked. I think that 46 minutes would have done the job. Thanks so much for sharing!
I used my enameled cast iron pot by Lodge, the dutch oven makers. I got mine at Bass Pro Shops for about $40. It worked beautifully. I bet one of my well seasoned dutch oven that I use for buscuits when I'm camping would work just as well.
Thanks for the great tutorial.
Thank you, thank you! This bread turned out beautiful, it's cooling as I write, so I can't wait to slather butter on it! I went out and bought a dutch oven just so I could make this bread. I told my husband, it was a very costly first loaf! 🙂 As much as he loves my breads, I know he'll be fine with that!
Hi Janet,
Have you tried using any other types of flour? I am gluten free and would love to try this recipe with other flours. Thanks:)
Made a double batch of dough last night and added mixed herbs and granulated garlic. Needed a bit more water than noted however when I went to bake it this morning……….OMG! The house smelled so heavenly! Couldn't wait to see the 30 minute mark when you take the lid off. I was impressed! I don't bake! LOL (well I guess I will now) After the bread baked for the final 15 minutes I pulled it out of the oven and VOILA! I let it cool for a bit however who doesn't love a piece of warm bread with butter! Yum, Yum, Yum! I already have another double batch of dough sitting and waiting to be baked tonight! LOL
My Le Cruset is only 2 5/8 quarts…could I cut the dough in half before baking, and how would I adjust the cooking time?
Wow, this looks amazing! I am going to try a version using frozen persimmons that I found at Trader Joe's and walnuts, raisins, nutmeg and cinnamon. If I practice now, I will perhaps perfect it by fall!
Thank you so much for this recipe! I ordered a Lodge Logic Cast Iron Dutch Oven from Amazon a couple of days ago. I knew it was coming today, so got the dough ready last night. We are eating it right now and LOVE it!
Thanks!
Pam
I just made the recipe…The bread came out delish…Was scared because when I added the water it was not wet like in your pic….The end results turned out great……Thank you..I will never buy crusty yummy bread from a store again…..Now all I need is a good recipes for some jam…..
– I don't think letting it rise in a plastic bowl would make difference. Try adding about 1/4 cup more flour and see if that help.
– For a smaller pot, reduce the baking time by about 10 minutes. Uncover and continue to bake until golden brown. Should work great.
– It's so fun to hear from all you baking Diva's. Your comments are so fun to read. Thanks so much and keep them coming.
I made this bread and it turned out pretty well for me. Loved the taste! The only thing is when I turned it out onto the floured counter and formed a ball, it flattened out quite a bit. So I was wondering, if letting it rise in a plastic bowl could have caused this? I followed the recipe exactly, and that is the only thing I could think of that was the least bit different! I will definitely be making it again!
My Le Cruset is small, only 2 5/8 qt. if I cut the dough ball in halves for baking, how would I adjust the cooking time?
THIS is the bread recipe I have been looking for !!!! Thank you soooo very much !!
okay, I just finished mixing the dough and covered it! Can't wait to see what it looks like in the morning. Excited!
Using bread flour lightens the bread a bit, but I believe the bread still turns our great with a crisp crust.
Will using bread flour instead of all purpose make a difference?
Your Grandmothers old dutch oven should work just beautifully. Probably better than anything else.
This is it !! This is the bread recipe I have been looking for !!! Thank you sooooo much !
My cast iron Dutch oven isn't enamel coated….is this a problem? It has a cover, but isn't coated….very old…it belonged to my Grandmother. I hope you can see this comment and get a chance to answer soon cause I just mixed up my dough and it's proofing on the countertop now!!
I would re-season it before baking in it. You can google that or YouTube it. It will help preserve your grandma's pot and you will find it releases foods much easier when you go to clean it.
I'm pretty sure you can use a stainless pot. I haven't tried it, but I received a comment that someone had and it worked just great.
I used my Martha Stewart TriPly 5.5qt stainless steel pot with lid and it works fine but the metal did tint slightly golden. But it is safe up to 500 degrees so bake away.
Could I use a deep oval stainless steel roasting pan to bake in?
to answer a few quesitions:
– Storage: I just place my bread cut side down on a cutting board and leave it on the counter. By the end of the day…NO BREAD. You can store it in a plastic bag, but the crust will go soft. You can re-crisp the crust by putting in a 300 degree oven for a few minutes.
– All you your suggestions, tips, and flavor combinations are amazing. I really need to try peppercorns in a loaf. I'm a fan.
wrap the bread in wax paper and then put it in a plastic bag – LEAVING THE END OPEN. For those of us who can't eat the whole loaf, it keeps the crust crunchy, but still keeps the inside moist.
This is how I store my hard cheeses in frig – they don't mold that way.
Our favorite is garlic with about a cup of chopped Kalamata Olives….YUM!!!!
I made this for the first time today with rosemary, Gruyere, and cracked black pepper. It was delicious and turned out beautiful! I was so excited about the results that I mixed up a batch with cranberries, orange zest, and walnuts for tomorrow morning. I added about 1/2 t. cinnamon and 1/4 c. flax seed meal to see if it adds a little texture and fiber. My enameled dutch oven is one I got from Target about 6-7 years ago for $40. I think they now run about $60 at Target, but it works just as well as Le Creuset. Thanks for this great recipe! The hardest part of the recipe is waiting 12 hours to bake it when the dough smells so good!
eating a slice, still warm from the oven, right now. delicious!!
Try Baking Soda to clean the Pots. Can't wait to try the bread.
If you've answered this before, please excuse the repetition. What is the best way to store the loaf once it's baked?
This is amazing! Thanks for posting this, I have been looking for an easy bread to make for my family and friends
I just finally came across your post. i think this is FABULOUS and I will try it out today. Lately, I have been on a huge bread making kick. I have been making dough in the bread machine and then forming my own french style loaves and baking them in the oven. I have been wanting more of an aritsan style though and I think this is right up my alley! Thank you so much for sharing this!
To answer a question from Anonymous: I pre-mixed the dry ingredients and the next day when I was ready to add the water, the yeast had clumped up into a hard shard. I think it was too moist in my house and the live yeast was reacting. I strained the mixture and started again.
– You can definitely cut the recipe in half. Cooking time will be less.
– Thank you, Hidden Pantry. I love your cooking blog and will be following you.
– You can premix the dry ingredients without any trouble.
– Thanks to everyone for cleaning tips.
Would it hurt if the dough was out for over 18 hours? Also, Can you premix the dry ingredients or would that affect the yeast? Thanks!
This looks like the same recipe Laura Calder of French Cooking gave a few months ago during one of her shows. She called it the Miracle Boule. I have made it with success dozens of times using plain old cast iron dutch ovens. I like you marveled at the crusty exterior and uneven interior holes as well as chewy bite. I shared this on my blog thehiddenpantry.blogspot.com
I am now following you and invite you to visit me.
Have you ever tried "Bar keepers friend" to clean your pots? I use it to keep my copper bottomed pan clean and stainless steal pots and pans http://www.barkeepersfriend.com/kitchen-cookware
If I only have a Le Creuset that is 2.5 and I cut the recipe in half will that work? Thats the only dutch oven that I have.
Made my first loaf today: easy recipe yielding a crusty golden loaf with chewy center. I am making the raisin, cinnamon, and walnut loaf tonight! Thanks for a great recipe!
Just use straight from the tap water.
I have scrolled through many posts, but have not seen water temperature addressed (sorry if I just missed it!). Does the water need to be a certain temperature, or just straight from the faucett?
Thanks,
Karen