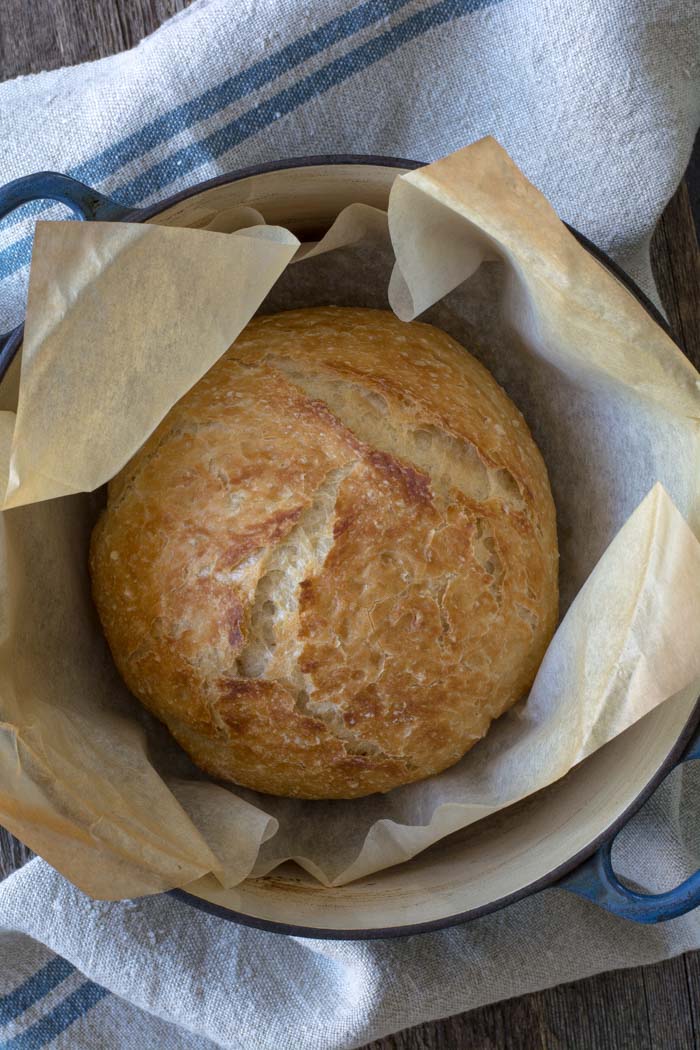
What I love about this bread
- It’s so easy to make. This dough can be made in less than 5 minutes.
- The basic dough recipe can be enhanced with many different flavor varieties.
- Very little hands-on time.
- Crusty bread never ceases to impress family and friends.
- My 12-year-old grandson can make it.
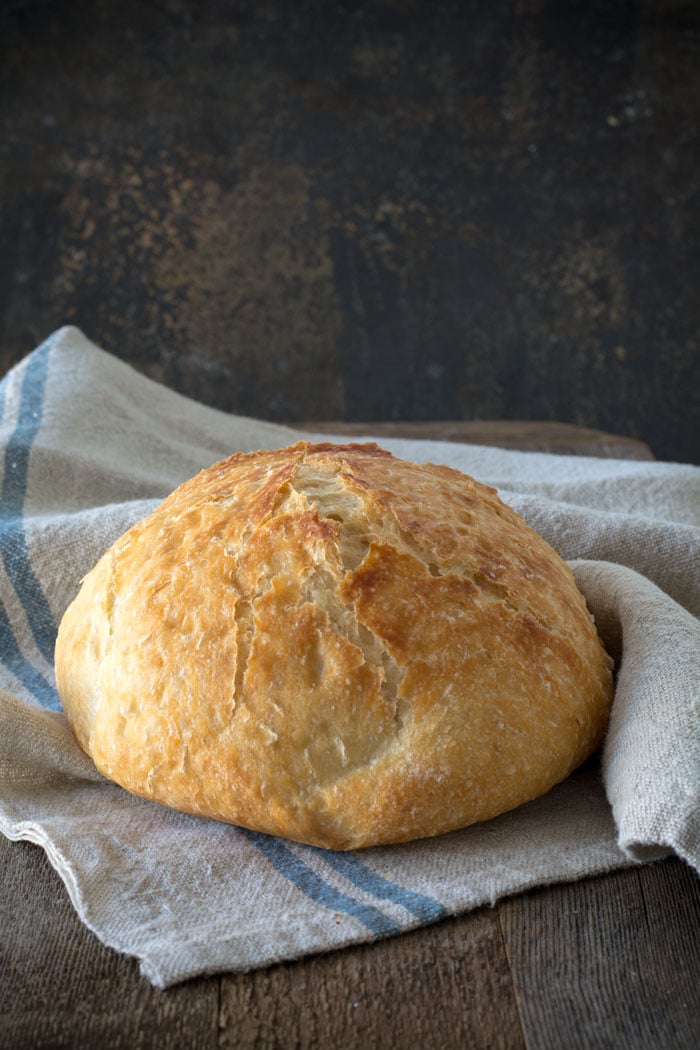
Let’s make No-knead crusty bread:
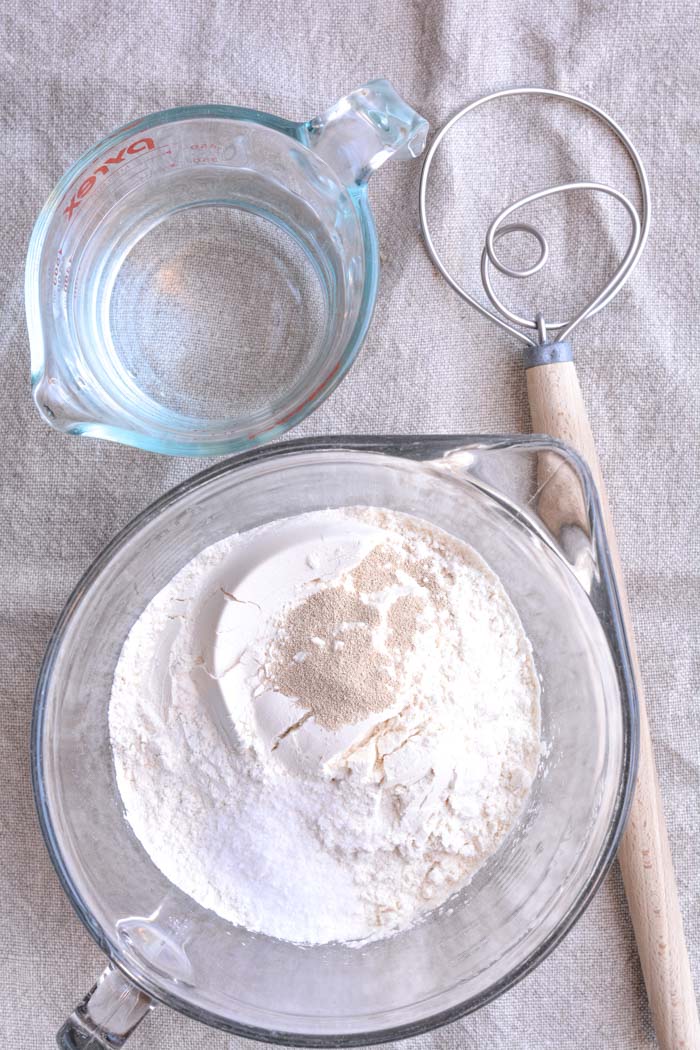
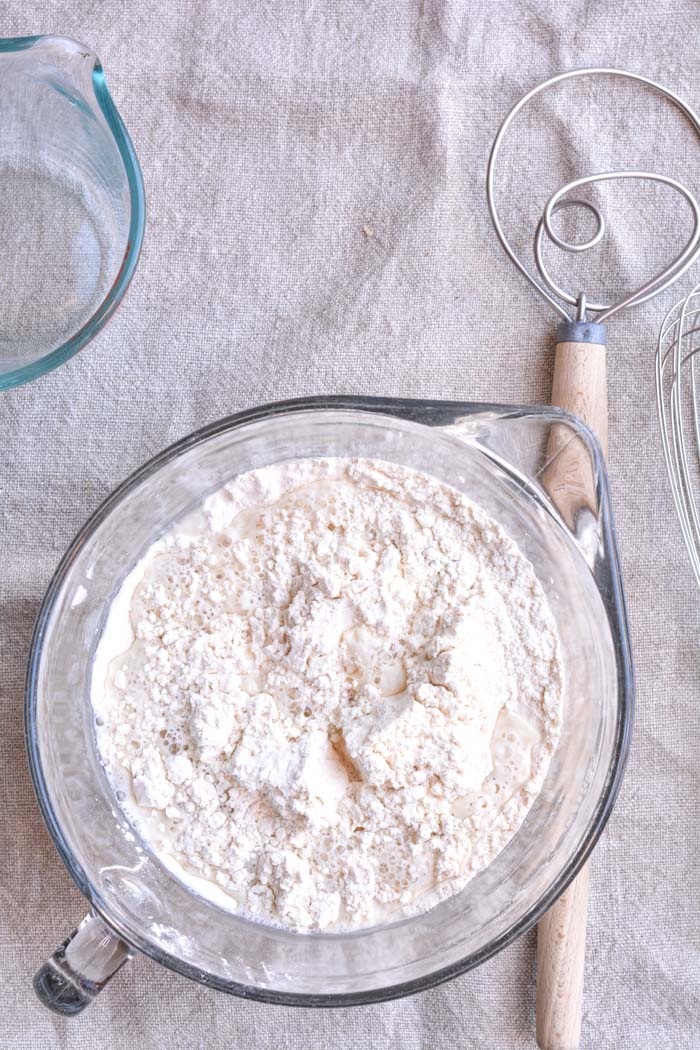
- In a large mixing bowl, add flour, kosher salt, and yeast. Whisk together.
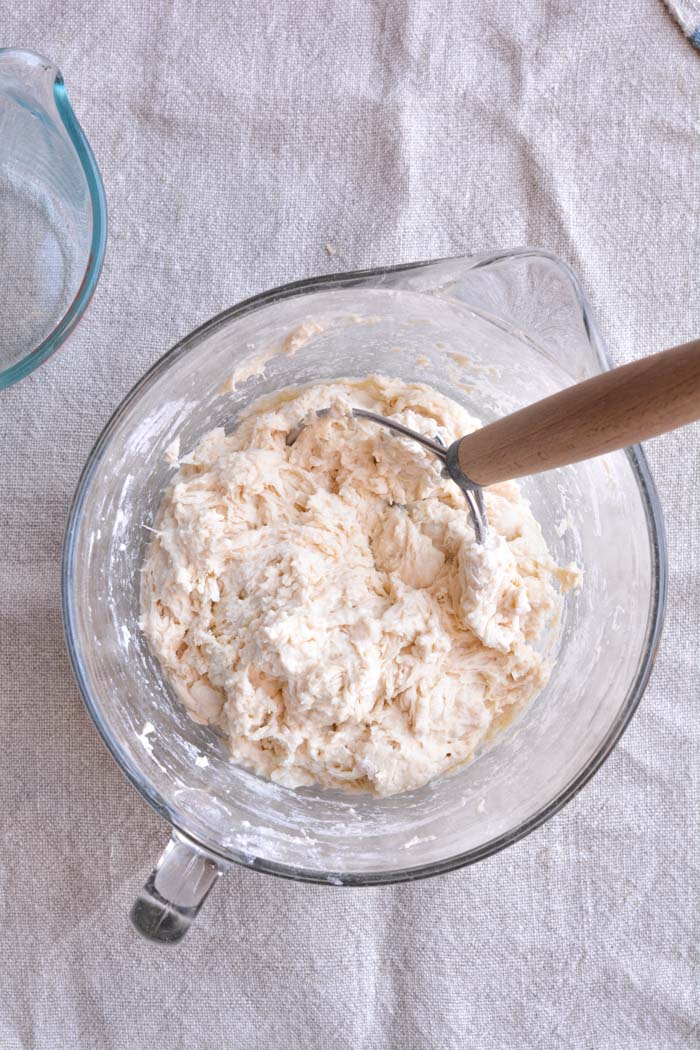
- Add water. Mix just until all of the flour has combined with the water. The dough will look like a shaggy mess. That’s ok.
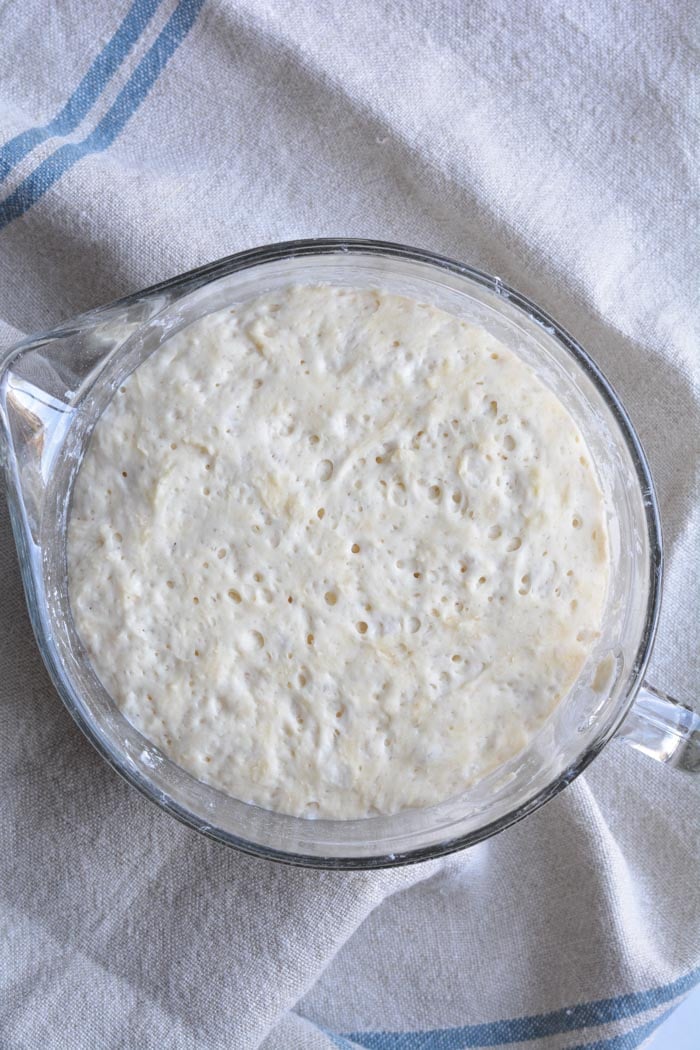
- Cover the bowl with plastic wrap and let it sit for 12 – 18 hours on the countertop. DO NOT REFRIGERATE. This is not optional. It takes that much time to proof the dough. The reason why you need a large bowl is that the dough will start to rise.
- After 12 hours the dough will look like this. It’s pretty sticky, but that’s ok it’s supposed to be.
Shaping and baking the bread:
- Preheat oven to 450 degrees. As soon as it has heated to 450 degrees place your pot with the lid in the oven and preheat the pot for 30 minutes.
-
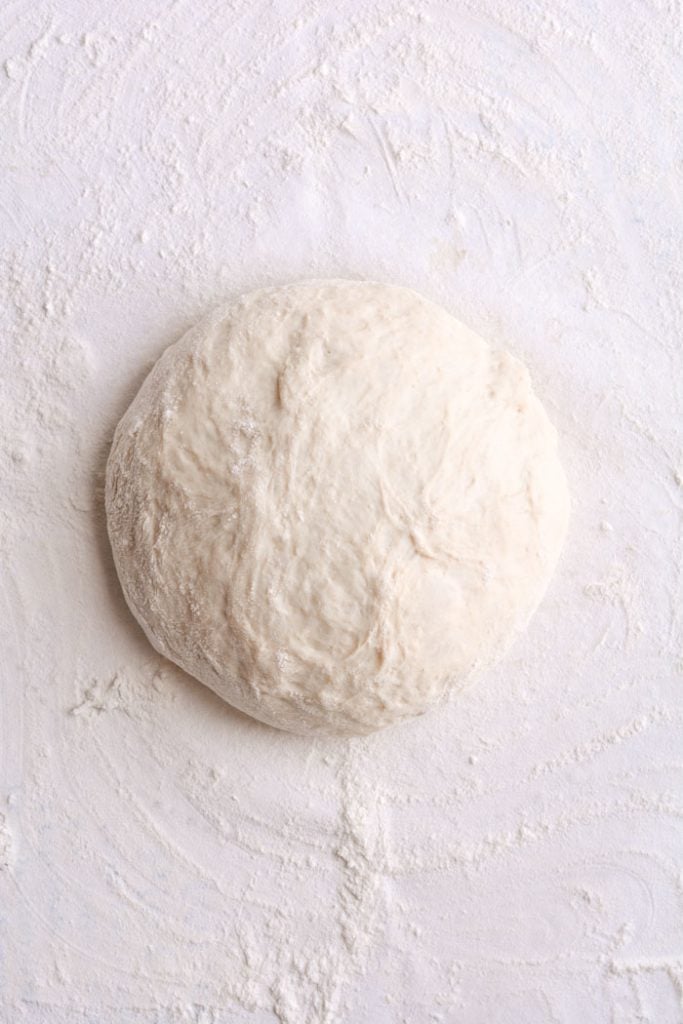
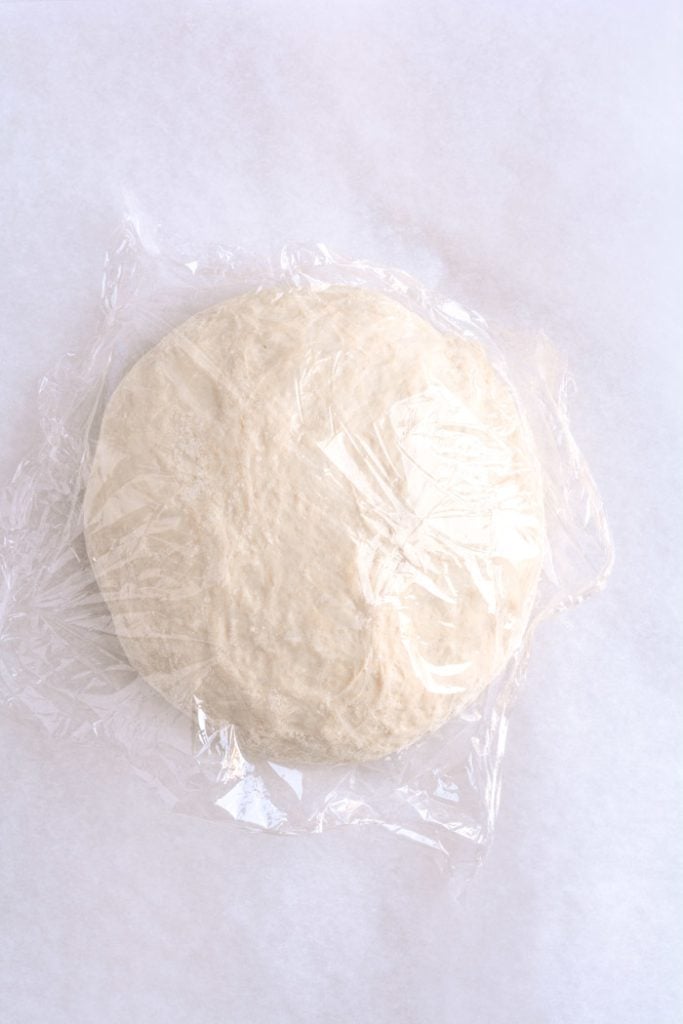
Right after you put the pan in the oven to pre-heat, dump the dough out onto a HEAVILY floured surface. Shape it into a round ball and place on a sheet of parchment paper. Parchment makes it so easy to transfer the dough into a hot pot and then remove it after baking. The parchment paper stays in the pot. This will rest for 30 minutes while the pan is heating. Cover with plastic wrap. Note: Use silicone coated parchment paper. The regular non-coated paper will stick terribly. Don’t chance it.
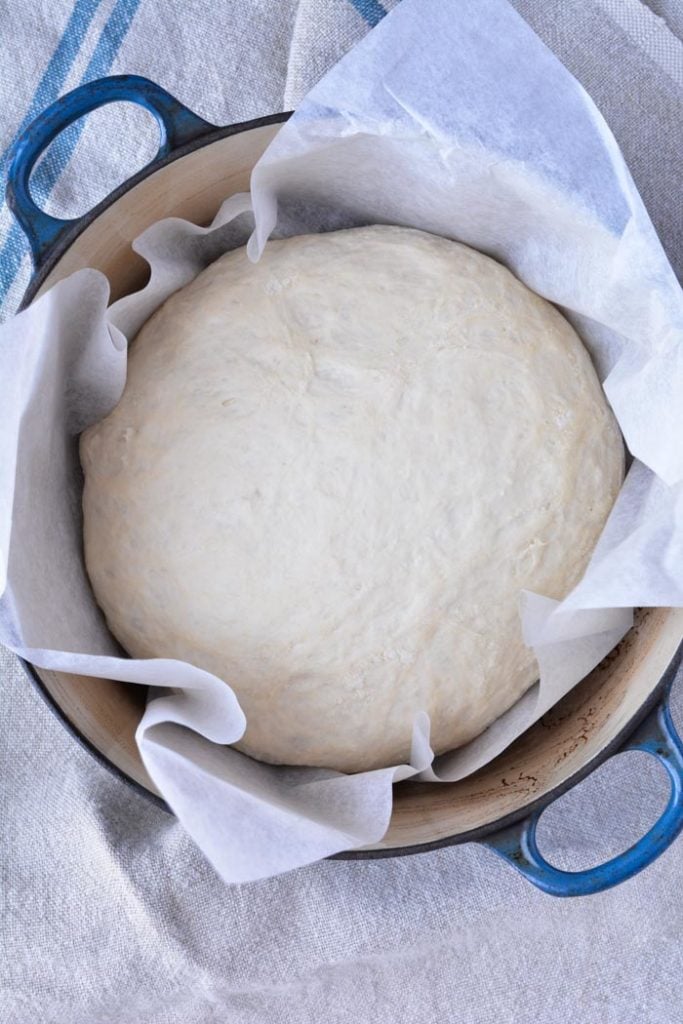
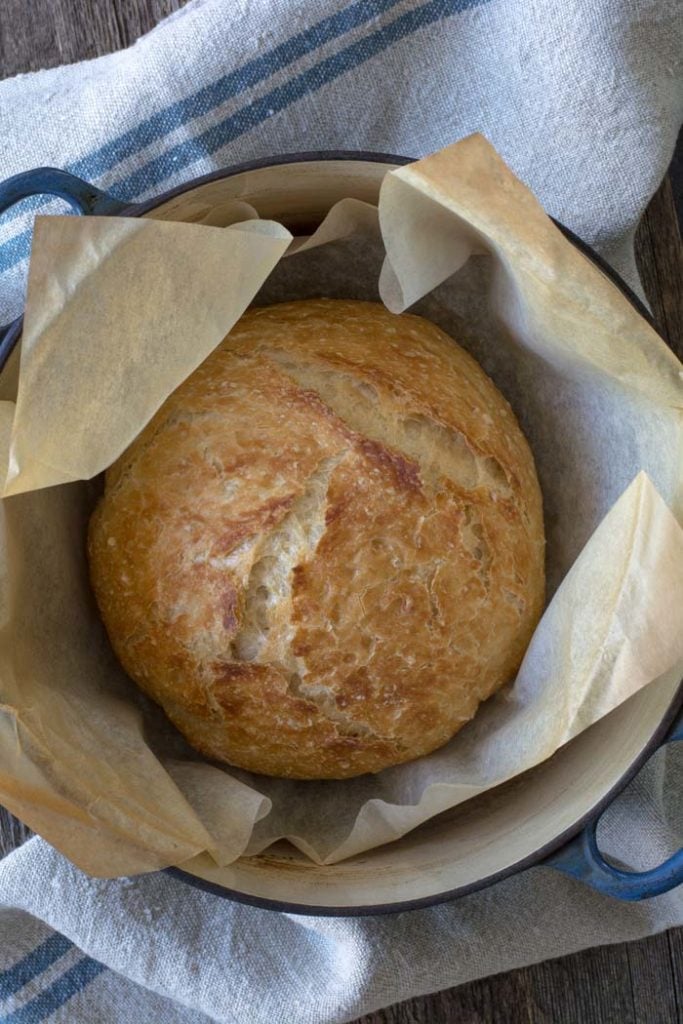
- Remove pot from the oven and carefully pick up the parchment and drop dough into the pot. Be careful the pan is HOT. Put the lid on the pot and return it to the oven for 30 minutes.
- After 30 minutes remove the lid from the pan. Bake for an additional 15 minutes or until nicely browned. You can test with an instant-read thermometer to make sure the bread is fully cooked on the inside. The temp should be between 190F and 200F degrees. Remove from the oven and carefully remove bread from the pot by lifting the edges of the parchment paper.
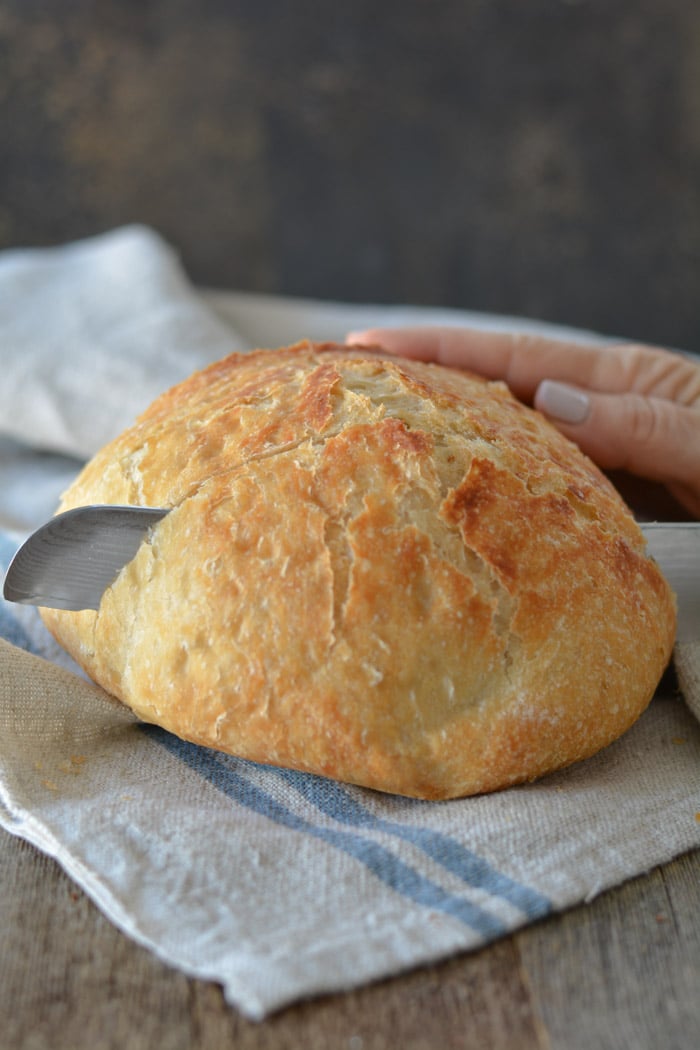
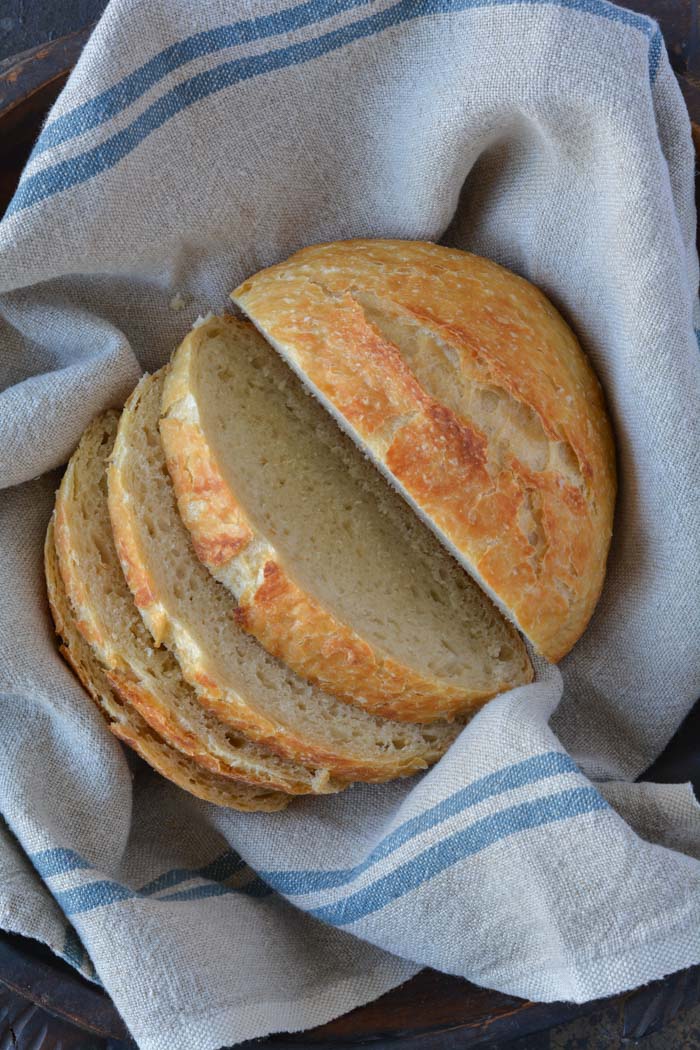
Holy cow! Can you believe how gorgeous that is? It’s best to wait for the bread to cool before slicing. Because I love warm bread I sliced it right away.
FAQ’s
Q: Do I have to use an enamel covered cast iron pan?
A: NO. You can use anything that can take the heat. The following have been used that I know of:
Clay pots with lids, Pizza stone with a bowl to cover the bread, insert from a crockpot, pyrex baking dish with a lid, stainless steel pot with a lid, baking dish covered with aluminum foil, old cast iron dutch oven.
Q: Do I have to use unbleached flour?
A: I always use unbleached flour. You can try bleached flour.
Q: Can I use self-rising flour?
A: I don’t know. I would just stick to all-purpose.
Q: What size is my pan?
A: My smallest pan is 5.5 quart. You can use as small as a 3 quart.
Q: What type of yeast do I use?
A: I use SAF instant yeast. Any yeast should work.
Q: Why is my bread turning out flat?
A: You could try using less 1/4 cup less liquid. Or add 1/4 cup additional flour. Make sure your dough appears to be dry when you first mix it. It will have more moisture during the rising time.
Q: Can my dough sit out longer than 18 hours? Does it HAVE to be between 12-18 hours?
A: I have let some dough sit as long as 24 hours and the bread was beautiful.
Q: Have you tried Gluten-free?
A: From what I hear the best GF is from King Arthur Flour https://shop.kingarthurflour.com/items/gluten-free-measure-for-measure-flour-3-lb
Q: Do I have to grease or oil the pan? Will my breadstick?
A: No you don’t need to grease the pan. I have never had the bread stick when using a cast iron pot. I haven’t tried anything else. The best way to be certain that the bread won’t stick is to form the loaf on a sheet of parchment paper and lift the bread into the pan using the sides of the parchment. Leave the paper in the pan. It’s won’t burn. When the bread has baked, just lift the sides of the parchment out of the pan. Voila! HOWEVER: Not all parchment paper is created equal. I use a silicone coated parchment paper. Regular parchment paper can stick something terrible. Don’t chance it.
No-Knead Crusty Bread
Wonderful yet easy artisan bread with a crisp crust. Prep takes just a few minutes with an overnight rise. Baked in a pot with a lid to create a steam oven. Bread can be made with many flavors and variations.
Ingredients
- 3 cups + 2 tablespoons unbleached all purpose flour (450 gr)
- 1 3/4 teaspoons Kosher salt (10 gr)
- 1/2 teaspoon Instant or Rapid-rise yeast (3 gr)
- 1 1/2 cups water cool (315 gr)
Instructions
-
In a large mixing bowl, whisk together flour, salt and yeast.
-
Add water and mix until a shaggy mixture forms.
-
Cover bowl with plastic wrap and set aside for 12 - 18 hours. Overnight works great.
-
Heat oven to 450 degrees. When the oven has reached 450 degrees place a cast iron pot with a lid in the oven and heat the pot for 30 minutes. OR pot can be placed in cold oven while oven is preheating leave in oven for 30 minutes.
-
Meanwhile, pour dough onto a heavily floured surface and shape into a ball. Cover with plastic wrap and let set while the pot is heating.
-
Remove hot pot from the oven and drop in the dough. Cover and return to oven for 30 minutes. After 30 minutes remove the lid and bake an additional 15 minutes. Remove bread from oven and place on a cooling rack to cool.
Recipe Video
Recipe Notes
FAQ's
Q: Do I have to use an enamel covered cast iron pan?
A: NO. You can use anything that can take the heat. The following have been used that I know of:
Clay pots with lids, Pizza stone with a bowl to cover the bread, insert from a crockpot, pyrex baking dish with a lid, stainless steel pot with a lid, baking dish covered with aluminum foil, old cast iron dutch oven.
Q: Do I have to use unbleached flour?
A: I always use unbleached flour. You can try bleached flour.
Q: Can I use self-rising flour?
A: I don't know. I would just stick to all-purpose.
Q: What size is my pan?
A: My smallest pan is 5.5 quart. You can use as small as a 3 quart.
Q: What type of yeast do I use?
A: I use SAF instant yeast. Any yeast should work.
Q: Why is my bread turning out flat?
A: You could try using less 1/4 cup less liquid. Or add 1/4 cup additional flour. Make sure your dough appears to be dry when you first mix it. It will have more moisture during the rising time.
Q: Can my dough sit out longer than 18 hours? Does it HAVE to be between 12-18 hours?
A: I have let some dough sit as long as 24 hours and the bread was beautiful.
Q: Have you tried Gluten-free?
A: No. I'm still waiting for someone to venture into the realm of Gluten-free. If you try it, let everyone know.
Q: Do I have to grease or oil the pan? Will my breadstick?
A: No you don't need to grease the pan. I have never had the bread stick when using a cast iron pot. I haven't tried anything else. The best way to be certain that the bread won't stick is to form the loaf on a sheet of parchment paper and lift the bread into the pan using the sides of the parchment. Leave the paper in the pan. It's won't burn. When the bread has baked, just lift the sides of the parchment out of the pan. Voila! HOWEVER: Not all parchment paper is created equal. I use a silicone coated parchment paper. Regular parchment paper can stick something terrible. Don't chance it.
More Notes:
Regular active yeast can be used in place of the instant or rapid-rise yeast. It will need to be activated in 1/4 cup warm water. Stir and let sit for 5-10 minutes. However, most of the comments I have received state that the rapid raise works the best. You choose. Whisk the flour, salt, and yeast together.
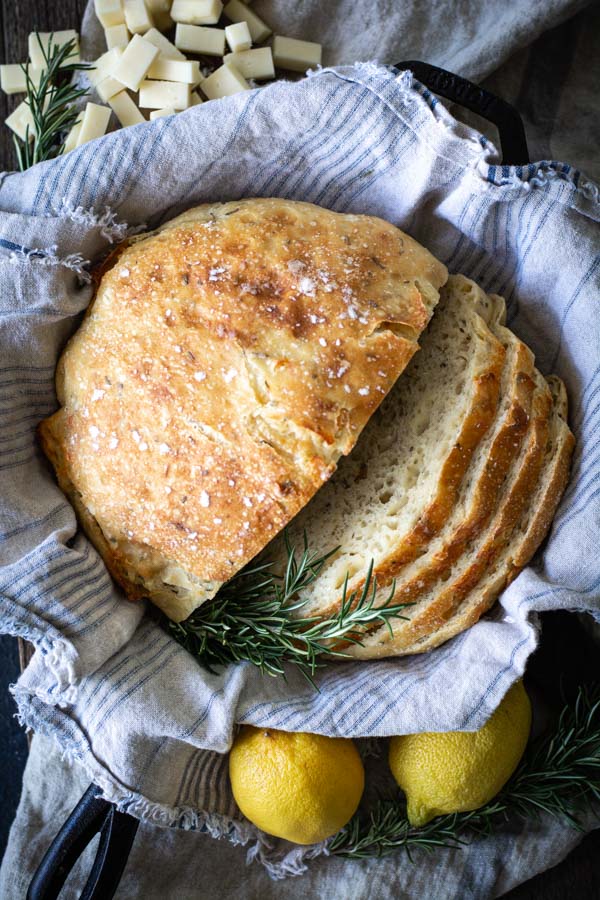
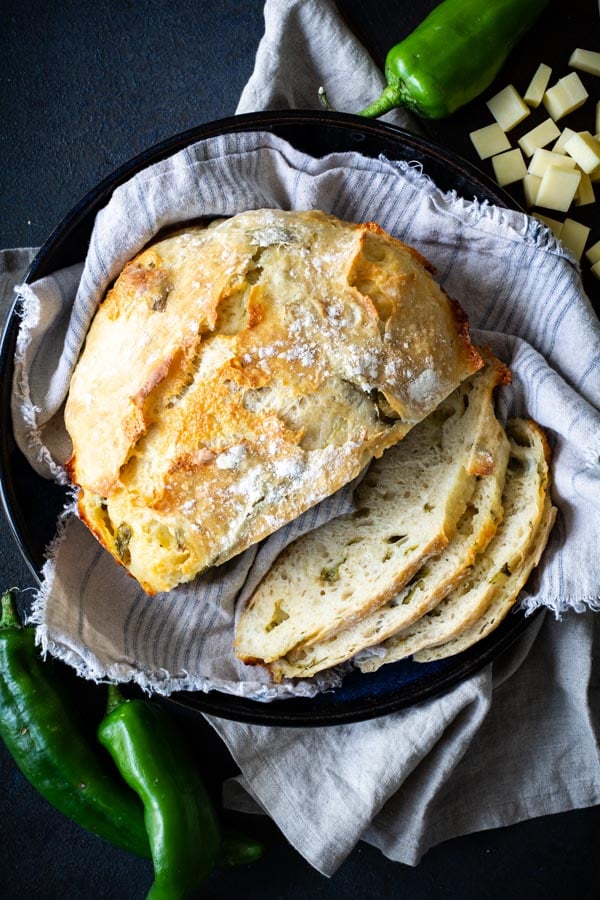
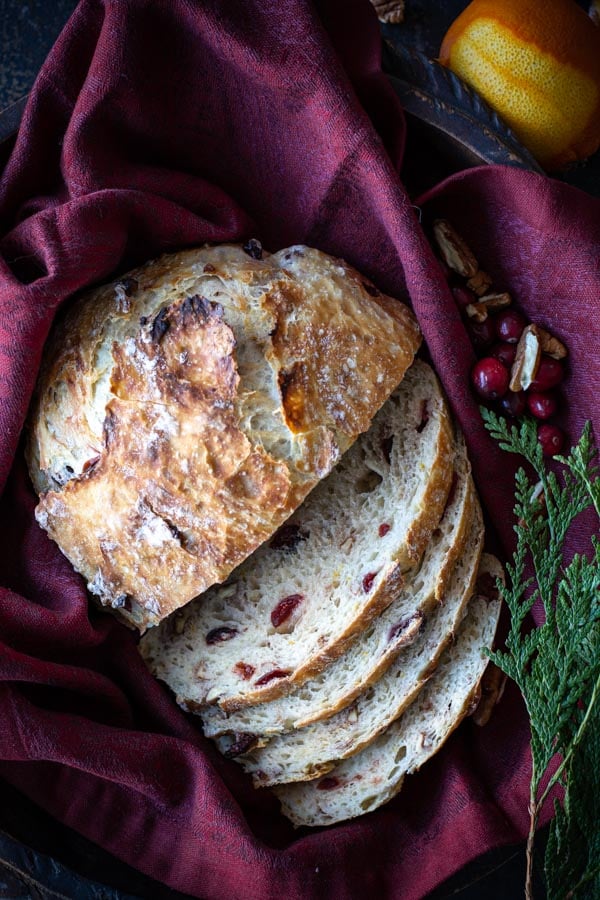









I have a round clay bread baker that indicates putting the dough and baker into a cold oven, then setting to 450 (depending on bread) and baking for 30 minutes, give or take. Will this recipe work without preheating the oven and the pot?
Great recipe! Came out perfect!! Oh…and quite delicious!!! And oh so easy!!!!
I want to try making rolls and french bread with this recipe next.
Louisa in Denver: Congratulations! Way to beat that high altitude. Your comment just made me smile. I live at over 5,000 is makes baking a real challenge.
After 9 years of failure to make bread at over 5000 feet altitude, this recipe/method is awesome! I have used my dutch oven so far, and as long as you don't put oil in the bottom of it, the bread comes out lovely. The oil actually ends up burning the bottom a bit and makes it all chewy and kinda bad on the bottom. Without the oil, my dutch oven smokes a bit when I heat it up, but otherwise is great. I flip the dough into it so that the nice, smooth top is on the bottom of the dutch oven and the bottom is facing the top. That way, you don't get the extra flour bits inside the dough and the top can blow up and crack to it's heart's content. I haven't tried a ton of recipes yet, but I did replace 1 cup of AP unbleached High Altitude flour with 1 cup WW Pastry flour, and it looks nummy! I have to wait until it cools to try it, but this time I am getting a piece before my kids devour it.
Thank you Janet! I am in Denver, and between the Altitude and the dryness here, I have never been able to get bread to come out edible, and I have tried every known combination of recipes and kneading. I found your recipe, and now I am set. It comes out every time, and doesn't take forever to make. The best part is that my picky eater asks for slices of my bread over what we get from the bakery. I love it! I am going to try a ton of combos for mixing in. Now, if I could just find a good rice pudding recipe that my picky eater would eat, I would be in like flynn. :0) Thanks, Louisa
Thank you so much for this. I have made probably 5 or 6 loaves of cinnamon rasin bread. And made a loaf of jalapeno cheddar bread, added some crushed rosemary, garlic powder, crushed red pepper, Italian seasoning and some Simply Salad seasoning. Took half the dough and pressed it out on parchment paper on a cookie sheet. Baked it at 425 until it was almost done and used it for pizza. Wonderful. Took the other half and made 6 sandwich rolls. This was so good so today I made another cinnamon bread and another batch of jalapeno bread into rolls. It will make 12. Ham, provolone cheese, a few seconds in the microwave to warm the cheese, What a sandwich.
So, I tryed out a Gluten Free version of this bread… It worked out pretty well. It didn't get as fluffy looking as the Glutenous version seems to, but I baked it anyway – not bad 🙂
Recipe:
1 cup Brown Rice flour
3/4 cup Sorghum flour
3/4 cup Potato Starch
1/2 cup Tapioca Starch
1 1/2 tsp Salt (kinda salty for my taste – I think I'll lessen this)
1 tsp Xanthan Gum
1/2 tsp Yeast
1 1/4 – 1 1/2 cup Water
Followed all the rest of the directions.
Thanks for the fun idea – I can't wait to try it again and add some of your fun flavor add-ins!
Karen C
Sueli in Brasil: Thank you for your comment. You made me smile, you made my day. Bravo to your baking skills.
o seu pão é um sucesso aqui no brasil!!
todos em casa adoraram!
sou louca poe massas, pães e pizzas!
obrigada!
If your bread seems to get to dark on the bottom, try placing the pot in the oven when it is cold and heating the pan while the oven is preheating to 450 degrees. Then drop the dough into the pot as soon as the oven is heated. Bake as directed.
I can't wait to try this recipe. It looks so good.
I bake a personal sized loaf of my favorite bread. 1/3 cup of milk, 1 small egg, half a teaspoon of yeast, 1/2 teaspoon of salt, 3 heaping teaspoons of oat bran and enough flour to make a dry dough. I place the dough in a buttered bread pan and let it double in bulk. I coat the top with some oil then bake in a 350 degree oven for 30 minutes. I usually eat it with butter or jam. I never have day old bread.
I can't thank you enough for sharing this recipe. I've made three loaves so far and they've turned out perfect every time. The second loaf, I added some homemade pesto and parmesan cheese and it tasted fantastic.
I turned the dough out on a lightly floured piece of parchment paper. While it's resting, I cut the corners off the paper so it'll fit nicely in the dutch oven. So far a quick rinse after it has cooled and the dutch oven is pristine and it's easy to get the bread out, simply grab the edges of the parchment and voila!
I just tried this tonight for the first time. My friend has made it several times. I have 2 le C pots I made them in. It burnt a bit on the bottom and I put it in for the correct amount of time. Any thoughts??
Regarding Pot preheating: I have baked this bread two ways. 1)preheating the pot at 450 degrees for 30 minutes. 2) Placing the pot in a cold oven and heating it while the oven heats to 450 degrees then plopping the dough in. I have not attempted the put the bread in a cold pot. I just followed the directions given by Jim Lahey the originator. I assumed he wanted the dough placed in the hot pot with the lid placed on it to create a steam oven. The steam creates the crisp crust.
Jo: Way to rock the yeast!
Just wondering: when heating the dutch oven in the first place, does the lid stay on or off?? I'm making this recipe right now with my dutch oven I received for Christmas (world market brand) and couldn't find a comment that addressed this (there are a LOT of comments lol). So, after much going back and forth, opening and closing my oven door, I took my lid off and put it next the dutch oven to heat. Is this right or wrong? Does it matter??? Will it heat the same???
I am truly blown away by this bread. My first attempt did not rise but that was completely my fault. I used dry active yeast and didn't activate it first. It was my first time using yeast. To be honest, I've always been secretly frightened of recipes involving yeast and steered clear of them. However, this bread has opened my eyes!
My second attempt (after activating the yeast…) was a huge success. I ate three pieces before it cooled completely. Not ashamed. My husband is in awe of my (your) abilities. Thank you so much. I will cherish this recipe forever as the one which started my journey into all things yeast.
-Jo
Anon: yes you can use a pyrex dish. You don't have to half the recipe if your dish is large enough to fit the dough and allow for rising.
You shouldn't have to make any changes if you live in Denver. I'm at 5500 feet and the bread works.
thank you for all of the great suggestions and success stories. Happy baking.
I absolutely adore this recipe. I have made the plain loaf a few times now and it has not lasted through the day. So simple and delicious! Thank you!!
Can you use a glass pyrex loaf pan for this bread? if you do you you have to halve the recipe? Thanks! J
I don't think that a 30 minute preheat of the pan in the oven is absolutely necessary. Yes, the dough should sit on the counter for 30 minutes, but my oven takes just 20 minutes to get to 450. If I put the pan in the cold oven when I turn the oven on, then the pan will also be at 450 when the oven gets there. The way your instructions read, your oven is on for at least 45 minutes before you begin baking.
This looks incredible! Do you have suggestions for changes for those of us in Denver? Thanks so much.
Do I use same amount of Active dry yeast (Fleischmann's) as you use with instant?
I just made the plain bread. It took a long time before any bubbling or wetness happened in the bowl. I had used traditional yeast. I let it sit on the counter for 2 nights plus one day before things started happening in there. It still turned out beautifully, and tasted great too. Yum! just started another batch with cinnamon, pecans and raisins, this time I presoaked the yeast, so hopefully I don't have to be as patient this time:)
I just mixed up a batch with dill and sharp cheddar – it looks fabulous!
Hey! I forgot to let you know about a month ago I actually made this bread with about a cup of sourdough starter added to the mix. I'm fairly bad at actually measuring some things, that's why I say about a cup! It's the only change that I made and it turned out wonderfully and my boyfriend and roommate love me for it! I was just now taking another loaf out of the oven so vBulletin I remembered to let you know!
How about a modification to the recipe for Sourdough Bread?! I made the basic recipe and made a loaf with Sharp Cheddar and Rosemary! My family loved it!
I just made a homemade Sourdough Starter and would love to know how to make sourdough bread the same way!!
Any ideas?
Thank you so much for this recipe, I made it for the first time this morning and it's so much nicer than bread made in the bread making machine. I came here via pinterest and am looking forward to reading the rest of your blog 🙂
God bless,
Suzanne
Dear Janet,
Thanks for your wonderful recipe!
The step-by-step photos and faqs are really helpful. I (me! who would have thought?) made the bread and it turned out fantastic!
Just as a proof 😀
http://patinpasta.blogspot.com/2013/02/rustic-crusty-bread.html
Lexy: you should be ok to use your 3.5 quart pan. You may have to tip it over to remove the bread, if you can't get your hands around it. good luck.
Leonor: Bravo!
Adorei esta receita. Fiz e vou fazer mais!!!!!!! Obrigada por compartilhar!
Leonor – Brasil – SP
Please forgive me if this has already been adressed. I don't have time to read over 1,000 comments.
You did mention that you can use a smaller cast iron pot (3.5)….do I cut the recipe in half for that size? Thanks..cant wait to try.
Leonor: I can't wait to see you photos and hear your comments. Thanks for commenting.
Adorei essa receita!. Vou fazer e posto as fotos e comentários!
Muito obrigada por compartilhar!
Hello! Super stoked to try the recipe…i'm wondering if you or anyone else knows if this would work in a Pampered Chef dutch oven? It's not enamel, just the good ole' baking stone material- its quite deep and has a lid.. thank you!
wow !!! really wonderful……..
vanntetting
First things first- thanks a bunch for the recipes and the step by step, that was great for my daughter to follow!!
In case you're still looking for info on how to clean your Le Creuset dutch ovens, here's what I do:
For stains inside, you can make a paste out of baking soda and warm water, let it sit in the bottom until it starts to dissolve, then use a scotch brite pad to "scour" the bottom. This takes off most light food stains.
For the exterior (and interior, if the baking soda isn't strong enough) use Batender's Friend scouring powder with a dish cloth.
For exterior only, Cerama Brite paste (the stuff you use on a ceramic stovetop) works really well… it comes with an applicator pad. Because it has a faiurly heavy chemical smell, I've avoided using it inside my Le Creuset pots/pans.
Larry
Can't wait to try this recipe! As far as cleaning, I use Bar Keepers Friend and it cleans beautifully!
Just found this recipe and blog, I'm very excited to try this bread! I have a gluten free flour blend that I'm going to try, will let you know what happens!
Thank you so much for this bread. I live in Ecuador, and the bread is not great here. I did not alter the recipe at all and I live at 9000feet.
Yum
I made this bread today and it was amazing! Thanks for such a wonderful simple and delicious recipe! I will definitely be trying different flavor combinations. My family loved it and can't wait for me to make more. Thank you, thank you.
Have you ever tried cleaning your pans with baking soda and a dish cloth? I've had success using this method.
Best bread ever!!! Thanks for sharing:)
I just use tap water and i don't worry about the water temperature. Works for me.
Does the water temperature matter in this recipe? Does it have to be 110 degrees like most breads?
Dear Anonymous, Next time you would like to slam my religion, please have the kindness to leave your name. You have the right to believe what you want and so do I. I would never bash or ridicule anyone for their religion regardless of what that religion so happen to be.
I hope you are baking some fabulous bread. Next time you bake a loaf put a little sugar in it that just might take your bitterness away.
My name is Janet Barton. I'm a mother, grandmother, 6x Bostom Marathon runner, food blogger and I'M A MORMON!
xoxo
Hi You ask how to get the stuff off your pots. This worked for me, if you have a dollar tree near you, there is this stuff called Awesome you find it in the cleaning area of the store it comes in a spray bottle. Soak your pots in this stuff over night and most of it will wipe off. It also great cleaner for around the stove and kitchen area it's awesome grease cleaner…
Good Luck!
I have been using a similar recipe for years – love it. Am anxious to use this one – like your add in's. I too do something very similar – one of my sweet favorites is candied pecans, cranberries, white chocolate and cinnamon. Another fav is parmesan cheese, finely chopped dill pickle, and garlic. I also use raisins, cinnamon, nutmeg, and chopped dried apricots. Love bread making! Karolyn
Thank you for sharing this recipe! I have made some every weekend for the past month and just recently tried with rosemary and olives! AMAZING! I also gave the gluten free a try, basically substituting the flour for gluten and wheat free flour and everything is pretty much the same, only difference is the cooking time which needs to be quite a bit longer.
Thanks again!!
Angela: To make the soup bowls, the baking time would definitely be shorter. Probably not a lot shorter, especially if you're baking them in the same pan and the same time. You can do this by placing parchment paper in between the loaves during baking time. I would probably reduce the baking time with the lid on by 5 min. Then just bake until golden. That should do it.
Anon: I love the idea of adding whey. I have the whey sitting out on my counter right now to go into some dough. I can't wait to try it. Thanks for the helpful hints.
if you have enamelware it works just as well as cast iron. I love this bread. when I make it I make two loafs at a time . one I make using the water the other I use my leftover whey from my homemade yogurt.it has more of a sourdough taste to it
I hope you still check this!!! I made this recipe, and, like everyone else, LOVED it! Thanks so much for sharing. I want to use it for making bread bowls for a loaded baked potato soup. How long would you say I should bake each one? I'm thinking of making two bowls from one recipe.
so good.. turned out just like the picture and soooo delicious Will use part wheat next time
You can add 1/2 to 2 cups of cheese to a recipe. Depends on how cheesy you want your bread to be.
This is such a fun and wonderful recipe. I am on my third day of experimenting. My first loaf was pretty plain with a little cheese. My second loaf was unbelievable. I added smoked gouda and basil. Now I have a loaf of cheddar and red pepper flake rising. I love this. I am not a person who can just whip up any recipe and have it turn out. Thanks again,Jo
Should have the comment issues worked out this week. I'll try to answer as many questions as I can and hope you receive the answers. If you don't email me directly at simplysogood@hotmail.com I'll respond directly to you.
I love hearing how successful your bread is turning out. Kudo's to all of you.
Carol: I have not tried sweet milk bread with this recipe. I would guess it would brown more because of the added sugar. Sounds delicious. let us know if you try it.
Keep the comments and suggestions coming. Keep a look out for my new design.
I wonder if heating it in the oven with water in it would work and then dumping the water out of course and quickly wiping it dry.
I ordered my Lodge Dutch oven from Walmart for $35 + shipping. Lodge cookware comes already seasoned. I'm making my first loaf now. Plain.
I didn't put any oil in it. Just preheated it as directed. Will report back how it turns out.
It's Super Bowl Sunday. If its good I'll bring it with me to the party.
Di
Just a heads up. These enamel pans can be ridiculously expensive. Hwwever, my hubby found one for me at Big Lots for 1/4th the cost. I plan to make mine tonight for tomorrow's soup day. Great ideas on here. Thanks!!!!
We made your recipe as a family this week and I just wanted to stop by to thank you and let you know it came out just as easy and amazing as you said it would. We are happily converted to a bread baking family, and I hope not to buy grocery store bread ever again. 🙂
I blogged about our experience here: http://thismummaslife.com/2013/02/01/and-a-big-yellow-bowl/
and here: http://thismummaslife.com/2013/02/02/baking-bread-the-result/
linking to your recipe on both posts.
And now I have a new batch…parmesan oregano…sitting on the counter waiting for the yeast to do their thing.
I found your recipe on Pinterest and although I haven't tried your bread recipe yet, I plan to soon. Looks great! I'm writing about cleaning your pots 🙂 I bought the same pot but in white at an estate sale for $10 about 7 years ago. I debated buying it because it was pretty dirty. I used Bar Keepers Friend on my Le Creuset and it came out good as new. It also works great on our All-Clad pots and pans.
Thanks!
Greetings:
I have been making Jim Lahey's No Knead Bread since November!!! It never ceases to amaze me…. I tried my first loaf with Organic unbleached white flour and all of my subsequent loaves have been with Organic unbleached bread flour BOTH are good!!! I have made plain loaves and the following types: rosemary, cheddar; caraway, caraway Gruyere, thyme, lemon; Rosemary and Olive; cinnamon; and crystalized ginger & dried apricot. LOVE this bread recipe any way!!! Happy to have learned from your blog that the dough can sit longer than the12 hours……
Janet,
I have made this bread several times and people are always amazed. I would love the pizza crust recipes.
Thanks
Lisa
I have made several of these now, we love them. My husband is begging me to make sweet milk bread, I have a recipe for a bread maker but was wondering if it could just be adapted to this recipe? I am not one to adapt recipes very well, it calls for 3/8 cup of eagle brand milk in my recipe, do you think it could be added to this recipe? If so would the water amount change?
We love this bread recipe at our house! Comes out perfect every time. My married daughter is gluten free so we made a loaf using a gluten free flour blend (almond flour and two different rice flours). We also added some Xanthan gum. Otherwise we stuck to the recipe. The flavor was good, but the texture was too moist. Tried baking it longer than specified, but still kind of spongey. We will keep trying different variations and let you know how it turned out.
Making this bread was ridiculous. As in too easy to be true…but it is TRUE! Unbelievable! It is SO good I'm just in shock. I've been buying $10 loaves that are very similar to what I just baked in 20 min. with $.50-worth of ingredients. Incredible! Wish I could post the picture here, but I see no option to do so. Oh and I used bleached flour by mistake (didn't realize I bought it bleached, they had me at "High Altitute" Hungarian flour).
You can clean your babies with Mr. Clean Erasers.
I'm sorry not to have answered the past several questions. I'm having a few issues loading the comments during my redesign. I hope to have that corrected soon. Hang in there I'll try to answer the best I can.
Could I make your no-knead recipe as a sourdough loaf? If so, I've got a starter recipe but I don't know how much to add…do you have a recipe for sourdough no knead bread?
This might be my single greatest culinary find in the last decade. Though I have few qualms jumping into nearly any kitchen operation, will try any recipe, improvise endlessly… bread terrifies me. Always has. Never made it… until now. I've seen several "no knead" methods, but they still took a bunch of time and involved a fair number of steps that looked easy to mess up if you didn't know what you were doing. This looked too easy to not try. And OMG, I am THRILLED beyond belief. 2 loaves a perfect success. I even went out and bought the Costco bag of yeast; I'm that on board with this whole making my own bread thing. THANK YOU!!!! I think I have conquered my last kitchen phobia. Well, except pie crust…
I never thought to bake the bread in my Le Creuset pot (I have the red one – LOVE IT!) I'll give your recipe a try this weekend.
BTW found you through a shout-out from Retro Fashion is my Passion.
thriftshopcommando.blogspot.com
Looks devine! I love bread! You may have already answered this Q. above(there were so many responses and Q's)but…is there an alternative to the cast iron baking? I do not have anything like that.Thanks bunches 😀
I just found this on pinterest! looks delish. in regards to cleaning your le crueset, have you tried bar keepers friend? it SHOULD, in theory, do the trick. get the powdered version, sprinkle it on all your stained bits, spray a little water on, let it sit for ten minutes or so, and it should come right up! there's also bon ami, and mrs. Meyer's have powdered scrubs that work wonderfully also! and smell good. excited to try this recipe, thanks!
Can't wait to make the bread! BTW – magic erasers clean the pots nicely – and relatively easily. 🙂
I would like to know results if anyone has made no-knead bread using only Jovial's Einkorn ancient wheat. I have the flour, and have not made bread with it yet. It makes great cakes though.
Hi!
I tried to read most of the comments and questions before I ask mine, but it seems like nobody asked…
Did you ever tried to make this into rolls?
If so, how long did you bake it ?
Thanks !
This is unreal!!! First I forgot the last 15 minutes so the bread didn't turn out so good (the chickens loved it) but I had to do it again right away and oh my God, it reminds me of the bread that we had as a child in Hungary. Thank you so much for sharing this with us, you have no idea what kind of a gift it is from you to me. 🙂