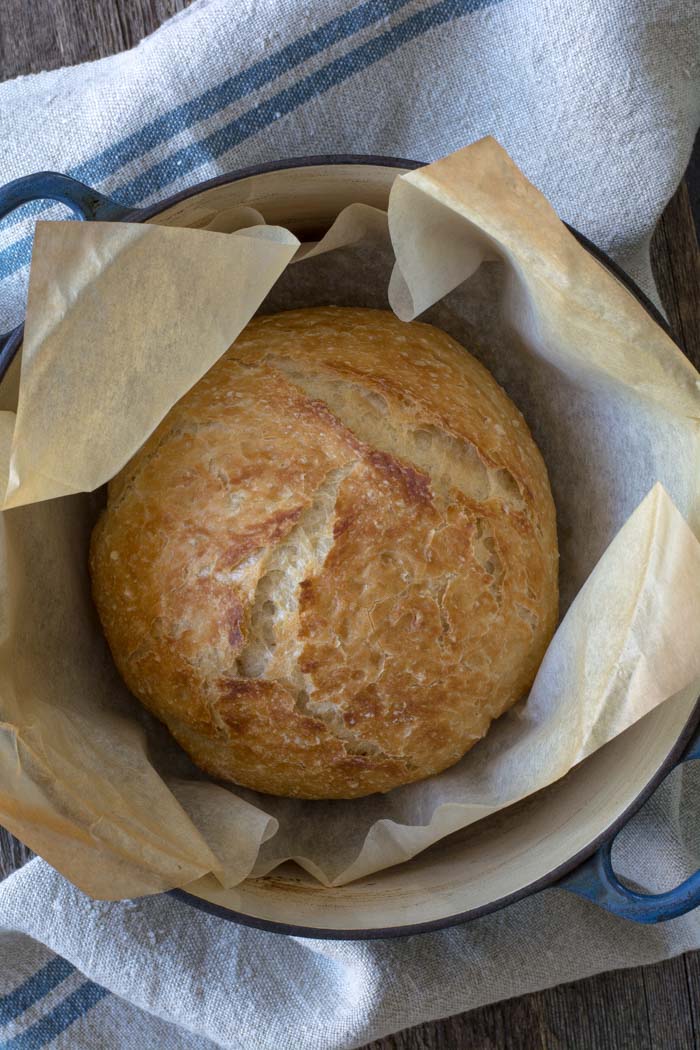
What I love about this bread
- It’s so easy to make. This dough can be made in less than 5 minutes.
- The basic dough recipe can be enhanced with many different flavor varieties.
- Very little hands-on time.
- Crusty bread never ceases to impress family and friends.
- My 12-year-old grandson can make it.
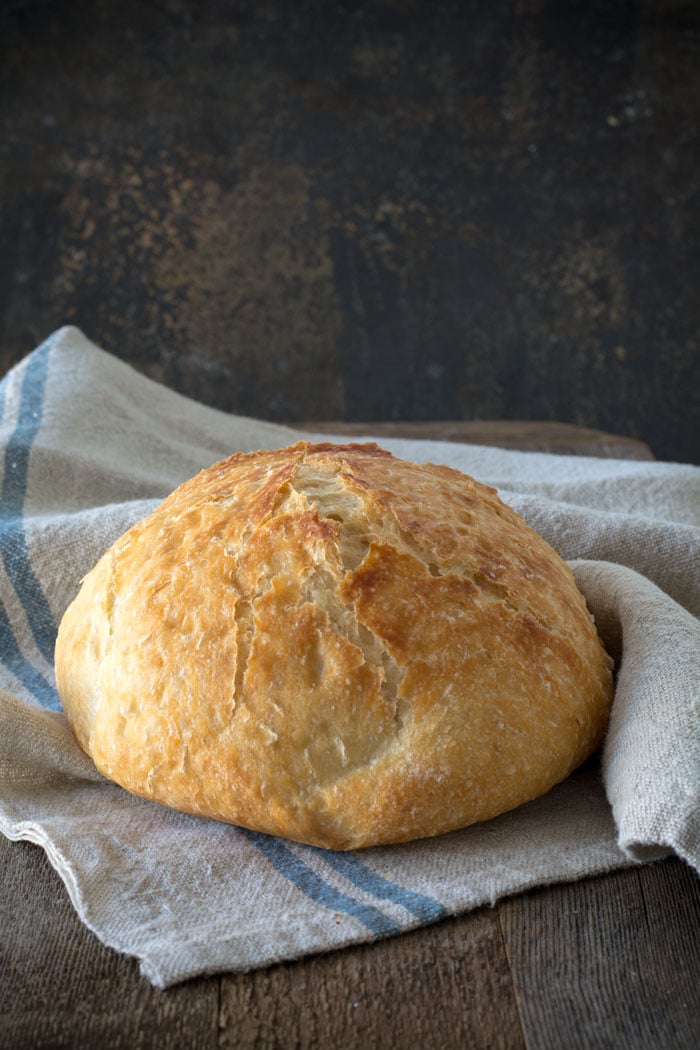
Let’s make No-knead crusty bread:
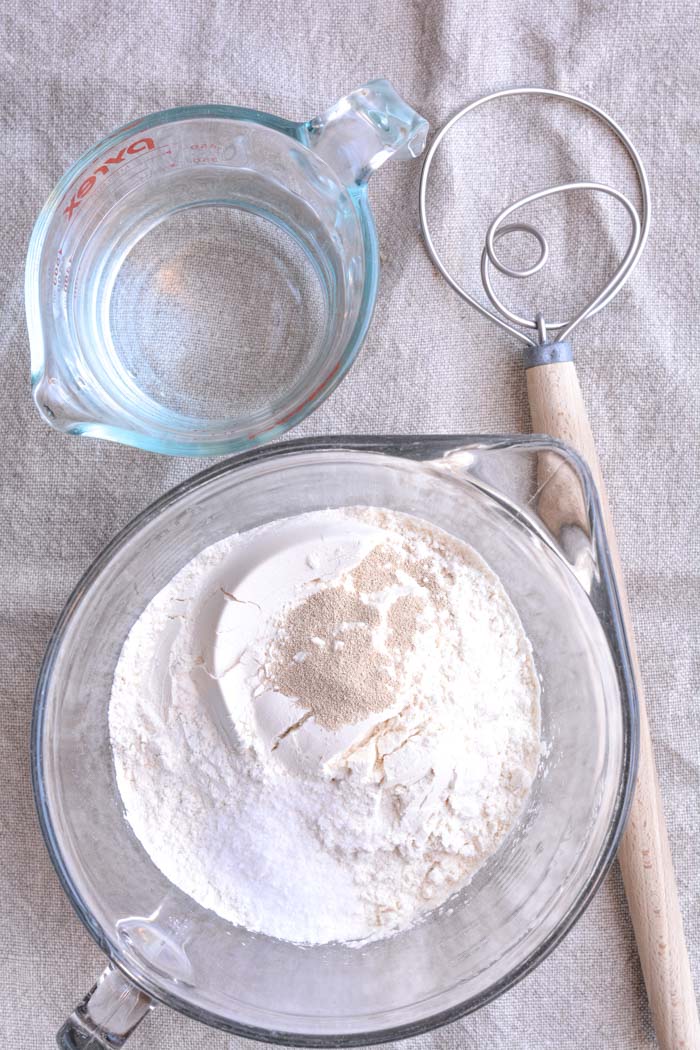
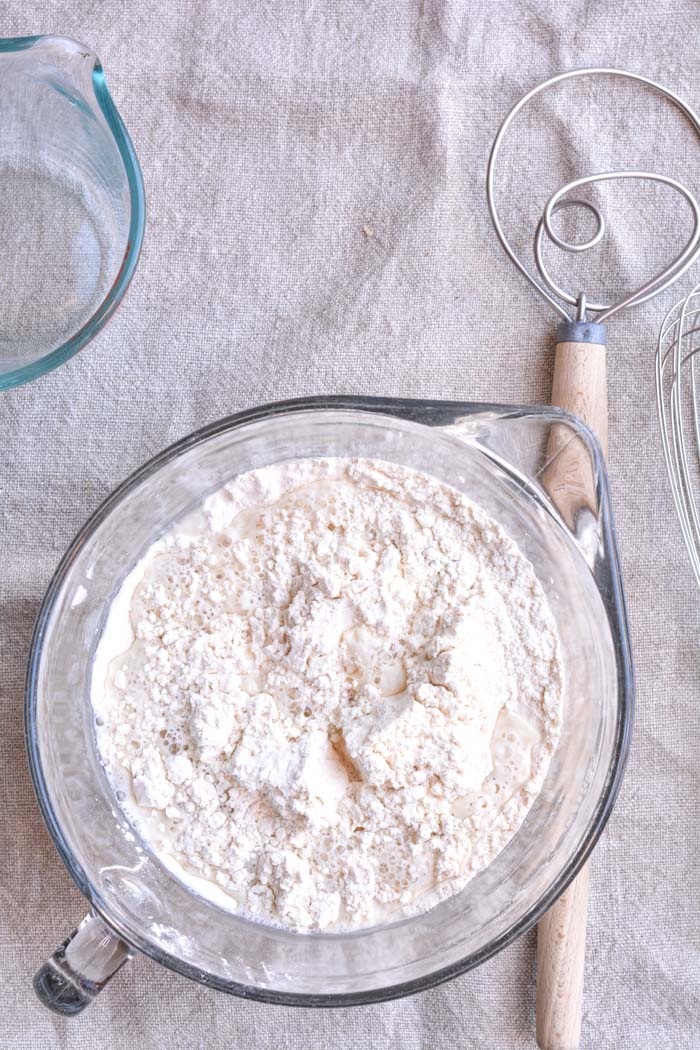
- In a large mixing bowl, add flour, kosher salt, and yeast. Whisk together.
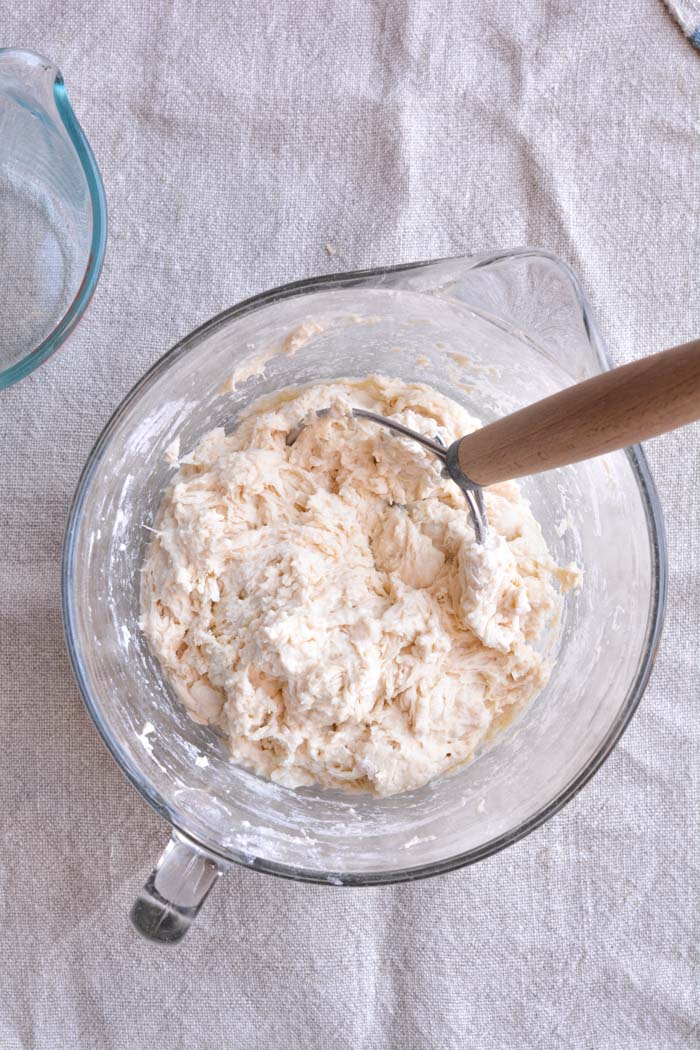
- Add water. Mix just until all of the flour has combined with the water. The dough will look like a shaggy mess. That’s ok.
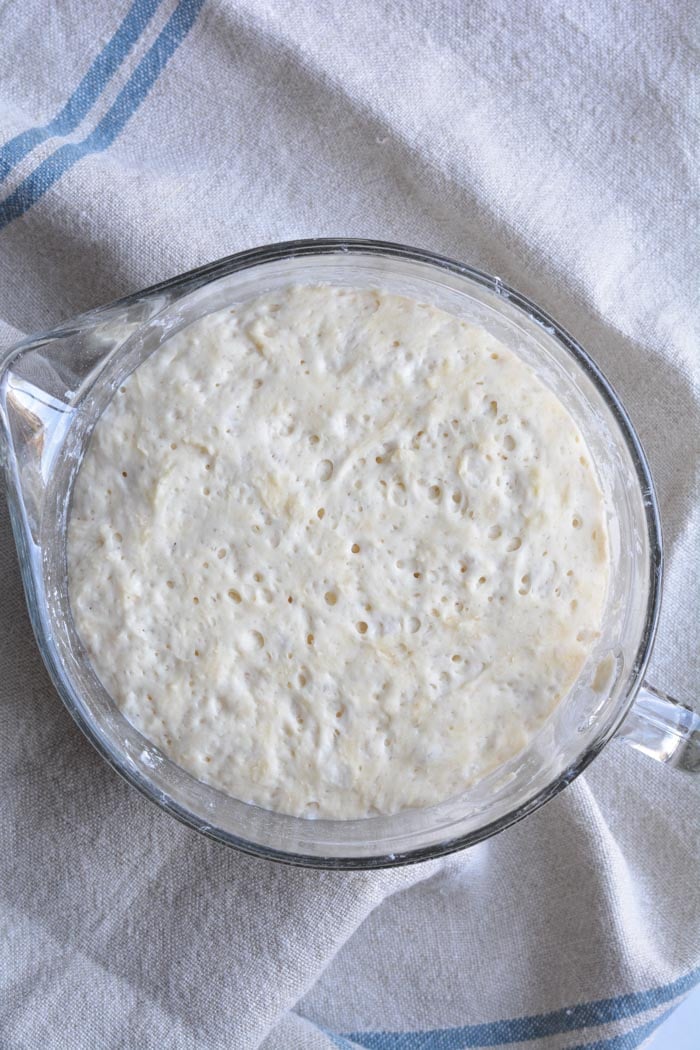
- Cover the bowl with plastic wrap and let it sit for 12 – 18 hours on the countertop. DO NOT REFRIGERATE. This is not optional. It takes that much time to proof the dough. The reason why you need a large bowl is that the dough will start to rise.
- After 12 hours the dough will look like this. It’s pretty sticky, but that’s ok it’s supposed to be.
Shaping and baking the bread:
- Preheat oven to 450 degrees. As soon as it has heated to 450 degrees place your pot with the lid in the oven and preheat the pot for 30 minutes.
-
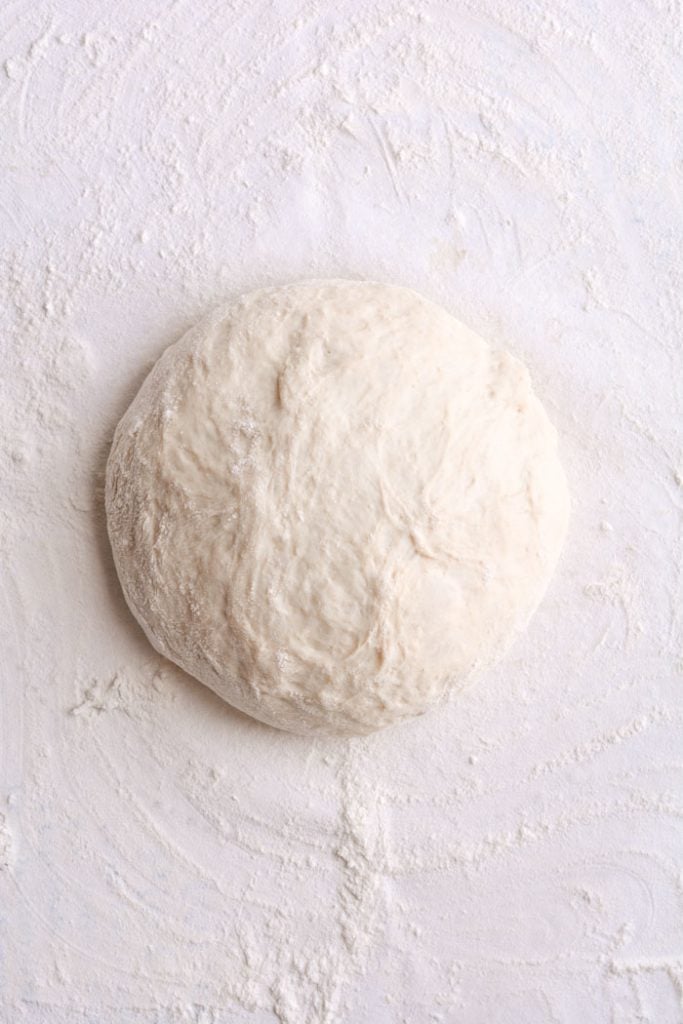
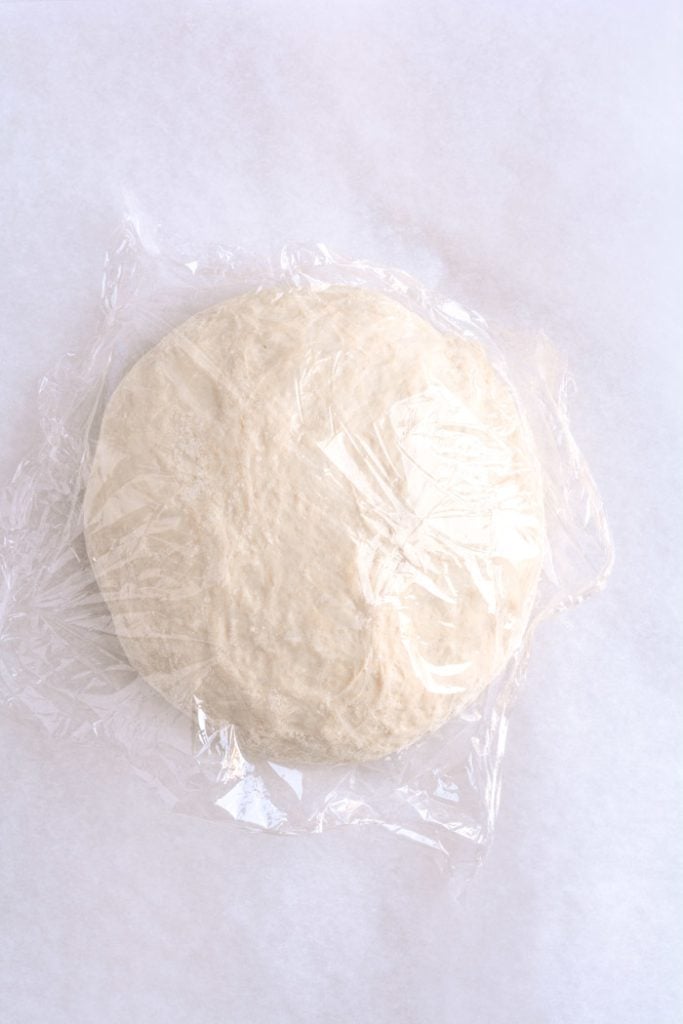
Right after you put the pan in the oven to pre-heat, dump the dough out onto a HEAVILY floured surface. Shape it into a round ball and place on a sheet of parchment paper. Parchment makes it so easy to transfer the dough into a hot pot and then remove it after baking. The parchment paper stays in the pot. This will rest for 30 minutes while the pan is heating. Cover with plastic wrap. Note: Use silicone coated parchment paper. The regular non-coated paper will stick terribly. Don’t chance it.
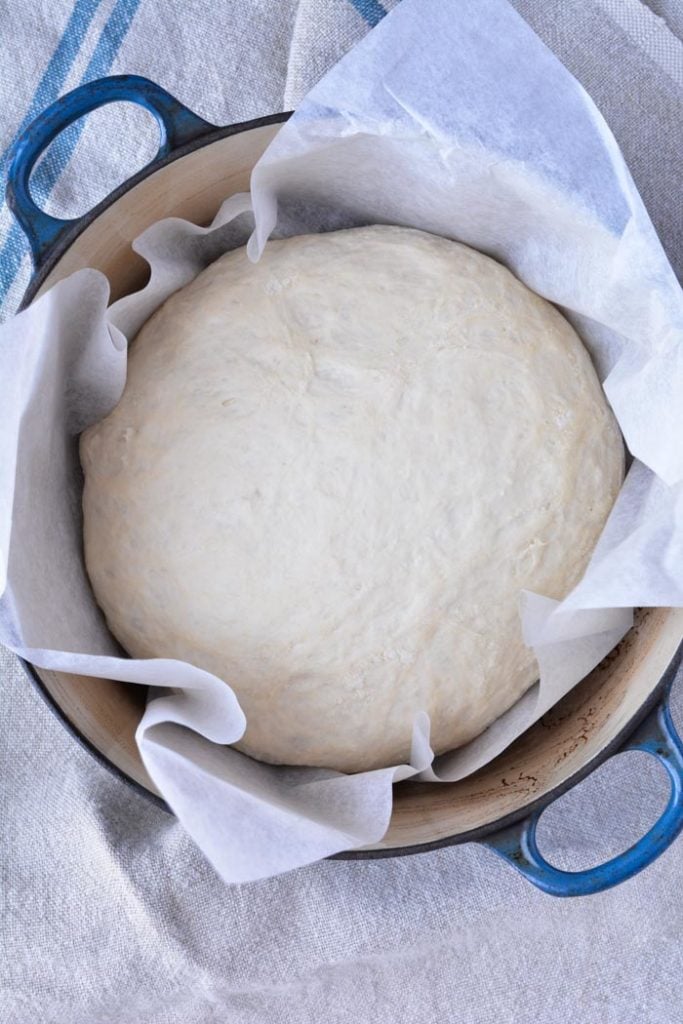
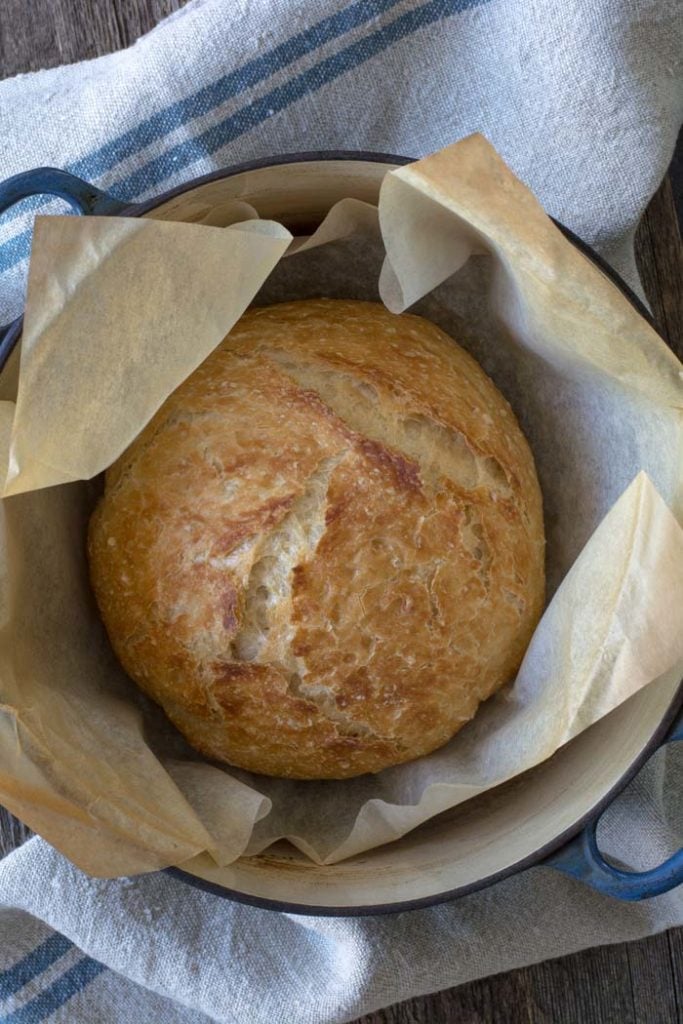
- Remove pot from the oven and carefully pick up the parchment and drop dough into the pot. Be careful the pan is HOT. Put the lid on the pot and return it to the oven for 30 minutes.
- After 30 minutes remove the lid from the pan. Bake for an additional 15 minutes or until nicely browned. You can test with an instant-read thermometer to make sure the bread is fully cooked on the inside. The temp should be between 190F and 200F degrees. Remove from the oven and carefully remove bread from the pot by lifting the edges of the parchment paper.
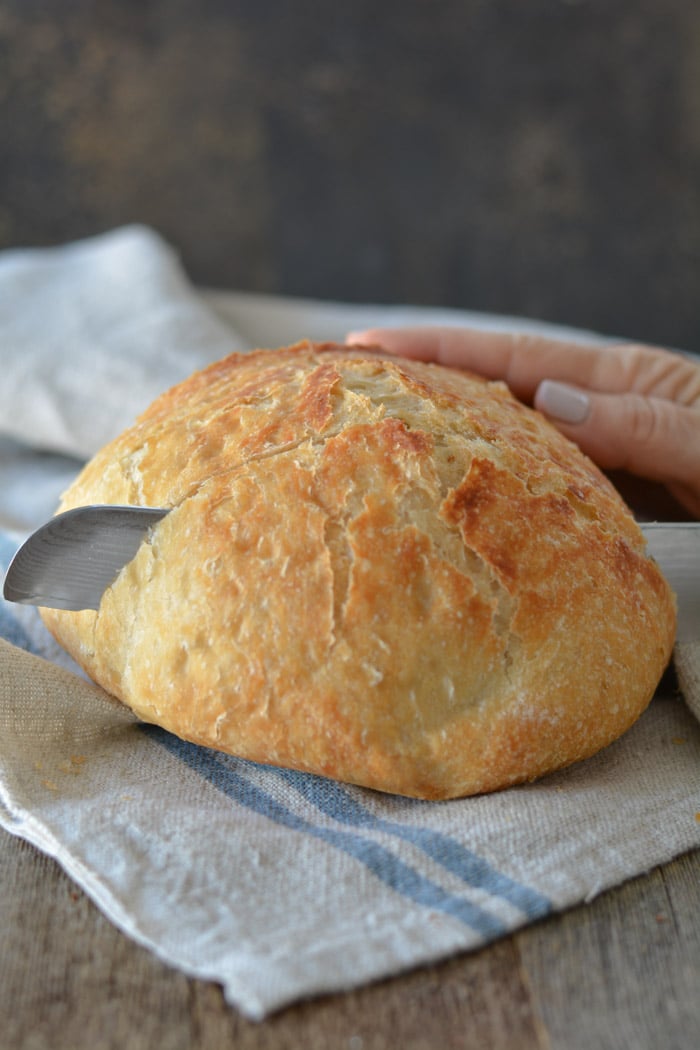
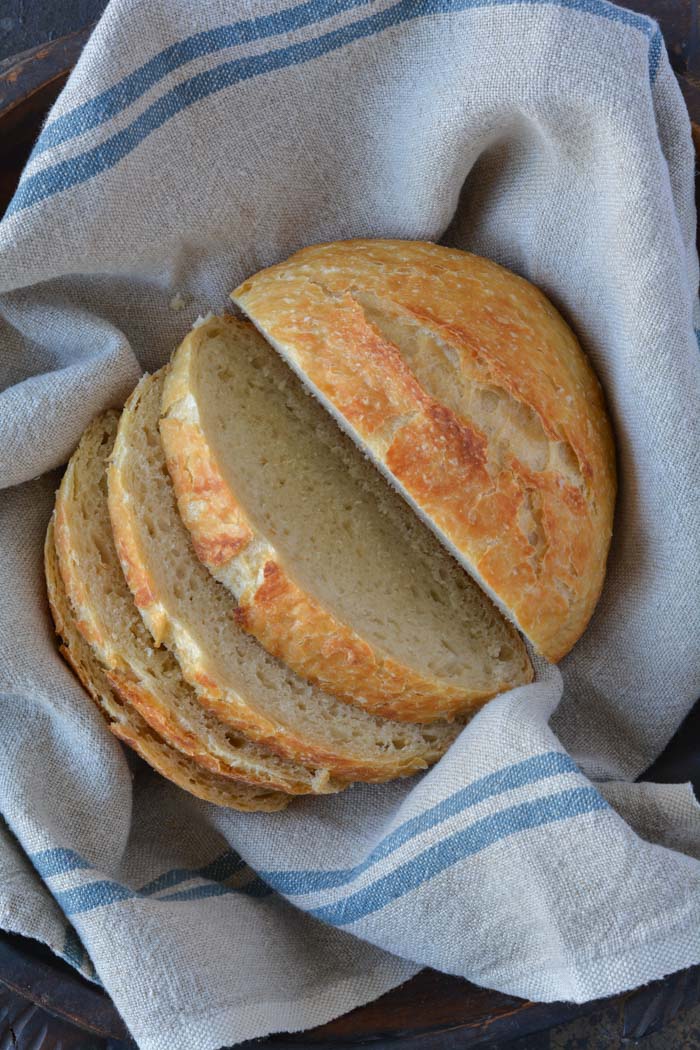
Holy cow! Can you believe how gorgeous that is? It’s best to wait for the bread to cool before slicing. Because I love warm bread I sliced it right away.
FAQ’s
Q: Do I have to use an enamel covered cast iron pan?
A: NO. You can use anything that can take the heat. The following have been used that I know of:
Clay pots with lids, Pizza stone with a bowl to cover the bread, insert from a crockpot, pyrex baking dish with a lid, stainless steel pot with a lid, baking dish covered with aluminum foil, old cast iron dutch oven.
Q: Do I have to use unbleached flour?
A: I always use unbleached flour. You can try bleached flour.
Q: Can I use self-rising flour?
A: I don’t know. I would just stick to all-purpose.
Q: What size is my pan?
A: My smallest pan is 5.5 quart. You can use as small as a 3 quart.
Q: What type of yeast do I use?
A: I use SAF instant yeast. Any yeast should work.
Q: Why is my bread turning out flat?
A: You could try using less 1/4 cup less liquid. Or add 1/4 cup additional flour. Make sure your dough appears to be dry when you first mix it. It will have more moisture during the rising time.
Q: Can my dough sit out longer than 18 hours? Does it HAVE to be between 12-18 hours?
A: I have let some dough sit as long as 24 hours and the bread was beautiful.
Q: Have you tried Gluten-free?
A: From what I hear the best GF is from King Arthur Flour https://shop.kingarthurflour.com/items/gluten-free-measure-for-measure-flour-3-lb
Q: Do I have to grease or oil the pan? Will my breadstick?
A: No you don’t need to grease the pan. I have never had the bread stick when using a cast iron pot. I haven’t tried anything else. The best way to be certain that the bread won’t stick is to form the loaf on a sheet of parchment paper and lift the bread into the pan using the sides of the parchment. Leave the paper in the pan. It’s won’t burn. When the bread has baked, just lift the sides of the parchment out of the pan. Voila! HOWEVER: Not all parchment paper is created equal. I use a silicone coated parchment paper. Regular parchment paper can stick something terrible. Don’t chance it.
No-Knead Crusty Bread
Wonderful yet easy artisan bread with a crisp crust. Prep takes just a few minutes with an overnight rise. Baked in a pot with a lid to create a steam oven. Bread can be made with many flavors and variations.
Ingredients
- 3 cups + 2 tablespoons unbleached all purpose flour (450 gr)
- 1 3/4 teaspoons Kosher salt (10 gr)
- 1/2 teaspoon Instant or Rapid-rise yeast (3 gr)
- 1 1/2 cups water cool (315 gr)
Instructions
-
In a large mixing bowl, whisk together flour, salt and yeast.
-
Add water and mix until a shaggy mixture forms.
-
Cover bowl with plastic wrap and set aside for 12 - 18 hours. Overnight works great.
-
Heat oven to 450 degrees. When the oven has reached 450 degrees place a cast iron pot with a lid in the oven and heat the pot for 30 minutes. OR pot can be placed in cold oven while oven is preheating leave in oven for 30 minutes.
-
Meanwhile, pour dough onto a heavily floured surface and shape into a ball. Cover with plastic wrap and let set while the pot is heating.
-
Remove hot pot from the oven and drop in the dough. Cover and return to oven for 30 minutes. After 30 minutes remove the lid and bake an additional 15 minutes. Remove bread from oven and place on a cooling rack to cool.
Recipe Video
Recipe Notes
FAQ's
Q: Do I have to use an enamel covered cast iron pan?
A: NO. You can use anything that can take the heat. The following have been used that I know of:
Clay pots with lids, Pizza stone with a bowl to cover the bread, insert from a crockpot, pyrex baking dish with a lid, stainless steel pot with a lid, baking dish covered with aluminum foil, old cast iron dutch oven.
Q: Do I have to use unbleached flour?
A: I always use unbleached flour. You can try bleached flour.
Q: Can I use self-rising flour?
A: I don't know. I would just stick to all-purpose.
Q: What size is my pan?
A: My smallest pan is 5.5 quart. You can use as small as a 3 quart.
Q: What type of yeast do I use?
A: I use SAF instant yeast. Any yeast should work.
Q: Why is my bread turning out flat?
A: You could try using less 1/4 cup less liquid. Or add 1/4 cup additional flour. Make sure your dough appears to be dry when you first mix it. It will have more moisture during the rising time.
Q: Can my dough sit out longer than 18 hours? Does it HAVE to be between 12-18 hours?
A: I have let some dough sit as long as 24 hours and the bread was beautiful.
Q: Have you tried Gluten-free?
A: No. I'm still waiting for someone to venture into the realm of Gluten-free. If you try it, let everyone know.
Q: Do I have to grease or oil the pan? Will my breadstick?
A: No you don't need to grease the pan. I have never had the bread stick when using a cast iron pot. I haven't tried anything else. The best way to be certain that the bread won't stick is to form the loaf on a sheet of parchment paper and lift the bread into the pan using the sides of the parchment. Leave the paper in the pan. It's won't burn. When the bread has baked, just lift the sides of the parchment out of the pan. Voila! HOWEVER: Not all parchment paper is created equal. I use a silicone coated parchment paper. Regular parchment paper can stick something terrible. Don't chance it.
More Notes:
Regular active yeast can be used in place of the instant or rapid-rise yeast. It will need to be activated in 1/4 cup warm water. Stir and let sit for 5-10 minutes. However, most of the comments I have received state that the rapid raise works the best. You choose. Whisk the flour, salt, and yeast together.









Hi Tam, I'm so sorry your bread stuck. Try parchment it works wonders and is so easy to life the bread in and out of the pan.
Hi janet,
Thanks for this recipe. I have the bread in the oven right now. I have never made a fat-free bread before so I am excited to see how it turns out.
Thanks !
I have never made bread before. I tried your recipe and my bread came out as if it was purchased in Paris…Viola made my Parisian husband happy! Thank you and please most more recipes. Thank you for sharing!
I just found my MIL's Corning Visions Dutch oven so I immediately this bread. I was so excited when i took it out of the oven. It smelled so good and was beautiful. But, the bread was glued to the dutch oven. i followed the directions exactly. I think next time I might heat the pot longer or use some pam.
Wow Rick. Look at you! Amazing use of grains and ingredients. Thanks for sharing.
I have made a few batches using this recipe as a base, but I put it in a ~8×13 Pampered Chef pan so it is rectangle and I simply cut it into 6 loaves and then each in half for toast…It may be hard to imagine, but it turns out great. I did also add my spent grains from my batch of beer as well as that was the yeast I used and it turned out great. I also added Rosemary, Rolled Oats, sunflower seeds, Hemp Seeds, honey (mixed with the yeast), flax meal and added another 1/2 cup of water. It really tastes great and will try some of other recipe's. – Rick
Wahoo Heather. You did it! How easy was that?
I am at the taking-the-lid-off stage RIGHT NOW, I was totally prepared for it to be a disaster but it looks EXACTLY LIKE YOUR PICTURE. I am a total convert, and I haven't even tasted it yet.
A good proportion of whole wheat flour and white flour I think is 50/50.
I grind my wheat in a Vitamix. What proportions would you suggest? Thanks!
You can easily reduce the salt. I would start with 1/2 teaspoon. This is a more dense bread. I don't think it can get too airy. Make sure that you don't knead it during the last rising time as it sits. Just gently fold it into a round shape. This will keep the air bubbles in the bread. It will be quite dense if it is kneaded like regular bread dough. I hope this helps.
I have just made this. I used a little less salt and a touch more yeast and left it for 24 hours due to work constraits. My faithful Lecreuset baby (orange) was a wedding present in 1977 so I used parchment option just in case (I don't think a magic eraser will ever solve the problem). It is probably just a 3 quart as the dough filled it. I was worried as it seemed a little sloppy when I turned it out and creeped as I was heating the pot up. Still I slopped it on the parchment paper and stuck it in the oven. I couldn't beleive my eyes after 30 mins a beautiful risen loaf after a further 15 mins the parchment paper was getting a bit crisp but I managed to turn it out alright. I have just tried a slice. Crust beautifully crispy but interior a little too dense and perhaps a bit salty for my taste. How can I get a more airy bread and can I cut down on the salt.
Such a versatile recipe/method. I found this 3 years ago and I still use it today, tried it with orange zest and some cinnamon butter swirl! Sooo good <3
Thank you so much for all of your great ideas, suggestions and tips. You are marvelous bakers.
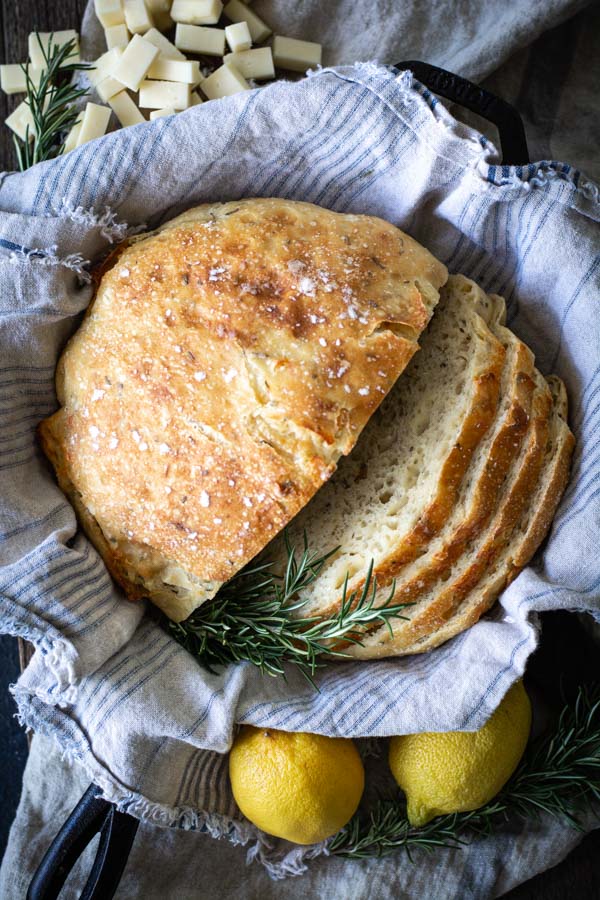
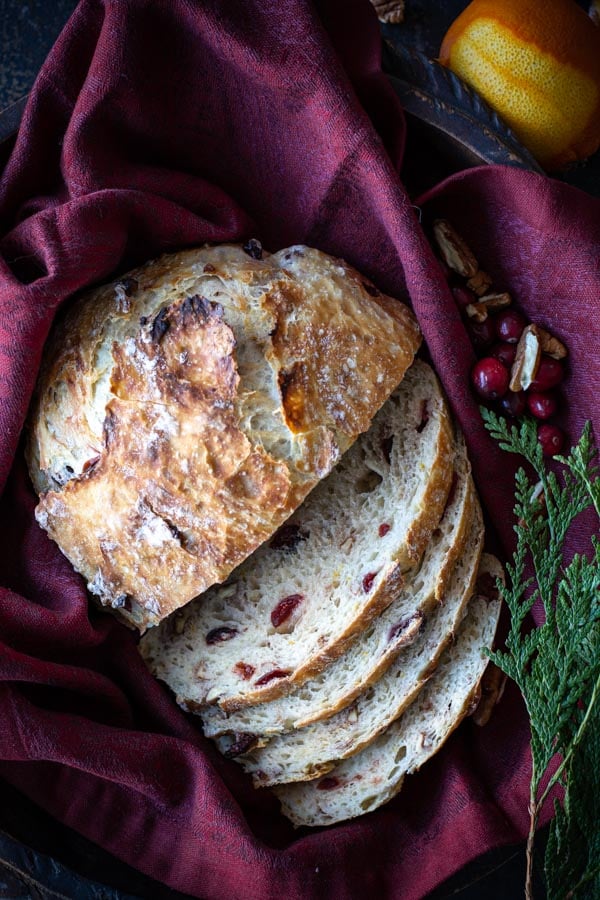
I really like your take on this recipe, and I have baked both a cranberry-orange and also a rosemary-garlic. I have made both with 1 cup whole wheat flour & 2 cups white flour.
I think it is worth noting that although you can indeed use any high-heat oven safe crock with a lid for this recipe, I think it is better to put your pot in a COLD oven and allow it to heat up along with the oven. After 1/2 hour, it will be the 450 degrees.
I bake my breads in a covered stoneware dish (my husband is a potter, so of course that is what I have on hand) and it is always best to heat up the pot with the oven, this prevents a shock which could crack the pot. I would think this would work just as well with a cast iron pot, as the heating up time is reduced.
Thanks for the great recipe!
My bread turned out great, and it taste so good. But I was wondering after it cooled down how do you store it. Is it ok to put in the fridge with a Ziploc bag. I used the lodge cast iron and it worked fine for me but I did oil it before using it like it says in the manual. Thanks for this recipe. Now just waiting on my husband to come home to taste it
OMGosh! It worked and it's delish! I just got back from the Lodge cast iron outlet with my new 4 quart dutch oven. Move over Panera – I can now make my own chewy, crispy bread. Today I mixed up part whole wheat, sunflower, pumpkin and flax seed dough. I think it will be great. Thanks for such a wonderful yet easy recipe. My bread machine will be in my next garage sale.
What a great recipe. It is as good as the bread we had in Italy if not better. Thank you , thank you, THANK YOU!
I really appreciate how thorough you are explaining all the steps in making this bread. I will certainly try it. Marci Maloney
Wow, I am in this blog way too late, but seriously happy to have found it…I make breads on a weekly basis, never able to make crusty and beautiful like these, I will be trying this recipe on Thursday! can't wait!!!! thank you for the beautiful photography too!!!
OK. So the first loaf was fantastic. We ate it all in one day so…..have made a wheat version…..just replace 1/12 c flour with wheat flour. Fantastic. Also it seems to be better the longer you leave it. Am going to be spending the week inventing new flavors. Thought I might try apricot and vanilla! Yum.
Try making a paste of baking soda and water and using it to scrub the pot.
Your bread——–fabulous. I have not bought store bread since reading your
post on Pinterest. We got back from Europe in early Nov. We found the bread
in our stores, ANEMIC. I found your bread recipe. Oh mamma. I make it
when we are almost out. I have done many things to tweak the recipe and we love it.
Thanks you so much. Ruthie
Thanks, Vicki for answering the question on Rye flour. I did add about 1/2 teaspoon of caraway seeds to my bread. I made a loaf that turned out quite well with 1 cup Rye flour to 2 cups white flour. It was delicious.
Thank you for all of your fabulous comments. I love hearing your success stories. I'm sorry if I don't reply directly, but there are over 4,600 comments on this post and I have a hard time keeping up. I read every comment and suggestion and post them. I hope you notice they are posted. You are all awesome.
I was skeptical, but this was awesome! I think we finished our first loaf before it was even cool!
I just made this and it's insane. I actually made it for my DH, who is a bread addict, however I'm not sure it will last till he gets home. That's how delicious it is. I had to make another batch of dough for tomorrow, as I know it will be gone by then!
A few notes: I reduced the amount of salt for this second batch to 1 1/4 tsp – I really love salt, but I found the bread a little too much so. I also had to increase the amount of water because my dough was VERY dry with just the 1 1/2 cups (I live in a dry climate, maybe 400 ft above sea level) by about 1/3 cup. This caused my dough to be really doughy and sticky at the rest stage and I couldn't really 'shape into a round' anything (although I tried!). This didn't have any effect on the end result, which was an amazing, crusty on the outside, soft on the inside bread; comparable to any local bakery!
Whole wheat is next!!!
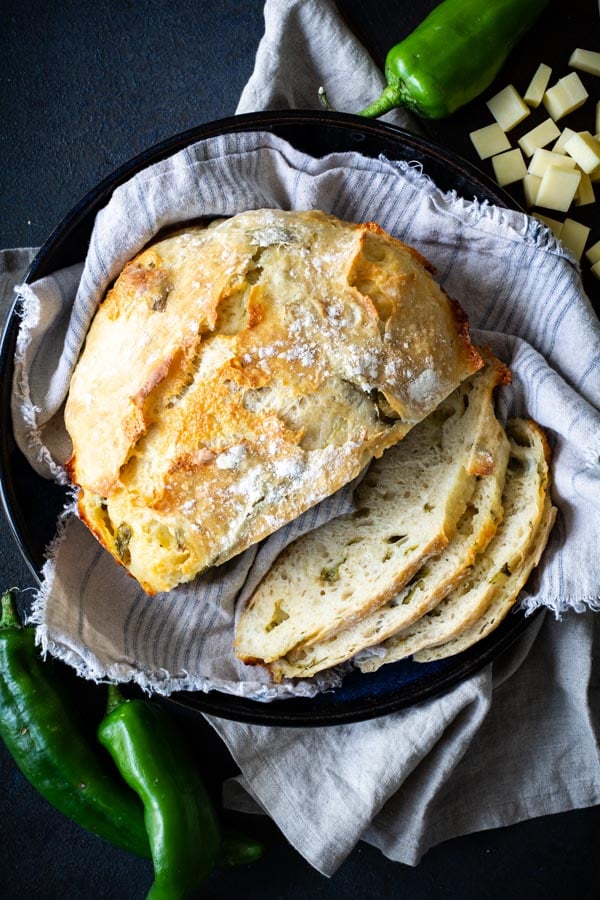
I made this bread (for the second time today) and each time has been simply wonderful! Everyone was amazed that I made it and didn't buy it. They HAD to have the recipe too :)This time though I added basil, garlic, and cheddar to the dough. Right before I put it in the oven I drizzled it with olive oil! Turned out wonderful! Made it to go with Chicken and Gnocchi soup! http://www.copykat.com/2010/02/28/olive-garden-chicken-and-gnocchi-soup/
So yummy!
Just made mine and it's gorgeous and crusty! I can't wait to experiment with mixing in herbs, cheeses, and nuts! Thanks for the awesome recipe!
I have found that Baking Soda and Lemon cleaning just about anything…
I just emailed lodge about this. They saidto add water while preheating the pot then dump it out before adding the dough.
I don't use hot water when using the instant or rapid rise yeast. Just cool tap water.
Put it in the oven before you start to preheat. It needs to heat up slowly. Another poster said her enamel chipped for that same reason.
My rapid rise yeast packet says to us 120° water. Do you use hot water when making this recipe?
I just found this recipe. Thank you. I made a batch this evening hopefully I'll bake bread tomorrow :-). I only had regular yeast and bleached flour, wish we luck. Also, do.not use ammonia to clean your pot. Use baking soda as a paste. It works to clean bakeware as well as remove grease. It's my only cleaner. Thanks again for the bread recipe.
Amazing!! I cant wait to try this 🙂 As for your pots I had some old stained casserole dishes and got an insane idea to use a magic eraser. It worked…a little water, a little elbow grease stains from years ago ..gone hope it works on the pots 🙂
I used gluten free flour and made a half recipe (in case it didn't work out, only wasted 1 1/2 cups of flour) It was DELISH!!! My two kids (both gf) absolutely LOVED it!! My husband and I had some (we aren't gf) and loved it too! Was gone within 25 min of coming out of the oven. Had to let it cool a bit, gf bread is gummy when it first comes out of the oven. I have a feeling there will be a permanent spot on my cupboard for the bowl of dough!! THANK YOU!! (I added 3/4 tsp of xanthan gum to the 1/2 recipe, too)
To Bratkat
Hopefully you will be able to find this comment. There are hundreds, so I hope it comes through. If not please send me an email reply on my contact me link at the top of the page. I'm not sure if anyone has specified that their whole wheat was a white whole wheat. If you are talking about a winter white wheat, I believe it has been tried. You will need to reduce the flour by 1/4 cup. I have had some comments about adding 1/2 cup more water. I tried that and had a soupy mess. Start by reducing the flour amount and see what happens. Sorry I can't be more specific. Just keep playing with it.
I sent this yesterday but it doesn't seem to be published. Has anyone tried white whole wheat flour and if so do I need to make any changes?
To clean your pots mix 1/4 cup baking soda with enough Hydrogen Peroxide to make a little bit runny paste. Rub the paste over the pot scrubbing a bit. Rinse with nice clear hot water. If really dirty it might take a couple treatments. Works for me. It is great for cleaning refrigerators that have the textured surface too. Cleans anything really 🙂
Has anyone used unbleached white whole wheat flour? Did you have to make any changes?
Here's a product for cleaning your pots: http://www.amazon.com/dp/B000E5D04E/?tag=apartmentth0a-20
My mom got me onto a product called Bar Keepers Friend ….its the only product that she will use on her good pots and pans. are trust me she is very anal when it comes to her stuff in the kitchen….it cleans like nothing I have ever seen and does not scratch so no issues about damaging them….
I can not wait to try the bread out…i do make my own (that is not in a bread machine) but I'm always looking for something new …thanks Nicole
Janet, recently came across your blog and recipe and giving it a go this morning. One loaf cooling and the other just plopped into the oven.
I'm using an inexpensive cast aluminum caldero, and it seems to be working like a charm. I also used another commenter's tip about parchment paper, and that also worked well, because as you've warned, the dough it very sticky and the pot is very hot!
Thanks again…
Can you sub whole wheat flour??
I cannot believe how well this worked!! Just made a loaf this evening and have passed the recipe on to a cousin–IT IS DELICIOUS!!!! It did what none of my round loaves have done before-it actually did not spread out thin and achieved height-awesome recipe! Thank you!
Thank you so much for your awesome work in pics and instructions. My bread turned out perfectly. I had pans not nearly as nice as yours so I was not sure but my bread looks just like yours. I love it.
So I have already made two loaves in two weeks (the 2nd loaf was gone in less than 3 days) and just now I made three more (Cinnamon Raisin, Kalamata Olive, and Mandarin zest with coconut flakes, sunflower seeds and some dried fruits)they look awesome just got to wait 12 more hours to see how they TASTE!!! Little brother requested the olive and cinnamon raisin loaves. Mommy wanted the tropical loaf lol!!!
Thanks for the recipe
Marine <3 🙂
I have been baking this bread receipe for about 6 months and every one comes out perfect. I use the Sassafras Superstone™ La Cloche Round Bread Cloche from Williams Sonoma at $60. I do not preheat the pot and it still comes out the same. Was using the Le Creuset (have about 20 of their pots) and the process was too HOT. I saw the La Cloche and gave it a try without the preheating and it is the exact same result. Thank you for this recipe!!
Love this recipe.. I have made a few changes of my own.. I do not let it set for 12 hrs only for a few hrs just enough to rise double then I nead dough for 3-4 mins let rise again on counter until pot is ready for bread then bake as directed comes out wonderful and allows me to make more than one loaf a day due to only one pot..
Very nice. I've made artisan bread for years and was spritzing the over sides to make steam for crusting the loaf. Your pot method does it much better. I think the water in the moist dough is kept inside the baking pot making steam. Wonderful crust. Now, on to the flavors.
To clean the outside of my enamel dutch oven as well as all my pyrex I use a wet, not damp, SOS pad. It does not cratch the glass or enamel. I found it does not work on the inside but only because the cleaners is difficult to get out of the cratches in my enamel
I would try the product that Lagostina puts out for cleaning cookware.
I LOVE this recipe!! I always make it when I make Taco Soup. With that I use taco cheese and cilantro!
Cleaning your Le Cruset, or any cast iron….. Le Cruset sells a cleaner. Purchased mine at Amazon.com or you can purchase it anywhere, I think, where they sell Le Cruset, like at Sonoma Williams.
I just ran across this recipe a couple of days ago and whipped up a whole wheat, oat flour version with a bit of all purpose flour too. No problems with the rise on it and a mighty fine texture with lots of air pockets. I find the secret to whole grain breads is adding about a table spoon of vital wheat gluten per 2-3 cups of whole grain flour.
I just found this recipe, so I"m hoping you ar still updating and answering questions.(fingers crossed). I just made this and my bread is in the 2nd 30 minute setting process prior to goingin the oven. I don't think it's going to turn out….it looks flat right now. I really hope it turns out, I'm having friends over for dinner. Maybe I should have tried this once before serving to guests!
Made this yesterday and baked today, I added cheddar cheese and chives, and some garlic powder. Really nice taste, and the crust was wonderful. Did not grease the dutch oven, and had NO troubles with anything sticking,( other than to my hands).
Thanks for the great recipe.
The absolutely best pan cleaning liquid is the the Lowes foaming organic hand soap is sea .Its blue comes in a bag, cleans pans amazingly, also cleans copper in seconds . Idont know why but its organic and it works, I I just go with it.
Right, your bread recipe seems great and I'm sure to try. About your pots, however, have you ever tried WD40? It's the most incredible product I've ever used. Those heavy stains that seem to stay on pots, pans, oven's glass door, kids' crayon marks, graffiti, hard water stains… It's simple, you don't have to mix with this or that and get your hands all dry and nasty. Read about it online. You won't be disappointed.
Thanks for the recipe!
u can also clean ur pans with oven cleaner..spray, let soak for a bit, wash away !
I've used the ammonia in sealed bag and it does work wonders! Sometimes I have to follow up with a Magic Eraser to get the really tough stuff.
Carrie: Thank you so much for your comment. So great to know that even through a snowstorm and the loss of power the BREAD COMES THROUGH!
Let me add my gratitude to all those before – this is a wonderful recipe! I did not read your comment about how the dough could set out for 24 hours just fine – but I found out on my own. The first time I tried the recipe was at my parents' home in the middle of a snowstorm. Being a little over zealous I mixed up 3 different batches (plain, asiago, cinnamon w/ cranberry & walnut). Only trouble was the electricity was knocked out by the storm and did not come back on until 30 hours later, at which time I turned on the oven & followed the baking instructions not knowing what would happen. All three rose and tasted incredible! (Carrie)
Thanks, Beah for the link to your blog. Love it! Your bread looks amazing!!!
I have been using your receipe for a while now and it works great! I asked you a few weeks ago if I could reproduce it on my French-speaking blog and you kindly agreed. So here it is: http://echappee.over-blog.com/article-pain-sans-petrissage-115868157.html, with links back to your blog and post, I hope you will visit it! Thanks again.
This is great!
I live in the South of France and it is tradition here "pain aux olives" (bread with olives)… We also bake cakes with olives and ham/bacon…
I will try both of them with this recipe!
Thanks for sharing!
I'm anxious to hear about the GF results. Thanks, Songbird.
I preheated my pizza stone for 30 – 40 minutes at 450 degrees F.
Dear Janet I'm going to give the Gluten Free version a try one day this week, since I have to eat GF!! I will let you know when it's done and how it turned out!!
If you have raisins, or craisins burning on the bottom, don't stress. You're not doing anything wrong. It's a hot pan in a hot oven so the darn things are just going to burn a bit. I try to make sure that most of the craisins are on the inside, but a few always pop out. chocolate chips will do the same. Good luck.
I just tried this recipe for the first time and made the only successful loaf of bread I've ever made! I can't wait to try some of the other flavors, but my husband says we have to finish eating the first loaf first. thank you so so much for this!
What am I doing wrong with the cranraisins add ins They burn on the bottom of my pot
You can clean you babies with Bar Keeps Cleanser and it will take all the gunk off!!!
It's important that the pot is hot when the dough is placed inside. If the pot cannot be preheated empty, I would fill the pot with water, preheat, dump out the water, put in the dough and bake as stated in the recipe.