What I love about this bread
- It’s so easy to make. This dough can be made in less than 5 minutes.
- The basic dough recipe can be enhanced with many different flavor varieties.
- Very little hands-on time.
- Crusty bread never ceases to impress family and friends.
- My 12-year-old grandson can make it.
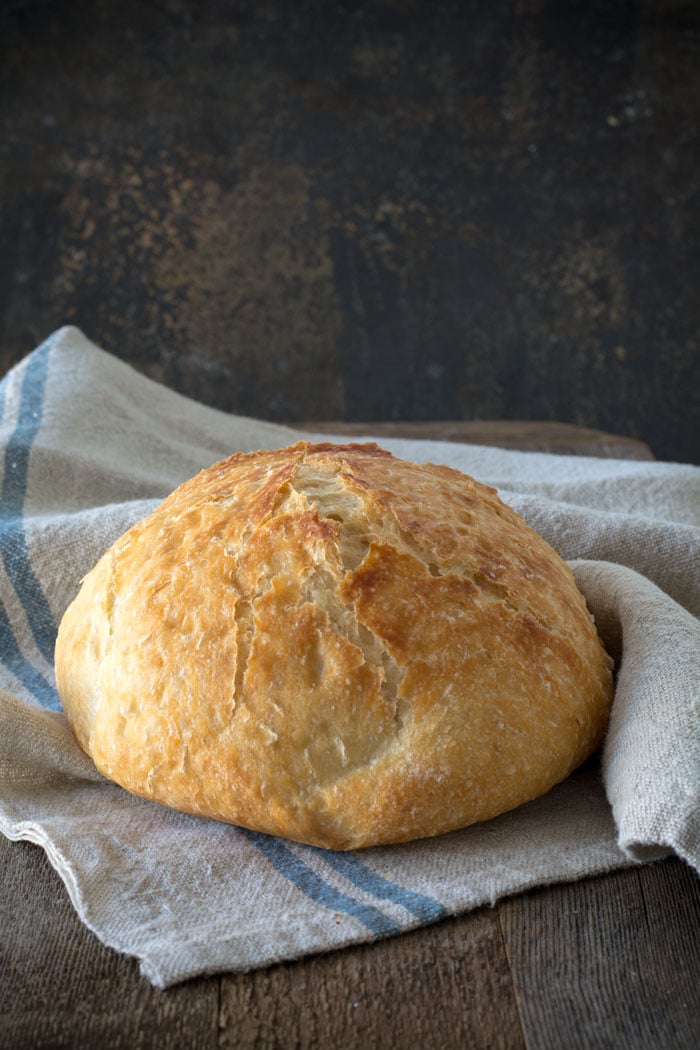
Let’s make No-knead crusty bread:
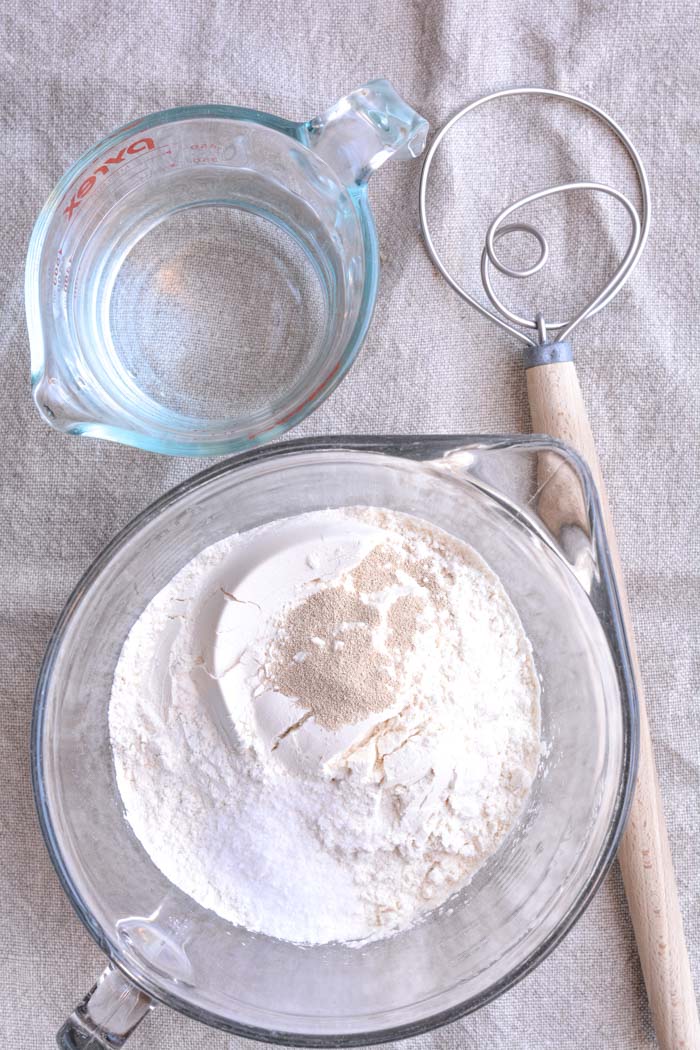
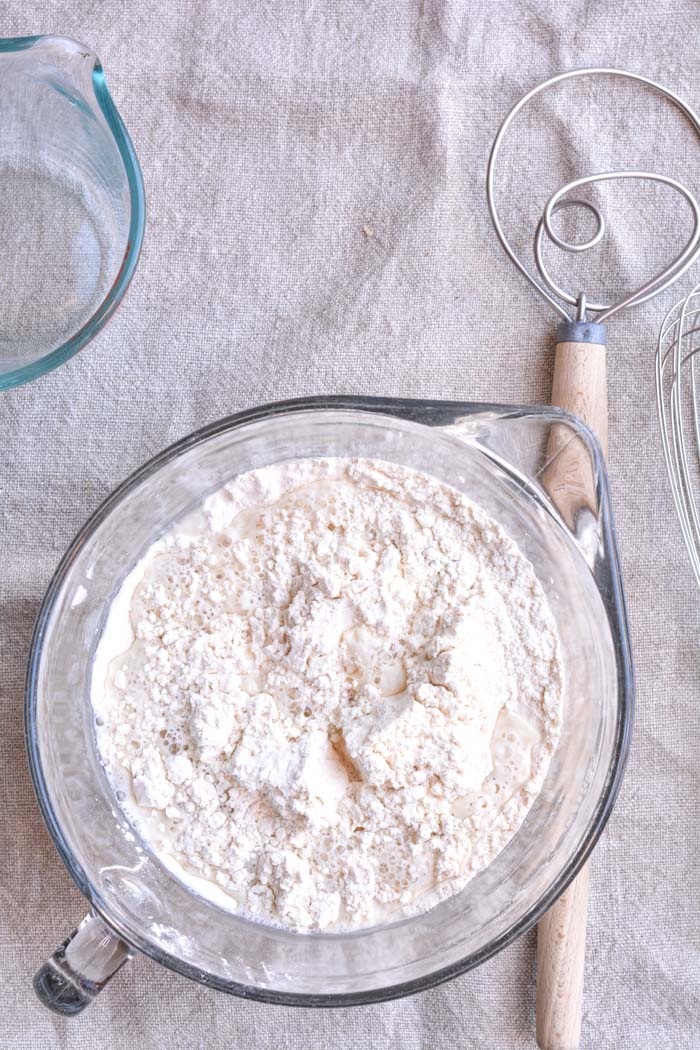
- In a large mixing bowl, add flour, kosher salt, and yeast. Whisk together.
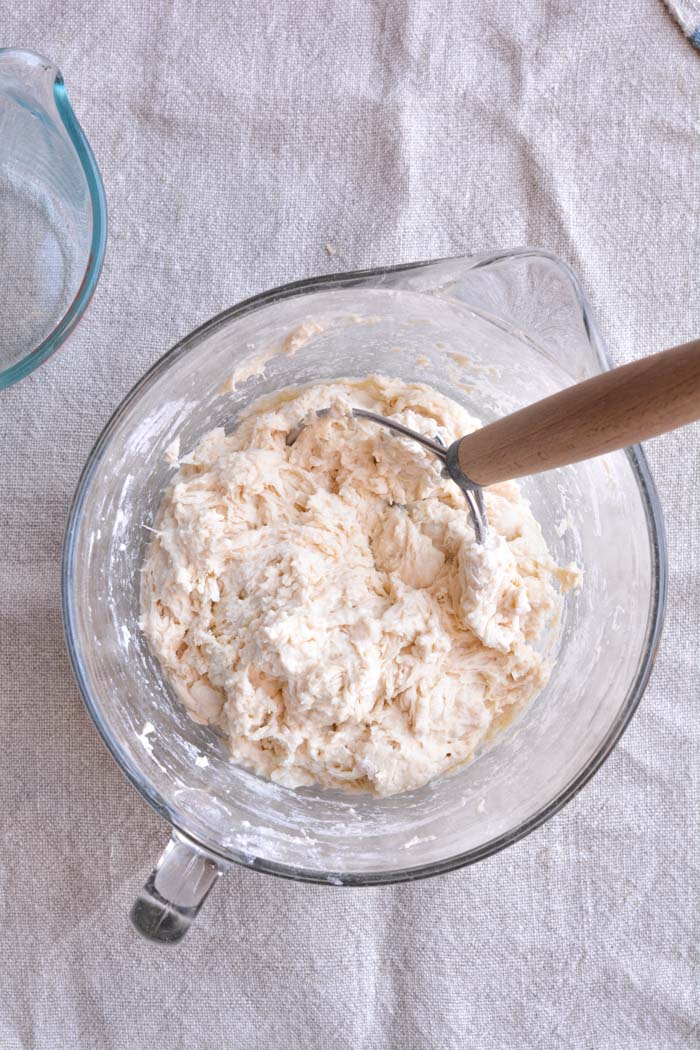
- Add water. Mix just until all of the flour has combined with the water. The dough will look like a shaggy mess. That’s ok.
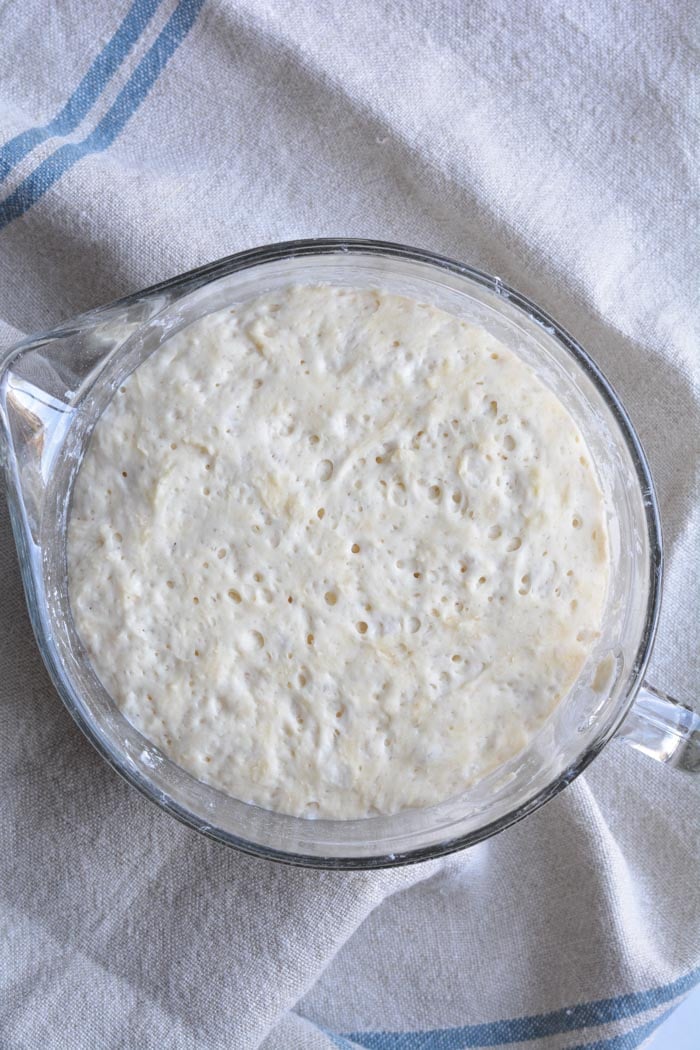
- Cover the bowl with plastic wrap and let it sit for 12 – 18 hours on the countertop. DO NOT REFRIGERATE. This is not optional. It takes that much time to proof the dough. The reason why you need a large bowl is that the dough will start to rise.
- After 12 hours the dough will look like this. It’s pretty sticky, but that’s ok it’s supposed to be.
Shaping and baking the bread:
- Preheat oven to 450 degrees. As soon as it has heated to 450 degrees place your pot with the lid in the oven and preheat the pot for 30 minutes.
-
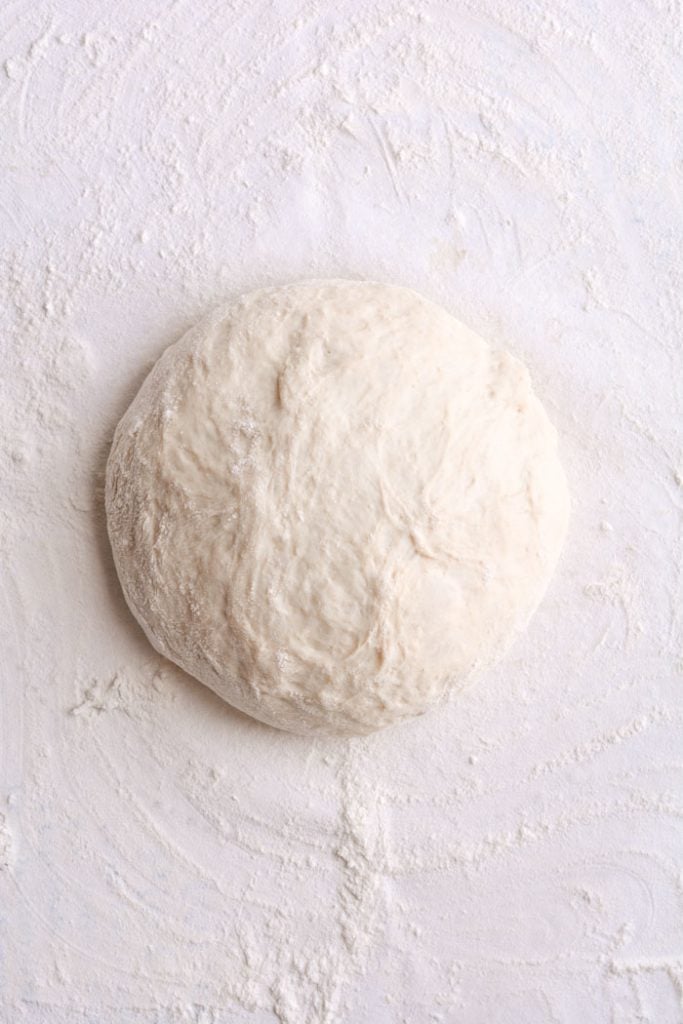
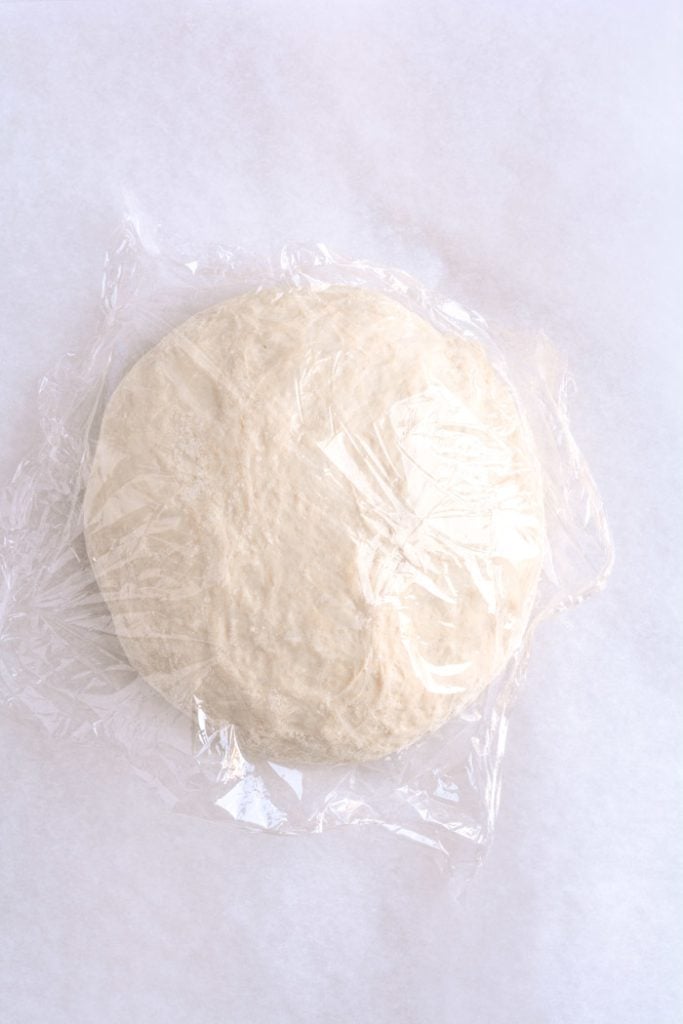
Right after you put the pan in the oven to pre-heat, dump the dough out onto a HEAVILY floured surface. Shape it into a round ball and place on a sheet of parchment paper. Parchment makes it so easy to transfer the dough into a hot pot and then remove it after baking. The parchment paper stays in the pot. This will rest for 30 minutes while the pan is heating. Cover with plastic wrap. Note: Use silicone coated parchment paper. The regular non-coated paper will stick terribly. Don’t chance it.
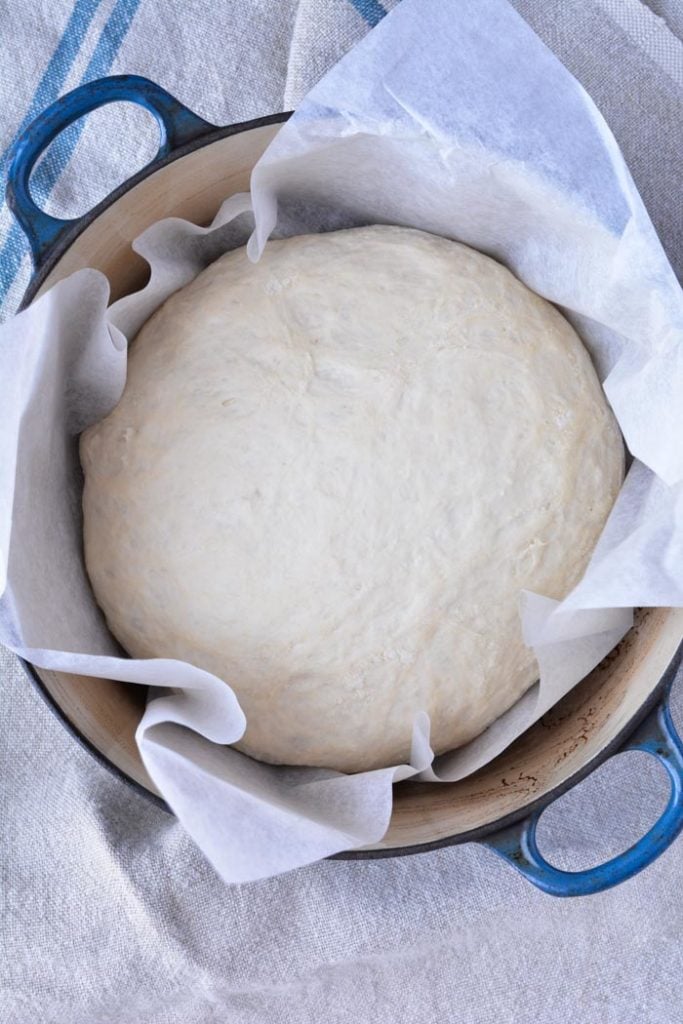
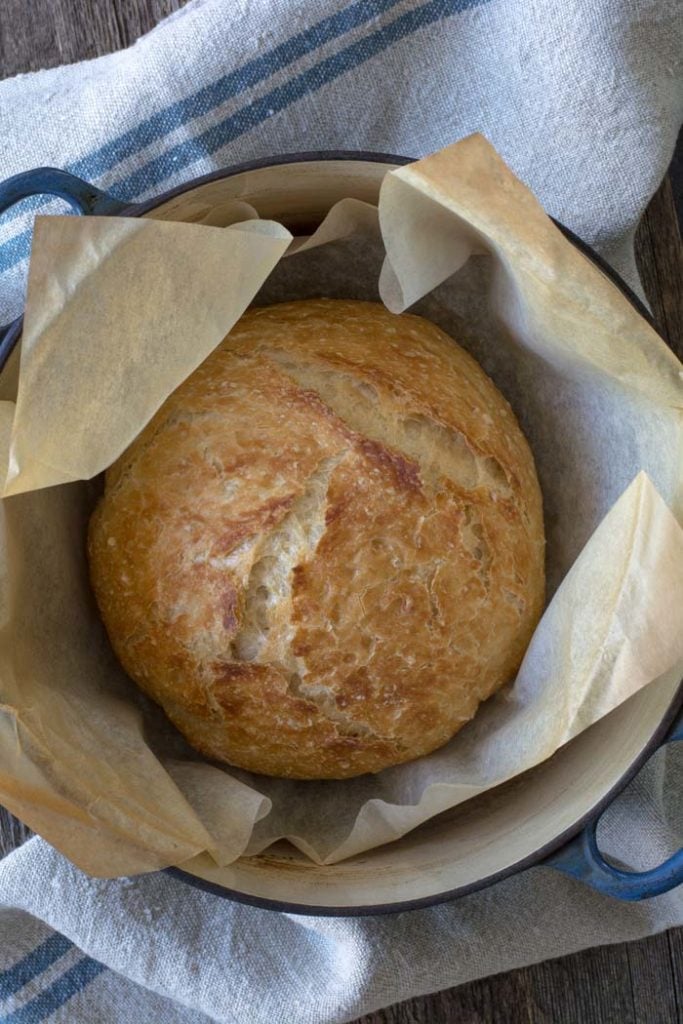
- Remove pot from the oven and carefully pick up the parchment and drop dough into the pot. Be careful the pan is HOT. Put the lid on the pot and return it to the oven for 30 minutes.
- After 30 minutes remove the lid from the pan. Bake for an additional 15 minutes or until nicely browned. You can test with an instant-read thermometer to make sure the bread is fully cooked on the inside. The temp should be between 190F and 200F degrees. Remove from the oven and carefully remove bread from the pot by lifting the edges of the parchment paper.
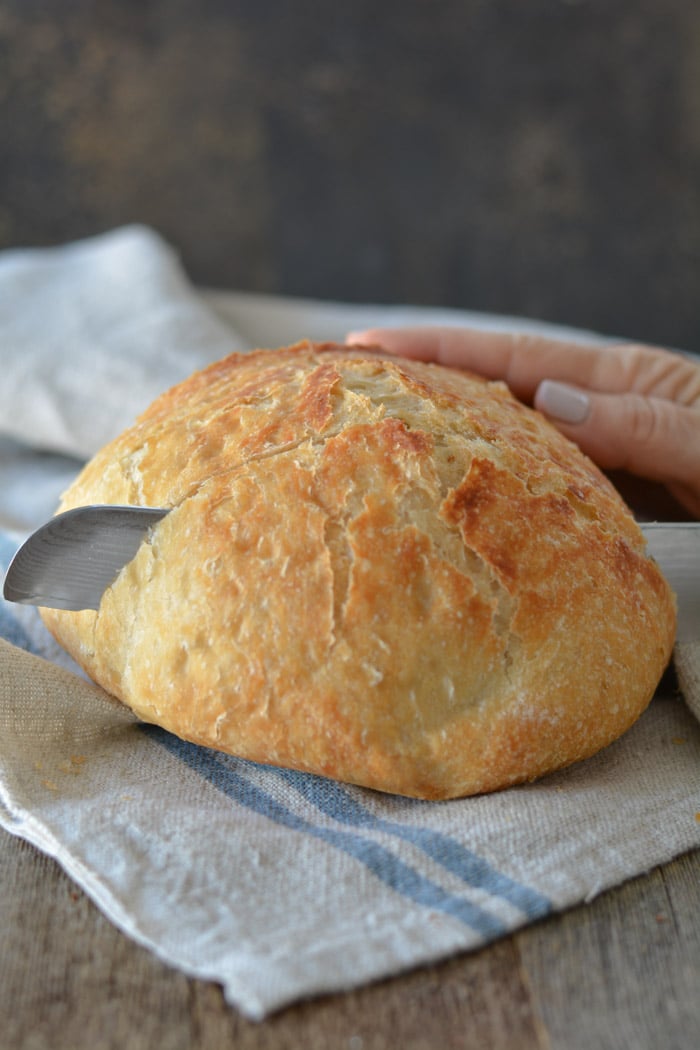
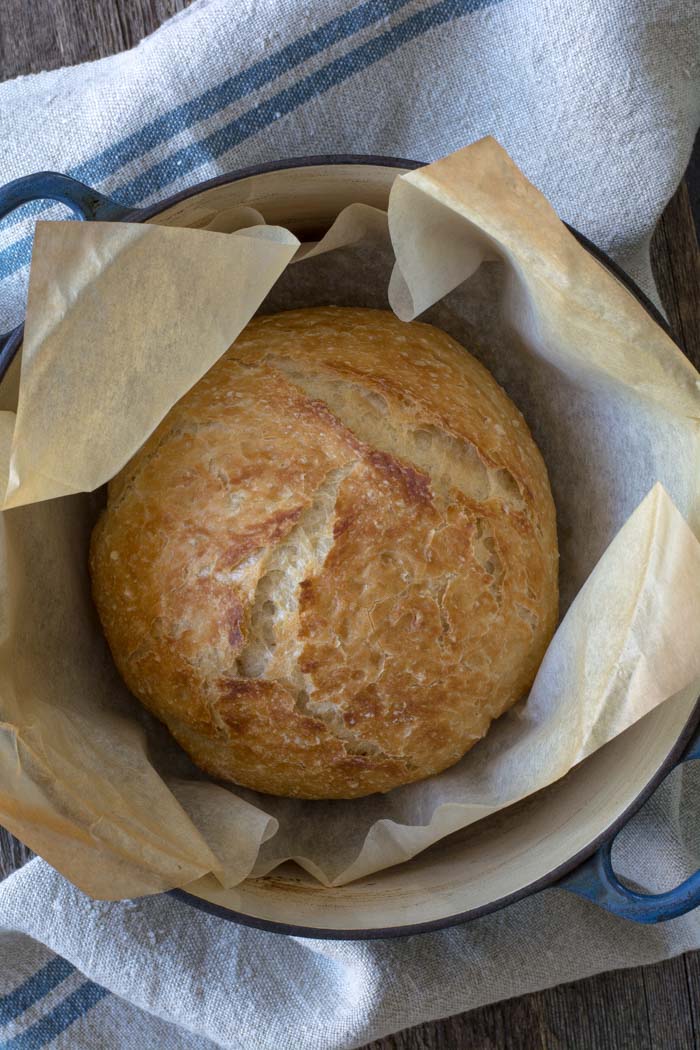
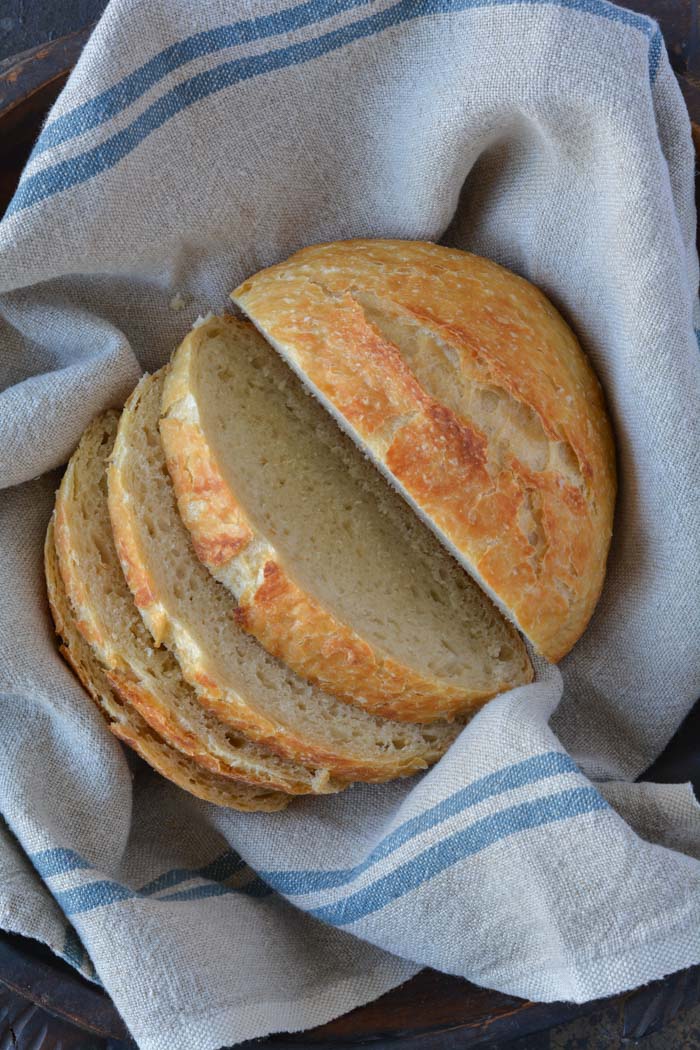
Holy cow! Can you believe how gorgeous that is? It’s best to wait for the bread to cool before slicing. Because I love warm bread I sliced it right away.
FAQ’s
Q: Do I have to use an enamel covered cast iron pan?
A: NO. You can use anything that can take the heat. The following have been used that I know of:
Clay pots with lids, Pizza stone with a bowl to cover the bread, insert from a crockpot, pyrex baking dish with a lid, stainless steel pot with a lid, baking dish covered with aluminum foil, old cast iron dutch oven.
Q: Do I have to use unbleached flour?
A: I always use unbleached flour. You can try bleached flour.
Q: Can I use self-rising flour?
A: I don’t know. I would just stick to all-purpose.
Q: What size is my pan?
A: My smallest pan is 5.5 quart. You can use as small as a 3 quart.
Q: What type of yeast do I use?
A: I use SAF instant yeast. Any yeast should work.
Q: Why is my bread turning out flat?
A: You could try using less 1/4 cup less liquid. Or add 1/4 cup additional flour. Make sure your dough appears to be dry when you first mix it. It will have more moisture during the rising time.
Q: Can my dough sit out longer than 18 hours? Does it HAVE to be between 12-18 hours?
A: I have let some dough sit as long as 24 hours and the bread was beautiful.
Q: Have you tried Gluten-free?
A: From what I hear the best GF is from King Arthur Flour https://shop.kingarthurflour.com/items/gluten-free-measure-for-measure-flour-3-lb
Q: Do I have to grease or oil the pan? Will my breadstick?
A: No you don’t need to grease the pan. I have never had the bread stick when using a cast iron pot. I haven’t tried anything else. The best way to be certain that the bread won’t stick is to form the loaf on a sheet of parchment paper and lift the bread into the pan using the sides of the parchment. Leave the paper in the pan. It’s won’t burn. When the bread has baked, just lift the sides of the parchment out of the pan. Voila! HOWEVER: Not all parchment paper is created equal. I use a silicone coated parchment paper. Regular parchment paper can stick something terrible. Don’t chance it.
No-Knead Crusty Bread
Wonderful yet easy artisan bread with a crisp crust. Prep takes just a few minutes with an overnight rise. Baked in a pot with a lid to create a steam oven. Bread can be made with many flavors and variations.
Ingredients
- 3 cups + 2 tablespoons unbleached all purpose flour (450 gr)
- 1 3/4 teaspoons Kosher salt (10 gr)
- 1/2 teaspoon Instant or Rapid-rise yeast (3 gr)
- 1 1/2 cups water cool (315 gr)
Instructions
-
In a large mixing bowl, whisk together flour, salt and yeast.
-
Add water and mix until a shaggy mixture forms.
-
Cover bowl with plastic wrap and set aside for 12 - 18 hours. Overnight works great.
-
Heat oven to 450 degrees. When the oven has reached 450 degrees place a cast iron pot with a lid in the oven and heat the pot for 30 minutes. OR pot can be placed in cold oven while oven is preheating leave in oven for 30 minutes.
-
Meanwhile, pour dough onto a heavily floured surface and shape into a ball. Cover with plastic wrap and let set while the pot is heating.
-
Remove hot pot from the oven and drop in the dough. Cover and return to oven for 30 minutes. After 30 minutes remove the lid and bake an additional 15 minutes. Remove bread from oven and place on a cooling rack to cool.
Recipe Video
Recipe Notes
FAQ's
Q: Do I have to use an enamel covered cast iron pan?
A: NO. You can use anything that can take the heat. The following have been used that I know of:
Clay pots with lids, Pizza stone with a bowl to cover the bread, insert from a crockpot, pyrex baking dish with a lid, stainless steel pot with a lid, baking dish covered with aluminum foil, old cast iron dutch oven.
Q: Do I have to use unbleached flour?
A: I always use unbleached flour. You can try bleached flour.
Q: Can I use self-rising flour?
A: I don't know. I would just stick to all-purpose.
Q: What size is my pan?
A: My smallest pan is 5.5 quart. You can use as small as a 3 quart.
Q: What type of yeast do I use?
A: I use SAF instant yeast. Any yeast should work.
Q: Why is my bread turning out flat?
A: You could try using less 1/4 cup less liquid. Or add 1/4 cup additional flour. Make sure your dough appears to be dry when you first mix it. It will have more moisture during the rising time.
Q: Can my dough sit out longer than 18 hours? Does it HAVE to be between 12-18 hours?
A: I have let some dough sit as long as 24 hours and the bread was beautiful.
Q: Have you tried Gluten-free?
A: No. I'm still waiting for someone to venture into the realm of Gluten-free. If you try it, let everyone know.
Q: Do I have to grease or oil the pan? Will my breadstick?
A: No you don't need to grease the pan. I have never had the bread stick when using a cast iron pot. I haven't tried anything else. The best way to be certain that the bread won't stick is to form the loaf on a sheet of parchment paper and lift the bread into the pan using the sides of the parchment. Leave the paper in the pan. It's won't burn. When the bread has baked, just lift the sides of the parchment out of the pan. Voila! HOWEVER: Not all parchment paper is created equal. I use a silicone coated parchment paper. Regular parchment paper can stick something terrible. Don't chance it.
More Notes:
Regular active yeast can be used in place of the instant or rapid-rise yeast. It will need to be activated in 1/4 cup warm water. Stir and let sit for 5-10 minutes. However, most of the comments I have received state that the rapid raise works the best. You choose. Whisk the flour, salt, and yeast together.









You can freeze the bread by letting it cool then placing it in plastic bags. When ready to thaw, remove from the freezer and plastic bag. The bread can be reheated in a 300 degree oven until warm and crispy, about 5-10 minutes.
How do you think this would freeze? Anyone try it? I like to have a "baking day" and have the freezer stocked!
I just made this…I only had bleached flour so I used that…It came out PERFECTLY!! Even got two thumbs up from my other half!! I will definitely experiment with different flavors…I have to tell you…because of this being on Pinterest, I asked for a dutch oven for Christmas just so I could try this bread! I'm so glad I did…It's perfect and all natural and cheaper than the all natural bread I buy at the store!! Thank you!!
I'm having good luck cleaning the pot with Bar Keepers powder that you get at Walmart. I tried 1/2 wheat flour and 1/2 white flour and tried instant yeast (which apparently I've been using the bread machine before) and didn't work out so well. Flat…going back to my normal unhealthy white flour. Tried chocolate chip and walnut. Would have tasted better if it had risen more and wasn't like a bagel. Not a wheat fan apparently! 🙂
I was so worried that it would not come out right. When I took out from the bowl, it was flat. So, I put it in the hot crockpot insert (I did not have a cast iron one as suggested, I said a prayer and covered it with aluminum foil. 45 minutes later it looked just like the picture above. Now to test it. Bringing it to my Italian mom's house for Sunday dinner. She makes her own bread so we shall see what comments I get for my first attempt at making homemade bread. Thanks again! This was fun!!
Tina
Not sure if you will see this since your last post was April 2012!
Renee: If you have a sourdough start, I would try it. I heard it turns out great. I need to get a start and try it myself. I'm going to try whey that I have drained off of yogurt. There was a comment stating that gave the bread a sourdough flavor. Thanks for your comment. I'm sure you will have great success. Happy baking.
Forget to mention…..I have the exact Le Cruset pot you have, in the same color even. I love it and use it all the time. It might just become my baking pot too "-)
It's been quite a while since you posted this recipe. I just found it on Pinterest and am giving it a try today.
I bought brand new yeast and put it to rest in the large bowl just now.
I'm really excited to see how this turns out. Thanks for the easy recipe.
Oh, do you think you could do a sourdough bread this way?
Just finished making this! The original recipe calls for 1/4 tsp yeast, which is the amount I used – it didn't rise as much as I would have liked, but this is still one beautiful loaf of bread! Next time I'll try the 1/2 tsp.
Thank you for the flavor combo ideas. The next one I want to try is Parmesan and red pepper flakes. A baker at our local farmers' market flavors his baguettes that way, and they are fabulous!
Jessica A: I have never added meats to this bread, so I can't help you out much. I know there have been some bacon and sausage add-ins. Maybe someone will comment with some instructions. You other flavor ideas sound amazing. Thank you so much for the four suggestions. Protein does play a big role in bread results. Please share your results with all of us bread bakers. Good luck.
I made this bread a few days ago and am so glad I did. I went with a 14 hour proof time and used a Sam's knock off as well for a baking dish. I did put a bit of salmonella flour in the bottom of the pan right before the dough went in just because I like the texture. I actually had to run a small errand and left the lid on all the way through baking and didn't seem to have any negative impact on the bread. Still nice and crusty!
Now that I have the plain down I'm gonna start experimenting with flavors. Maybe a caramelized onion and feta or gruyere? Pear and brie? Cider/juice/brandy soaked apples and raisins with cinnamon?
Also for the wheat bread being flat I know that King A Flour makes a white wheat flour as well as a wheat made from the usual hard red wheat. Maybe the lightness of the white wheat flour could be the key in getting the wheat based versions of this bread to rise? Also if your all purpose flour is protein heavy that could be the case so maybe look into a softer all purpose flour if it's available. Not saying any of this madness will work just throwing it out there!
I did want to ask a question regarding meat additions though. If I wanted to add something like Italian sausage, or cured pork should it be crisped before adding to the dough or not?
CLEANING:
Have you ever tried using Honeycomb foam? It is amazing. It comes in a block and you just cut off about an inch every time you need a new sponge. Use it until it's dead then cut off another inch. It is really gentle on items but great for cleaning. I just got mine at a kitchen cleaning store. I doubt Walmart carries them.
Just made 2 loaves today!!! My house smells yummy and I LOVE how easy it was!
OH MY !!!!!!!!!!!!!! This bread is beyond awsome,it is other worldly, it must be what heaven tastes like. Thank You so much for this recipe.
I have my first loaf in the oven as I type this….I'll let ya know how it turned out 🙂
Best recipe ever! I've tried it and it's awesome!
Things bread is ABSOLUTELY amazing…and to think that I was paying 5 bucks a loaf for this from the bakery. Thanks for sharing!
I have been making this bread for the last 3 years. Almost make 1 loaf a day. I love this bread and will not make any other kind. Some tips for your folks:
Pots – I use a glass one. You can get a Pyrex on ebay. I just happen to have one from the 70s. I don't think they make them any more.
Yeast – you MUST use instant. Any other and the bread will not rise and be flat.
Flours – use all purpose (bread rises the best). I tried bread flour and it did not rise as much. Also, when using whole wheat or rye ONLY use 3/4 cup at the most and the rest white flour or the bread will not rise much.
Water – I use 1 3/4 cups. Gives the bread larger holes.
The second rising – I always have my bread rise for the second time for at least an hour and a half or 2.
Greasing pot – DO NOT grease the pot with anything. The bread will not stick. I use a spoon to scoop the dough right into the scorching hot pot. TIP: if you heat your pot and leave it in the oven for 10 minutes or so before you dump the dough (because you got busy and could not get to it) your dough WILL stick. The dough must go into the hot pot almost immediately when it finishes heating.
Variations:
Dill Cottage Cheese
Cottage Cheese Dill
½ c small curd cottage cheese warm
½ tsp garlic powder
2 tsp dill (I use fresh finely chopped)
To make the cottage cheese warm, use very warm water such as 110 degrees or warmer. So, the water required for the recipe, use that and make sure it is warm. Add the cottage cheese and let it sit for a few minutes. Add the garlic and dill to the flour, add the yeast, add the salt and then the cottage cheese water at the end. Mix it all up and allow to sit for 12 hours or longer. Process and bake as normal.
Herb and Onion
½ teaspoon basil (I use dried or fresh) both equally good
½ teaspoon thyme (I use dried or fresh) both equally good
½ teaspoon oregano (I use dried or fresh) both equally good
2 tablespoons minced dried onion
2 teaspoons garlic powder
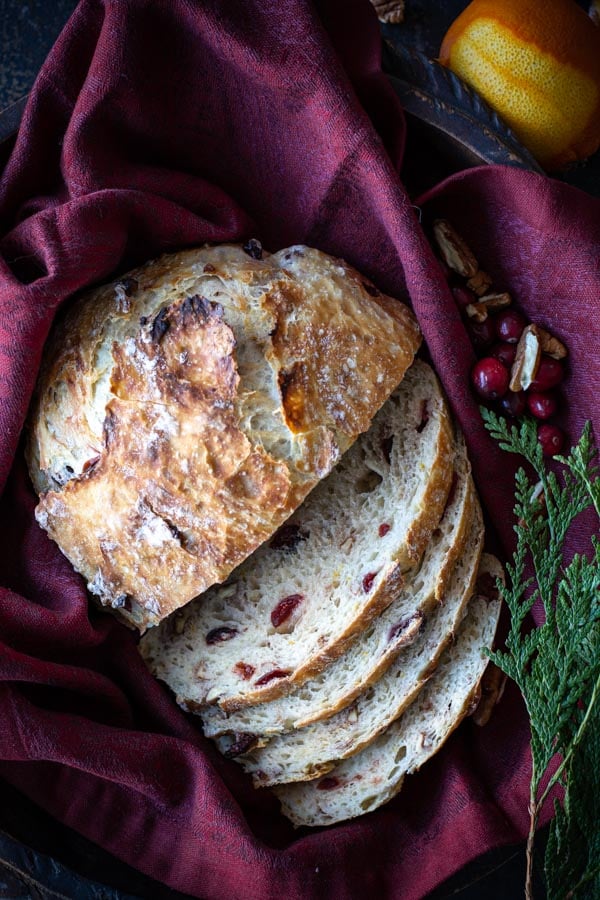
Cranberry-Pecan Extraordinaire
1/2 cup (2 1/2 oz.) whole wheat flour
2 1/2 cups (13 oz.) all purpose or bread flour
1 1/2 tsp. salt
1/2 cup dried sweetened cranberries
1/2 cup pecan pieces
1 1/2 cups purified water
1/4 tsp or 1/2 tsp instant yeast
Cinnamon Raisin
2 ¼ cups white flour
3/4 cups whole wheat flour
3 oz. steel cut oats
1 1/2 t. salt
1 t. cinnamon
1 and 1/2 cups water
1/3 cup starter
1/2 cup raisins
1/2 cup chopped walnuts
Hope this helps.
Barb
Thanks so much for all of your votes for my husband. We have our fingers crossed. You are the greatest people out there. I love you all.
I can't wait to try this bread recipe. I love bread and easy homemade bread is even better. Also, good luck to your husband. I place my vote and I hope others do also, especially if you keep providing these yummy recipes 😉
Can't wait to try this bread! Thanks for the recipe and all the hints. Did you ever find an answer on cleaning your pot? Not sure if this will work on an enameled pot (I just got one at Christmas and haven't researched it) but Barkeeper's Secret or Barkeeper's Friend (I can't remember exactly which it is) is a great product.
To Clean your Pots & Pans use Bar Keepers friend,,Cleans Great & does'nt scratch..I use it on my SS pans, If not in your stores you can find it online
I made the bread this weekend. It is delicious and went well with our soup. I am looking forward to trying it as toast and possibly French Toast. The recipe is so very easy and it is nice that there are only ingredients I can pronounce.
made with 3 cups cup4cup GF flour. A bit dense. But amazing. My bread looked nothing like the pictures posted, but I kept moving forward because I'm making GF. Will try with some mix-in next time. Your recipe is saved on my favorites.
Love your pictures. Your bread is beautiful.
I do the same with my sourdough bread, but start it in a cold oven. Comes out beautifully too.
I also use Le Creuset. The bread gets that steaming effect cooking it with the lid on.
Baking the bread like that does get the pots dirty though. I use Le Creuset's cleaner for their cookware. It works well, but you do have a scrub a bit. I try to use it every time, so it doesn't build up.
http://www.amazon.com/Le-Creuset-12-Ounce-Enameled-Cast-Iron/dp/B000E5D04E/ref=sr_1_1?ie=UTF8&qid=1358706341&sr=8-1&keywords=le+creuset+cookware+cleaner
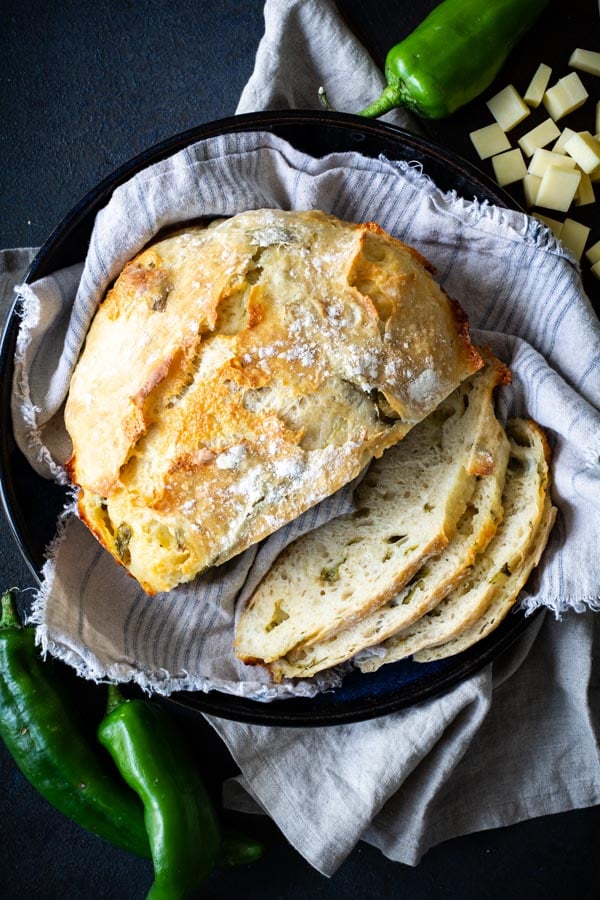
I just made this bread. OMG I AM IN LOVE!!! Thank you thank you thank you so much for posting this. I have never made bread before because i thought it would be too much work! LOL…. This was so easy and the results says it all! I am going to make another batch this evening of bacon cheddar bread, then a jalapeno cheddar bread!!! thank you so much!
after letting it rise ,dump it out on parchment paper with some flour and when you're ready to put it in your dutch oven lift the paper and all. Easier to put it in the hot pan and easy to lift out when its done.
This bread is incredible. Thanks for sharing.
I just pulled a loaf out of the oven – looks beautiful. I added black and green olives and sharp cheddar. Can't wait to try it!!
I wanted to see if I could bake this in a normal metal bread pan. I followed the instructions exactly. My review is that the pan definitely needs to be greased b/c mine stuck very badly. The bread tastes fine. I was looking for a standard sized sandwich bread so I don't have to buy at the store. This bread was about half the height of a normal sized bread. It didn't quite puff up over the top of the pan.
I will never buy store bought bread again. This recipe is great! Todays loaves are cinnamin, raisin, pecan AND rosemary,asiago,garlic… Delish! Thanks for posting this recipe.
thanks i will try it 🙂
Elizabeth Elliott: I'm sorry to hear your bread is doughy. The bread texture is a bit wetter and can be rubbery. I would lower your oven temp by 25 degrees. Put the pan in the cold oven and heat it with the oven. As soon as your oven temp reaches 425 drop in the bread dough. Oh make sure you take the dough out of the bowl and shape it before you start heating the oven. I would bake the bread with the lid on longer…oh maybe 10 min. Remove lid and bake until golden. Let me know if this works for you. I'll cross my fingers.
ok so ive made four loaves of bread and each one is coming out doughy in the middle. the last loaf i left in an additional 15 mins with the lid on 🙁 any suggestions on what i should do? it smells awesome cooking but i just dont know what im doing wrong
Ok, my bread came out perfect and yummy…..I would like to add honey to the bread to make the bread sweet. Do you have any suggestions?
I used to make a bread machine bread with pepperoni, garlic and mozzarella. Bet that would be great in this bread!
Mmmmmm, sounds fantastic but I'm coeliac, so I'm going to be the gluten free guinea pig! You do indeed have the patience of a saint – I've just read all those comments! Will let you know how I get on. Thanks for this!
I just made this and It is SOO good! It turned out great! I made it just as directed, the plain variety. I'm so excited, I've never made bread before in my life and I feel so accomplished now! LOL I'm going to make the cranberry/orange/almond one soon! I could eat this every day.
Just made this bread and it is delicious. Can't get over how easy it was. Thank you should be fun to play around with different ingredients.
Thank's to all you great bread bakers for voting for my husband. He's in 3rd place and hanging on strong thanks to your votes. Keep it up and happy baking. I love you all!!!
Thank you for the great blog post…I recently got a Le Crueset and I'm going to try this at the weekend. My sister sent me the link to your blog, so I can't wait to read through your other posts. Oh, and I voted for your husband….fingers crossed he wins! x
I purchased the towels from Ikea a couple of years ago. I haven't seen them since.
When we first got married, the stove in our apartment was a mess with brown glaze on the white enamel where the oven vented across the stovetop surface. Nothing I used would clean without scratching the enamel. I accidentally spilled some baking soda on the glaze and to my surprise, a damp sponge wiped it away! Since then, I use baking soda sprinkled on a damp sponge (sometimes adding a drop of dish detergent) as our number one cleaner! It is especially good in cleaning stains in tea and coffee cups too! My inherited Corning Ware dutch oven, roasting pans, and cookie sheets twinkle after 35 years of marriage…all because of baking soda!
Simply love your blog…everything looks DELICIOUS!.Keep posting..
hypertherm plasma consumables
where do you get your beautiful dish towels to wrap your bread up in?
FANTASTIC! Just made and tasted my first loaf and it is wonderful. Had to spend $60 for an enamel cast iron pot to make it in but it was worth every penney and that pot is going to get a workout. Pictures and instructions were perfect, thank-you. Reminds me of an English Muffin. This recipe's a keeper!
Betsy: Toasting walnuts enhances their flavor. You can toast them of not. Your choice. I'm so glad you are loving the bread.
thanks 🙂 ill give it a try
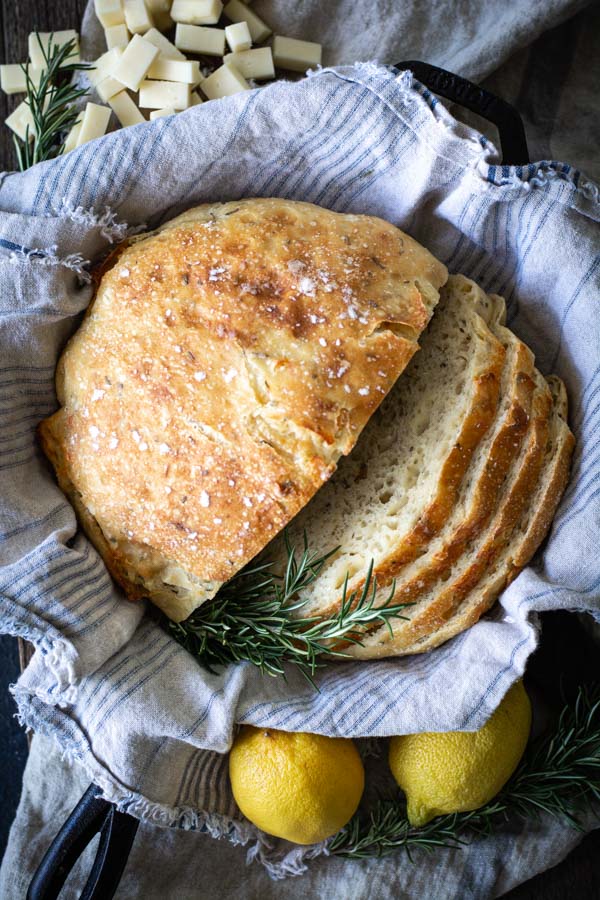
"Hold Cow" club member here! I am so grateful to you, I made my first loaf of bread today and it was picture perfect. We ate the entire loaf of Rosemary, lemon, gruyere bread with minestrone soup (foolproof-barefoot contessa.) Your questions and answers are great as is your website. Thanks so much. Tomorrow I am going to make a Raisin Walnut bread but am wondering if I have to toast the walnuts prior to adding them. Hugs to you and thanks again.
This bread would work in a "crock pot insert", but I wouldn't try baking it in a crock pot. You need the high heat. If you use a crockpot insert remove the knob from the lid. They aren't oven safe. Good luck.
question: would this work in a crock pot? i love homemade bread and havbe yet to try my own lol 🙂 it looks yummy
Quick clean for pot. I accidentally discovered that the magic sponges take off a lot of that dark cooking grime without any abrasion to the enamelware. Also, Bon Ami cleanser and/or Brillo pads work well, but the Brillo pad will take the shine off of the enamel(the Bon Ami with a soft cloth doesn't seem to do that).
Janet; What size pot wld u recommend? Calphalon has a 5 qt then next a 7qt. Is the 5qt. big enough or is the 7qt too big. Thank you.
JANET; MY HUSBAND AND I LOVE CRACKED WHEAT BREAD, IS THERE CRACKED WHEAT FLOUR OR WHAT DO I USE TO GET CRACKED WHEAT?
JANET M. POWELL
Kathy: Insert an instant read thermometer into your bread. It should be 190 degrees C if its is cook properly. Hopefully that will help.
Niti: Bread does freeze well. Just unwrap before thawing to keep the crisp crust. Once thawed you can put it into a 300 degree oven for 5 minutes or so to warm it up. You should love it.
This is so exciting. I have tried for years to bake bread with this texture. Going to make 4 loaves next time. Do they freeze well? That is my plan. If they last that long.
Wow! This sounds fantastic. I'm going to try it over the weekend. However, I have a gas oven that I'm not very happy with so am hoping it will turn out O.K. The last bundt cake I baked normally takes an hour to completely bake, I had it in the oven for 1 hr., 15 mins. and it seemed done but when I cut into it the middle was half cooked. I need to have the repairman out but it seems to bake meats and fish just fine.
Kathy
I have not had problems with my bread sticking. I'm so sorry your bread is glued to your pan. The best remedy is parchment paper. Sorry 🙁
Mine is completely stuck to the bottom of my Le Creuset, like glued to it. Not sure what I did wrong :/
I haven't read through your blogs but in case no one has posted…the best way to clean the le creuset is with bar keepers friend. I have those pots and the dirt will come right off. Use some elbow grease! Just dust some bar keepers on the pan and with a little water make it pasty and scrub. should come right off!
Stacey in Australia, Yes you can make this in the morning for your dinner. I just let the bread sit out uncovered on a cooling rack or a cutting board. This way it will maintain the crisp crust and should still be awesome. I have even placed the bread in a heated oven for about 5 minutes to reheat. It works great. Good luck to you.
I really like the Mr. Clean type erasure pads. They have taken some nasty baked on stuff off my pans.
Not sure if you are still checking this, fingers crossed. I made this before and the family ate it before it even cooled down! Want to make some for tomorrow night.. If I bake it early in the day will it still be okay for dinner or must it be baked just before serving…???? Thanks!
Stacey – Australia
I realize you posted this recipe nearly a year ago, but I've only recently found this recipe. It's delightful! You mentioned not having luck with wheat bread, and I've tried out a really successful combination: King Arthur Flour White Whole Wheat pastry flour (substituting the full 3 cups) and about 1 1/2 tbsp honey. I wound up using a little more water than the original recipe as well, and it took a little more effort and flour to gather the dough into a ball. The bread comes out just as crusty as ever, but the crumb is a little finer than my other attempts. Thank you so much for this recipe! It has changed my life, and I don't think I will be buying bread any time in the near future!
Made my second loaf this morning. Roasted garlic w/ thyme and black pepper. It is awesome!!! I added a litte raw sugar also. Not sure why but this loaf is bigger than my first. Also, I use King Arthur flour and instant yeast and so far both of my loaves have been perfect. Next Sourdough!!
Trying this in my Heritage Cast Iron – 7 Qt Casserole with Lid. Will let you know how it works!
GLUTEN FREE VERSION! Yeah! It came out delicious this time! I used the same amount of GF all purpose flour but I added 1/2 cup more water and 4 tsps of Xanthan Gum. I thought it was going to be a failure because it didn't rise while it was sat overnight, but after baking it looks as good as your picture and tastes as delicious as if it was loaded with Gluten! If I knew how to create a name, I would send you a pic for your other GF followers!
wooow beautiful
very nice thank you so much =)
New follower…a hungry one! LOL! I am right now searching the web for an affordable cast iron pot to cook this bread in! The French ones are out of my price range. Thanks for sharing such an easy to follow recipe and all of the comments and tips! I love it!
Hugs, GraceinAZ (Pat)
thanks for the great pics and easy to follow instructions! ps… BAR KEEPERS FRIEND. it is sold next to comet. in a gold shake can. works miracles on enameld anything!!!
Flour that is bleached naturally as it ages is labeled "unbleached," while chemically treated flour is labeled "bleached." Bleached flour has less protein than unbleached. Bleached is best for pie crusts, cookies, quick breads, pancakes and waffles. Use unbleached flour for yeast breads, Danish pastry, puff pastry, strudel, Yorkshire pudding, éclairs, cream puffs and popovers."
Whole wheat flour would not be a substitute. Just use what white flour is available. You can use whole wheat flour in this recipe. I would start with a 50/50 blend of white and whole wheat. You will notice the wheat flour doesn't absorb the water like the white flour. I hope this helps.
What's the difference between unbleached and whole wheat flour, pls? I don't think we have as many kinds of flour in Brazil as you do in the US.
Would it work with whole wheat?
Cheers!
To Anonymous in UK: My pot smallest pot measures 9 3/4-inches wide and 4 1/2-inches tall. That's about 25 cm x 11.5 cm. I hope this helps. I'd love to hear how your brot forms work. Please let me know if you order them.
Thanks to all of the great comments and add-in's. You are all great bakers and are so creative in your breads. Keep baking.
Just pulled my first loaf out of the oven. HOLY COW… I don't know if there's going to be any left for the kids or my husband to try when they get home from school/work… I baked it in my Lodge Cast Iron dutch oven-no enamel coating or anything, just one of the old style cast iron dutch ovens. I was doubtful when you said don't grease the pan, but I didn't, and my loaf popped out beautifully!! So yummy! I need another slice now…
This is the pot I bought (to make this bread) – I did check my oven temp to make sure it was correct since the pot is guaranteed up to 450 degrees and that's the same temp needed for the bread. My oven was correct so I made it and it came out perfectly (twice now). The pot is GREAT and much, much cheaper than LeCruset! Just make sure to handwash (and do some weight lifting – this thing is HEAVY). Also to note – follow the maufacturers directions, Included with the pot, to season it before using it. Although it's enamel coated inside and out, there is a ridge of uncoated cast iron on the top of the pot and the rim of the lid. Made sure you season it as directed and you'll be fine.
http://www.walmart.com/ip/Tramontina-Gourmet-6-Quart-Cast-Iron-Covered-Dutch-Oven-with-Stainless-Steel-Knob/19581135
Thanks for this recipe — I'm making my second batch today! I actually went to Walmart before the holidays to buy a dutch oven – my first – just for this recipe (at a fraction of a Le Cruset)! And it works great!
I've made this using bread flour and it was VERY dense. This time I'm using half bread flour and half white flour. Haven't made any with additions, yet, but will next time!
I clean my enamel pots the old fashioned way — with a Brillo pad! Very (VERY) gently use it to scrub off the bits and blackened areas – -it works like a charm and has never caused any harm to the pots!
Thanks again for this recipe – love it!