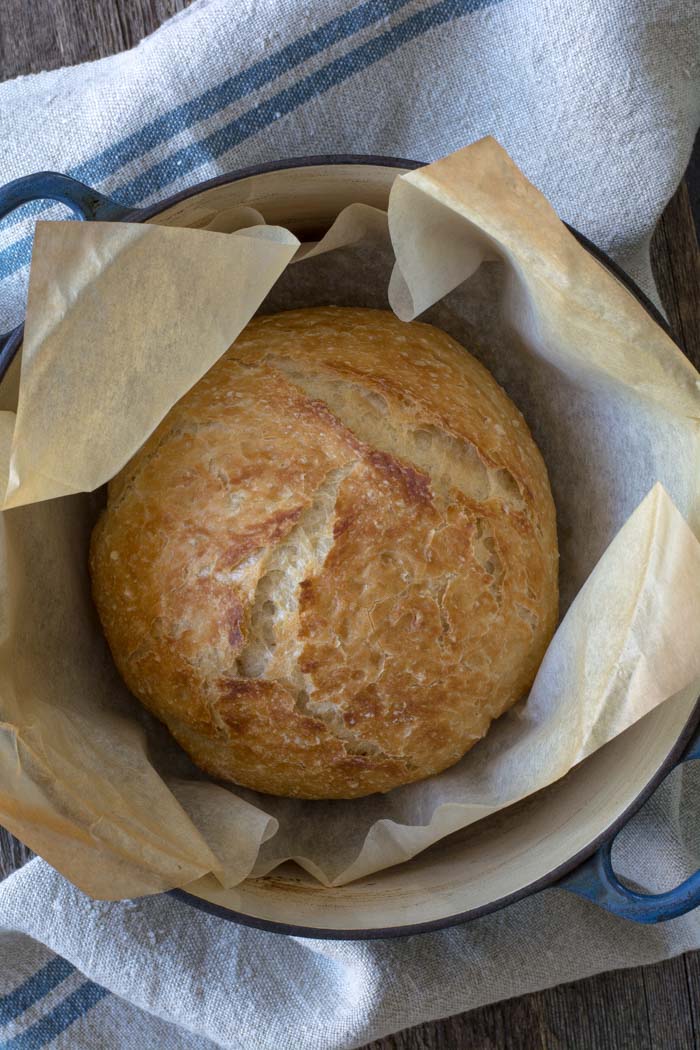
What I love about this bread
- It’s so easy to make. This dough can be made in less than 5 minutes.
- The basic dough recipe can be enhanced with many different flavor varieties.
- Very little hands-on time.
- Crusty bread never ceases to impress family and friends.
- My 12-year-old grandson can make it.
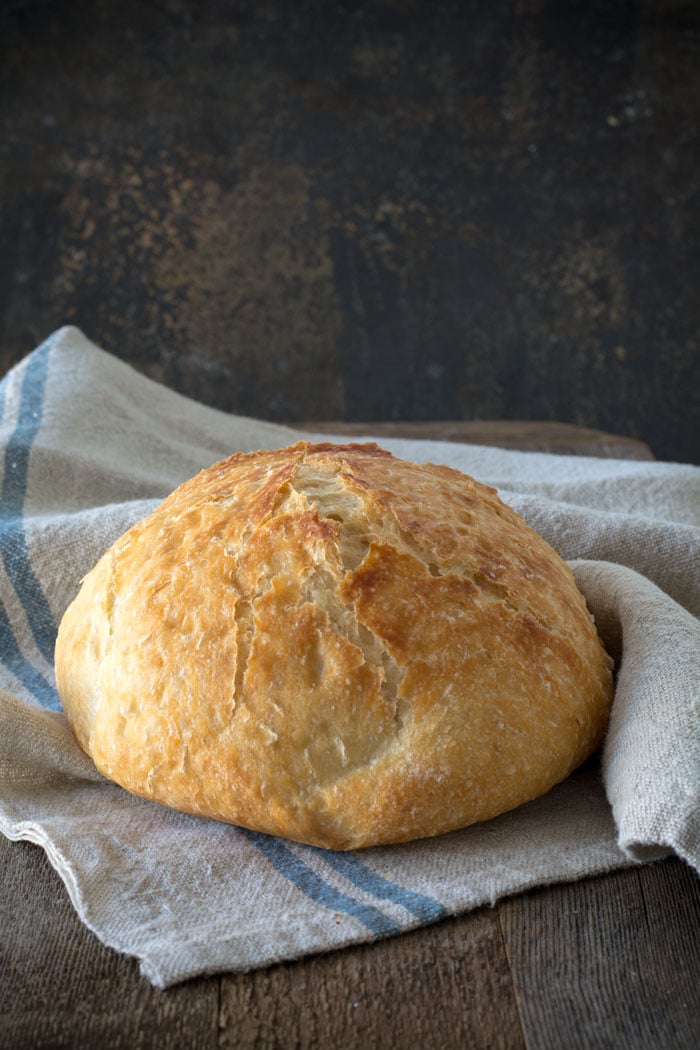
Let’s make No-knead crusty bread:
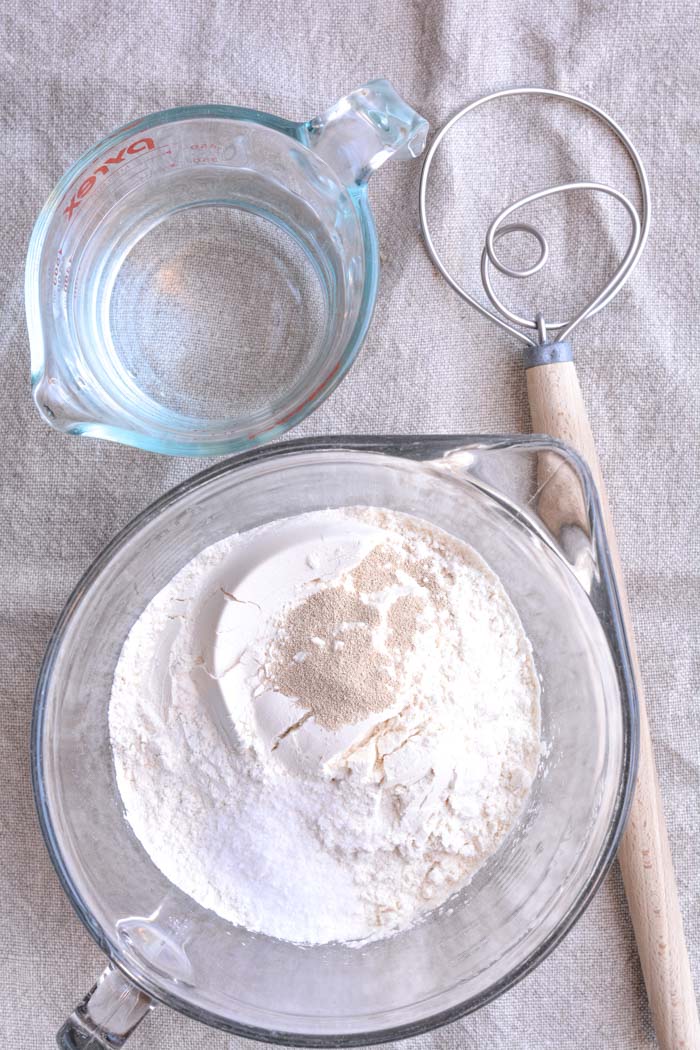
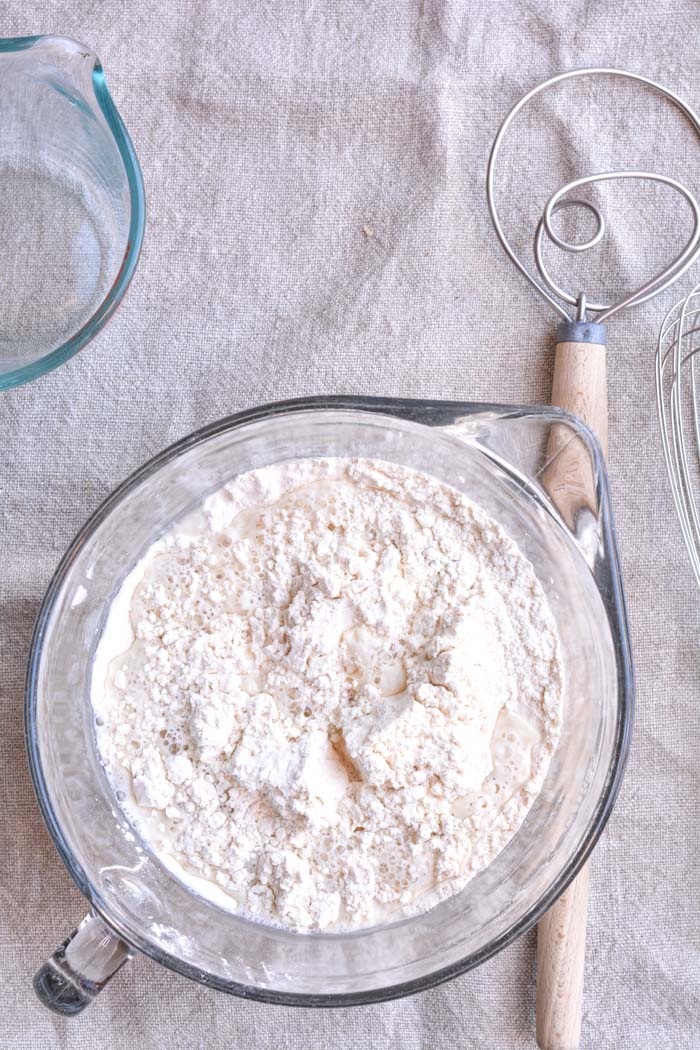
- In a large mixing bowl, add flour, kosher salt, and yeast. Whisk together.
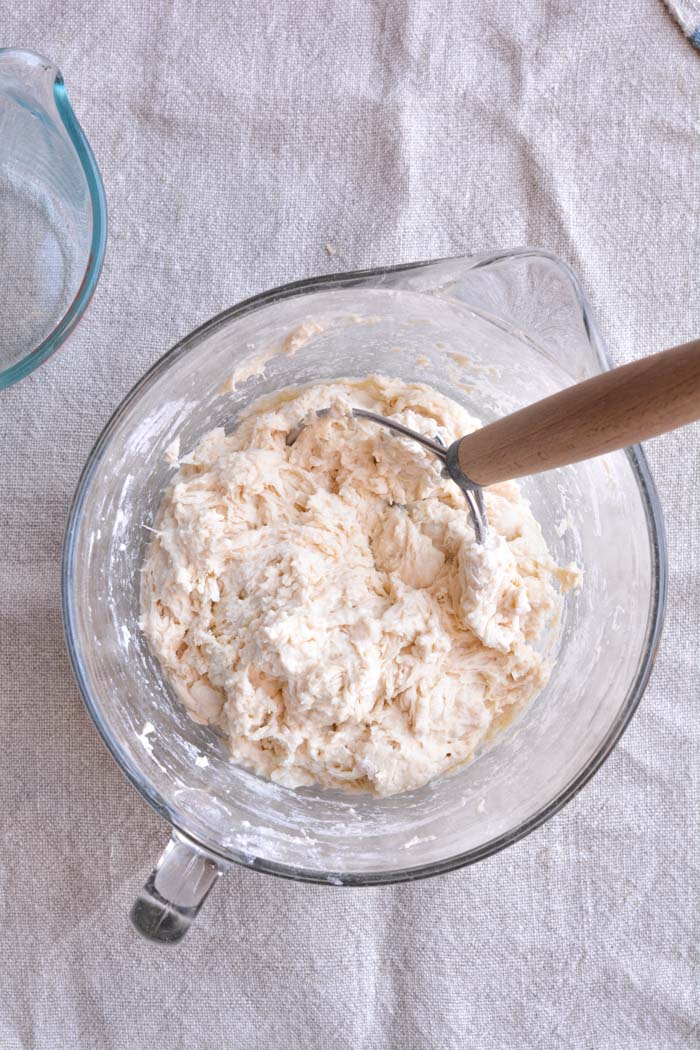
- Add water. Mix just until all of the flour has combined with the water. The dough will look like a shaggy mess. That’s ok.
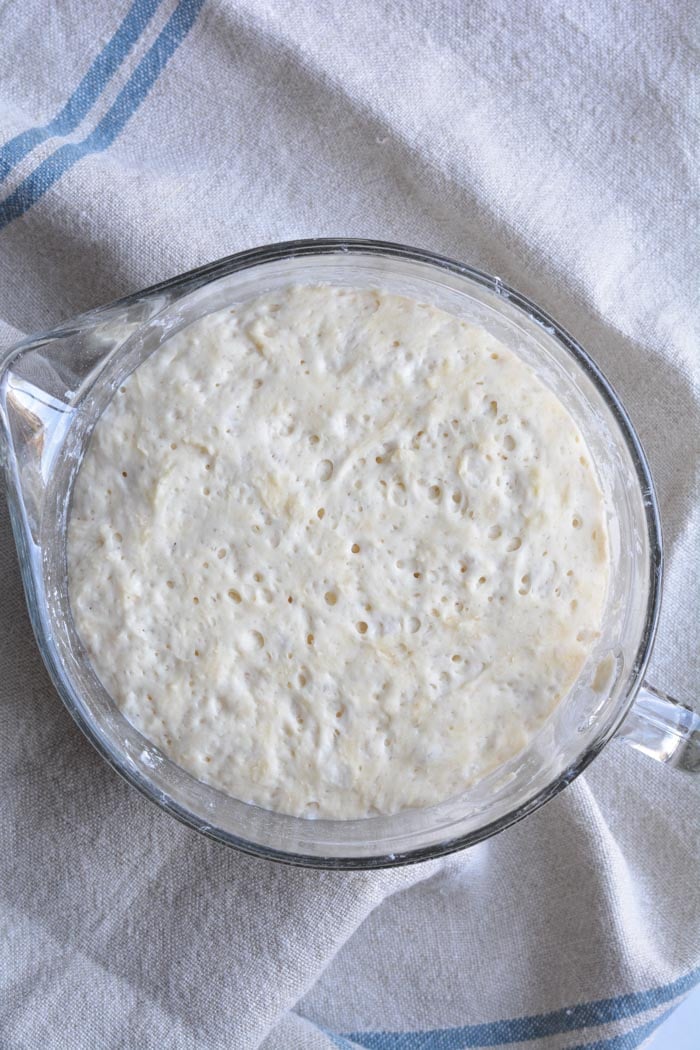
- Cover the bowl with plastic wrap and let it sit for 12 – 18 hours on the countertop. DO NOT REFRIGERATE. This is not optional. It takes that much time to proof the dough. The reason why you need a large bowl is that the dough will start to rise.
- After 12 hours the dough will look like this. It’s pretty sticky, but that’s ok it’s supposed to be.
Shaping and baking the bread:
- Preheat oven to 450 degrees. As soon as it has heated to 450 degrees place your pot with the lid in the oven and preheat the pot for 30 minutes.
-
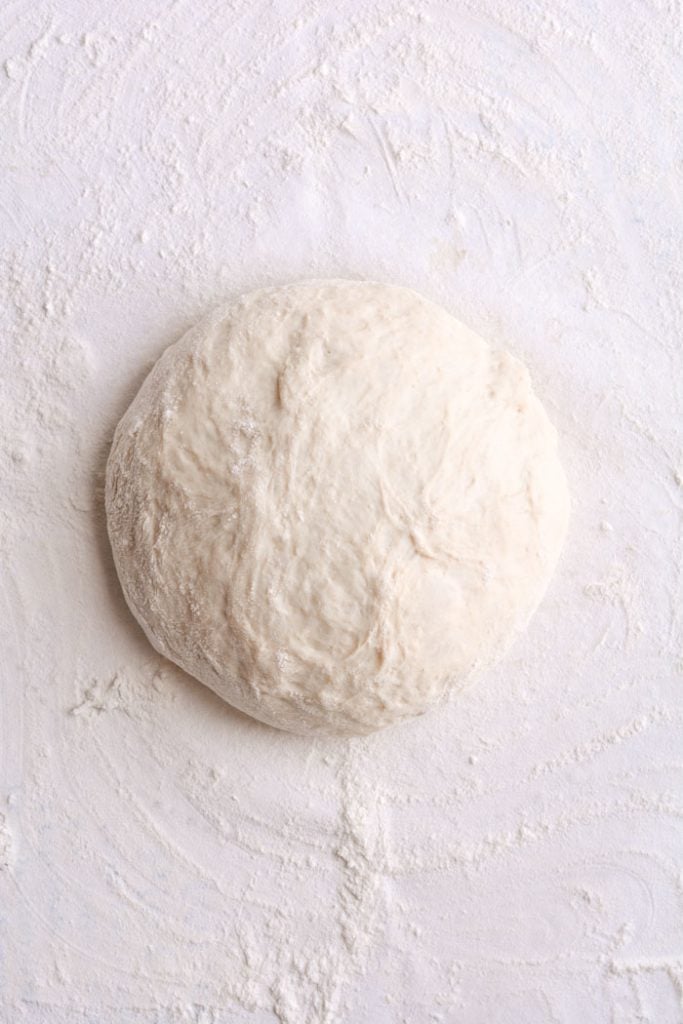
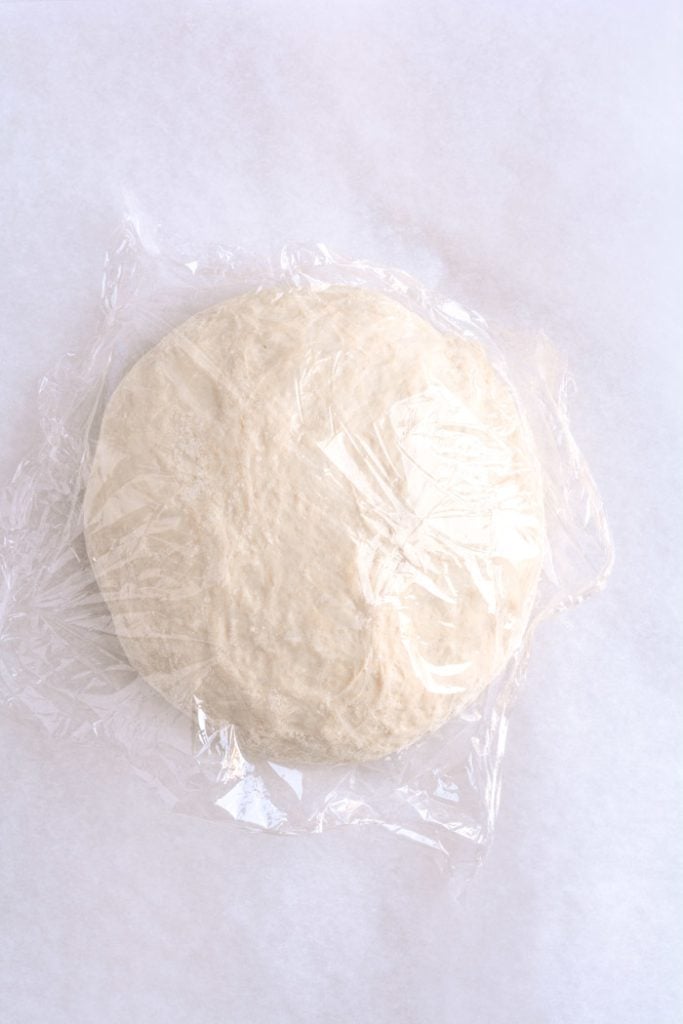
Right after you put the pan in the oven to pre-heat, dump the dough out onto a HEAVILY floured surface. Shape it into a round ball and place on a sheet of parchment paper. Parchment makes it so easy to transfer the dough into a hot pot and then remove it after baking. The parchment paper stays in the pot. This will rest for 30 minutes while the pan is heating. Cover with plastic wrap. Note: Use silicone coated parchment paper. The regular non-coated paper will stick terribly. Don’t chance it.
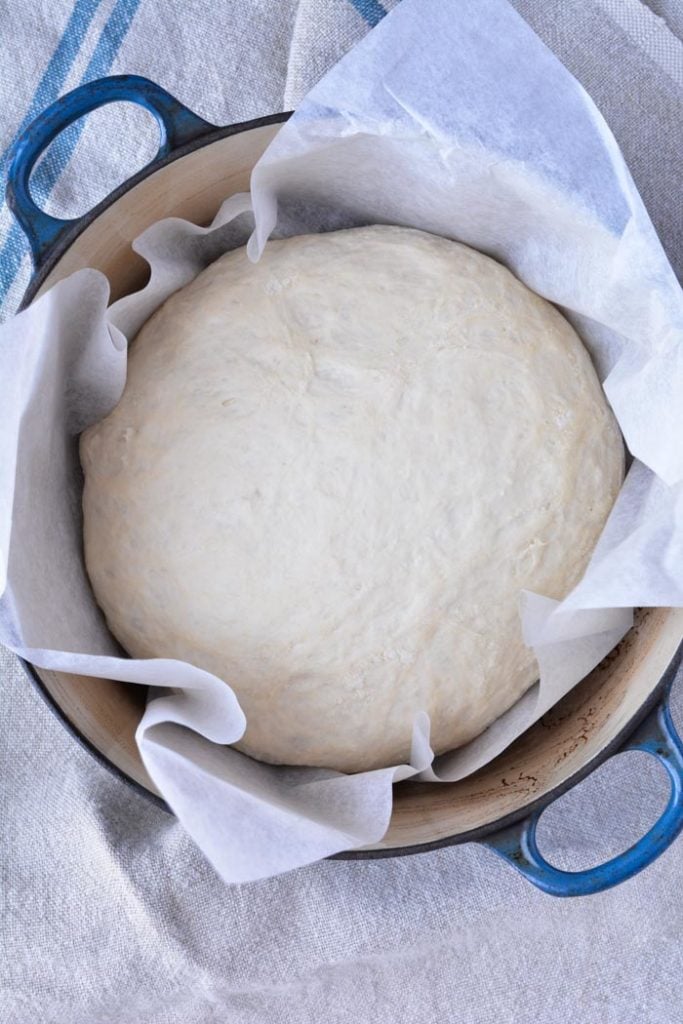
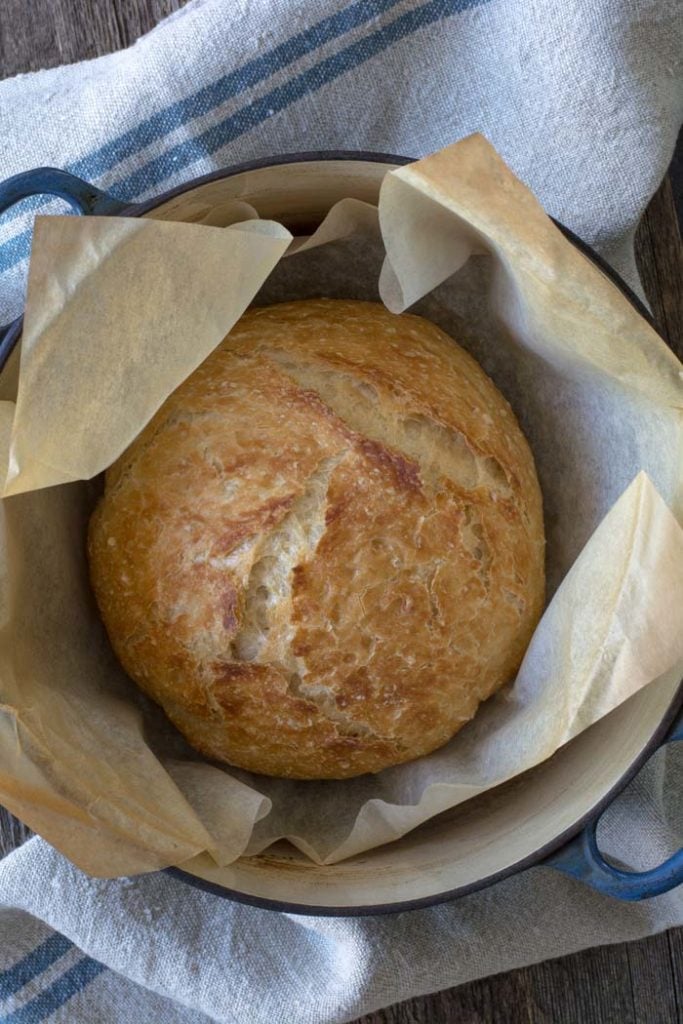
- Remove pot from the oven and carefully pick up the parchment and drop dough into the pot. Be careful the pan is HOT. Put the lid on the pot and return it to the oven for 30 minutes.
- After 30 minutes remove the lid from the pan. Bake for an additional 15 minutes or until nicely browned. You can test with an instant-read thermometer to make sure the bread is fully cooked on the inside. The temp should be between 190F and 200F degrees. Remove from the oven and carefully remove bread from the pot by lifting the edges of the parchment paper.
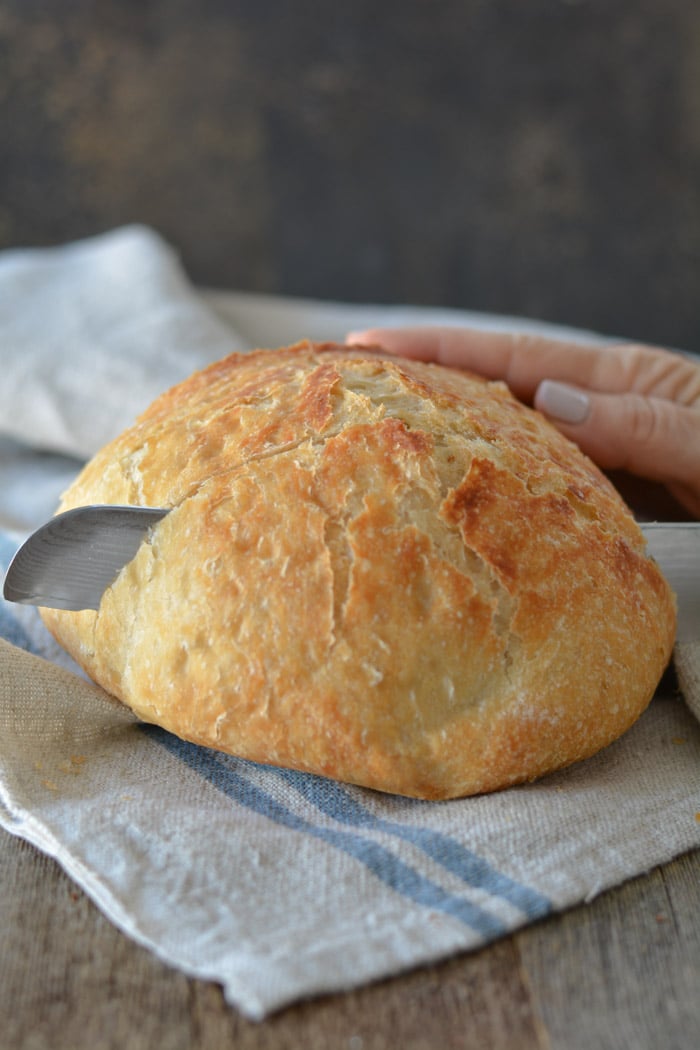
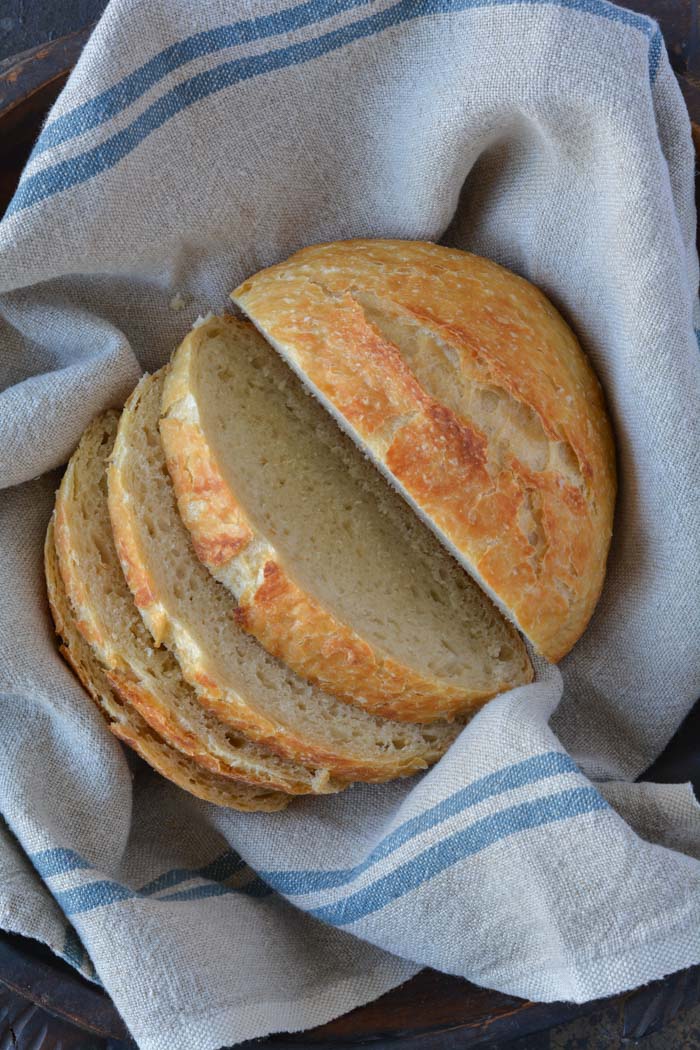
Holy cow! Can you believe how gorgeous that is? It’s best to wait for the bread to cool before slicing. Because I love warm bread I sliced it right away.
FAQ’s
Q: Do I have to use an enamel covered cast iron pan?
A: NO. You can use anything that can take the heat. The following have been used that I know of:
Clay pots with lids, Pizza stone with a bowl to cover the bread, insert from a crockpot, pyrex baking dish with a lid, stainless steel pot with a lid, baking dish covered with aluminum foil, old cast iron dutch oven.
Q: Do I have to use unbleached flour?
A: I always use unbleached flour. You can try bleached flour.
Q: Can I use self-rising flour?
A: I don’t know. I would just stick to all-purpose.
Q: What size is my pan?
A: My smallest pan is 5.5 quart. You can use as small as a 3 quart.
Q: What type of yeast do I use?
A: I use SAF instant yeast. Any yeast should work.
Q: Why is my bread turning out flat?
A: You could try using less 1/4 cup less liquid. Or add 1/4 cup additional flour. Make sure your dough appears to be dry when you first mix it. It will have more moisture during the rising time.
Q: Can my dough sit out longer than 18 hours? Does it HAVE to be between 12-18 hours?
A: I have let some dough sit as long as 24 hours and the bread was beautiful.
Q: Have you tried Gluten-free?
A: From what I hear the best GF is from King Arthur Flour https://shop.kingarthurflour.com/items/gluten-free-measure-for-measure-flour-3-lb
Q: Do I have to grease or oil the pan? Will my breadstick?
A: No you don’t need to grease the pan. I have never had the bread stick when using a cast iron pot. I haven’t tried anything else. The best way to be certain that the bread won’t stick is to form the loaf on a sheet of parchment paper and lift the bread into the pan using the sides of the parchment. Leave the paper in the pan. It’s won’t burn. When the bread has baked, just lift the sides of the parchment out of the pan. Voila! HOWEVER: Not all parchment paper is created equal. I use a silicone coated parchment paper. Regular parchment paper can stick something terrible. Don’t chance it.
No-Knead Crusty Bread
Wonderful yet easy artisan bread with a crisp crust. Prep takes just a few minutes with an overnight rise. Baked in a pot with a lid to create a steam oven. Bread can be made with many flavors and variations.
Ingredients
- 3 cups + 2 tablespoons unbleached all purpose flour (450 gr)
- 1 3/4 teaspoons Kosher salt (10 gr)
- 1/2 teaspoon Instant or Rapid-rise yeast (3 gr)
- 1 1/2 cups water cool (315 gr)
Instructions
-
In a large mixing bowl, whisk together flour, salt and yeast.
-
Add water and mix until a shaggy mixture forms.
-
Cover bowl with plastic wrap and set aside for 12 - 18 hours. Overnight works great.
-
Heat oven to 450 degrees. When the oven has reached 450 degrees place a cast iron pot with a lid in the oven and heat the pot for 30 minutes. OR pot can be placed in cold oven while oven is preheating leave in oven for 30 minutes.
-
Meanwhile, pour dough onto a heavily floured surface and shape into a ball. Cover with plastic wrap and let set while the pot is heating.
-
Remove hot pot from the oven and drop in the dough. Cover and return to oven for 30 minutes. After 30 minutes remove the lid and bake an additional 15 minutes. Remove bread from oven and place on a cooling rack to cool.
Recipe Video
Recipe Notes
FAQ's
Q: Do I have to use an enamel covered cast iron pan?
A: NO. You can use anything that can take the heat. The following have been used that I know of:
Clay pots with lids, Pizza stone with a bowl to cover the bread, insert from a crockpot, pyrex baking dish with a lid, stainless steel pot with a lid, baking dish covered with aluminum foil, old cast iron dutch oven.
Q: Do I have to use unbleached flour?
A: I always use unbleached flour. You can try bleached flour.
Q: Can I use self-rising flour?
A: I don't know. I would just stick to all-purpose.
Q: What size is my pan?
A: My smallest pan is 5.5 quart. You can use as small as a 3 quart.
Q: What type of yeast do I use?
A: I use SAF instant yeast. Any yeast should work.
Q: Why is my bread turning out flat?
A: You could try using less 1/4 cup less liquid. Or add 1/4 cup additional flour. Make sure your dough appears to be dry when you first mix it. It will have more moisture during the rising time.
Q: Can my dough sit out longer than 18 hours? Does it HAVE to be between 12-18 hours?
A: I have let some dough sit as long as 24 hours and the bread was beautiful.
Q: Have you tried Gluten-free?
A: No. I'm still waiting for someone to venture into the realm of Gluten-free. If you try it, let everyone know.
Q: Do I have to grease or oil the pan? Will my breadstick?
A: No you don't need to grease the pan. I have never had the bread stick when using a cast iron pot. I haven't tried anything else. The best way to be certain that the bread won't stick is to form the loaf on a sheet of parchment paper and lift the bread into the pan using the sides of the parchment. Leave the paper in the pan. It's won't burn. When the bread has baked, just lift the sides of the parchment out of the pan. Voila! HOWEVER: Not all parchment paper is created equal. I use a silicone coated parchment paper. Regular parchment paper can stick something terrible. Don't chance it.
More Notes:
Regular active yeast can be used in place of the instant or rapid-rise yeast. It will need to be activated in 1/4 cup warm water. Stir and let sit for 5-10 minutes. However, most of the comments I have received state that the rapid raise works the best. You choose. Whisk the flour, salt, and yeast together.
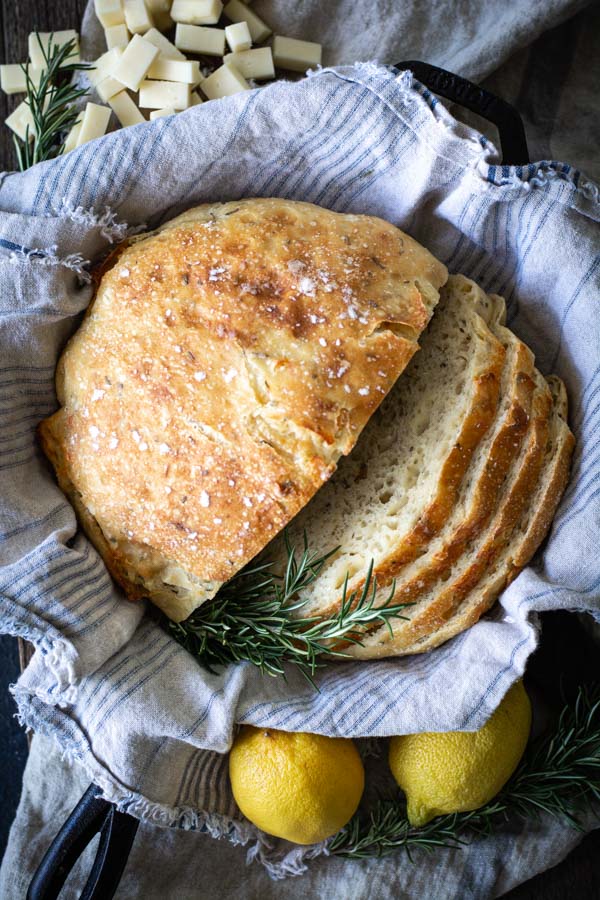
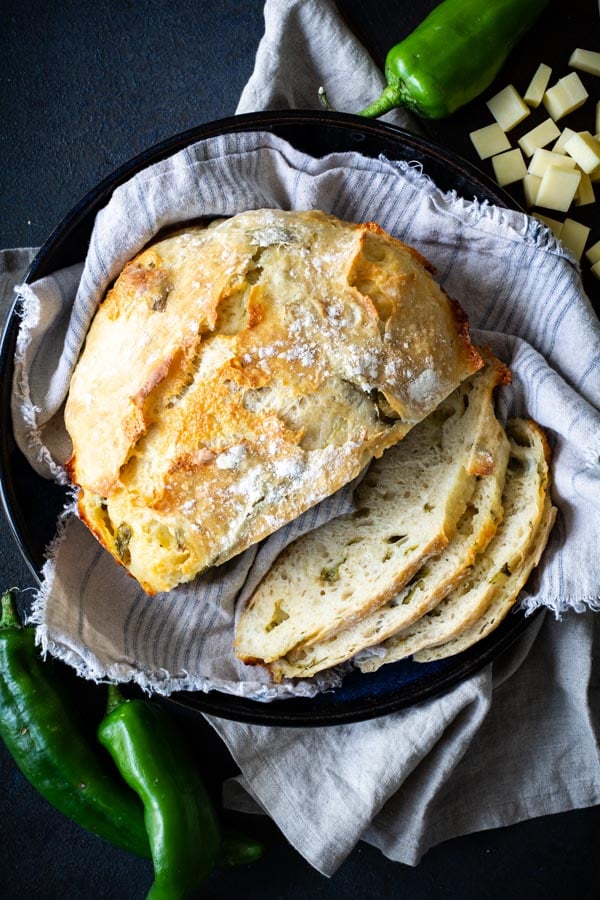
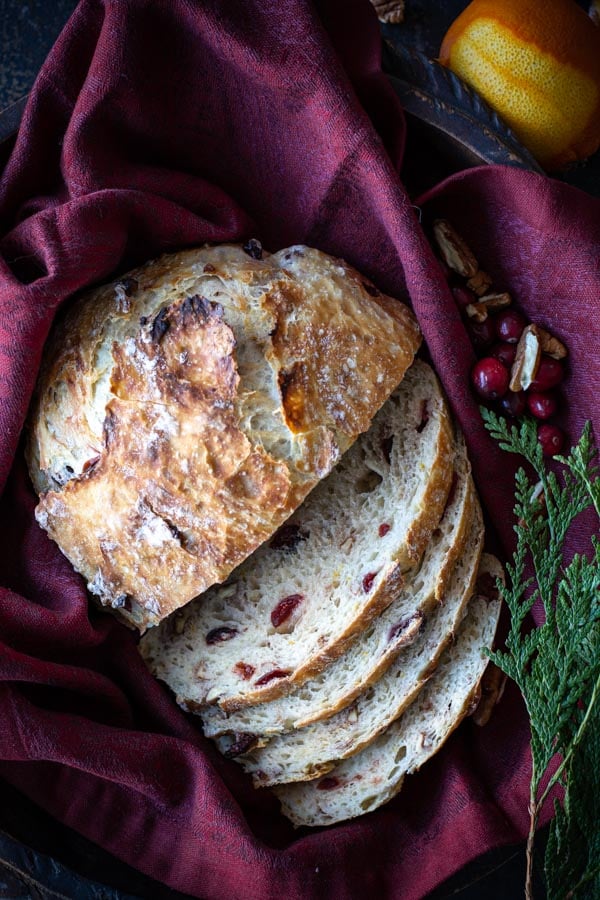









Janet, this recipe is amazing! I can't believe I can bake my own bread and it's better than anything I buy in the store! Here's a post I wrote about my first attempt with it: http://christainnewyork.com/2013/01/07/beautiful-baking-and-breaking-bread-acts-of-trust-and-faith/
This is similar to Cook's Illustrated's "almost no-knead bread", which I just made my 2nd loaf of. One helpful tip from them: after it rises overnight, knead it a few times (10-15), form into a ball, then place on lightly oiled parchment paper to rise for 2 hours (same step as your recipe, except you say rise for 30 min). Once it's ready to go in the oven, you lift the parchment paper like a sling into the dutch oven. No mess!
They also use a bit of vinegar and beer to add a fermented flavor. It's really good! Thanks for this recipe, I'm going to try some of your flavor combos soon!
BTW, have a Wolfgang Puck 5.6 enamel covered cast iron dutch oven, and love it! Found it at TJ Maxx for 49.00. So happy!
Mine turned out awesome!! My son already asked me to make a Rye bread! Thank you so much! Used the parchment paper, and it worked out beautifully!
Hi Janet. Love the bread. Just wondered if you know what happens if you tried to bake it without pre-heating the pot? My 80 year old mother would like to bake it, and I would prefer if she only handles the pot once…when the bread is done. Thanks
Hi,
My daughter just sent me your website link, and I'd like to try your bread. My question is, we "dial down" at night to about 60 degrees. Would this temperature be too cold, to set the bread out overnight?
Thanks,
kathy
Hi, Your bread looks more'ish, I have a vintage Le Creuset lidded (knobless) pot that you would preobably refer to as a double dutch oven that would allow me to use both the lid and the base for bread making.
As this is in storage right now I cannot measure its diameter and wondered could you clarify the size of your Le Creuset as shown in the above recipe in cm's (we don't do quarts in the UK)
I am also in the process of buying some brot forms and am wondering what best size to opt for to use with your recipe and pan size specifically…anyone any idea?
Regards,
Sue
thank you for sharing all of your great success stories. Even the not-so-successful stories. They help us all to create fabulous bread. Keep baking.
I've been making your bread with great success for a few months now. Tonight I am trying half whole-wheat flour, half white flour. I added about 5 Tbl. extra water because it seemed a little too dry. Keep your fingers crossed. Thank you for the recipe, my family loves it.
I've made this several times now- the first time I messed it up by more than doubling the yeast. Oops! But it was still good, it had more of a sourdough flavor, the texture was very chewy & it crumbled more than cut. I've done plain, cheddar, ground flax (actually, I always add the ground flax- 3 or 4 heaping teaspoons of it, it doesn't really change the flavor too much), 5 cheese, and tomorrow's is going to be garlic & chive (to be served toasted with cheddar on top…Mmm!). Since I don't really like a crunchy or thick crust, I don't preheat my dish (I use pyrex casserole dishes with the lids), and when it comes out, I butter the top & bottom for a softer crust all over. My two 1/2 year old will eat it, and that's awesome, because he rarely eats anything- this recipe is also great because he's allergic to eggs & dairy, and goes crazy if we give him anything with added sugar, so I can avoid all of those! Thanks Janet, we love it! <3
OMG, this bread is amazing! I was skeptical, but oh man! My first try and it turned out awesome. I dumped a can of green chilies in it and had some left over velvetta cheese from the holidays and crumbled that in there as well. I could not have gone to the store and bought a better loaf, I loved it
I am anxious to see how the quinoa flour works in this bread. Keep us updated. I have held back in using quinoa flour because it's so expensive.
has anyone tried using Quinoa instead? You can make cake with the Quinoa replacing the flour. will be making a loaf today!
Do not use a Lodge pot for the bread. The enamel will peel off the inside!
I haven't read all the posts so I may be repeating this tip. Damped your pan and shake baking soda on it. Use your finger or slightly damp wash cloth to rub the grease and stuff off your pan. Great for stove top too. Cheap and non toxic 🙂
To make your pots look like new spray oven cleaner on them out doors and leave them over night. Next day it is too easy.
LOVE THIS BREAD!!!! A bunch of us decided on a last minute pot luck so I used the dough setting on my bread machine but baked the bread in the oven. Everyone loved the bread and not even a crumb was left. I use a pyrex dish with a lid. I also use parchment paper in the dish. I am thinking the cranberry, orange, almond as my next loaf. Sounds yummy!!!
mine also says that. I also says to not put it in above 400 degrees. I did try it anyway at 450 ( read the instructions after I made it.) And I put it in empty, it didnt hurt my pot that I can tell.
A million Thank you's to everyone voting for my husband. Happy baking 🙂
Does anyone know if you can use a Calphalon hard-anodized aluminum pan to do this?
I've been 'stalking' this recipe for months. Received a dutch oven for Christmas and this will be the first recipe I try! 🙂 Will keep voting for your husband, and will post back after I bake some bread!!
By the way, I made mine in a Lodge porcelain enamel cast iron pan and had followed the instructions to heat the pan as you indicated (did not see the comments from those who had problems until after I pulled my bread out of the oven. I had no problems but did check the site and it does indicate that you should not head the pan empty.
Just pulled a loaf of this bread out of the oven. It is BEAUTIFUL and smells DELICIOUS! I added garlic salt, onion powder, chopped dried onions, dried parley and colby jack shredded cheese. Can't wait to have it for dinner tonight. I've been baking lots of bread the past few months and was excited to see a recipe where I did not have to pull out my Kitchen Aid mixer. I love my Kitchen Aid but no room on the counter to keep it there and it is heavy pulling it out of the lower cabinet.
To answer the past several quesitons: First of all THANK YOU for your comments, ideas and suggestions and especially for voting for the old hubby. I love you all!!! I'm sorry for the amount of calories you will be consuming after eating this bread. It's amazing.
anon: If you are making a double loaf, you will want to cook it longer with the lid covered. I would use a large pot to spread it out in. I would bake with the lid on at least an additional 5 minutes. I have never tried this, so I hope that's long enough. If all else fails, use and instant read thermometer and stick it into the center of the loaf. If the loaf is baked enough, the temp should read 190 degrees.
anon: I haven't had any problems with any of the parchment I have used. It browns and goes crunchy, but I have never had a fire. That's a good suggestion, however. Best to be safe than sorry.
Krista: I have never used or heard of granite ware. If it can take the heat, I'd definitely give it a try.
Anon: You can make small rolls. You just need a pan large enough or you can try this method: http://simplysogood.blogspot.com/2012/05/another-use-for-no-knead-bread-dough.html
Michelle: You could try putting the dough into your oven with the light left on. My husband goes crazy when I leave lights on and he's has turned the oven light off, when I have been trying to proof dough. I have heard of using an electric heating pad, but you would need the temp to stay around 90 degrees or under. I hope it warms up soon for you.
Happy Baking!!! Happy 2013.
DO NOT use Lodge pot for this bread. It ruined mine. My instruction sheet didn't say you couldn't heat it empty, but when I called (after my pot started flaking) she said you can't. 🙁
I just made this bread with my cast iron dutch oven and aluminum foil (because the knob on the lid can't go in the oven…they melt…weird!). This is a dangerous recipe that will completely ruin my New Year's Resolution plan of losing a bit of weight. The bread is absolutely delicious! Aside from the fact that my loaf is flat, it looks just like yours –browned and yummy. I realized that I used too much liquid. I'll reduce the liquid next time or add more flour. Other than that, it's amazing! 🙂
Janet… I have read and reread this multiple times, went out and bought a lodge brand pan for myself for my birthday present to myself. I finally found time to make the orange cranberry lastnight. I baked it this afternoon and it turned out great. I'm glad I didn't broadcast that I was making bread, because the whole loaf will be gone in the morning after I eat breakfast! Thanks, I can't wait to experiment with other flavors.
I voted for your hubby! Thanks for the recipe!
I have made this several times, always a success! Thank you
Making it today to share with friends at our New Year's Day soup party!
I am having trouble with my bread rising. I think that maybe my house is just too cold, as I had the same problem making refrigerator rolls. They never got nice and fluffy like when my mom made them…..I've tried a table lamp…not enough heat….I wonder if anyone else is having a hard time getting their bread to rise because THEIR HUSBAND WON'T TURN ON THE HEAT???? Of course, suggestions are most welcome. Not to get the hubby to crank up the thermostat….I've tried everything…but for the bread, I mean.
Holy Smokes! Made it! Love it! Thank you! I even voted for your husband too, then noticed that the post is 2+ years old. Hope he got to run!
Hi there, I haven't read through all the posts, so I don't know if anyone suggested this. To clean my enamel coated cast iron pans, I use a Mr. Clean Magic Eraser. Do not "scrub" or press really hard, just gently rub the eraser on the surface of the pan to remove stains and do not use any soap. Wash with warm sudsy water after and rinse. Works great!
Just whipped together the cranberry orange crusty bread…its rising right now and I can't wait to serve it tonight at our New Year's Party. Thanks for the recipe!
This looks amazing..have a question…can this be done in a granite ware small roasting pan?? Thoughts??
To clean the pots. spray with hydrogen peroxide and sprinkle with baking soda… go take a nap… come back and wipe off the mess
This is super. I love making bread and this is the easiest. I am going to make a variation tonight, there are so many different ways to try. Thanks for this recipe. Just love it.
Can you use the dough to make small rolls instead of one loaf?
You might want to check the instructions on your parchment paper before using it for this bread – I have 2 brands: Reynolds brand is oven safe to 420 degrees & Wilton is safe to 400 degrees
Great read. Definitely going to try. Maybe basic variation first. Checked my yeast, and it expired 2 mos ago. (I admit it….dont use it much). How 'expired' can yeast be before it's past its shelf life? Also, are there any 'sweet' variations? I'd love to try cardamom, but would need to add something to compliment. Ideas?
Recipes using yeast usually call for the yeast to be added to warm water. Your recipe doesn't specify warm water so I'm wondering if it matters for this recipe. Can't wait to try this – just got a new dutch oven for Christmas!
Hi, if I double the recipe to make one very large loaf, how long do I bake it?
Answer to Japro question:
I have THOUSANDS of questions. I can't find where you have replied for a question. I have only used Le Creuset pots. My daughter has one from Costco and my son has a Martha Stewart one from Macy's. We have not had any problems with them cracking. I have never used a lodge enamel covered pot. I would follow the mfg recommendations on heating the pot. It's better to be safe than sorry. I have had comments where they have preheated with water then dumped out the water and added the dough. I hope this helps. Send me your email address if you have further questions to get a quick response. It takes me a long time to go through the thousands of comments just so I can reply.
My MIL loves this recipe (found via pinterest) and since all three of her boys do too, she bought all three daughter in laws Dutch Ovens and gave a link to your blog. Just finishing my first loaf. Thanks!! 🙂
Pam: No I did not invent the recipe. It was Jim Lahey.
Anon: I would follow the instructions for your pan from the manufacturer. Just in case. Go with the 400 degrees increase the time with the lid on by 5 minutes, then uncover and bake until brown. That's what I'd do.
i also have a lodge 6qt enamel cast iron,but it says its oven safe to 400f. any thoughts?
Pam
Just curious, did you invent this fantastic recipe yourslf? I experiment all the time. Trying to make my mark. Thanks for this!
I was wondering if I double the recipe like you did, can I make one very large loaf? I am going to try to make a Smörgåstårta (Swedish Sandwich Layer Cake). You might want to look this up, its amazing and looks like a lot of fun to make for a party but you need a very large loaf to make it. Also do you think it could be made as a large rectangle? I'm going to try making the large round one tomorrow, I have a 6.5 qt cast iron enamel pot and hope it will be a taller loaf. I'm letting the bread sit and rise overnight tonight. Wish me luck and I sure would love to know if you know the answers to my questions. If not, I'll let you know by experimenting tomorrow afternoon.
Sounds amazing. I think you would need to bake the bread longer. However, if you have a larger pot and spread the dough out, it may not take additional baking. I would bake the bread longer with the lid on to make sure the bread cooks in the middle. I would think that it might need 5-10 minutes additional baking time with the lid on. Remove the lid and bake until brown. You could always use an instant read thermometer inserted into the middle of the bread. I'm pretty sure it should have a temp of 190 degrees. I hope this helps. I would love to see a photo of the finished product. Best of luck to you.
My father in law recently made this bread for us, one word…. FABULOUS!!!!
The reason so many people ask you the size of your cast-iron pots, is that you still have not put that information in the recipe. That information should appear the first time you show the pot (and again during the step where you put the dough in the pot). Also you should say up front that you do not prepare the baking pot.
First I want you to know I have never, and I mean NEVER, baked a thing in my life. I saw this bread on Pinterest and I had just purchased a new stove & was dying to learn to bake so I thought why not try this bread. I went out & bought myself a Le Creuset Pot with lid like you have (mines only 3 qt) and got to work. Well a week later & I've made 6 loaves, 3 of which I gave as Christmas presents that were Oooohed & ahhhhhed over. I've made white, whole wheat & cheese bread & all have been amazing. Everyone loves it!! Thank you so much for making such an easy to follow blog on this recipe. Its really Bread for Dummies, like me 🙂
My friend baked this bread this morning and it looks beautiful! When the snow here stops flying, I would like to purchase some yeast and try a gluten-free version. I'll let you know how it turns out!
Another good way to clean pots is with a paste of baking soda and hydrogen peroxide. I've had good luck with this "magic" cleaner. I use a scrubby sponge and a bit of elbow grease on the really tough spots. Learned this from Jillee at One Good Thing by Jillee http://www.onegoodthingbyjillee.com/2012/05/new-life-for-old-cookie-sheets-again.html
One day I wanted to make this bread so badly, but only had about 6 hours to let it sit. I used the "quick/rapid rise yeast" instead of the regular kind. It was awesome! The loaves turned out even larger than the other way and the texture and flavor was just like when I did the recipe letting it rise overnight. I am so thankful I found this recipe! Kelly
Thank you Janet this is fantastic…..I made this yesterday and used my Lodge big (Chili) pot with lid or whatever it's called. I was concerned at first if i should grease the pot prior to baking the bread and I didn't, it lifted right out out the pot and OH it was sooooo good.
I'm making two loafs today and will try cheddar/pepperjack and garlic. I only have the one large Lodge pot w/h lid so I'm going to use my crock-pot insert to cook the second loaf.
I'll post to let you'll know how they turn out.
Replies to latest questions:
Jet – Yes, I have tried Vital Wheat Guten. It worked well with whole wheat, the rye was a bit flat, but fabulous tasting.
Anon – follow instructions for your particular pot for preheating.
Thank you for the many creation ideas. They all sound wonderful. If you need a direct questions answered, just send me your email address in the comment. Your address will not be posted. I moderate all comments. Then I can send you an answer right away. Thank you so much for the many ideas and suggestions. happy baking.
Ok. I learn about your blog and recipe through a frien after she saw me posted a picture of my christmas gift from my sister, a casserole. I made one yesterday and couldn't believe it's so easy. And the bread turns out beautiful and yummy. I'm baking another one right now and will get more ingredients from the store later to try out the other flavor. I'm putting my breadmaker away because this is so much easier and better. Thank you so much!!!!!
Hi, I wanted to share my experience. First try, I used my stainless steel pot and even put down some cornmeal on the bottom to lessen the chance of it sticking to the pot. Well it did stick. I actually went out to buy the enamel one since I've been wanting one anyway and tried again. Bingo, the bread turned out lovely. I did increase the water by 1/4 cup more. Can't wait to try all the variations. Thank you for sharing this easy recipe.
Eager to try this out. Just found it from pinterest. as for cleaning your pots, have you tried straight baking soda? It is my absolute favorite new cleaning product that seems to get everything, including long-time crud, off my pots and pans.
It works…I have been making loaves this week to give as gifts…tastes great, the Cranberry Orange smells divine. Thank you so much for sharing!!!
Crud, forgot to ask – have you tried adding Vital Wheat Gluten, especially when playing around with wheat or rye flours, to help it rise? I bought it recently, thinking to use it making traditional wheat bread, but with the simplicity of this recipe, I'm going to experiment after the holidays (when I have fewer witnesses.:D) but looking for input from anyone else that may have tried it already….
Oh my oh my oh my!!! That adage about "if it's too good to be true, it's not" does NOT apply to this recipe! Because that thought kept going through my mind, I've had my enameled cast iron dutch oven for 2 months, worrying that it really couldn't be that easy.
It is!
I worried that my house in northwestern Illinois would be too cold in December since I prefer a cool house (the thermostat doesn't go above 63 and is set at 55 overnight) so my concession was to preheat my over to 145 degrees, turn it off then put the bowl of dough inside – especially since I didn't put this together until 7pm. Next time, I'll be braver and see what happens without using the warm oven. Which will be tonight – my husband and I have eaten half of this warm loaf already and I think I'm going to make a loaf for my son to take with him Christmas day. 🙂
Thank you very VERY much for taking the time to create such a delightful page and share this recipe!
Wow. Amazing. I added rosemary, garlic, dried onion and cheddar to mine and also have a cinnamon raisin one in the oven. My picky 5 year old loves it too! 🙂
My enamel coated cast iron dutch oven (Gourmetliving) says oven safe to 400 degree's. I'm not sure what to do about preheating it. Should I only preheat to 400? Will the bread turn out alright?
Insanely delicious! 35 years ago I was given a heavy Bennington Pottery lidded crock. It set on a shelf but is now my bread pot. perfect.
Oh my, thank you so much for sharing this recipe! We are having great fun wth it. My husband loves to experiment in the kitchen, though he's not a baker. Being the holiday season, I decided to make several loaves of different flavors. The best one…..added 1 cup chopped english walnuts & 1 cup milk chocolate chips. Substituted 1 & 1/2 cups black cherry Kool-Aid for the water. YUM!! I think the kool-aid doesn't need to be quite as diluted as directed for drinking; make it more cherrier! The hubs loves it, says it's a keeper! He doesn't like sweets much so this was great to him. And it's so pretty!!
Thank you for the recipe. Made it last night. I made the mixture around 6:30am let it sit all day until around 6pm. I used active dry yeast that I mixed right into the flour. The yeast was a bit old(but not outdated) but had been stored in a foodsaver packet in the frig. The dough seemed a little loose and I think I will add a bit less H20 next time. I added 5 cloves of fresh chopped garlic and fresh chopped rosemary. The dough seemed to rise OK, not great. Next time I will proof the yeast and add it with the water. I preheated the oven, let the dough rest for about 40 minutes and popped into a 450 oven in a Martha Stewart Creuset look alike. I baked it for 30 minutes and removed it from pan and let it begin to cool on wire rack. The bread did NOT make it thru the cooling process. My son and husband attached it. The loaf came out of the oven and looked beautiful with a nice crispy crust(how I love it) but after sitting for about 30 minutes the crust was really soft. Does this happen to the crust of most loaves? Should I have beaten them off of the bread until it cooled longer? Should I bake it a bit longer? It was a nice light brown color but could have been a bit browner. I love a crunchy crust!! The flavor was awesome! The texture was good, a little dense from not rising enough.
Thanks,
Julie
I just wanted to say thank you so much for this recipe! I have tried make a good loaf of bread on many occasions with not much luck (hand method not processor!). This is the best loaf I have ever made and it will become a regular in my household now, thank you!
Janet I'm so happy! My first shot at bread making and it was a success!
I followed your instructions and read up on many of the comments.
The only thing I did differently was that I skipped the 15 minutes of preheating the oven and threw my dutch oven straight into the oven for 1/2 hour prior to putting in the dough.
It worked! ¡DELICIOSO!…GOOD!..mmm..
I made this bread today and man, was it delicious! Thanks so much for this recipe, it worked like a charm. Never buying bread again! 🙂
My daughter and I love this recipe. She has tried it many ways and it is fool proof.
But…I tried putting walnuts, apples, cinnamon,and a 1/2 sugar. I think the sugar is
what made it not turn out. It rose very nicely, but cooked it over an hour, and it was
still not done, raw on the inside.
What made it do that, was it the sugar?
tThanks so much, Leslie McCalment, lmccalment@yahoo.com
You wanted to know how to get those pots sparkeling. Use easy off stove cleaner on them for about 10 min. Wash with dawn dish liquid to nullify all bad taste etc. Thanks for a new bread receipt.
late to the party here, but I just made this and it was the best damn bread ever. Making it with minced garlic and rosemary to go with lentil stew for a dinner party later in the week. Just divine.
I used an old lodge cast iron dutch oven (3 qt), and it was REALLY rusty, so I followed some internet instructions on reseasoning it. I'm glad I did. I made the first loaf this morning, and am in the process of making two more tonight/tomorrow.
That cast iron thingy that sat in the garage for six years, after only one use, will definately become a new kitchen staple!!
I wouldn't mind a Nice enameled one, but the lodge stuff works beautifully and costs substantially less.
I just made a loaf….amazing. I can't get over how gorgeous it looks, and HOW EASY it is to make!! I gave the first loaf to my bread-snob boyfriend, and he ranked it up with the bakery loaf he "must" have. 😀
Tthank you so much for sharing the recipe, and even more, for sharing the pictures and step by step, plus the comments from everyone.
-A very happy amature baker.
Is it possible to do a sourdough version of this? I made this tonight…first time ever making bread! It turned out great but my husband and I aare both sourdough lovers. What would I need to do that? Thanks!