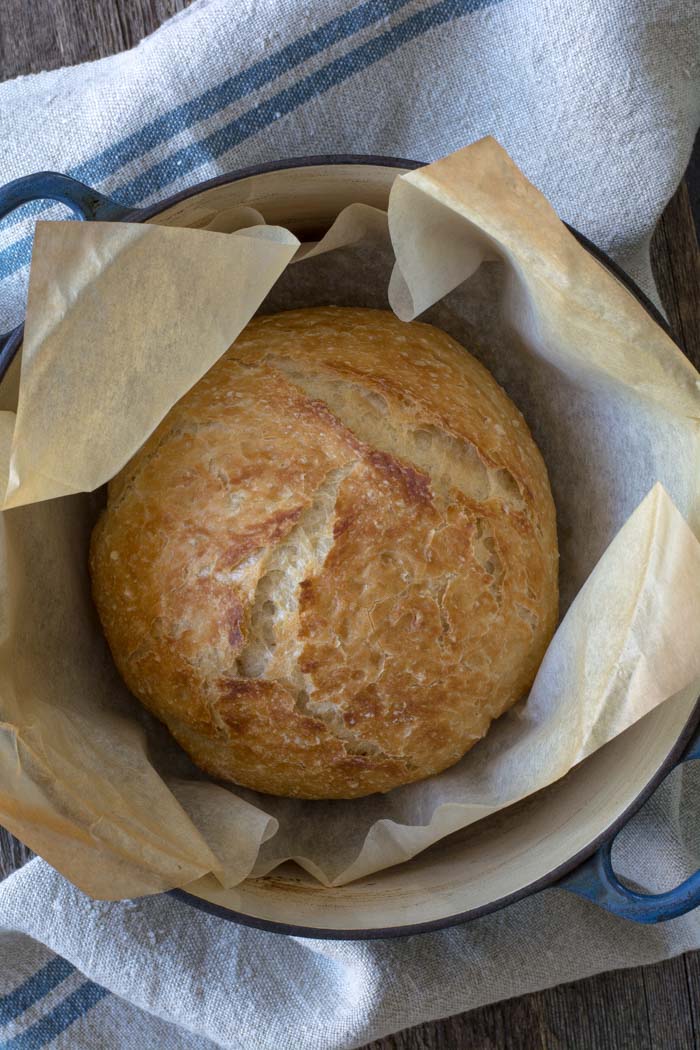
What I love about this bread
- It’s so easy to make. This dough can be made in less than 5 minutes.
- The basic dough recipe can be enhanced with many different flavor varieties.
- Very little hands-on time.
- Crusty bread never ceases to impress family and friends.
- My 12-year-old grandson can make it.
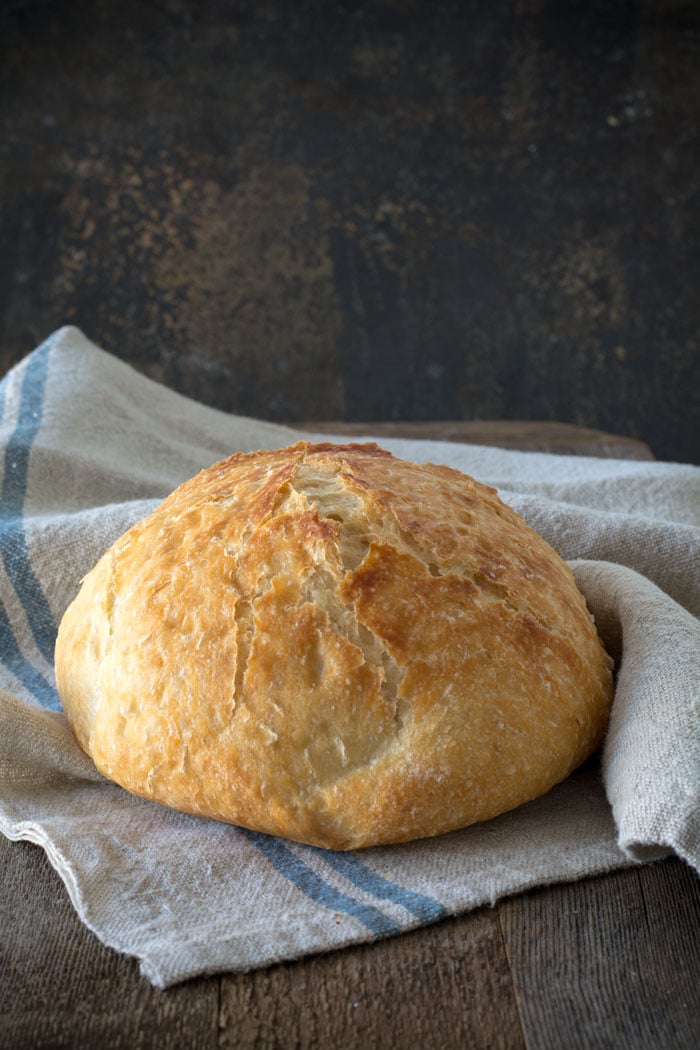
Let’s make No-knead crusty bread:
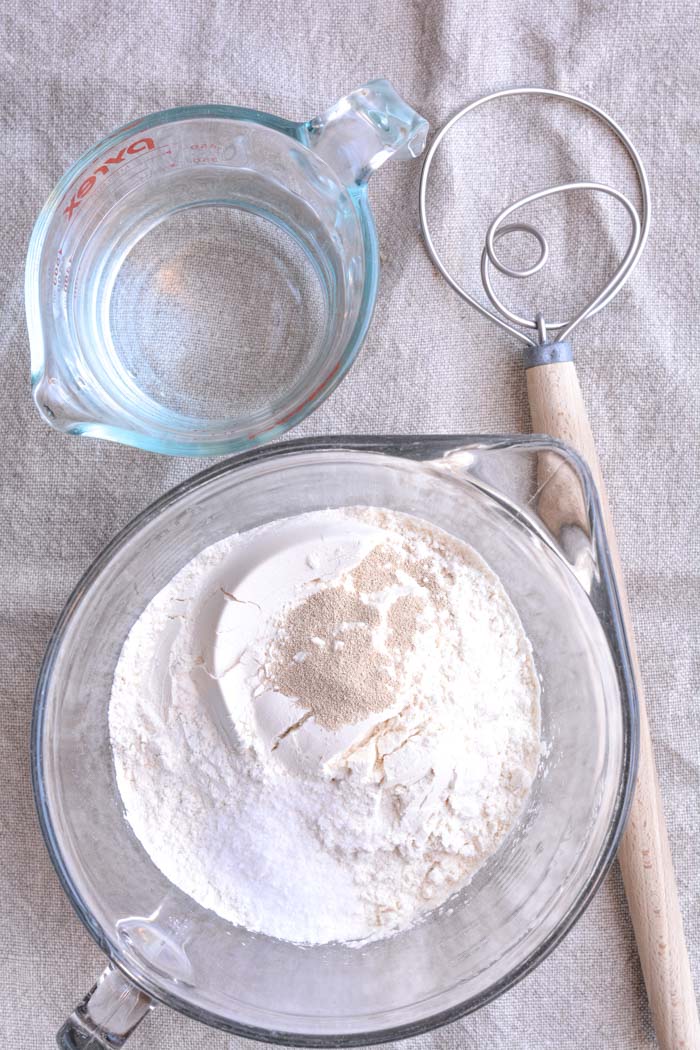
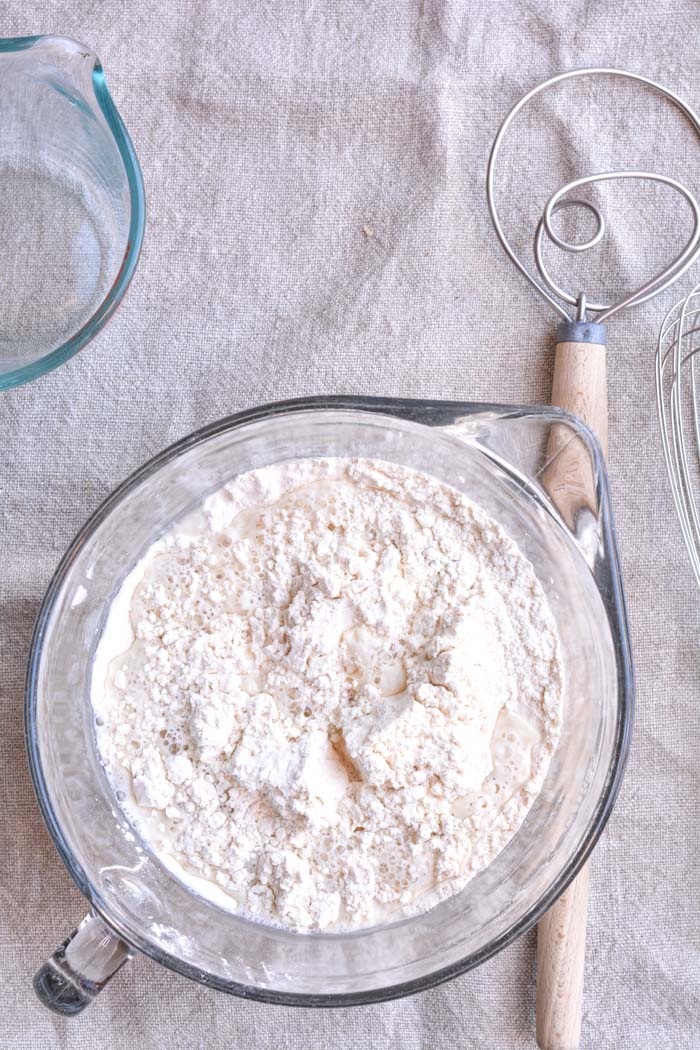
- In a large mixing bowl, add flour, kosher salt, and yeast. Whisk together.
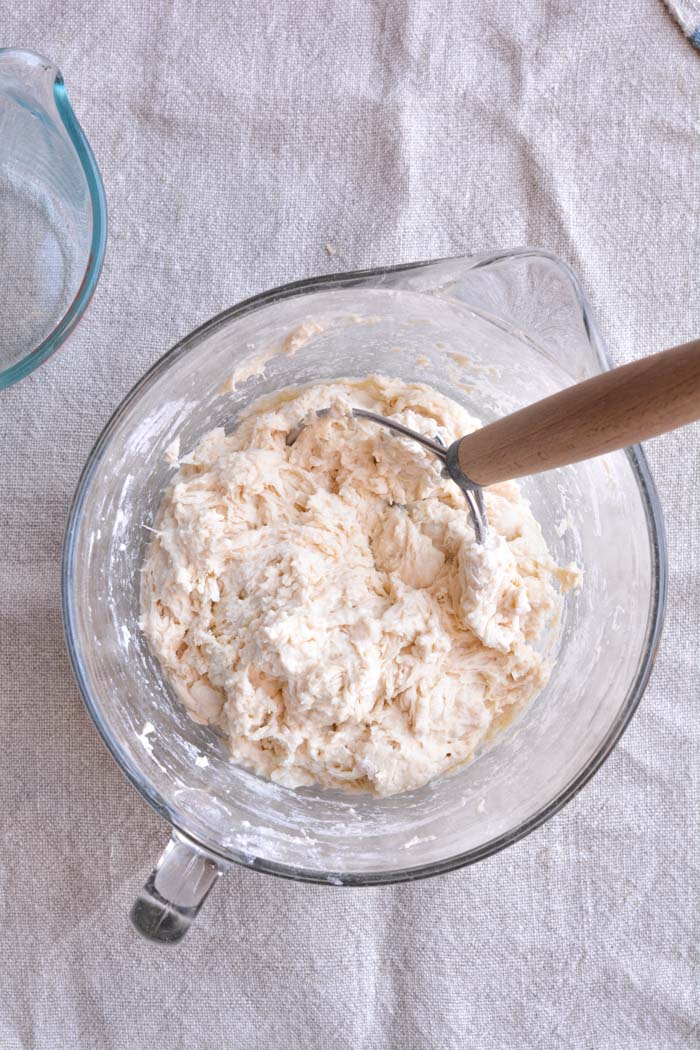
- Add water. Mix just until all of the flour has combined with the water. The dough will look like a shaggy mess. That’s ok.
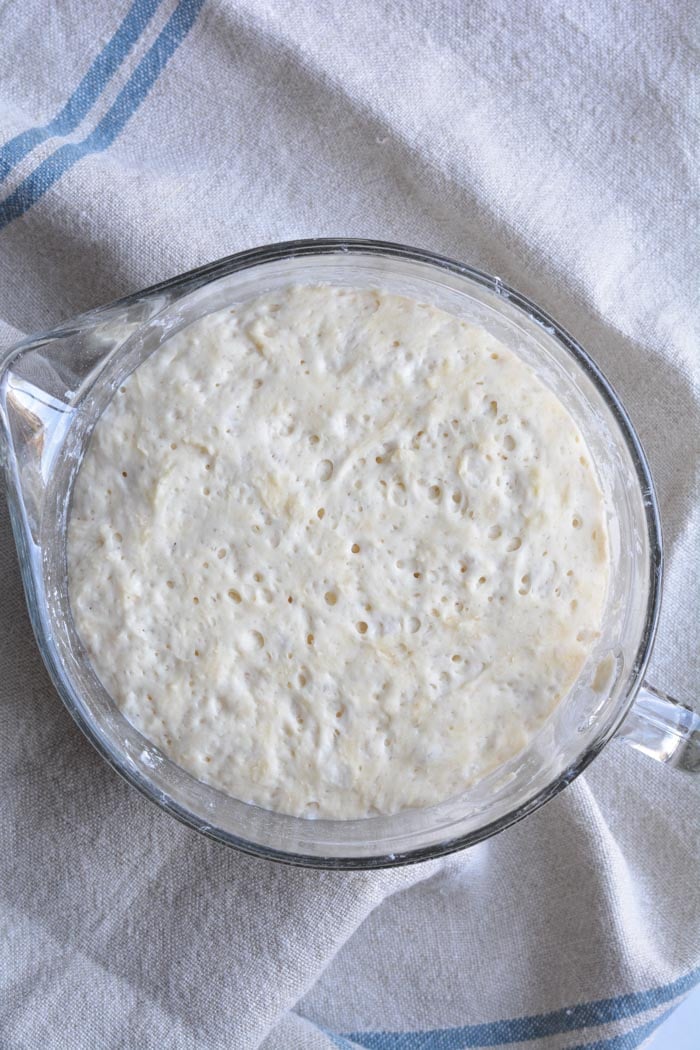
- Cover the bowl with plastic wrap and let it sit for 12 – 18 hours on the countertop. DO NOT REFRIGERATE. This is not optional. It takes that much time to proof the dough. The reason why you need a large bowl is that the dough will start to rise.
- After 12 hours the dough will look like this. It’s pretty sticky, but that’s ok it’s supposed to be.
Shaping and baking the bread:
- Preheat oven to 450 degrees. As soon as it has heated to 450 degrees place your pot with the lid in the oven and preheat the pot for 30 minutes.
-
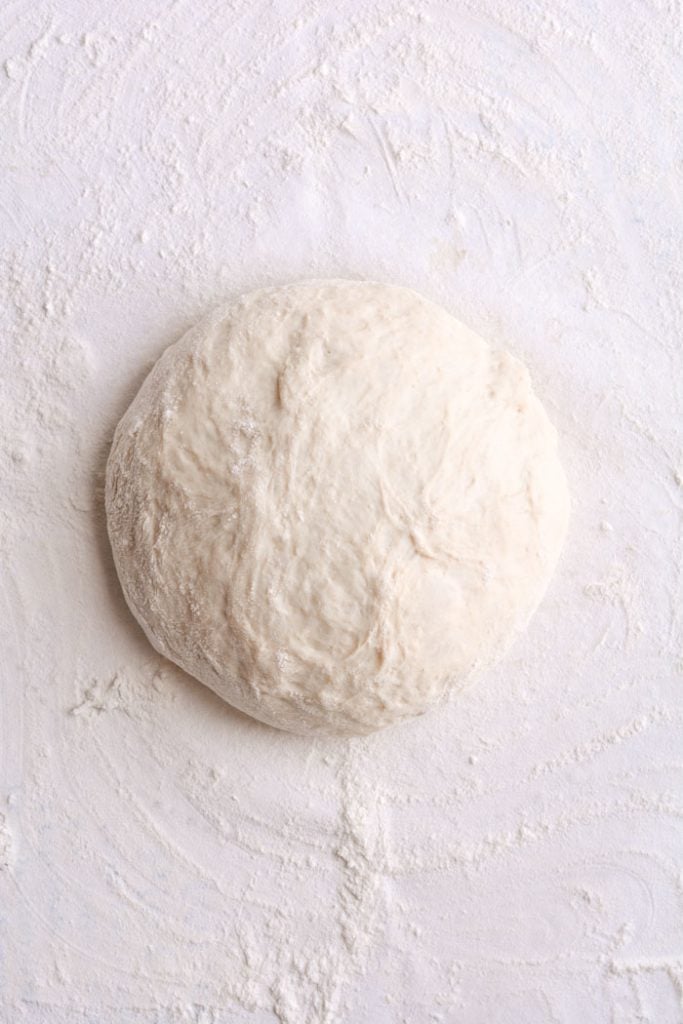
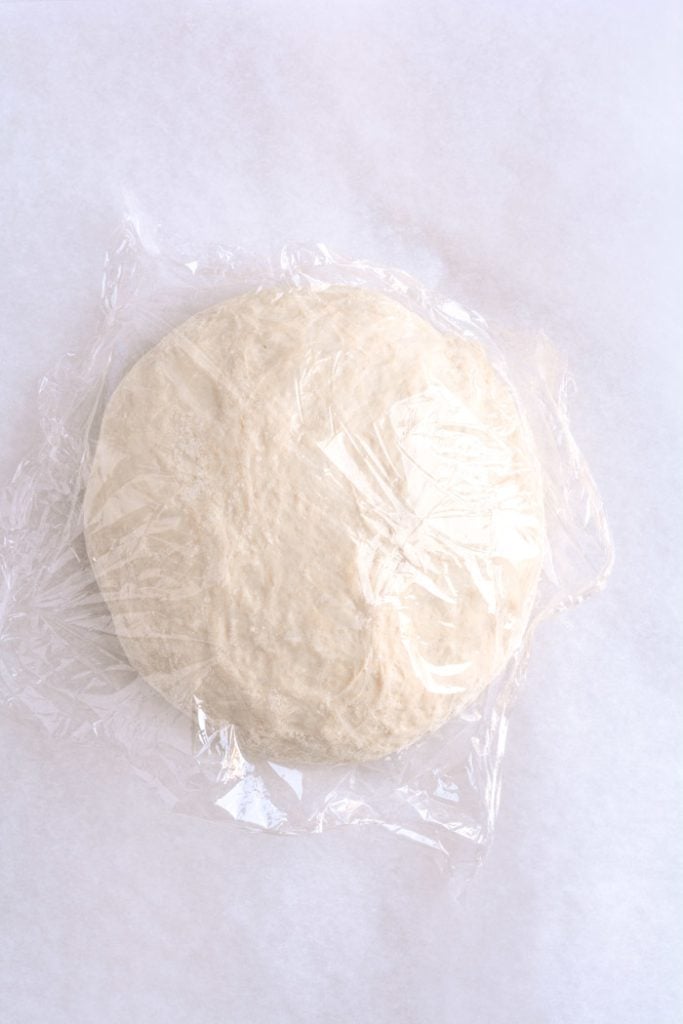
Right after you put the pan in the oven to pre-heat, dump the dough out onto a HEAVILY floured surface. Shape it into a round ball and place on a sheet of parchment paper. Parchment makes it so easy to transfer the dough into a hot pot and then remove it after baking. The parchment paper stays in the pot. This will rest for 30 minutes while the pan is heating. Cover with plastic wrap. Note: Use silicone coated parchment paper. The regular non-coated paper will stick terribly. Don’t chance it.
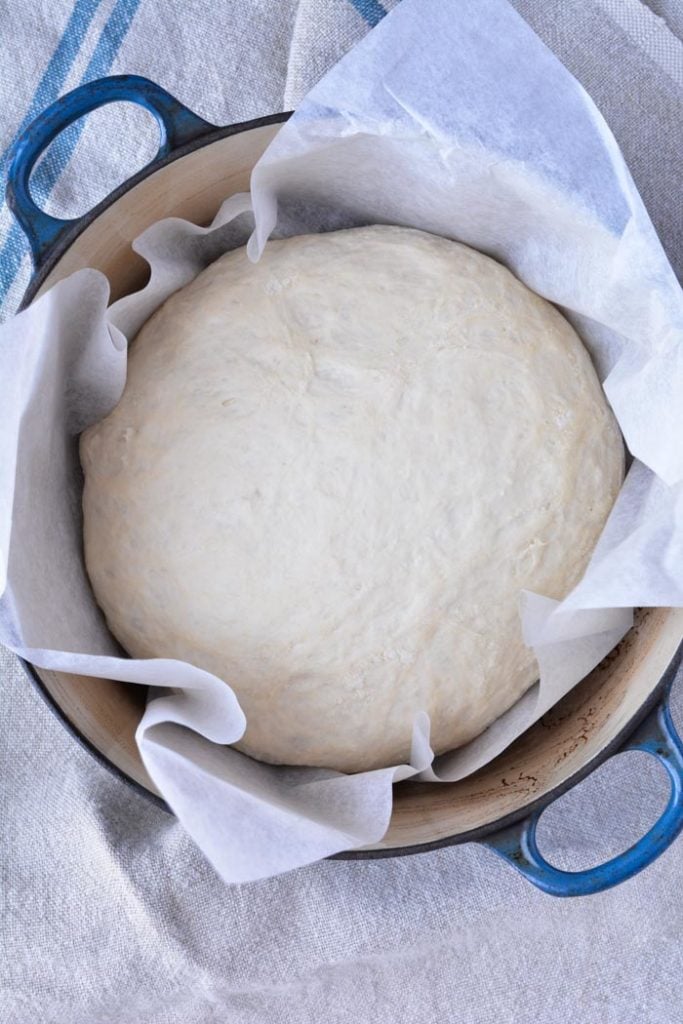
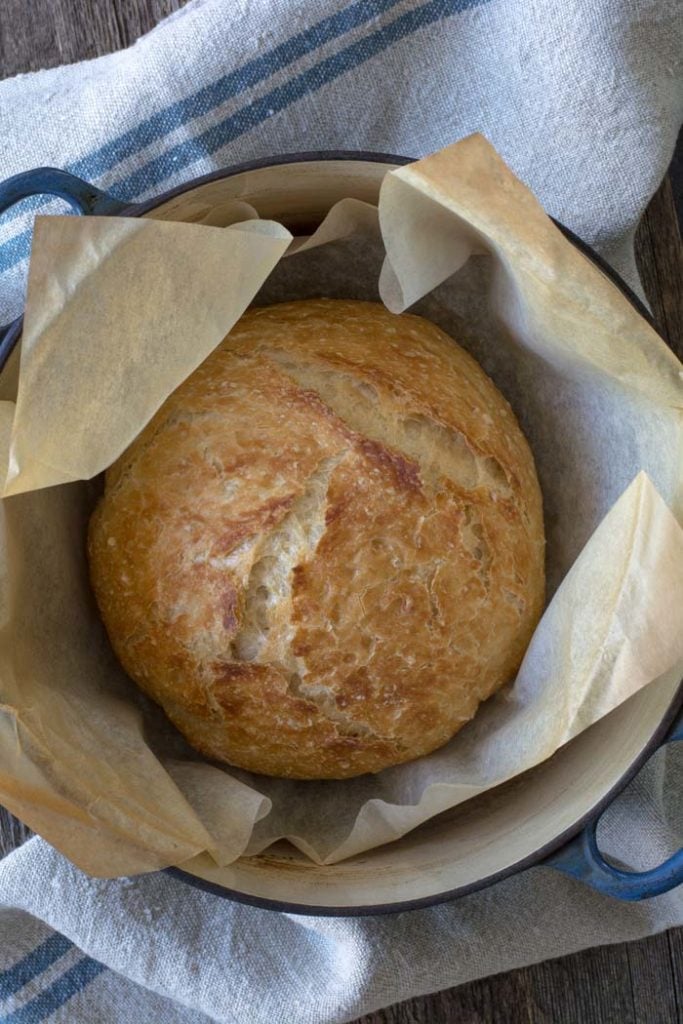
- Remove pot from the oven and carefully pick up the parchment and drop dough into the pot. Be careful the pan is HOT. Put the lid on the pot and return it to the oven for 30 minutes.
- After 30 minutes remove the lid from the pan. Bake for an additional 15 minutes or until nicely browned. You can test with an instant-read thermometer to make sure the bread is fully cooked on the inside. The temp should be between 190F and 200F degrees. Remove from the oven and carefully remove bread from the pot by lifting the edges of the parchment paper.
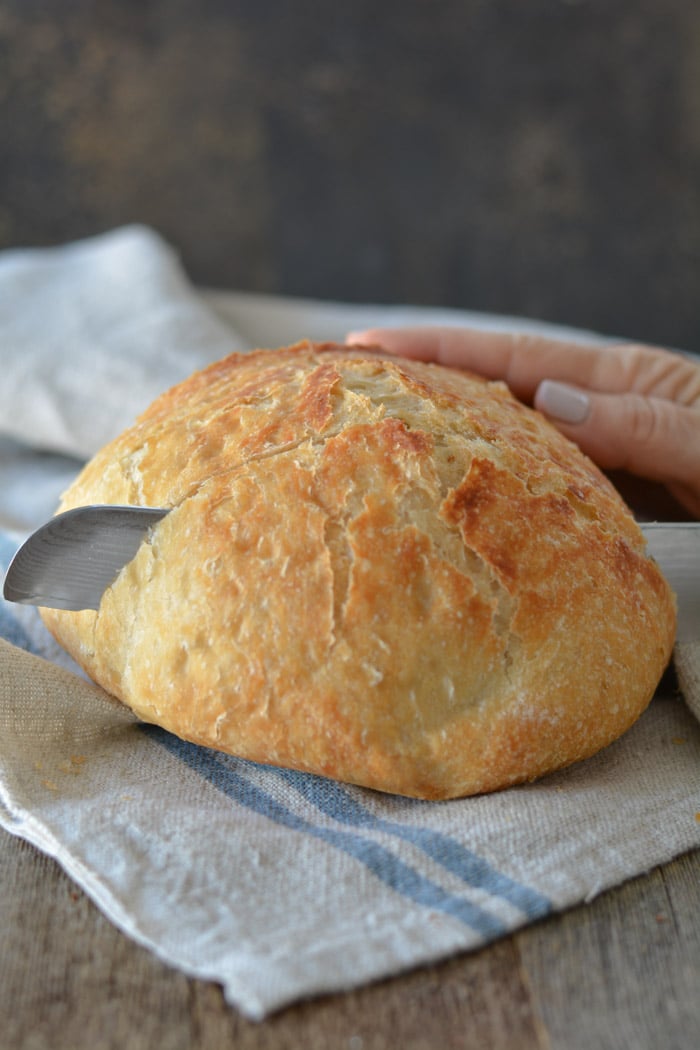
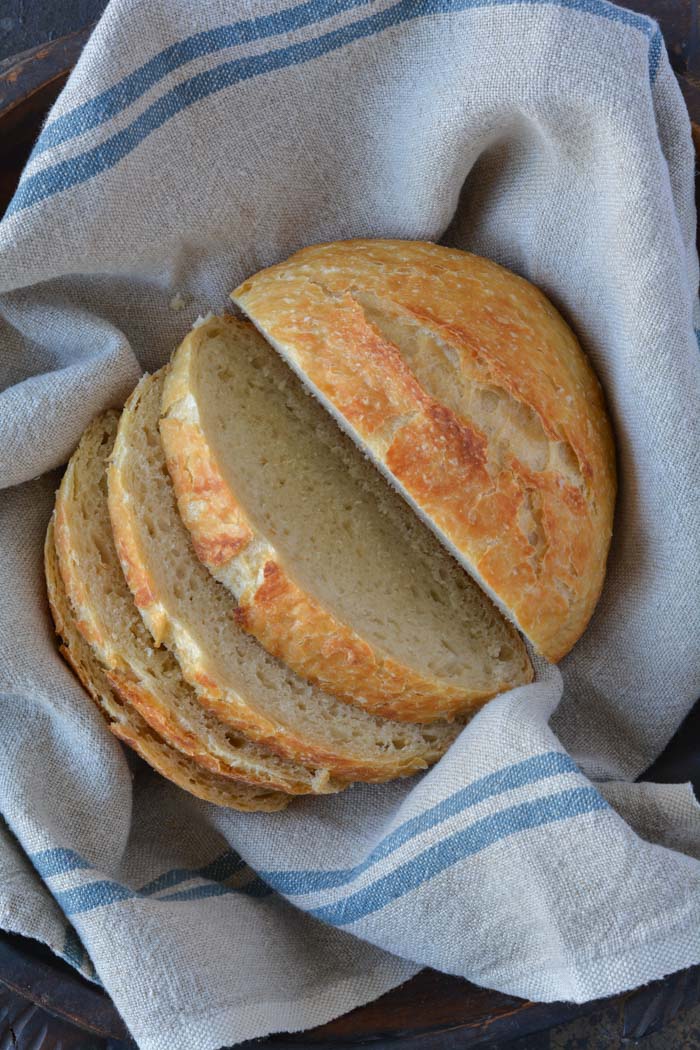
Holy cow! Can you believe how gorgeous that is? It’s best to wait for the bread to cool before slicing. Because I love warm bread I sliced it right away.
FAQ’s
Q: Do I have to use an enamel covered cast iron pan?
A: NO. You can use anything that can take the heat. The following have been used that I know of:
Clay pots with lids, Pizza stone with a bowl to cover the bread, insert from a crockpot, pyrex baking dish with a lid, stainless steel pot with a lid, baking dish covered with aluminum foil, old cast iron dutch oven.
Q: Do I have to use unbleached flour?
A: I always use unbleached flour. You can try bleached flour.
Q: Can I use self-rising flour?
A: I don’t know. I would just stick to all-purpose.
Q: What size is my pan?
A: My smallest pan is 5.5 quart. You can use as small as a 3 quart.
Q: What type of yeast do I use?
A: I use SAF instant yeast. Any yeast should work.
Q: Why is my bread turning out flat?
A: You could try using less 1/4 cup less liquid. Or add 1/4 cup additional flour. Make sure your dough appears to be dry when you first mix it. It will have more moisture during the rising time.
Q: Can my dough sit out longer than 18 hours? Does it HAVE to be between 12-18 hours?
A: I have let some dough sit as long as 24 hours and the bread was beautiful.
Q: Have you tried Gluten-free?
A: From what I hear the best GF is from King Arthur Flour https://shop.kingarthurflour.com/items/gluten-free-measure-for-measure-flour-3-lb
Q: Do I have to grease or oil the pan? Will my breadstick?
A: No you don’t need to grease the pan. I have never had the bread stick when using a cast iron pot. I haven’t tried anything else. The best way to be certain that the bread won’t stick is to form the loaf on a sheet of parchment paper and lift the bread into the pan using the sides of the parchment. Leave the paper in the pan. It’s won’t burn. When the bread has baked, just lift the sides of the parchment out of the pan. Voila! HOWEVER: Not all parchment paper is created equal. I use a silicone coated parchment paper. Regular parchment paper can stick something terrible. Don’t chance it.
No-Knead Crusty Bread
Wonderful yet easy artisan bread with a crisp crust. Prep takes just a few minutes with an overnight rise. Baked in a pot with a lid to create a steam oven. Bread can be made with many flavors and variations.
Ingredients
- 3 cups + 2 tablespoons unbleached all purpose flour (450 gr)
- 1 3/4 teaspoons Kosher salt (10 gr)
- 1/2 teaspoon Instant or Rapid-rise yeast (3 gr)
- 1 1/2 cups water cool (315 gr)
Instructions
-
In a large mixing bowl, whisk together flour, salt and yeast.
-
Add water and mix until a shaggy mixture forms.
-
Cover bowl with plastic wrap and set aside for 12 - 18 hours. Overnight works great.
-
Heat oven to 450 degrees. When the oven has reached 450 degrees place a cast iron pot with a lid in the oven and heat the pot for 30 minutes. OR pot can be placed in cold oven while oven is preheating leave in oven for 30 minutes.
-
Meanwhile, pour dough onto a heavily floured surface and shape into a ball. Cover with plastic wrap and let set while the pot is heating.
-
Remove hot pot from the oven and drop in the dough. Cover and return to oven for 30 minutes. After 30 minutes remove the lid and bake an additional 15 minutes. Remove bread from oven and place on a cooling rack to cool.
Recipe Video
Recipe Notes
FAQ's
Q: Do I have to use an enamel covered cast iron pan?
A: NO. You can use anything that can take the heat. The following have been used that I know of:
Clay pots with lids, Pizza stone with a bowl to cover the bread, insert from a crockpot, pyrex baking dish with a lid, stainless steel pot with a lid, baking dish covered with aluminum foil, old cast iron dutch oven.
Q: Do I have to use unbleached flour?
A: I always use unbleached flour. You can try bleached flour.
Q: Can I use self-rising flour?
A: I don't know. I would just stick to all-purpose.
Q: What size is my pan?
A: My smallest pan is 5.5 quart. You can use as small as a 3 quart.
Q: What type of yeast do I use?
A: I use SAF instant yeast. Any yeast should work.
Q: Why is my bread turning out flat?
A: You could try using less 1/4 cup less liquid. Or add 1/4 cup additional flour. Make sure your dough appears to be dry when you first mix it. It will have more moisture during the rising time.
Q: Can my dough sit out longer than 18 hours? Does it HAVE to be between 12-18 hours?
A: I have let some dough sit as long as 24 hours and the bread was beautiful.
Q: Have you tried Gluten-free?
A: No. I'm still waiting for someone to venture into the realm of Gluten-free. If you try it, let everyone know.
Q: Do I have to grease or oil the pan? Will my breadstick?
A: No you don't need to grease the pan. I have never had the bread stick when using a cast iron pot. I haven't tried anything else. The best way to be certain that the bread won't stick is to form the loaf on a sheet of parchment paper and lift the bread into the pan using the sides of the parchment. Leave the paper in the pan. It's won't burn. When the bread has baked, just lift the sides of the parchment out of the pan. Voila! HOWEVER: Not all parchment paper is created equal. I use a silicone coated parchment paper. Regular parchment paper can stick something terrible. Don't chance it.
More Notes:
Regular active yeast can be used in place of the instant or rapid-rise yeast. It will need to be activated in 1/4 cup warm water. Stir and let sit for 5-10 minutes. However, most of the comments I have received state that the rapid raise works the best. You choose. Whisk the flour, salt, and yeast together.
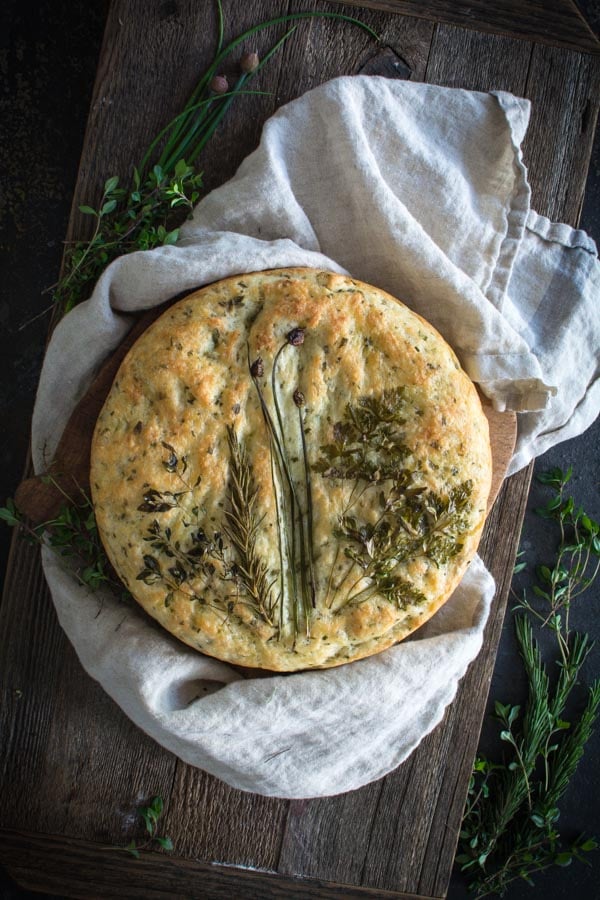









Can you use Masai corn flour instead of all purpose flour? I just mixed a batch half Masai half all purpose and added fresh tyme rosemary and chivess from my garden
I did not read all the comments so I don't know if you've cleaned your pots. But I do mine by soaking them in boiling water with oxiclean and Dawn dish detergent for an hour. Then I gently scrub the marks with a Mr Clean sponge and they are good as new. Hope this helps!
I always use Kosher salt. The original recipe I have doesn't specify. You are right regular table salt would be less.
Your recipe doesn't specify: Is the 1-3/4 tsp. salt a measurement for kosher salt or regular salt? If the measurement is for kosher, less table salt is required? My bread machine died while making this morning's bread, and I'm ready to start your bread today.
You were inquiring about how to clean your dutch oven? I used the magic eraser and got the stain all off of the outside of my pot. Don't know if it matters how long it's been on there but it's worth a try!!
Keep you wonderful ideas and mix-in's coming. I love to hear about your bread creations. Happy baking.
Oh you just mad my heart so happy. What a great friend you are. This recipe is so simple and makes a great gift or thank you.
I have made several varieties of your bread and now want to use garlic. Do I roast the cloves first? If so, how do you do that?
I would definitely roast the garlic first. Her is a link you can follow to roast that garlic. http://thepioneerwoman.com/cooking/2008/05/how-toroast-garlic/
good luck
I am making this today with freshly shredded gouda and rosemary.
I am making it today with smoked gouda and rosemary!
Turned out great for me but I might need to cut back on the water a little. A couple of points for the ones that this did not turn out for:
1. Weigh your flour – if 3 people measured a cup of flour each one would hold a different amount.
2. Use warm water between 100-110. Cold water kills yeast.
I'm thinking some finely chopped onion, dill weed and dill seed with some shredded asiago. Another batch would have chopped sundried tomatoes with chopped olives. I need to get a dutch oven, quick!
Hi there – I picked up a less expensive version of the pot you recommended and when I got home noticed that the pot can only be used in temperatures up to 425. Being a novice baker what would you recommend the baking time be adjusted to?
Keep the time the same. If after 15 minutes the bread isn't as golden brown as you would like, just add on a few minutes until it reaches the golden brown you would like.
Try this to clean your cookware – I have used this on the racks for my stove, pots, frying pans, etc. It always works, with just a little elbow grease at the end.
Fill your sink with the hottest tape water possible
Add 1/2 cup salt
Add 2 cups Water Softener
Add teaspoons liquid dish detergent (I use dawn)
Mix everything together and place your cookware and let it soak a good hour. Then using the scrubber side of a sponge, scrub off the baked on ick.
Good luck
Amazing !!! I have been making bread for years with my main goal being to achieve a sour dough type bread. Crusty,chewy & moist. I bought sour dough starter, I even made sour dough starter and I tried every recipe I could find with no luck. I have tried making dough using my mixer, my food processer and even a bread machine. My breads were always good but never what I was looking for. When I saw your recipe on pinterest I was very doubtful but had nothing to loose. With every step I said to myself, "This will never work", even when I took my first bread out of the oven and it looked perfect I was sure it wouldn't taste good. Well,I was wrong it was great !!! I just made my third loaf, making sure the first two weren't a fluke and it was wonderful !!! Crusty, chewy & moist.
Thank you, thank you, thank you
I was thinking about buying a bread making machine, but I'm going to try this recipe out first. Thanks so much for sharing!
I was thinking of buying a bread making machine, but I'm going to try this recipe first! Thanks so much for sharing.
Hello — Not sure if you are still looking for a way to clean your blue "babies"… if you still are — I just found this way. I put them in my oven and pushed the "clean" button on my self cleaning oven. I actually did this by accident (forgetting they were in there). They came out almost brand new! Both the discoloration on the outside of the pot and the inside, clean up so pretty! (Like you – everything in my kitchen is heavily used!) By the way, your bread looks fanastic!!!
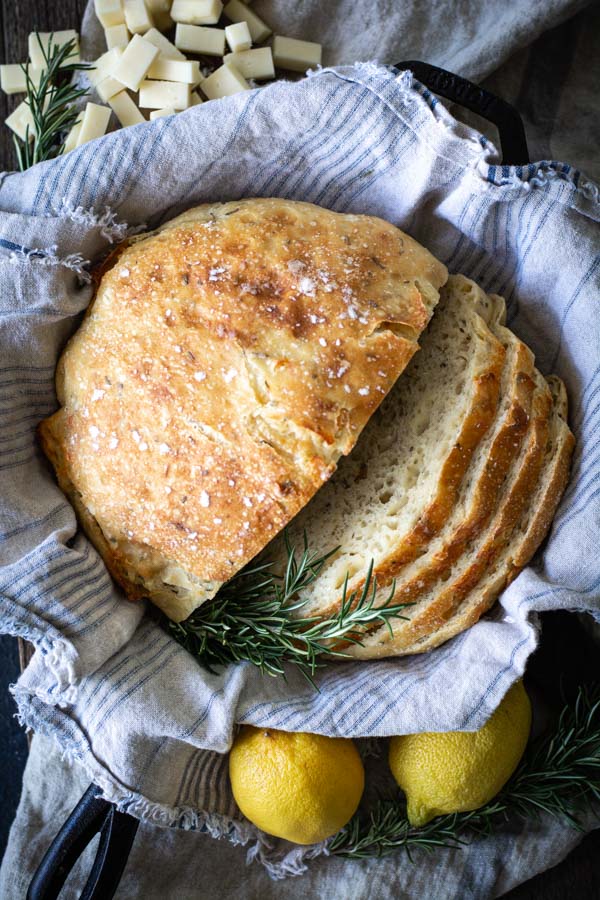
Thank you for this recipe. I borrowed my daughter's cast iron chantal pot and it worked great for cranberry walnut (don't love almonds) it was fantastic – have made it 3 times now. I have the gruyere, rosemary, lemon sitting on the counter to be cooked tomorrow. Can't wait!!
Hi… am making this bread now…. fingers crossed 🙂 just a comment to annonymous……..THIS BREAD RECIPE WAS NOT DISCOVERED 2 YEARS AGO.. It is an old eastern european recipe (Polish and German) which has been around for centuries. Actually saw it as well on hairy bikers program Baking around europe and when they were in Germany one bakery that has been in operation since the late 1800's showed how they make this bread (they keep it in the fridge)… So annonymous do some research before you wag your tongue 🙂 Happy baking people ……..
Add about 1/2 cup raisins and 1 teaspoon of cinnamon. It's divine. You can scroll through the comments to find out many different ideas for adding new variations to your bread. There are some fabulous creations there. The sky is the limit.
I'm in the process of deleting older posts due to the fact that many people are having a hard time loading all of the comments. I have found out that most people aren't reading the comments, due to the number of questions asked over and over again. I don't mind answering all questions, but most people aren't able to get to the comments reply for the answers. I'm trying to update the comments and put of a FAQ for this post in between my daughter being home for engagement photo's, wedding planning and all the wedding stuff. So sorry. No offense against any comment. I have over 1300 comments that I have to scroll through to make reply's.
Just made a trial loaf in my stainless steel pot had no sticking at all!!! Needless to say my 6 daughters were waiting when it came out and the loaf was gone in 5 minutes I'm going to try making cinnamon raisin tomorrow and garlic parm 🙂 love it!! Thank u for sharing
I tried to scan the comments so forgive me if this has been asked. Can you use bleached flour or does it absolutely have to be unbleached? I can't wait to try this!! I bought a 5 1/2 quart cast iron pot just for this recipe! I've never owned one before and I'm soooo excited to try this!! I buy flour by the 25 lb bag because I love to bake but it is bleached. Thanks so much for this recipe. I also got it from Pinterest. 🙂
Amy
I do not have an enamel covered cast iron pan. I do have the basic black cast iron pot with a cast iron lid just like the usual frying pan. Do you think this would work without sticking, or do you think I should Pam it? Have you ever used self rising flour?
You do NOT have to have an enamel covered cast iron pan. You can use pretty much anything with a lid. I haven't had problems with the dough sticking, although a few have. I have never tried using Pam. I have tried parchment paper and it works like a dream. I have never tried using self rising flour. Just stick to all-purpose flour.
If I may ask, why have so many of these posts been removed?
I'm in the process of removing older comments. It has nothing to do with anonymous or not. I have over 1300 comments so I'm trying to make it easier for responding and finding the answer to any questions. That's all. I'm just trying to do a little clean up.
I hate to leave a comment as anonymous as it appears they've all been removed. That being said, this looks AMAZING. Definitely a try it soon recipe. Thanks for posting and extra thanks for all the pictures. I like to "see" what food is suppose to look like! LOL!
I too made this bread, what a simple delicious treat. Thanks for sharing…..susan
Wow stumbled upon this recipe yesterday and started my dough after work. Baked it this morning between getting back from the gym and going to work and it is amazing!! making more tonight 🙂
I am paleo so I wonder if you can sub the flour for coconut flout or a nut flour. If so I would attempt to make it.
An easier way to transfer the bread is to place parchment paper underneath the bread and use the paper as handles to lift the bread into the hot pot. Place the lid on and bake as normal. When done, use the paper handles to remove the bread to cool. Cook's Illustrated used this in an article a while back. Easy peasy, lemon squeezy!
Oh, my goodness!!!! I've made homemade bread for years, but it never had that lovely sour-dough taste, or the chewy, crispy crust, and it was a whole lot more work than this! I just tried my first plain loaf, and I am in love! Tonight will be starting a new different one. Thank you so much for this post and recipe – thanks to you, I may never buy bakery bread again! So wonderful!!!
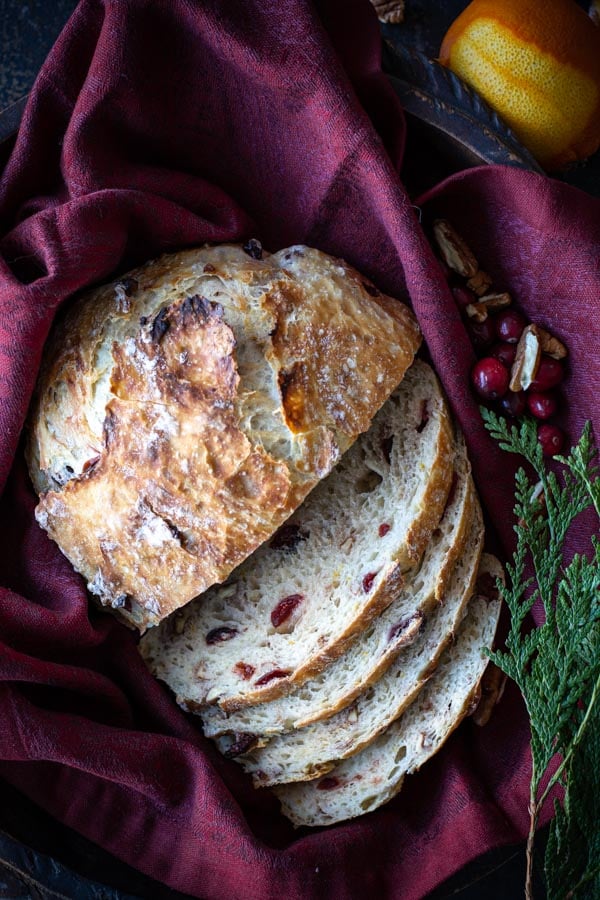
WHOA. This has to be the most DELICIOUS bread I have ever, EVER made. It turned out perfectly in my covered clay pot. Love it! I used your idea for cranberries and orange, but I will be making a new loaf this week in a totally different flavor. I love your detailed descriptions and beautiful pictures. Thank you!
Love this! So easy and delicious! Thanks for helping me conquer my fear of yeast! lol 🙂 I'm thinking I would really love to try one with brown sugar, cinnamon and raisins. Will the brown sugar mess with the yeast?
~Tiffany
My wife made this last night, I couldn't stop eating it. I left my diner set until i had my fill of this wonderful bread. Thank You! Thank you to honey! I really enjoyed it.
Thanks so much for posting this recipe. I have been trying to make homemade bread for my son, because he can't eat corn or soy. He is one and a half and I have finally found a bread that I can make that turns out. Thank you so very much! My son loves your bread as does my whole family!
This bread is incredible! I have never baked one loaf of bread in my life and in the past 5 days, I have baked two of these gems! The first one I tried plain and it was delicious. The second I added a cup of shredded sharp Vermont cheddar. It was even better. Can't wait to try the orange and cranberry next week. Thank you for sharing!
I have a suggestion for cleaning the pots, make a paste of water and water softener powder (not borax, its not the same, no matter what the box says), anyway make a paste, smear it on let stand till it dries then scrub with a brand new wet greenie scrub pad – or equivalent, something that wont damage the enamel. make take a few iterations. can't wait to try this bread, looks awesome! – lisa b
Wow! Thanks so much for this recipe! It's brilliant! I just cut a piece and slathered it with butter- delicious. My only issue is that I have an old gas oven and it burnt a little on the bottom. I might try a slightly lower temperature next time. How good would these be as gifts? I would have easily paid $4 – $5 for these at the artisan bakery near where I live. It's going to save us a fortune! 🙂
Add me to the list of grateful readers. I am probably the last person in the world to hear of this but better late than never. I've passed this along to my sister in Saskatchewan and we are both baking bread like crazy with all sorts of variations. Thanks for posting this – I can't believe how much money we're saving and how proud I am.
share some of your variations. I've read the whole post and recorded all the options (there are 34 so far), so when fall comes I'm going to bake every day.
Mine turned out wonderful. It was all thick crusted and delicious looking. We took a bite and it was great… but then, we took another and it was soooo salty. I could barely eat any of it. I double checked the recipe measurements that I used and it was the same. Weird.
Now that I'm so happy abouot this bread…how do you store it? In a plastic bag? Foil. I want it to stay crispy. And now I need a raisen bread reciipe for this bread. Thanks, Melinda
OMG!!! I'm shocked!! I have made the most beautiful bread of my life. It's perfect!!
Thanks so much for sharing. Now I'll try diff kinds for fun. And I love my Le Creuset.
Thanks so much again. My husband loved it. Melinda
I can't get the "load more" feature for the comments to work. I'm just wondering if I can use a camping dutch oven for this.
I love this bread, it is always a hit at my house. The only problem I am having with it is in the texture. In your picture when you dump the dough out onto the floured pastry cloth, it holds the round shape. My dough just spreads out, and the eventual loaves (while delicious) don't have the height that yours do. I have tried letting it rise for different amounts of time but it doesn't seem to make a difference. Any suggestions?
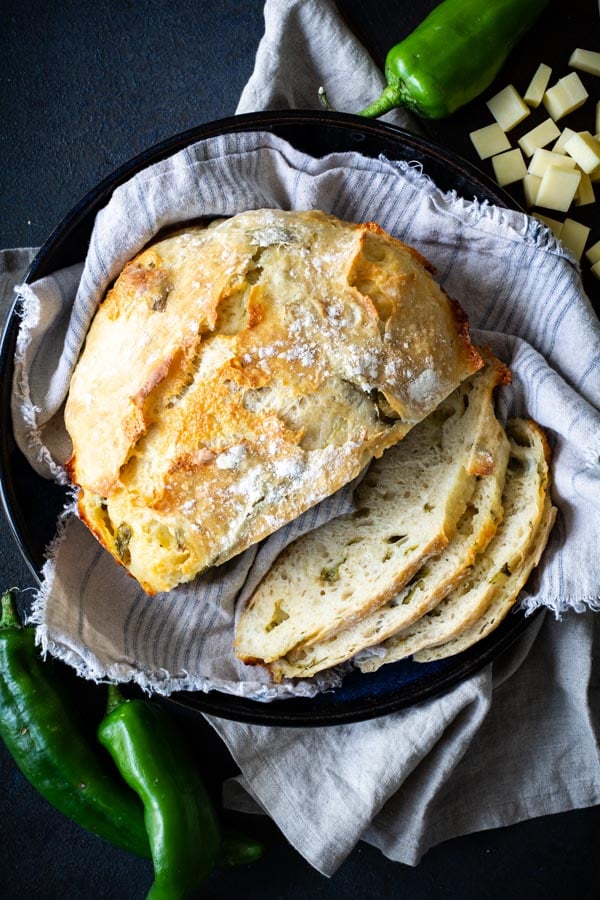
I love this bread and the ease of preperation make it a winner. I will be forever grateful for this blog and all the wonderful step by step photos. Today is Cheddar Jalapeno and it rocks!
All went well until it came time to shape in a ball. My dough didn't want to stay shaped. Was it too wet.
Anyway, I continued the process in my corning ware and the bread came out perfect although a little flat – a little less than 3 inches high. How high should the bread be.
Question, when you say shape, but not knead, how much extra flour do you mix in?
Seems just dumping it on the floured cloth and positioning into a ball doesn't really make it look like yours, and when cooked it didn't really rise any. Was still very loose when it went into the oven.
I make a very similar recipe that is great but I just might try your your additions!
To clean your pots you should have success with "Bar Keepers Friend." It is similar to cleanser and great on stainless steel pots and pans and I also use it on my cast enamel cookware. Wal Mart sells it and it is inexpensive!
Magic Erasers work great cleaning off Le Creuset, and they don't damage the finish!
I made this bread over the weekend and it was absolutely delicious! Thank you so much for posting the recipe. I baked it in a 6 quart Magnalite roaster and it came out beautifully….my husband just couldn't get enough of it so I am making more tonight…thanks again!
– Yes, you can use a regular camp dutch oven. They work great.
– I have not tried a gluten-free version.
– Way to go making this in a camp trailer. That's just amazing. My husband wants to try it on a boy scout camp in a dutch oven and hot coals. I think it will work.
– Keep up the awesome baking.
I wonder if there's a gluten-free version of your recipe?
I've just had my first slice,so yummy. Love the chewy crust along with the lovely soft texture of the bread. Thank you so much Janet, next will be cheese and bacon, which is very common in Australian bakeries, but one I've not seen here in the US.
Followed your directions to the letter and it came out perfect! Rave reviews! Let me add I did it while camping in a travel trailer! It was so easy! Thanks for sharing, can't wait to try different flavors!
This looks and sounds incredible. I'm going to try this recipe while I am off over the next few days for the July 4th holiday.
Can you use a regular cast iron dutch oven? Like ones you use when you're camping?
I do NOT grease the pans. I have never had problems with sticking. Others have. I love the parchment idea. Just place the dough on a piece of parchment and lift into the pan. Bake on the parchment. Lift out when baking. So slick.
– You do NOT need to have an enamel coated pan. Stoneware, stainless, corelle bakeware…anything with a lid.
– What great ideas you all have. thanks for sharing.
My question is do you grease the pot with anything to prevent sticking?? Thanks!
Yes, I decided to heat up my oven on July 2 to try this bread. Just pulled it out of the oven. It looks amazing!!! Baked mine in my Pampered Chef stoneware bowl with the stoneware baker as a lid. Can't wait to try other versions of it. Fun, fun fun!!!
I am a potter, and make stoneware bowls for baking yeast breads as well as other stoneware pottery for baking and serving. During an art show yesterday, a customer suggested your blog. She suggested making a lid for my bread bowls, and trying your recipe. I'm really looking forward to this!
Put me on your list to purchase one. I would LOVE to have one of your bread bakers. What an amazing talent. Thank you so much for sharing this with me.
I would really like to make this but do not have the type of pan you call for, is there any other one I could use?
WOW I am loving this whole easy process. I have made several different loaves and am now passing them off to friends and neighbors. So far the canned chopped green chili's and cheddar has been my favorite. Thank you so much for sharing and the photos really helped with the first round. i am not anonymous my name is Sheryl hehehehhe
– I use a 5 quart dutch oven. I'm petty sure you can use as small at 3.5 quart from recent comments.
– Pampered chef clay pots with lid works great.
– Thanks to all for your fabulous comments and great mix-in ideas. You are all amazing.
I found a video of someone making this bread at DVO.com a year or two ago and made it myself and it turned out good. When they made their bread in the instructional video, just before putting it in the clay pot, they took a knife and cut a big "X" on the top of the bread. It gives the bread a really cool artisan look when baked.
What size was your pot?
Love your presentation 🙂 what size is your Le Creuset. I went to a website and there is so many diffrent sizes Thanks can't wait to try this, oh also i have a pampered chief stone with a lid, do you think that will work? Thank you again!
Second time with this recipe; awesome, Janet!
Thank you so much for posting this recipe…I found it on pinterst and have gotten at least 5 of my friends to try it and they cannot believe how easy and how GOOOOOD this is. I tried the lemon, rosemary, & gruyere and it was fantastic….I'm about to make a parmesan and roasted garlic!!! And a plain one for my boys….they are so picky!!! They beg me to make this every week since I found the recipe!!! My whole family loves it!!! Thanks again!!!
Jennifer in Louisiana
Thanks Janet I have my first batch rising waiting to cook.
You shouldn't have to oil a non-enamel coated dutch oven. I haven't had any problems with it sticking it a plain old dutch oven.
U am so grateful you posted this. I live in Nendocino County, CA. Home if organic/natural living and was looking for something my picky 9 yr old son would like. Tried this and it's so simple and easy I thought it was to good to be true! This bread is great! My son lives it and immediately asked for olive oil and balsamic vinegar! I was so good. I will be trying to make a load with Kalamata olives and basil. Thank you, thank you, thank you!
Brigétte
I know you have mentioned several times that the use of oil or pam isn't needed. What if your dutch oven is not enamel coated, but completely cast iron?
Make sure your cast iron pan is well seasoned – you'll do fine. Google for seasoning instructions. This can be done for old, old, old, old cast iron also. Just bake it in the oven til all the cooked on grease is burned off ,then start the seasoning process.
The old cast iron is so much better than the new stuff. (I have both)