What I love about this bread
- It’s so easy to make. This dough can be made in less than 5 minutes.
- The basic dough recipe can be enhanced with many different flavor varieties.
- Very little hands-on time.
- Crusty bread never ceases to impress family and friends.
- My 12-year-old grandson can make it.
Let’s make No-knead crusty bread:


- In a large mixing bowl, add flour, kosher salt, and yeast. Whisk together.
- Add water. Mix just until all of the flour has combined with the water. The dough will look like a shaggy mess. That’s ok.
- Cover the bowl with plastic wrap and let it sit for 12 – 18 hours on the countertop. DO NOT REFRIGERATE. This is not optional. It takes that much time to proof the dough. The reason why you need a large bowl is that the dough will start to rise.
- After 12 hours the dough will look like this. It’s pretty sticky, but that’s ok it’s supposed to be.
Shaping and baking the bread:


- Preheat oven to 450 degrees. As soon as it has heated to 450 degrees place your pot with the lid in the oven and preheat the pot for 30 minutes.
-
Right after you put the pan in the oven to pre-heat, dump the dough out onto a HEAVILY floured surface. Shape it into a round ball and place on a sheet of parchment paper. Parchment makes it so easy to transfer the dough into a hot pot and then remove it after baking. The parchment paper stays in the pot. This will rest for 30 minutes while the pan is heating. Cover with plastic wrap. Note: Use silicone coated parchment paper. The regular non-coated paper will stick terribly. Don’t chance it.


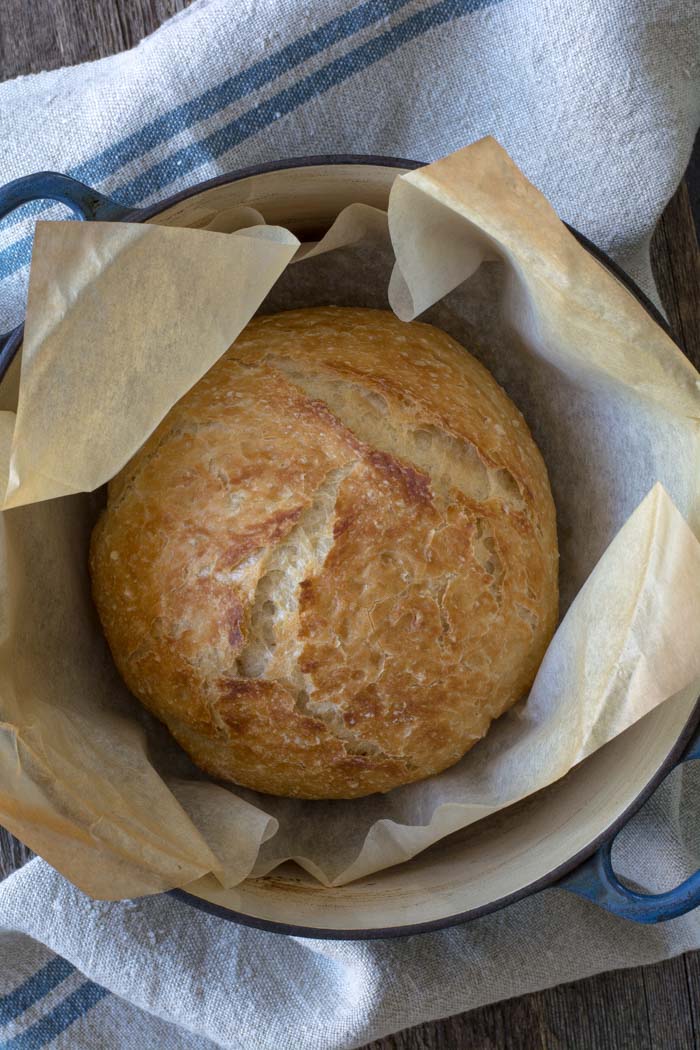
- Remove pot from the oven and carefully pick up the parchment and drop dough into the pot. Be careful the pan is HOT. Put the lid on the pot and return it to the oven for 30 minutes.
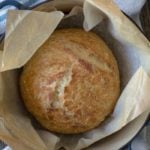
- After 30 minutes remove the lid from the pan. Bake for an additional 15 minutes or until nicely browned. You can test with an instant-read thermometer to make sure the bread is fully cooked on the inside. The temp should be between 190F and 200F degrees. Remove from the oven and carefully remove bread from the pot by lifting the edges of the parchment paper.
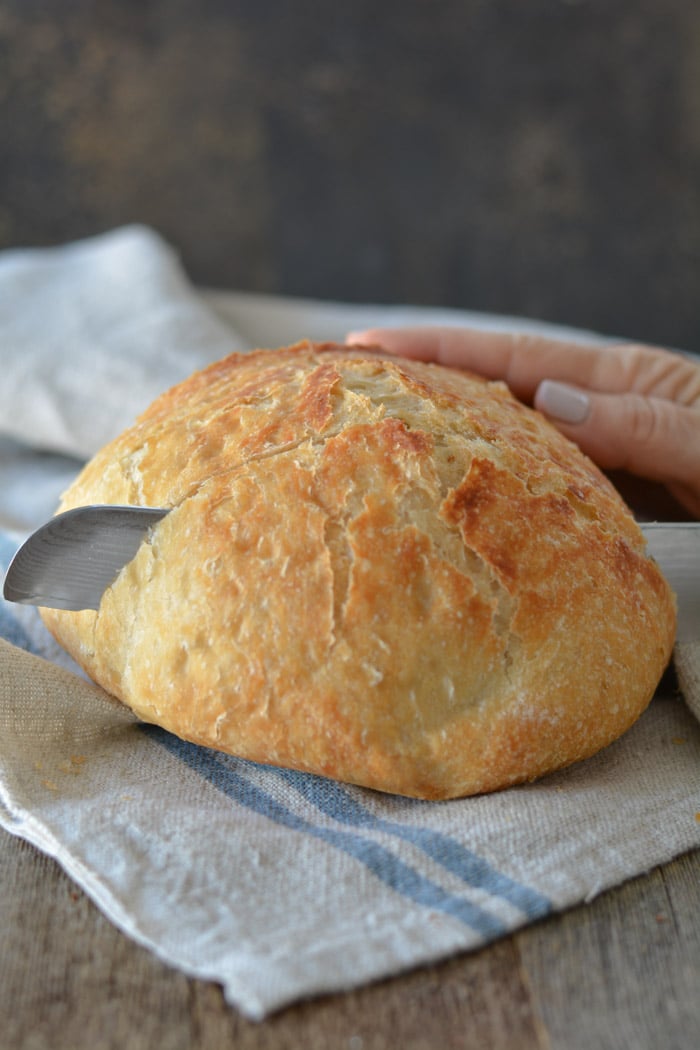
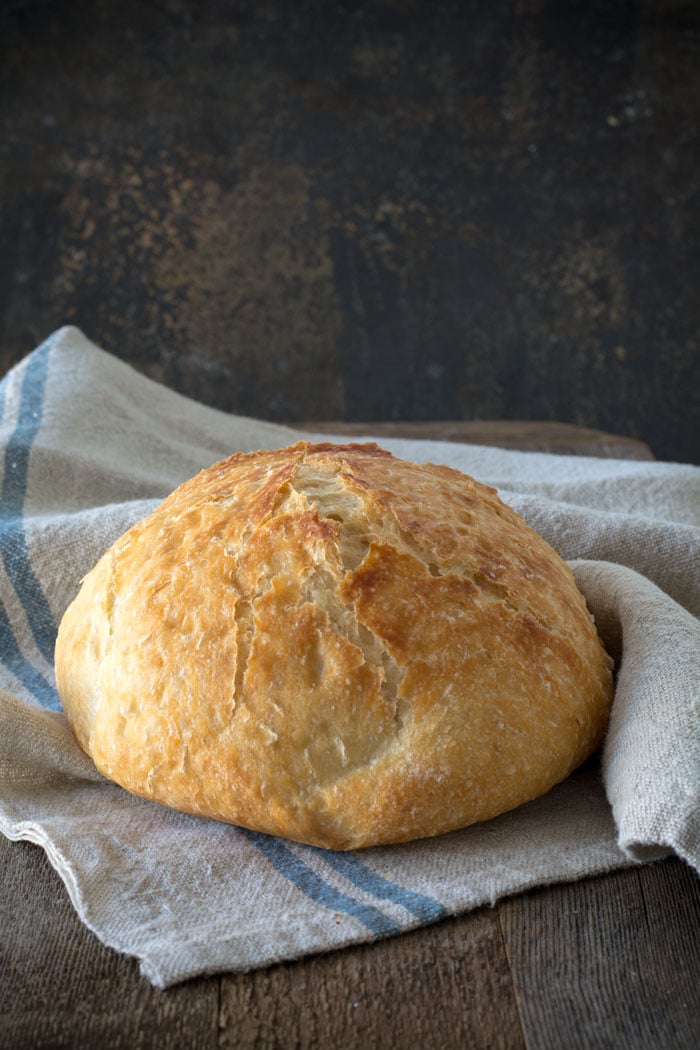
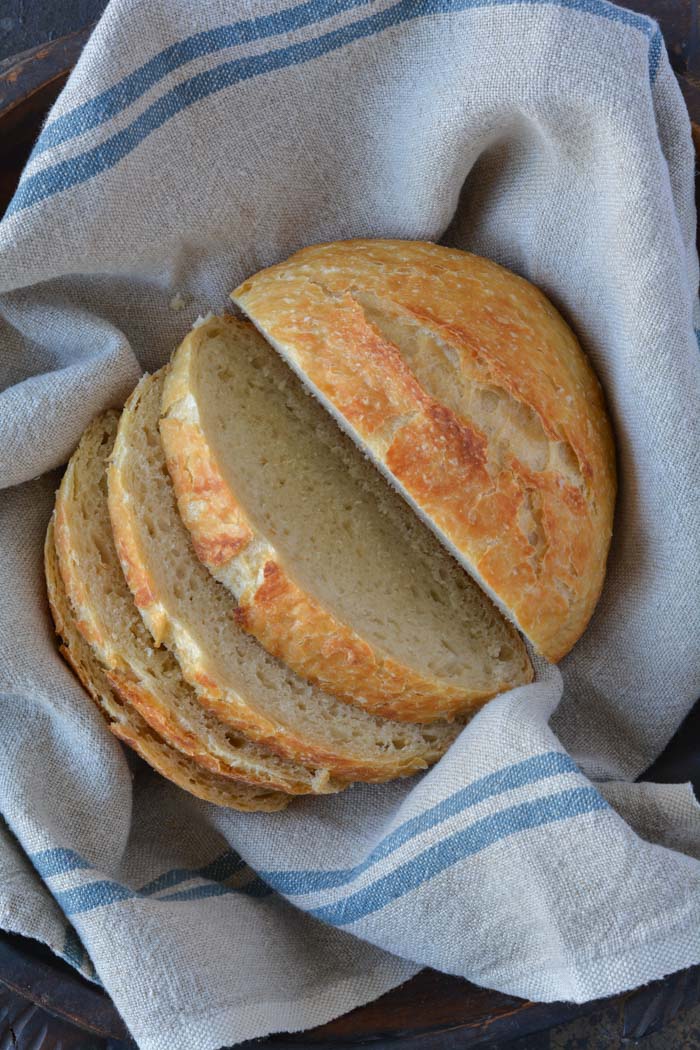
Holy cow! Can you believe how gorgeous that is? It’s best to wait for the bread to cool before slicing. Because I love warm bread I sliced it right away.
FAQ’s
Q: Do I have to use an enamel covered cast iron pan?
A: NO. You can use anything that can take the heat. The following have been used that I know of:
Clay pots with lids, Pizza stone with a bowl to cover the bread, insert from a crockpot, pyrex baking dish with a lid, stainless steel pot with a lid, baking dish covered with aluminum foil, old cast iron dutch oven.
Q: Do I have to use unbleached flour?
A: I always use unbleached flour. You can try bleached flour.
Q: Can I use self-rising flour?
A: I don’t know. I would just stick to all-purpose.
Q: What size is my pan?
A: My smallest pan is 5.5 quart. You can use as small as a 3 quart.
Q: What type of yeast do I use?
A: I use SAF instant yeast. Any yeast should work.
Q: Why is my bread turning out flat?
A: You could try using less 1/4 cup less liquid. Or add 1/4 cup additional flour. Make sure your dough appears to be dry when you first mix it. It will have more moisture during the rising time.
Q: Can my dough sit out longer than 18 hours? Does it HAVE to be between 12-18 hours?
A: I have let some dough sit as long as 24 hours and the bread was beautiful.
Q: Have you tried Gluten-free?
A: From what I hear the best GF is from King Arthur Flour https://shop.kingarthurflour.com/items/gluten-free-measure-for-measure-flour-3-lb
Q: Do I have to grease or oil the pan? Will my breadstick?
A: No you don’t need to grease the pan. I have never had the bread stick when using a cast iron pot. I haven’t tried anything else. The best way to be certain that the bread won’t stick is to form the loaf on a sheet of parchment paper and lift the bread into the pan using the sides of the parchment. Leave the paper in the pan. It’s won’t burn. When the bread has baked, just lift the sides of the parchment out of the pan. Voila! HOWEVER: Not all parchment paper is created equal. I use a silicone coated parchment paper. Regular parchment paper can stick something terrible. Don’t chance it.
No-Knead Crusty Bread
Wonderful yet easy artisan bread with a crisp crust. Prep takes just a few minutes with an overnight rise. Baked in a pot with a lid to create a steam oven. Bread can be made with many flavors and variations.
Ingredients
- 3 cups + 2 tablespoons unbleached all purpose flour (450 gr)
- 1 3/4 teaspoons Kosher salt (10 gr)
- 1/2 teaspoon Instant or Rapid-rise yeast (3 gr)
- 1 1/2 cups water cool (315 gr)
Instructions
-
In a large mixing bowl, whisk together flour, salt and yeast.
-
Add water and mix until a shaggy mixture forms.
-
Cover bowl with plastic wrap and set aside for 12 - 18 hours. Overnight works great.
-
Heat oven to 450 degrees. When the oven has reached 450 degrees place a cast iron pot with a lid in the oven and heat the pot for 30 minutes. OR pot can be placed in cold oven while oven is preheating leave in oven for 30 minutes.
-
Meanwhile, pour dough onto a heavily floured surface and shape into a ball. Cover with plastic wrap and let set while the pot is heating.
-
Remove hot pot from the oven and drop in the dough. Cover and return to oven for 30 minutes. After 30 minutes remove the lid and bake an additional 15 minutes. Remove bread from oven and place on a cooling rack to cool.
Recipe Video
Recipe Notes
FAQ's
Q: Do I have to use an enamel covered cast iron pan?
A: NO. You can use anything that can take the heat. The following have been used that I know of:
Clay pots with lids, Pizza stone with a bowl to cover the bread, insert from a crockpot, pyrex baking dish with a lid, stainless steel pot with a lid, baking dish covered with aluminum foil, old cast iron dutch oven.
Q: Do I have to use unbleached flour?
A: I always use unbleached flour. You can try bleached flour.
Q: Can I use self-rising flour?
A: I don't know. I would just stick to all-purpose.
Q: What size is my pan?
A: My smallest pan is 5.5 quart. You can use as small as a 3 quart.
Q: What type of yeast do I use?
A: I use SAF instant yeast. Any yeast should work.
Q: Why is my bread turning out flat?
A: You could try using less 1/4 cup less liquid. Or add 1/4 cup additional flour. Make sure your dough appears to be dry when you first mix it. It will have more moisture during the rising time.
Q: Can my dough sit out longer than 18 hours? Does it HAVE to be between 12-18 hours?
A: I have let some dough sit as long as 24 hours and the bread was beautiful.
Q: Have you tried Gluten-free?
A: No. I'm still waiting for someone to venture into the realm of Gluten-free. If you try it, let everyone know.
Q: Do I have to grease or oil the pan? Will my breadstick?
A: No you don't need to grease the pan. I have never had the bread stick when using a cast iron pot. I haven't tried anything else. The best way to be certain that the bread won't stick is to form the loaf on a sheet of parchment paper and lift the bread into the pan using the sides of the parchment. Leave the paper in the pan. It's won't burn. When the bread has baked, just lift the sides of the parchment out of the pan. Voila! HOWEVER: Not all parchment paper is created equal. I use a silicone coated parchment paper. Regular parchment paper can stick something terrible. Don't chance it.
More Notes:
Regular active yeast can be used in place of the instant or rapid-rise yeast. It will need to be activated in 1/4 cup warm water. Stir and let sit for 5-10 minutes. However, most of the comments I have received state that the rapid raise works the best. You choose. Whisk the flour, salt, and yeast together.


– Thanks for the imput, Barb on the lodge pot. That will be helpful to many who have that pot.
– Menina, you have an awesome pot. You can absolutely use your Doufeu…for everything!
Hi there
does it works with other Le Creuset pans? Because I have a DOUFEU model (http://www.lecreuset.fr/Les-Gammes/Fonte/Doufeu/Doufeu-Ovale-32cm–690l–68pers/)since 2005 (it was a wedding gift from this french couple) and I'VE NEVER USED IT because and don't know how!!! 🙁 and I consider it a crime 😛
Can you help me???
I have used my Lodge pot making this bread at least 12 times now and I have not damaged my pot. I know the instructions say not to heat it empty, what I do is put the pot in the oven when I turn it on and then when the temp reaches 450, I put the bread dough in and return it to the oven. The bread turns out great and my family and all my neighbours love it. Thanks again for a great recipe………LOVE IT!
Don't use your Lodge Enamel Pot. Read up a few comments. Someone tried it in her lodge enamel pot and the heat ruined it. Read the directions for the pot. Don't use heat higher than what the directions say. You could try baking only to that temp. ???? I'm sorry I don't have a lodge pot, so I'm not an expert.
Regarding cleaning your pots. Get the XXXL size ziplock storage bags. Put the whole pot in the bag with 1 cup of ammonia. Seal the bag and let it sit for about 36-48 hours. The grime will rinse right off. You only need 1 cup of ammonia because it's the fumes that eat the mess, not the liquid. I did this to clean my really gross Jenn-Air stove grates and they are now shiny and new!
I agree. I've cleaned my stove grates the same way and they look like new! My husband was quite amazed! I kept them outside overnight though because even in a zipped bad, I could still smell the fumes.
Baked this twice so far. Great receipe!
This looks great. Thanks for the tip.
Also, have you ever used honeycomb foam? It is the best scrubby I have ever used.
Awesome. I have the Jim Lahey book (and actually bought a kitchen scale to weigh the ingredients as recommended) and got better results with Janet's recipe and method. My jar of yeast is getting to the expiration date so I upped the yeast to about 3/4 teaspoon. I used a Scanpan 6 quart stockpot. Again, awesome.
I ruinned my pot doing thise. The outer coating dissolved.
I was praying this bread would taste awful. It doesn't. Damn it. Now I'm going to gain 10 lb. Not happy.
But seriously, amazingly easy, DELICIOUS bread! My 8 year old son said he's going to bake 50 loaves a day and sell them! A seal of approval from an 8 year old says a lot!
I mentioned that my son and I went through 100 lbs of flour in just 2 months. We just had to stop making this stuff because we were both putting on the pounds. We just had to try one more flavor combo. You are right…Damn it!
– I'm so sorry to hear about the lodge enamel pot. Now we know NOT to use that brand. I purchased one of Martha Stewart's enameled coated pots from Macey's and it works beautifully. No one wants to loose a pan.
– I'm happy to hear that a pizza stone and water work. NO YOU DO NOT NEED AN EXPENSIVE POT! LOOKS LIKE ANYTHING WILL WORK.
– just mix the dough until no dry flour is showing. Not long. that's why it's a no-knead bread.
– Congrats to the Holy Cow club. Can't wait to hear how the bread bakes in your pyrex.
I actually just bought the Lodge enamel pot and it worked perfect.
Let's hear it for the Holy Cow Club! My kids laugh at me 'cause I say that all the time. Hey, that way if they mimic me, at least they're not swearing for real! My first no-knead loaf is almost ready to finish uncovered, and it looks awesome. It barely fit in my largest Pyrex baker. I didn't feel like scrubbing my husband's rusty cast-iron camping gear, and I never thought I'd need one. I will be looking out for a baker now, for sure; maybe I'll find two, so my daughter can try this at her house. Forget the breadmaker…this is cheap and easy, my two favorite things to eat!
i don't have a cast iron pot nor am i going to spend any money to buy one! what can i use instead of the cast iron?
Costco sells a Kirkland version of the Le Creuset and it's made in France and it's about 80 bucks! The outlet stores for Le Creuset often sell pans that are made in China and not in France and I won't buy those.
We use our Costco version and it's amazing and we returned our Le Creuset to Crate and Barrel.
If you're not a member, have a friend get you a $10.00 gift card and then you can go in and use it. They will let you in without a membership if you have a gift card. :0)
I read that you can use a stock pot. I think any large pot with a lid would work.
I didn't know either but I just mixed it until the flour was completely mixed into the water. Hope that helps.
Let's hear it for the Holy Cow Club!!! My oven is heating and my teenaged son is sitting here waiting for the bread. Forget the breadmaker…this is so easy! I hope it works in my Pyrex baker (and that it's large enough; forgot to check what size it was and it's in the oven).
I didn't have the pan you used, or anything like it. I just heated water to boiling and put it in a pan on the bottom of my oven and baked the bread on a pizza stone. It turned out better than I thought it would (super crusty/crunchy exterior)……and looks like something you can buy at Panera.
Thanks for the recipe!
How long did you preheat your stone? Then followed the original directions?
I am heart-broken. I went to make this recipe for a friend since she has just had knee surgery. I have a Lodge Logic enamel covered cast iron pot. I followed your directions, but what I didn't do was look up Lodge Lodgic's directions for use of their cookware. I ruined my pot while making this recipe. The enamel covering chipped off. The pot wasn't inexpensive, but I warn your readers that you must need a quite expensive pot to make this recipe. Wondering if I didn't heat up the pot empty, if the recipe would still work? That is what ruined my pot. Sigh.
I don't know why your pot did that. I have a lodge as well and mine does great in the oven
I read on the Lodge Website that enameled ovens are only oven safe up too 400 degrees.
i have a regular lodge cast iron pot. it's not enamel coated and it works fine.
I have asked this same question (about putting the empty pot in a hot oven) but haven't gotten an answer. That's one reason I bought the pot, to make this bread. One site for this same recipe even shows the Lodge Logic pot as an advertisement on the blog right under the recipe. Do you know that this was definitely the reason for the enamel cracking?
FIX FOR LODGE LOGIC: Hey guys, I, too, have a Lodge Logic cast iron pot and, fortunately, I read this post before attempting my recipe. After reading the directions for use carefully, I tried this and it worked: Fill your pot with water to allow it to warm up with something in it rather than empty. I used warm/hot water. Place it in the oven to preheat. It may take a little longer this way, but I just waited until my oven beeped that it was preheated. Then, very carefully, pour the water out. I took a thick towel (so as not to burn my hands) and gave it a quick wipe before adding my bread so it wasn't wet. My bread came out a little bit dense, but this was because I didn't allow it to rise as long as I should have, plus I'm at high altitude. Otherwise, it was great! My family scarfed it down.
Sorry to hear about your pot, PSnavely, but thanks for the heads up.
Put water in it to heat it. dump the water out when you're ready to put the bread dough in it.
If your pot says not to heat it empty, put a couple bags of dried beans in it while heating. Then just dump them out before adding the bread dough. Keep the beans, they can be used again and again for heating the pan (you can also use them in a pie shell if baking it without filling,the beans will keep it from bubbling up and having to be broken down to get the filling in). I doubt you would want to eat those beans though after heating them dry.
For those asking about pizza stones, you can use a concrete stepping stone from the hardware garden department. I learned that from Alton brown on the Food Network. You can probably find his pizza episode online somewhere, maybe Hulu or Youtube.
I use my Lodge to bake bread twice, then I did a stew type recipe, Washing it I saw a crazing and bubble on the bottom and when I touched it, it started chipping away. Now have abotu 50 cent size bare spot. It am sure it will still be good enough for baking, but I won't cook stews in it again.
I think the trouble must have been putting it into a 450 degree oven. It would probably have been better to let it warm up during the pre-heating to 150.
Mine too. 🙁 That just happened, and I found this post through Google. I'm not sure the bread can be tasty enough to warrant ruining my pot!
When mixing the flour water together how long do you stir by hand. I am not sure what shaggy means.
Wow! So many fun comments and so many questions. I hope to answer them all.
– Not sure about olive oil. It could turn out beautifully. I just dip my bread in the oil as I eat. let us know if you try it.
-I have not tried Gluten-free. I keep hoping someone does and pass on the results.
-If making a smaller loaf, I would keep the temp. the same and just adjust cooking time. Take the lid off and 20 minutes then just keep checking. Once the bread is nice and golden brown remove it from the oven.
– Yes you can use a ceramic crock pot insert or ceramic dish with a lid.
– Yes, I have had problems with the bread browning too much on the bottom. I will try putting the pot on a cookie sheet. Great advice. Thank you.
I just love all of your suggestions and advice and flavor combo's. You're awesome!
wondering if my non-enameled cast iron will work for this bread.
Absolutely!
Thanks for the awesome recipe…I made a loaf and it wasn't very "big" so I'm hoping it turns out ok. I was wondering if you could use self rising flour with the yeast for this bread or would it totally screw it up? 🙂 Thanks for the help.
Hmmm. Self rising flour has baking powder in it. I'm not sure because I don't use self rising flour. This recipe seems to be pretty resilient, so you could give it a try. ???
I made this bread today and it smells and looks amazing!!!! Mine was not as "big" so I'm hoping it still tastes the same. 🙂 I was wondering if you could use self rising flour in combo with the yeast and get the same effect? Thanks!
Janet, you have inspired me and this morning pulled 2 wonderful loaves (the same 2 flavors you featured)out of my oven and I am now obsessed. Wanted your thoughts on using olive oil in the loaf, would I need to make any adjustments for flavoring with olive oil? Thinking of using sundried tomatoes and garlic with olive oil. Thank you thank you thank you!!!!
Thank You, Thank You, THANK YOU!!!!!! I recently moved from the west coast, were this type of bread if found everywhere and oh so yummy, to Florida, where I have had a very difficult time finding a bread with this texture, quality and crust! It was so easy to make, your pictures and easy flowing commentary was extremely encouraging. I have made this recipe twice now and the second loaf is better than the first, I can hardly wait to try the add-in's! Thank You SOOOOO Much for sharing this amazing and fulfilling gift of gourmet bread 🙂
Any idea how this would work with gluten free flour? I think I am going to try it with an all purpose gluten free flour blend and see how it works out. This looks so awesome. I can't wait to try it both with gluten free flour and regular flour. I love bread!!
Hey Amy! How did your gluten free loaf come out? I'm crazy to try it with Authentic Foods Multi Flour Blend (gluten free)…
Hey,Amy! How did your gluten free loaf come out? I'm thinking gluten free flours might need a tad more yeast. I know this post is kind of old, but I'm hoping to hear from ANYONE who has tried gluten free…
Would love to know if it works for you and the brand of flour you use. I am also gluten intolerant so would love a gluten-free alternative.
Would love to know if your gluten-free flour works and, if it does, which brand you used. I, too, am gluten intolerant.
Wow, this bread recipe is incredible and so so easy. I have never before been able to make such amazing homemade bread. I made mine with spelt flour and it worked perfectly. Thanks Janet!! 🙂
Pinterest strikes again!!! This looks amazing! I have read through the comments and apologize if this question has already been asked: has anyone tried using different gluten-free flours? Does anyone have any advice as to how to make this recipe gluten free? I am gluten intolerant as is my daughter and we would LOVE to find some amazing recipes for gluten free breads etc… that we can make at home and won't cost a second mortgage to eat! Thanks so much!
Janet, you are a homemade bread rockstar. I cannot wait to try this – Thanks!
I suppose I could halve the recipe to fit in my 3 3/4 qt. Le Creuset multi-function pan? Or make a full recipe and bake two loaves from it…? How would the time/temp vary? I've baked other no-knead breads – including ones that you can keep dough in the fridge for up to two weeks before you bake it! Excited to try a new one!
Has anyone ever tried this recipe with gluten free flour??
Can you use the ceramic bowl thats in in your crock pot for baking the bread?
This recipe is fabulous! My friends and I have been making this for a while now (found it as no knead bread on YouTube). The only thing we do differently is that we cook it in stoneware with a stoneware lid/dome. Steams the bread the same. We still preheat it, and still cook it on 450. The stoneware works great too!
Try putting your dutch oven in a large ziplock bag with 1/4 cup amonia and let it sit for 12-24 hours, the grime should just wipe away with minimal effort. I used this on my stove top grates and on my bbq grill grates that are enamel coated cast iron and it worked wonderfully. The fumes from the amonia break down the bond of the baked on grease.
does it have to be a cast iron pot?
OMG.. this looks amazing… sooo glad I found this on Pinterest; I'm German and miss my delicious bread here in the US and can't wait to give this one a try… I noticed that you used a spoon to mix it all up, would it work with a Kitchen-aid mixer as well or would that maybe be too much beating? Thanks for the amazing post…
Thank you Janet, can't wait to try the bread. I have a clay La Cloche I use to make sourdough bread, I believe that will work just as well as a Le Creuset.
Would you preheat this? I have one and would love to try to bake a loaf in it. Thanks!
Your breads look amazing. I tried another recipe in my cast iron pot and they had you put your dough on a piece of parchment paper and to put a cookie sheet under the pot so the bottom didn't burn. Have you ever had any trouble with the bottom turning too brown or burning? Thank you!
I've now made more than a dozen loaves of this bread, in amazing combinations! One thing I discovered is you can use up all your old herbs when then are expired (2 tsps. per loaf). No need to throw them out when replacing with new fresher bottles. Also, I used bread flour for the first time today and I found it to be lovely as well as the all-purpose flour. Seems you can't go wrong experimenting with this awesome bread!
What type of yeast are you using? Is it the rapid yeast or just regular?
Can't wait to try this bread..But I have to..I need one of those pans..saving my pennies..LOL.. Have you tried easy off oven cleaner…they make it safer now, I can use it on my enamel stove…but not on painted areas..
Janet, you have the patience of a Saint!
🙂 I'm going to show this comment to my family. Thanks for comfirming! Hahaha
could you add dry ranch dressing seasoning or would that harm the action of the yeast? thanks!
Do it!
Fantastic Bread. I've been reading through the posts (as I didn't want to ask a question that has been asked a million times) and wondered if the bread is supposed to be a bit moist in the center? I know its supposed to be a bit denser but it is slightly moist and I wondered if I need to adjust my cooking times. THanks will still eat it anyways.yum
Moist, but not doughy.
Janet, I started making this a few years ago, per the New York Times recipe. I use my crock pot liner with the all-glass lid it comes with. It works perfectly!
I absolutely love all the variation you have come up with…I've got to try them!
Great information. thank you.
WOW…I can't thank you enough for this post….This bread is the best thing ever and crazy easy… I can't believe I made such and amazing loaf of bread!! I added thyme, chili pepper, olive oil and white pepper, some dijon mustard on top and parmesan (lovely crust)… it's smells like a bakery in my own house!!
Gabriela – how much (roughly) of what did you use? This sounds incredible! I'm particularly interested in knowing how much olive oil you used and how well it worked. Thanks!
I found a 6 quart dutch oven, made by Lodge, on Amazon for $50. It showed up yesterday and I immediately went to the store for supplies!! My Asiago / Sundried Tomato bread is proofing now!! CAN'T WAIT to slice into it tomorrow!! 🙂
Baked this first thing this morning………..it is the most delicious bread in the whole world. And the easiest. Thanks so much for the recipe. I'll be making this over and over and over again.
I do not have a Le Creuset pot, what else can this be made in? It looks soo good and I would really love to try your recipe. TY. eragon1060@gmail.com
Le Creuset 12-Ounce Enameled Cast-Iron Cleaner
3.6 out of 5 stars (40)
$14.95
http://www.amazon.com/Le-Creuset-12-Ounce-Enameled-Cast-Iron/dp/B000E5D04E/ref=pd_sim_k_4
So, I first want to thank you for sharing. But I also want to share something. http://www.amazon.com/Enameled-Cast-Iron-Quart-French/dp/B004YWKZQO/ref=pd_sim_sbs_misc_1
Kirkland is selling what I think are Le C pots under their brand, these are made in France. Yes Kirkland used to sell other ones but because they were made in China, folk wouldn't buy them. So their enameled pots now come from France, and the price is really really good. I bought two, and can't wait to experiment with your recipe. Thank you again.
Those pots are only rated to 400 degrees. Have you had any problems with them?
YES!!!!! Finally.someone has posted what i NOticed first thing.most of the ENAMELWARE boldly state do not heat above 400degrees. S o now what? Just bake at 400 Anyway? I have 3 that say that.also several posts have stated optional bakeware like a crockpot insert which the mfgr. Has clearly Stated not to use as a stand by itself baking container. ( Also would not let me cap in small caps) thank you–i have read thru literally thousands of comments on this.
Just stick to whatever the manufacturer suggests. Bake at 400 degrees. I would bake the bread an additional 5-10 minutes with the lid on.
now that I have secured 2 pots for myself I with share something. Yes the french pots are expensive, and I was prepared to shell out some dosh to achieve what you did and shared. However, I found out that Kirkland, yes the Costco brand, sells these pots, and BTW they are made in France, even can use the same replace lip cap. Kirkland used to sell something similar, but it was made in China. They stopped selling that item and now it's from France, and the price, via Amazon, a nice jaw dropper http://www.amazon.com/Enameled-Cast-Iron-Quart-French/dp/B004YWKZQO/ref=pd_sim_sbs_misc_1 So I have included the link just in case anyone is interested in a better price but for something that is either Le C, under the Kirkland name. Can't wait to get mine and experiment with your recipe. Thanks
I'm 2 hours into making this bread and have 2 questions. First can I split this and make one small loaf and one pizza crust? Second can I let the dough rise longer than 18 hours. I started this bread this afternoon and would
Like to make pizza with it tomorrow but not at 6 in the morning. Could I possibly refrigerate it to use later in the evening? Thanks for this wonderful post.
Melanie
Absolutely. You will want to adjust the cooking time for a smaller loaf. Just keep watching it. You can let the dough sit out for over 24 hours. I have without any problems. You don't need to worry about refrigerating the dough. It should work just great. Sorry I haven't responded sooner I have been out of town and away from a computer.
Ok I've been trying bread/bisquits for years and no luck. I am now a SUPER HERO!!! YEAH!! I did find I had to add abut 1/2 more water to get all the flour. I also turned my oven down to 425 deg as the middle still seemed slightly wet while the outside was ready. Worked perfectly. THANK YOU!!! Bisquit recipe per chance?? hehe
Funny you should ask about a biscuit recipe. I have that on my list of things to blog. I'm going to finish a few more "healthier" recipes then move on to biscuits and fresh strawberry jam.
Last year I discovered that brushing whole milk on top of biscuits, while sitting on counter for 20 min, helps them to rise to their full potential during the baking process… I'm 50 yo & still learning! Thanks Janet for the bread recipe & all the hours of replies you've posted, with tons of awesome hints. An easy bread recipe for a busy Home School Mama! Debora
Janet,
Love the ideas, thanks so much. I tried pepperjack cheese with roasted garlic and rosemary and it was fabulous. Now, I want to try some of your other ideas. Tried a multi-grain/seed variation with sunflower seeds, flax seed, oatmeal and raisins. It made a very dense loaf that didn't raise as much but was still really delicious.
Also, can confirm that an enamel casserole dish with lid works fine and bread comes right out with no oil. Have also tried my crock pot liner and that works great for a larger option but be sure the handle is metal. I had to replace my original knob to be able to use it in the oven.
Hi! I'm wondering where you got the new knob for your crock pot liner as I'm interested in using my crock pot liner to make this bread. Please email me at compactkid14@gmail.com and let me know. Thank You!
Try cleaning your pans with Bon Ami..never scratches. Use with a damp cloth that you don't care about. Works wonder on glass pie plates, too.
I just received my dutch oven and in the directions for use, it says NOT to preheat the dutch oven empty. I really want to bake this bread…….can anyone tell me if preheating the dutch oven empty will damage it? I can't imagine giving directions to preheat if it will cause damage. Help please….
I don't read directions, so never saw anything about pre-heating. I will say I've now preheated my bare cast-iron dutch oven about four times in two days, and nothing happened, so I'd say you're safe. 🙂
It DID damage mine. Better to warm it up while you are heating the oven.
I have been using a similar recipe but have been substituting some of the water for 1/4 cup pale ale and 1 TBS white vinegar. It gives it a sour dough flavor. I also place it on a sheet of Pam-sprayed parchment paper then plop it in the Dutch oven. Yummy!
Hi, Janet – I found this a couple of weeks ago during a mindless Facebook/Pinterest browse and have been making a loaf of bread almost every day since! I've tried plain; dried apricot, almond and seeds; mixed grain/seed; rosemary and lemon (next time I'll add the gruyere); and kalamata olive and rosemary. The latter was the hero of my weekend camping trip in the Aussie bush, where it was devoured with a hard goats' cheese and washed down with chardonnay, between many exclamations of delight. Just one of those food perfection moments. I was fit to burst with pride. Thank you!
Thank you for all your kind comments and helpful suggestions. You are all such fabulous bakers! Keep it up.
I just purchased a porcelain enamel cast iron pot in blue. Beautiful! It is just like the LeCreuset pot and is my new favorite toy! This bread recipe has inspired me to experiment and become the bread baker of the universe! You are so awesome! Cindi
I clean my Le Creuset pans with a kind of paste made of dish washing liquid and kosher salt. It scrubs all the accumulation off, but takes a fair amount of work to do it. Best of luck & thanks for sharing this recipe.
Baking soda paste and elbow grease also works well with enamel or glass pots that have baked on residue or minerals.
Question. Does everyone here eat the whole loaf at one sitting? You say that wrapping in plastic wrap makes the crust soggy. So, what is the best way to save/store some leftovers without losing the crustiness?
Jim
I did some research a while back and the best way seems to be to just let it sit out with the cut side down. That's how I've been storing my bread and it works well as long as the loaf gets eaten within a few days.
Once it's completely cool we put it in a big ziploc bag and that seems to work
I slice and freeze after about 24 hrs stays fresh that way!!, tastes very good, so yummy toasted
Well I am a major procrastinator at times…. So after dough proofed for 20 hrs, I figured out I dd not have the right cooking container… Living n a very small town I went to 2 second hand stores and the pharmacy… No cast iron Dutch oven. Decided to use an old Corning clear brown glass Dutch oven container. Tuned out beautiful and YUMMY! Now my sweet husband has bought me a new bright red porcelain cast iron Dutch oven…. Think he has an ulterior motive….. He loved it too. Thanks for making me look good! LOL
Well, just a report to let you know how it turned out in my enamel pot.
When I took off the lid after it was hot I had the (lovely) odour of chilli – forgotten that I had cooked that the last time I used it! Anyway, it didn't seem to matter, the bread turned out perfectly! I used parchment paper but probably won't do that again as I found it awkward to get into the pot. But the bread – SOOOOO delicious and will be repeated very soon! Even my DH is eating it, and he rarely eats any of the bread I make!
Hi all.
in reading through all the positive comments I hope I am not repeating the question.
I am wondering if anyone has tried using rice flour? I havew a glutton intolerant in the house and need a great bread recipe.
I am going to try it but was hoping someone already had.
Try scrubbing your pot with a little Cameo, it should take the crud right off. I'm so making this bread, by the way…
omg its the best
I've been making the bread from the book "Artisan Bread in 5 Minutes a Day" for a while, it's basically the same thing, and learned that if you have a baking stone, you can use that with a large metal bowl to cover, and it does the same thing. I'm not one lucky enough to have any great cast iron (enamel or otherwise) but this works for me.
I really need to get that book. I think it's a great idea to use a pizza stone. Thanks for the great tip.
I agree with the comment above about you being the best blog hostess. My loaf looked like a brain going into the pot. Did I not shape it long enough I was so scared to over work it. Mine just didn't look as tight as yours. Also, could you use beer instead of yeast and water?
Why thank you for such a great compliment. I'll consider myself the hostess with the mostess 🙂 I just wish I could come into everyone's kitchen that is having problems with rising. Maybe make a stiffer dough…less water??? About the beer…not sure on that. I've only used beer to kill slugs in my garden. But hey, it's worth a try. Let me know if you try it. I'd love to hear the results.
After a full 12 hours in the bowl after sitting all night it definitely looked like yours,however, when I removed it from the bowl the dough was still quite gooey and didn't really form a ball. After placing it on the floured surface it flattened out quite a bit (about 8 inches in diameter and 1.5 inches high) Did I do something wrong?
Are you using white unbleached flour? I think the whole grains do something funky to the dough. Let's start with the yeast. Are you using instant. That's all I use these days. If you are using regular yeast (not instant,) try dissolving it in 1/4 cup warm water. When it begins to foam mix into the flour and other ingredients. You could try making a stiffer dough. Reduce the water by 2 tablespoons for a start. ???
Just wanted to make a note about cleaning your Le Creuset.
DO NOT use powdered bar keepers friend. It will dull the surface and NEVER be shiny again. Love the recipe and all the feedback. Thanks for posting.
Ooops. Mine didn't rise much. Guess I was supposed to activate the yeast in water first instea of just mixing the pellets in?
You could have something there on the yeast. I only use instant. Try activating the yeast in a 1/4 cup warm water. Then add to the mixture. You will need to reduce the water that you put in, of course. I just wish I could just pop on over to your kitchen to see what's up. Let me know if the yeast thing works.
I had to buy an enamel cast iron dutch oven cuz I didn't have one, but it was worth it because last night I made my first loaf, baked it this morning and ate it for breakfast! It looked exactly like yours. I'm thrilled. I had lots of flour on the bottom of mine which made it kind of thick, so I thought I might try just a dusting of cornmeal on the bottom. Have you tried that? I want to use raisins and cinnamon in a loaf for tomorrow. This was SO easy and it's so pretty and was so fast. My dutch oven said not to put it cold, into a hot oven, so I just popped it in the cold oven and turned it on to 450 and it worked just fine. Thanks so much for the inspiration!
I have not tried cornmeal, but what the heck. Give it a try. I did however try the suggestion of placing the dough onto parchment then dropping it into the hot pan. Worked like a charm. I think I'll do that from now on. I like the crunch the cornmeal could give. Cornmeal tastes much better that flour. Thanks for your comment and helpful tip on pan heating.
when you put the dough on parchment while pot is heating, do you put the parchment into the hot pot and bake it, too?
I agree with you. I had baked some bread in my Lodge enameled dutch oven without trouble but it said to warm the pot up in the preheating oven. Then this time I put it in when it was already hot, and afterwards I found a bump in the interior bottom of the pot which then cracked off until there was a hole in the enamel the size of a 50 cent piece. I am very sad, as I used this pot a lot for cooking. I think I can still use it for baking though, since the bread will be dry. Maybe I'll put a piece of foil on the bottom for baking as I would rather not eat enamel. (And save up for a Le Creuset.)
Not sure what Im doing wrong. Im getting discouraged since everyone else seems to be getting it right. Im on my 3rd batch and the dough is doubling in size, but when I bake it in the enamel cast iron pot its flat like a pancake. Any suggestions??
Where do you live? I'm coming over! I just want to see what is going on in your kitchen. Read down a few comments and see what I have said about instant yeast vs. normal yeast. Try that. I actually had this problem yesterday while playing around with rye flour. I had a loaf do the exact same thing that you described. I make two loaves one with 1/2 rye flour & 1/2 white. The other loaf was 1/3 rye flour and 2/3 white flour. The 1/2 & 1/2 was flat as a pancake, but had a stronger rye flavor. I like the flat loaf, I just sliced it in half length wise and pretended it was foccacia. Let's keep in touch about your bread. You will succeed!
I can't wait to try this out!! I was wondering though if anyone has mentioned making this into a gluten free recipe and IF it has still worked?
I have not tried gluten free. I was thinking about playing around with spelt and kamut since they have lower amounts of gluten. They would make the bread heavier than wheat, however.Let me know if you try it. My body handles gluten just fine…in fact it loves it. So I don't have to play around with gluten-free.
I just found this recipe and will be trying it in the next few days with GF flour. Pinterest has a great measurement conversion chart (you can find it in my cooking board – Julie Daech, if not by simple search). I have an all purpose GF mix that I bought and will try that first. Once I restock the pantry next week (if not before) I'll try with the conversion suggestions and I'll let ya'll know how it comes out.
Hi! I can't believe how easy & good this was! I thought for sure it wouldn't work….I mean, no kneading? no spraying the pan? But I did what you said and have a lovely loaf that I love! I can't wait to try some variations, but I'm horrible at not having a recipe. When you add other ingredients, how do you know how much of each additional items to add? Thx so much! 🙂
Just made my first batch and it is bread heaven!!! i have tried to make bread so many times and have failed. will this work in roll form as well if so what do you think the baking time would be?
thanks so much for sharing this.
These all look AMAZING! Love the gift idea too! Going to start a batch tonight, THANK YOU FOR SHARING!
Hi! I baked my bread today & it looks AMAZING! I put cheddar cheese & garlic in it. However, I cut a small slice & it appears a bit doughy. :0( I put it back in for 8 minutes, covered, I hope that will help. Have you ever had this happen to yours?
The only difference from your recipe is that I have a cast aluminum pan vs. cast iron. I did some research online & it appears that shouldn't make a difference, but could that be the culprit?
I appreciate any suggestions! Thanks!
Tammi
???Hmmmm. Well, the bread texture is denser than normal bread. It could be that it was just cut while too hot, but we generally cut into the bread as soon as it is out of the pan. You could try baking it longer. However you don't want the crust to be too dark or hard. Let me know what happens from baking it longer.
I may have figured out the problem with mine…I used your cheese measurement of 2 1/2 cups, but spaced that you were making a double batch! I only made a regular batch. Hmmm…extra cheesy bread I guess! LOL
My son would be in cheese heaven!
I had a question. I have trouble forming mine into a ball. It just wants to spread out until it's an inch high disk on the cutting board, waiting in the flour for the pan to heat up. I let it rise for 18 hours. Is it too much water? I used all the correct amounts and don't live at a high altitude. Thanks!
I had that happen today while trying to make Rye bread. Less water for sure. Start with 1/4 cup less water. See what happens then.
I made the dough yesterday and it didn't seem as moist as you mentioned. Having baked bread other ways in the past, the dough I ended up with was the right amount of stickiness just to throw in the oven right then. When I dumped it out this morning to bake, it was a little bit more sticky but definitely not bad at all. I live at about 5,000 ft. Should I be adding more water?
I'm above 5,000 and I don't add more water. The dough is pretty stiff and first and does seem wetter as it sits. I'm not super accurate at measuring all of the time. Some days the dough is stiffer than other days. Some days my bread rises higher than other days. I'm ok with that. I try to take baking pretty easy and let what happens happen. C'est la vie.