What I love about this bread
- It’s so easy to make. This dough can be made in less than 5 minutes.
- The basic dough recipe can be enhanced with many different flavor varieties.
- Very little hands-on time.
- Crusty bread never ceases to impress family and friends.
- My 12-year-old grandson can make it.
Let’s make No-knead crusty bread:


- In a large mixing bowl, add flour, kosher salt, and yeast. Whisk together.
- Add water. Mix just until all of the flour has combined with the water. The dough will look like a shaggy mess. That’s ok.
- Cover the bowl with plastic wrap and let it sit for 12 – 18 hours on the countertop. DO NOT REFRIGERATE. This is not optional. It takes that much time to proof the dough. The reason why you need a large bowl is that the dough will start to rise.
- After 12 hours the dough will look like this. It’s pretty sticky, but that’s ok it’s supposed to be.
Shaping and baking the bread:


- Preheat oven to 450 degrees. As soon as it has heated to 450 degrees place your pot with the lid in the oven and preheat the pot for 30 minutes.
-
Right after you put the pan in the oven to pre-heat, dump the dough out onto a HEAVILY floured surface. Shape it into a round ball and place on a sheet of parchment paper. Parchment makes it so easy to transfer the dough into a hot pot and then remove it after baking. The parchment paper stays in the pot. This will rest for 30 minutes while the pan is heating. Cover with plastic wrap. Note: Use silicone coated parchment paper. The regular non-coated paper will stick terribly. Don’t chance it.


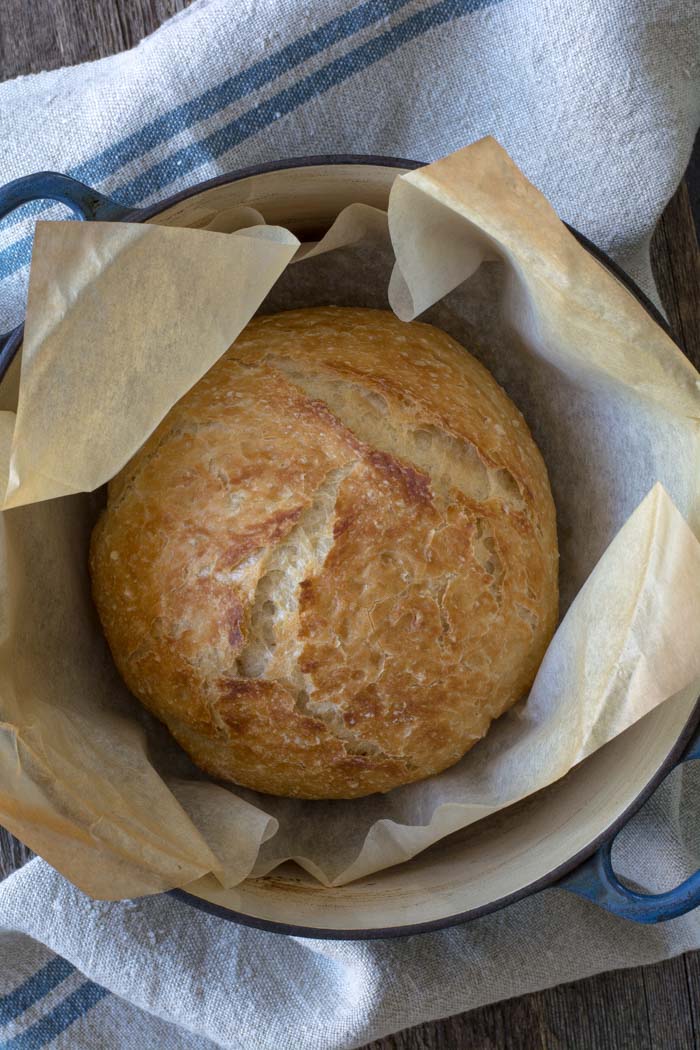
- Remove pot from the oven and carefully pick up the parchment and drop dough into the pot. Be careful the pan is HOT. Put the lid on the pot and return it to the oven for 30 minutes.
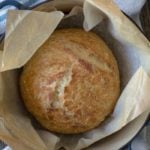
- After 30 minutes remove the lid from the pan. Bake for an additional 15 minutes or until nicely browned. You can test with an instant-read thermometer to make sure the bread is fully cooked on the inside. The temp should be between 190F and 200F degrees. Remove from the oven and carefully remove bread from the pot by lifting the edges of the parchment paper.
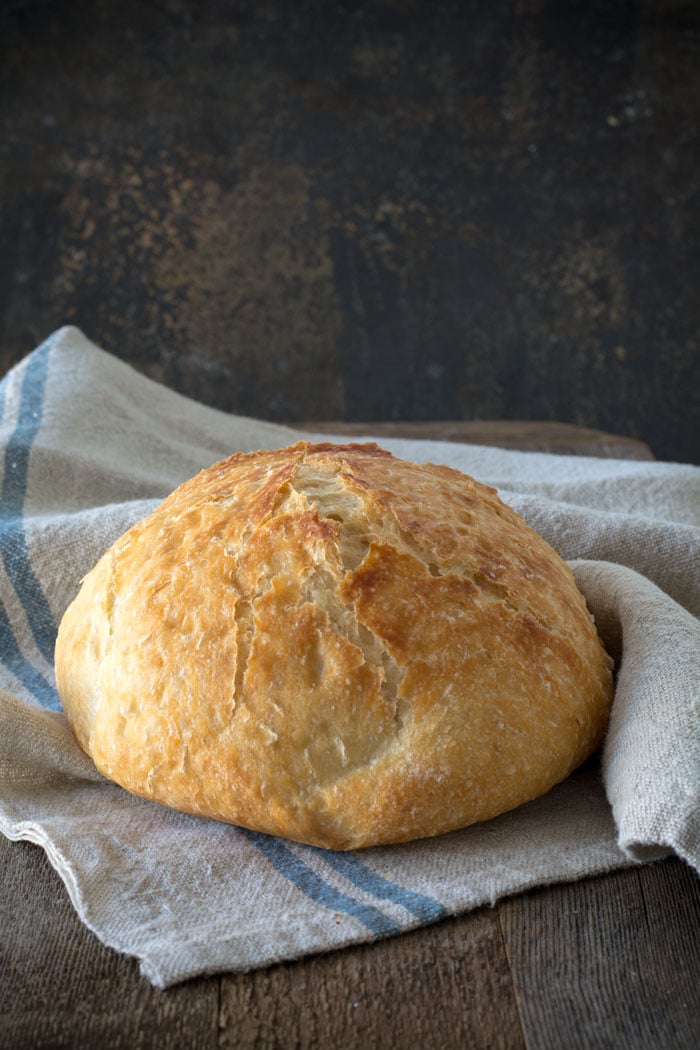
Holy cow! Can you believe how gorgeous that is? It’s best to wait for the bread to cool before slicing. Because I love warm bread I sliced it right away.
FAQ’s
Q: Do I have to use an enamel covered cast iron pan?
A: NO. You can use anything that can take the heat. The following have been used that I know of:
Clay pots with lids, Pizza stone with a bowl to cover the bread, insert from a crockpot, pyrex baking dish with a lid, stainless steel pot with a lid, baking dish covered with aluminum foil, old cast iron dutch oven.
Q: Do I have to use unbleached flour?
A: I always use unbleached flour. You can try bleached flour.
Q: Can I use self-rising flour?
A: I don’t know. I would just stick to all-purpose.
Q: What size is my pan?
A: My smallest pan is 5.5 quart. You can use as small as a 3 quart.
Q: What type of yeast do I use?
A: I use SAF instant yeast. Any yeast should work.
Q: Why is my bread turning out flat?
A: You could try using less 1/4 cup less liquid. Or add 1/4 cup additional flour. Make sure your dough appears to be dry when you first mix it. It will have more moisture during the rising time.
Q: Can my dough sit out longer than 18 hours? Does it HAVE to be between 12-18 hours?
A: I have let some dough sit as long as 24 hours and the bread was beautiful.
Q: Have you tried Gluten-free?
A: From what I hear the best GF is from King Arthur Flour https://shop.kingarthurflour.com/items/gluten-free-measure-for-measure-flour-3-lb
Q: Do I have to grease or oil the pan? Will my breadstick?
A: No you don’t need to grease the pan. I have never had the bread stick when using a cast iron pot. I haven’t tried anything else. The best way to be certain that the bread won’t stick is to form the loaf on a sheet of parchment paper and lift the bread into the pan using the sides of the parchment. Leave the paper in the pan. It’s won’t burn. When the bread has baked, just lift the sides of the parchment out of the pan. Voila! HOWEVER: Not all parchment paper is created equal. I use a silicone coated parchment paper. Regular parchment paper can stick something terrible. Don’t chance it.
No-Knead Crusty Bread
Wonderful yet easy artisan bread with a crisp crust. Prep takes just a few minutes with an overnight rise. Baked in a pot with a lid to create a steam oven. Bread can be made with many flavors and variations.
Ingredients
- 3 cups + 2 tablespoons unbleached all purpose flour (450 gr)
- 1 3/4 teaspoons Kosher salt (10 gr)
- 1/2 teaspoon Instant or Rapid-rise yeast (3 gr)
- 1 1/2 cups water cool (315 gr)
Instructions
-
In a large mixing bowl, whisk together flour, salt and yeast.
-
Add water and mix until a shaggy mixture forms.
-
Cover bowl with plastic wrap and set aside for 12 - 18 hours. Overnight works great.
-
Heat oven to 450 degrees. When the oven has reached 450 degrees place a cast iron pot with a lid in the oven and heat the pot for 30 minutes. OR pot can be placed in cold oven while oven is preheating leave in oven for 30 minutes.
-
Meanwhile, pour dough onto a heavily floured surface and shape into a ball. Cover with plastic wrap and let set while the pot is heating.
-
Remove hot pot from the oven and drop in the dough. Cover and return to oven for 30 minutes. After 30 minutes remove the lid and bake an additional 15 minutes. Remove bread from oven and place on a cooling rack to cool.
Recipe Video
Recipe Notes
FAQ's
Q: Do I have to use an enamel covered cast iron pan?
A: NO. You can use anything that can take the heat. The following have been used that I know of:
Clay pots with lids, Pizza stone with a bowl to cover the bread, insert from a crockpot, pyrex baking dish with a lid, stainless steel pot with a lid, baking dish covered with aluminum foil, old cast iron dutch oven.
Q: Do I have to use unbleached flour?
A: I always use unbleached flour. You can try bleached flour.
Q: Can I use self-rising flour?
A: I don't know. I would just stick to all-purpose.
Q: What size is my pan?
A: My smallest pan is 5.5 quart. You can use as small as a 3 quart.
Q: What type of yeast do I use?
A: I use SAF instant yeast. Any yeast should work.
Q: Why is my bread turning out flat?
A: You could try using less 1/4 cup less liquid. Or add 1/4 cup additional flour. Make sure your dough appears to be dry when you first mix it. It will have more moisture during the rising time.
Q: Can my dough sit out longer than 18 hours? Does it HAVE to be between 12-18 hours?
A: I have let some dough sit as long as 24 hours and the bread was beautiful.
Q: Have you tried Gluten-free?
A: No. I'm still waiting for someone to venture into the realm of Gluten-free. If you try it, let everyone know.
Q: Do I have to grease or oil the pan? Will my breadstick?
A: No you don't need to grease the pan. I have never had the bread stick when using a cast iron pot. I haven't tried anything else. The best way to be certain that the bread won't stick is to form the loaf on a sheet of parchment paper and lift the bread into the pan using the sides of the parchment. Leave the paper in the pan. It's won't burn. When the bread has baked, just lift the sides of the parchment out of the pan. Voila! HOWEVER: Not all parchment paper is created equal. I use a silicone coated parchment paper. Regular parchment paper can stick something terrible. Don't chance it.
More Notes:
Regular active yeast can be used in place of the instant or rapid-rise yeast. It will need to be activated in 1/4 cup warm water. Stir and let sit for 5-10 minutes. However, most of the comments I have received state that the rapid raise works the best. You choose. Whisk the flour, salt, and yeast together.


I have a Le Creuset dutch oven and when I started getting stains on it I just sprinkled some baking soda in it and gave it a rub with a damp cloth. Stains came out beautifully. Maybe someone else shared that already but I didn't take the time to read all the comments 🙂 Then you don't have to worry about putting some nasty cleaning products where you put your food… Found your post from pinterest and I'm looking forward to trying a few of your recipes!
How can I make your basic bread a sourdough bread?
Hi Lynn, I rarely have to store the bread because it doesn't last than long. A brown paper bag is a good option. I have wrapped the bread in a linen cloth, but no longer than a day.
Well, I finally found a pot to make my bread and I made 2 loafs tonight. We tried one of them and it was delicious. It was so easy!! I'm going to make up many more and give them as Christmas gifts. My only question is, do you only store your bread in brown paper bags?
Thank you 🙂
Anon. Using 1/4 teaspoon of yeast could be fine. I'm sure the bread will rise. You have nothing to loose by trying it.
Hi Anon. Email me at simplysogood@hotmail.com I can help you with your wet dough. Try using 1/4 c less water. If it seems too dry then add a bit more water.
oh no! it's 2013 so have no idea if you still respond to these posts the last was in 2012…ell, maybe i'll have some luck, I used the rapid yeast package and after everything was mixd decided to look at back to see how much is in individual package.Its only 1/4 tsp so there's nothing I can do at this point right?
I couldn't shape it into a ball, it kept spreading across the surface. What went wrong?? So upsetting
After 18 hours, the bread rose but I'm not able to shape it, it kind if spreads flat on the surface . I added the exact proportions, do you think there was too much water or should I try adding more flour?
Hello, fantastic easy recipe. Reminds me of Peasant Bread, love it. I have the same pots and the same well used look. I used a paste of 3 parts baking soda to 1 part peroxide and some elbow grease and they are shiny again. Hope it helps. Thanks for the recipe idea.
Alice
Use a magic eraser, works great! Much easier than ammonia method!
Making my second loaf now and in love with this! Just curious, I got asked to make a dessert one with just cinnamon and sugar, how much you add?
This may sound like an odd question, but here goes: Do I really need to dump my risen dough onto a heavily floured surface to form a round ball before putting it into my preheated baker? I am thinking that I might be able to make a parchment paper sling to line the inside of my mixing bowl, and after the dough mixing and rising is done, just gently lift the risen dough out of the mixing bowl by grasping the parchment and placing it all (dough and parchment sling) directly into my preheated baker… This might help to prevent the sticky dough from deflating as much as by grabbing it with my hands. What do you think? Should I then dust the top and sides with flour before it goes into the preheated covered baker? Thank you for this wonderful post! I am learning so much!!
Hi Stepanie, I get it. You don't want to have to repair braces. Try heating the pan up in the oven during the preheating time. When the oven reaches 450 degrees, add the dough. This has helped with the bottom being too dark and hard. After you remove the lid, just bake until it's golden brown to your liking and remove from the oven.
Love the bread recipe – thank you! The crust is a bit hard for our house – 3 kiddos in braces! Does it need the full 15 minutes without the lid? Mine really looked done when I took the lid off. How much is cooking those last 15 mins, and how much is just crusting up the crust?
After reading this blog, I am very excited to try this recipe. I was nervious about using my nice Lodge, enamal coated dutch oven – as several people pointed out the instructions say not to heat it empty. I made a trip to my local Target and was able to buy a very light weight cast iron dutch oven for $33.99. It isn't enamel coated but it has a non-stick surface in and out and also talks about the seal of the cover to lock in moisture. The blog makes it sound like this pot should work just fine. I know $33.99 is not cheap, but it is definitely less that what I would have to pay to replace my nicer enamel coated dutch oven. Just a suggestion 🙂
Hi Janet!
I used your recipe for my first attempt to make bread and I wrote about it on my blog. You can find the post here: http://californiagirlincolorado.wordpress.com/2013/11/13/i-made-bread/
Thank you!
This has got to be the easiest recipe EVER! Thank you. I had seen a comment somewhere that someone had made one with some wheat flour and now I can't find it. Anyone know how much wheat flour to use–don't want all wheat–maybe 1/2–1 cup?
By the way–my first attempt–to heating a pot ended up with a cracked crock pot insert. Those things are designed for low and slow and not for such a high temperature I realize now after ruining mine :-(. So, I used an aluminum ware dutch oven with parchment paper and it came out just like your pictures…heehehe…so
proud :-). Cooking for 25 family members for the week of Thanksgiving this year–cannot wait to impress all those bread lovers :-)—thanks again. Look forward to experimenting with flavors now.
What if you heated it with water in it? Then it wouldn't be empty!
I have made this 3 times so far and it's wonderful! Thanks for the perfect recipe!
I made a gluten free version of this recipe. I used Bob's GF All purpose flour, added 1/2 tsp of xanthum gum and a little extra water (about 1/4 of a cup) I didn't have the rapid rise yeast so I did use regular yeast and activated in in warm water. The taste is great and I like the bread… my one compliant is the same compliant I have with most GF breads I try to make… it is really condensed. Not fluffy like regular gluten bread 🙂 oh well story of my life.. but it was still good.
WOW! This is one of the best things I've ever found on Pinterest! I actually got out of bed at 11:00 at night and mixed up a double batch of this. The next day I was so excited to bake it off I could hardly wait. I used parchment paper and it was super easy to just drop it in the pot. It turned out DELICIOUS and just like your picture! That night I mixed up a quadruple batch and the next day took 3 of the loaves to neighbors. I just couldn't resist sharing it! My family was so excited that I made another batch for us. Now the problem will be not going crazy and making it every day. My two teenage daughters loved it so much! We made some of the Knorr spinach dip to go with one of the loaves and it was simply divine. Thank you SO MUCH!
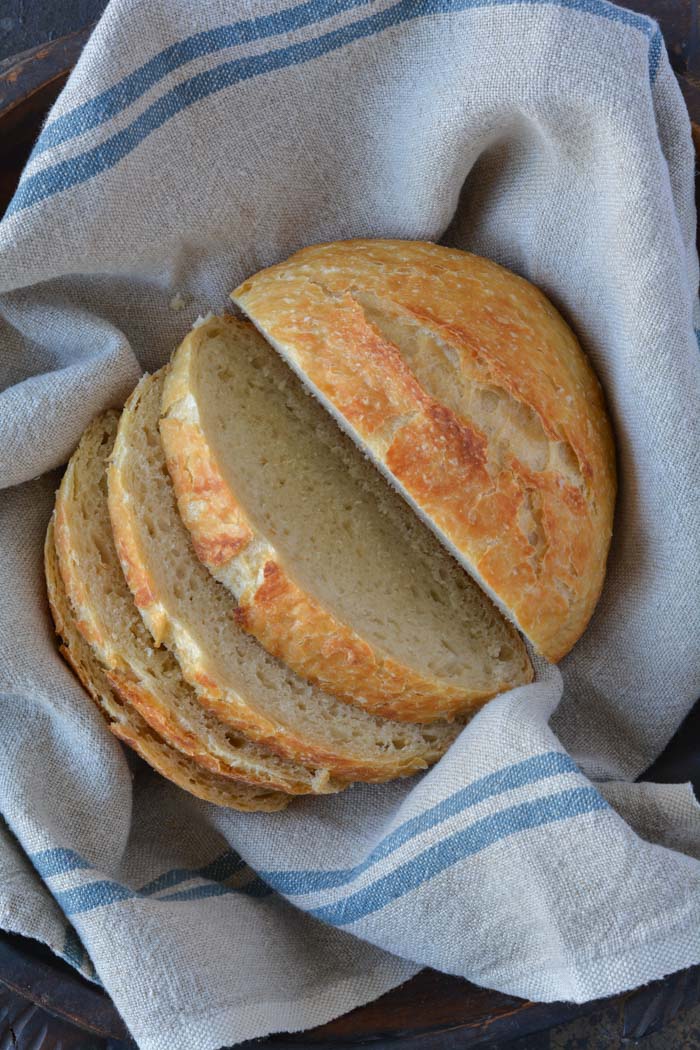
To Anon: If you have uneven texture in your bread, then you have successfully made artisan bread. You did everything right. This bread does have large holes in it and is uneven. Congratulations.
to Anon: If you have uneven texture in your bread, you have successfully made artisan bread. It does have large holes and uneven texture. You did everything right.
My bread was not uniform in texture–had holes in it. Any ideas why? Thank you.
Have you tried to make individual soup bowls with the bread? Read thru all the comments and didn't see one that had. Maybe double recipe then split into 4ths. Bake at less time. Thoughts?
To Anon: Try reducing your liquid by 2-4 tablespoons. That should help with the dough flattening out.
I follow the directions, but when I dump the batter onto a heavily flowered surface, it flattens out like a pancake, almost. What might cause this to happen.
This bread is absolutely fabulous! I did it with sundried tomatoes and cheddar and another with Italian herbs. Thank you so much. This will stay in my recipe file!
Omg. This is amazing. This was my first time ever making bread and I'm at the last stretch of cooking (15 minutes without the lid). I'm so proud of myself! For anyone who was concerned, like I was, about the dough becoming too flat when taking it out of the bowl, you're not alone. Mine did deflate a bit, but I made sure to gently roll it back into a ball when I picked it up to throw in the pot and it looks perfect now. I'm so excited to taste it, but I followed the directions to a T so i have high hopes! Great instructions and visuals!
Just made a loaf of asiago rosemary. Lasted about five minutes after baking! Everyone raved. I'm going to try using diced apples and cinnamon next. Cannot wait…..thanks for sharing.
OH. MY. G-D.
Your ROCK!!
My husband made this yesterday and today, just a plain loaf, our second type of bread now under our belts. And it's just amazing. Dipped in olive oil and balsamic vinegar, or covered in butter and apricot jam. YUM.
Thank you, from the bottom of our hearts, thank you.
Just made this bread. It is a fantastic recipe! Soooo easy! Will become a staple in our house. I put about a cup and a half of cheddar in it and about 2 teaspoons of chilli peppers in it. Yum!
Thanks for the great recipe!
This is no easier to make than any other basic bread recipe, nor is it any faster.
That sounds like a good way to clean the pot. I did my first bread in a calaphon (pot doesn't look too good?) pot and came out good, but shouldn't have cooked it so long. I found a cast iron pot at the flea market and used it the next time with better results. I just love this recipe!!! I wish I could make if without gluten, but not sure what to do. Maybe you can help.
I was wondering do you use bread flour or just plain all purpose flour? Have you ever used bread flour for this ?
I added some sourdough starter to this recipe and just took it out of the oven! WONDERFUL! You need to cook it about 10 minutes longer, but the flavor and texture is awesome!
Saw this on Pintrest, some where in the back of my mind I had seen someone make this but heck if I could remember. I used my pyrex dish with the matching lid. I just made the plain loaf, only thing I did different was from what I remembered they put a teaspoon of honey in the dough before adding the water. I have NEVER made bread that ever turned out. OMG I DID IT! I just took it out of the oven about 30 min ago, it is on the cooling rack, my daughter (21) just came in to borrow my car (hers is in the shop), Mom! what smells so good? She took one look at the bread, Did you make this? She got the first small slice, the crunchy edge, and I got a rave review!! Thank you so much for this and I didn't have buy an expensive pot! In fact I had everything right here in the kitchen so I didn't even have to go to the store! Followed the directions exactly (except for the tsp of honey) If I can do this, anyone can!!!
Because of being a bit nervous about heating my pot empty in the oven for such a long time, I've been heating it empty on the stove top for just a few minutes before putting in the dough. I have done it both ways and this works just the same and produces lovely bread with less risk to the pot.
I made this and substituted one cup of King Arthurs unbleached white wheat, added 1 1/2 tsp of cinnamon, 1/2 cup raisins and 1/2 cup chopped english walnuts. Just got it out of the oven and topped with my homemade blackberry jam for breakfast. Was delightful!
I have never used warm water making this bread, but I always use quick rising yeast.
One question – If you don't dissolve your yeast in 1/4 cup water, does the 1 1/2 cup water need to be warm when you add it, or will cold water work? Thanks.
I just tried this 'oh so easy' recipe with great success. The first loaf I made I used white whole wheat flour with cranberry and almond (didn't have an orange so I used lemon) and it came out beautifully. I'm just making a new batch with olive, cheese and herbs, can't wait to see how that turns out. I doubled it, but since I don't have two cast iron pots I'm going to try it with one of my corning ware casserole dishes. It should take the heat but I'll let you know.
thanks for sharing this great recipe 🙂
Made this bread today…………came out perfect! Thanks so much for sharing. This one is a keeper…..can't wait to try it with other flavors. Liz M in Canada
Thanks, tried it with WW, Rye and regular flour, but was way too heavy. Will try yours.
My first loaves are in the oven and I'm so excited to try them! I'm already starting the dough for another batch and this time I'm making your cranberry orange loaf with one minor tweak. I soaked the dried cranberries in Grand Marnier overnight to reconstitute them. I have been waiting for months to try this recipe because it's been too hot this summer to turn on my oven. Thanks for sharing!
I adore this recipe and want to share some flavor combos I've tried, all with great success. Cheddar garlic scallion, Italian herb (oregano, basil, and thyme), asiago and cracked black peppercorn, mozzarella basil, and my personal favorite: cheddar bacon scallion! I'm sure I'll try some sweet variations soon but I love savory breads. Thanks for sharing this recipe-life changing!
My Wolfgang Puck Enamel Pot works well for this bread. Comes out beautiful like yours. Thanks for awesome recipe. I love the bread with just asiago and freshly chopped rosemary that I grow myself. It is so great for sandwiches and everything else.
I've made this bread twice, the first time letting it rise only 10 hrs, and added some spices and cheese after it had risen…I couldn't believe how great it looked after the first 30 mins baking!!…It came out perfect!…..The next time I made it I added tiny cubed Va. ham and some white cheddar, I let it rise overnight and it came out perfect…Right now I have one proofing, and it has garlic, scallions and 3 kinds of cheeses ….I make it in a 3.5L dutch oven and the bread slides out of it with ease…I feel I have found nirvana with this bread, it's so easy and nice and crusty!!
Two cast iron skillets placed on top of each other work too!
Hi Diane in AZ: I have never frozen this dough before. I think I would let the dough rise then form the dough into disks. Place on a baking sheet and freeze. To thaw, I would remove from the freezer in the morning and let the dough rise and get all bubbly before using for pizzas. I hope this works…let me know.
QUESTIONs??? Would like to freeze the dough for making pizza. At what point would you freeze it? Before it sets over night? Or after and when it thaws out how long would you let it rise til it goes in the pot? I want to try a pizza crust with mozzarella… or maybe a garlic and then stuff the edges? Thanks for the great recipe Diana in AZ
Thank you for this fantastic recipe. I had to juggle a little because I'm used to measuring in grams instead of cups, but it turned out great. I made the bread with spelt flower. In some cases people with gluten allergy are allergic to wheat gluten only. In that case Spelt flour is a perfect replacement in almost all recipes. Trying a bread with raisins, dades, vigs and mixed nuts next time. Great with butter, cinamon and a cup of tea!
Thank you so much for this recipe! I can't believe how easy and how it always works, it's fantastic. I make this all the time now as a sourdough and have passed it on to my friends. Thanks once again!
Hey Janet, I make your bread recipe all of the time, today was a little frantic so I forgot to turn out the bread on the floured surface, I just put it in the pot. I thought oh well I wrecked the bread but lets just cook it. well it came out great and tastes the same. so I guess the recipe is super forgiving just like you said. love this bread, Suz
You can use meat tenderizer to remove the mess on your pots for a chemical free cleaner. It works wonders on cooked on messes. OR table salt and lemons with some elbow grease 🙂
Made this and was amazed how wonderful the bread turns out!
I have the same pots…. Barkeepers Friend works great both inside and out.
Is it possible to make a sourdough version of this?
Le Creuset at a garage sale for $10. That is the find of the century!
Anon:
I'm not sure about coconut milk. I have never tried it. Why not? If anything, you might need more liquid. I will try it tonight. Let me know if your try it as well.
Found a Le Creuset pot at a yard sale for $10 quite a few years ago. I had never heard of this pot before but knew it was a keeper because of the weight. Nice find! Can't wait to try the bread recipe.
Can I substitute coconut milk for the water?
Anon in France: You should use whatever yeast you have available. I should have clarified on the flour. I use wheat all-purpose flour. I did not use whole grain fresh ground wheat flour, but it can be used. I hope this answers your question.
Michael: Ha ha I should have clarified that I RUN with the blondes. Maybe you should pick up running 🙂
Anon: To reheat the bread, heat oven to 300 degrees and place in the oven for 7-10 minutes. That should crisp up the bread and heat it through. If the bread is beginning to brown to much, remove from the oven.
I really don't need 4 loaves of bread so I'm wrapping them up in a dish towel and I will deliver them to four wonderful blondes that I start my morning with everyday.
If I made this bread…maybe I could start my day with four beautiful blondes!!!!!! Awesome….
any tips on reheating the bread so as to mimic the fresh out of the oven taste? i mea, would you just maybe put it in a heated oven ( temp? ) for x amount of time? id like to make some for gifts.
this looks like a great no hassle recipe and I ll try it right away but I am puzzled about 2 points. the strangest thing is that no one brought them up:
1. in france we have bakers yeast, dry yeast and chemical yeast. I have no idea what quick yeast is and I try the dried yeast as it resembles your picture.
2. Towards the end of the recipe you say you do not use wheat flour, what flour do you use? cornflour? a flour mix with added gluten? thank you. marie.
I don't recall anyone using a roaster. I think it would work, but I would use parchment paper to bake the bread on because a roaster might have a tendency to stick.
I just made my first loaf of this. I put a little rosemary in the batter. As advertised, it was so easy and came out great. Just had a piece and it's sooooooo good!! Will have to try other variations as well. This could be really dangerous – I love bread.
use "barkeepers friend" or the le creuset cast iron enamel cleaner, it will make it look brand new. i said barkeeps friend first because it's very easy to find (bb&b and lots of places) and works just as well.
You CAN make smaller loaves. Proofing time is the same. You can half the ingredients or make the entire recipe and just cut the dough in half. You can place in the same size pan as used with a large loaf. I have used parchment paper to divide the two loaves while baking in the same pot.
Any suggestions for making smaller loaves? Pan size/type? Proofing time?
Thank you, thank you! This bread is simply terrify! Amazing texture, taste and ease of making makes this little gem an all time keeper for us. Kudos to you for sharing.
If I added up all of the hours I've spend kneading, it would surely stretch into years!! That's why I wanted to try this.
I just finished my first two loves and they came out fabulous. I made one jalapeno & cheddar and one sauteed garlic.
Next, I'm going to try crushed dehydrated tomato & basil.
Thank you so much for this easy and delicious recipe.
Lord, what I could've done with all of those years I spent kneading! 😀