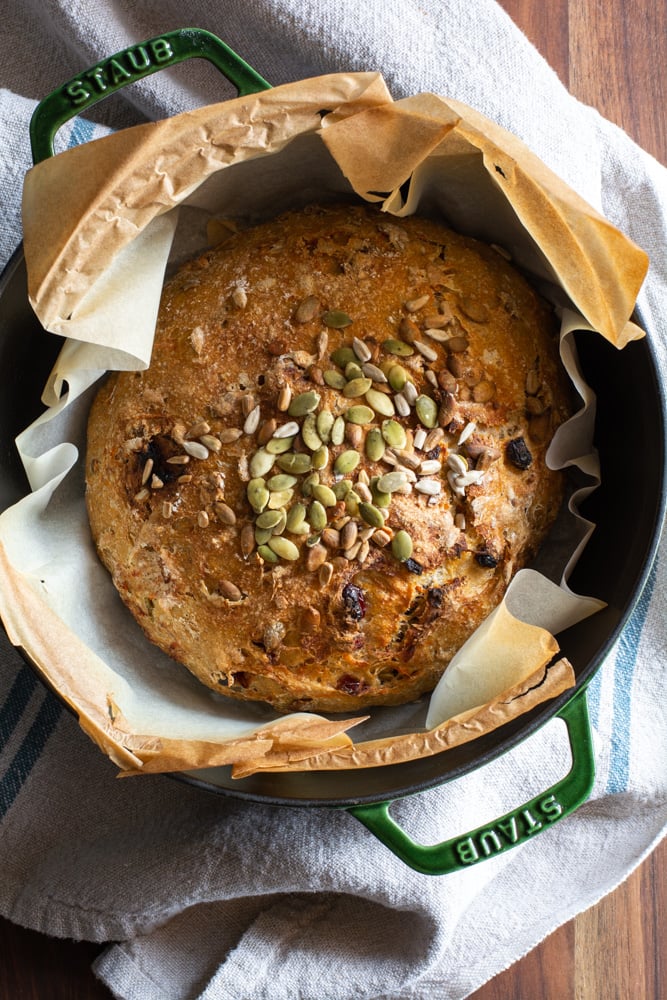
This No-Knead Breakfast Bread recipe is filled with dried fruit, shredded carrots, pumpkin, and sunflower seeds. Everything you need to get going in the morning or add some pep to the afternoon! The bread dough is easy to make without kneading, then rests overnight before baking in a dutch oven. It’s definitely worth the patience… Everyone loves starting the day with a thick slice of hearty and delicious homemade bread!
Cold winter months are perfect for heating up the oven and baking a loaf of bread. And while I enjoy spending lots of time in the kitchen, that doesn’t mean I want to be putting in a lot of effort here. Thankfully this no-knead breakfast bread recipe is wonderfully easy to make – while also yielding a beautifully rustic and delicious artisan-style loaf.
The dough comes together quickly and rests hands-off overnight. Then bake the no knead bread in a dutch oven for only about an hour. Dried fruits combined with cinnamon in this bread create a cozy aroma that fills your kitchen and home!
What a great way to start a new year…baking!
Recipe Ingredients
- All-purpose flour
- Wheat flour
- Active dry yeast
- Kosher salt
- Cinnamon
- Carrots
- Dried fruit – like golden raisins, cranberries, cherries, blueberries, etc
How to Make the Best No-Knead Breakfast Bread
First, Make the Fruit Bread Dough
- In a large mixing bowl, add flour, whole wheat flour, ground cinnamon, kosher salt, and yeast. Whisk together.
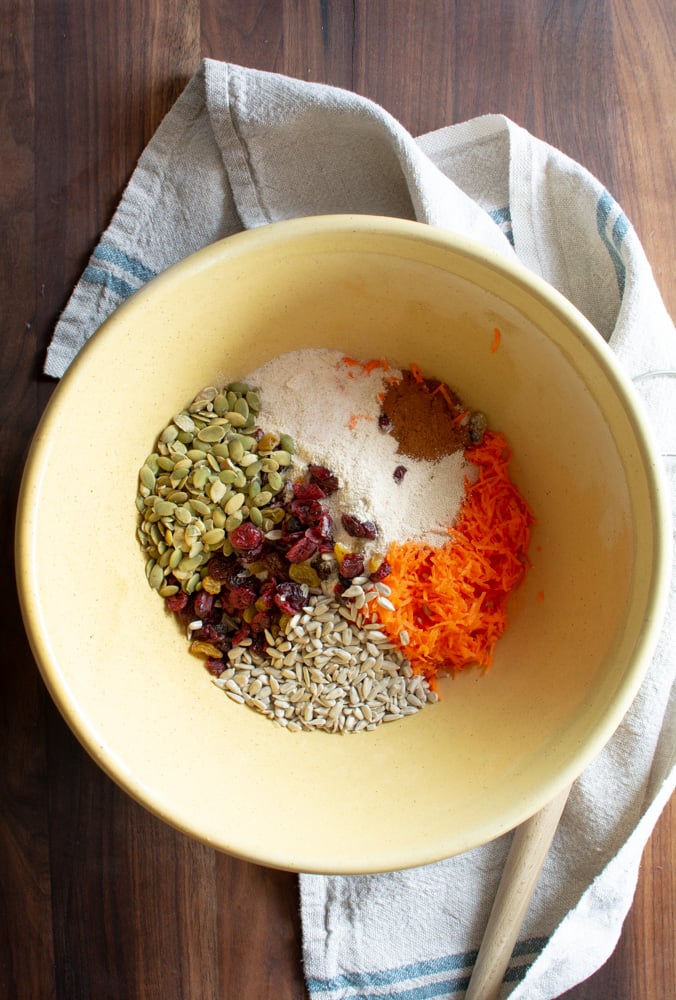
- Add the dried fruit, pumpkin seeds, sunflower seeds, and shredded carrots. (You can add other goodies like chopped nuts to this fruit breakfast bread recipe… Check out the tips below!0 Gently toss the ingredients together.
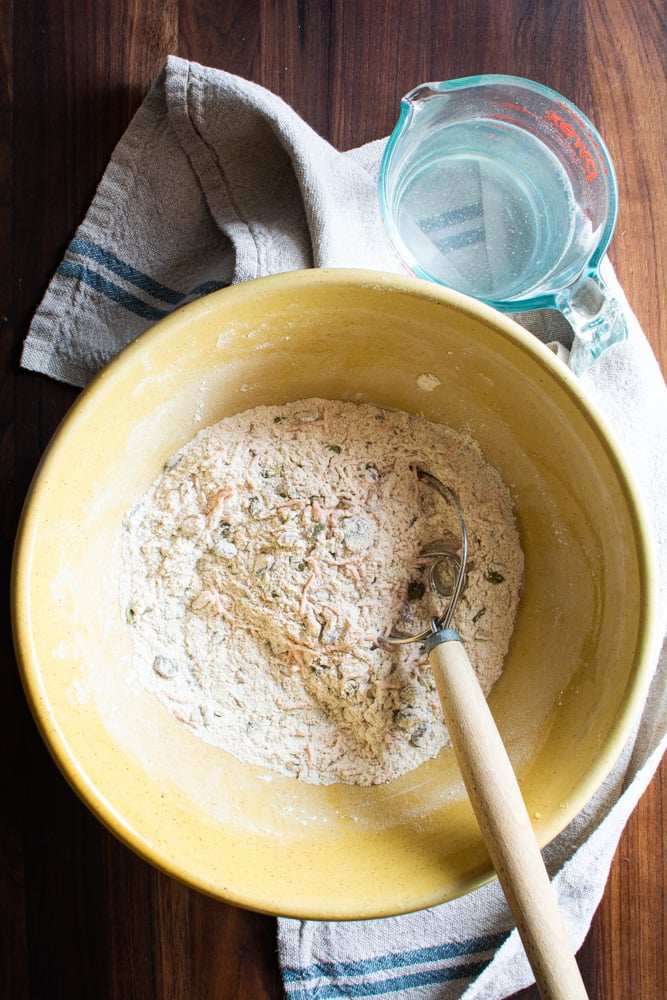
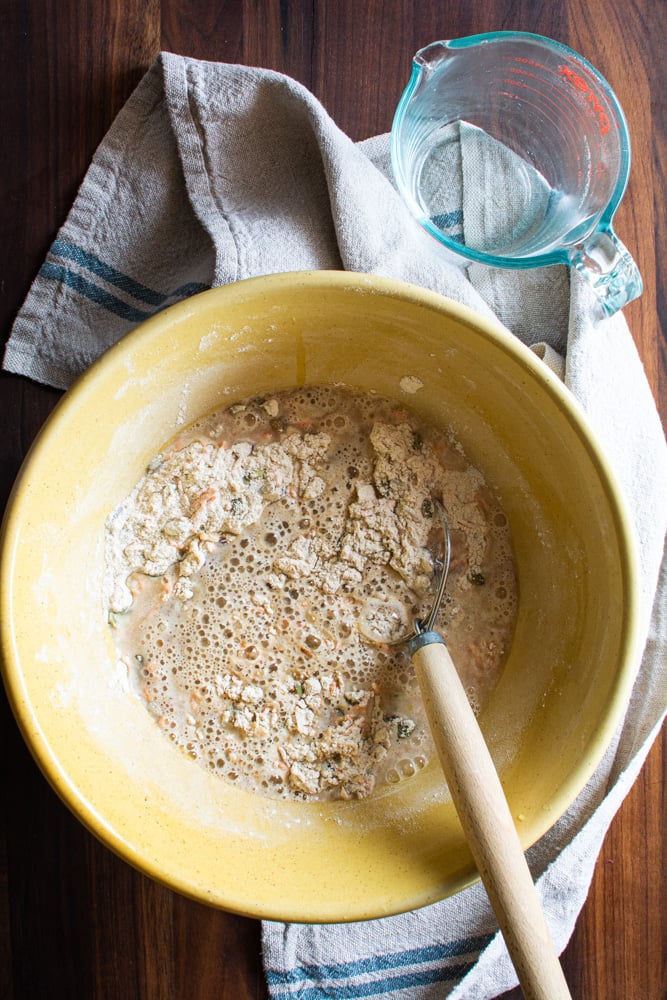
- Add water and honey. Mix just until all of the flour has combined with the water.
- The dough will look like a shaggy mess. That’s ok.
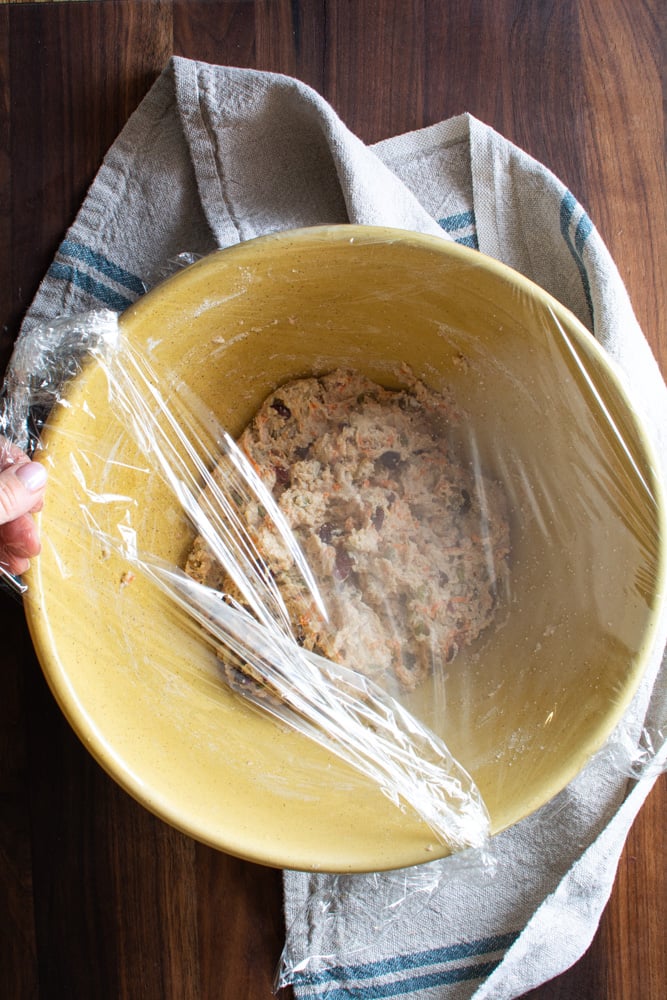
- Cover the bowl with plastic wrap and let it sit for 12 – 18 hours on the countertop. DO NOT REFRIGERATE. This is not optional. It takes that much time to proof the dough. The reason why you need a large bowl is that the dough will start to rise.
Shape and Proof
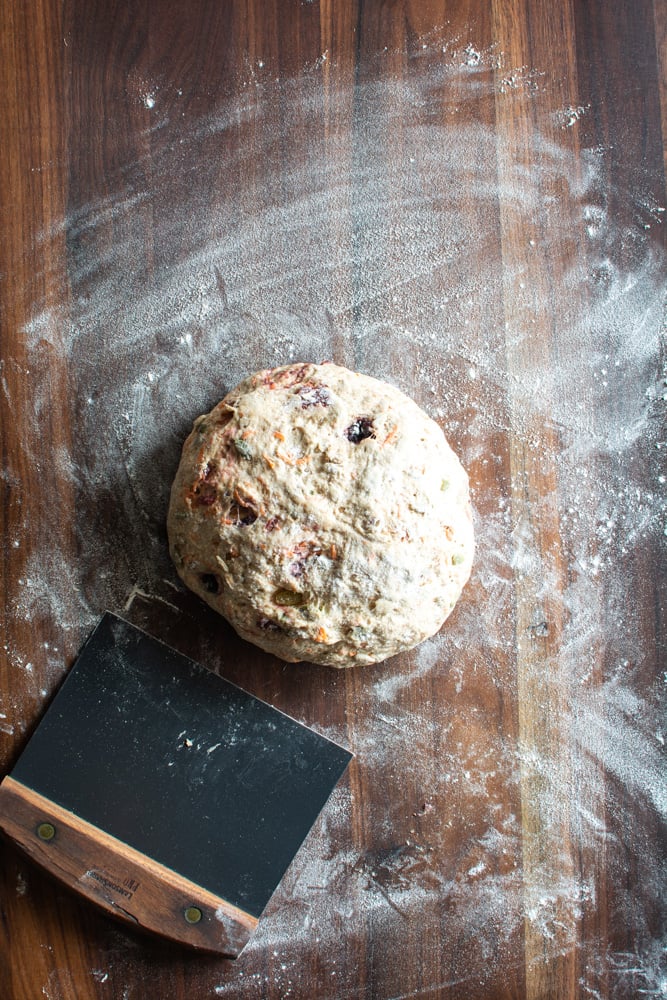
- After 12-18 hours, the dough will be sticky, but that’s ok it’s supposed to be.
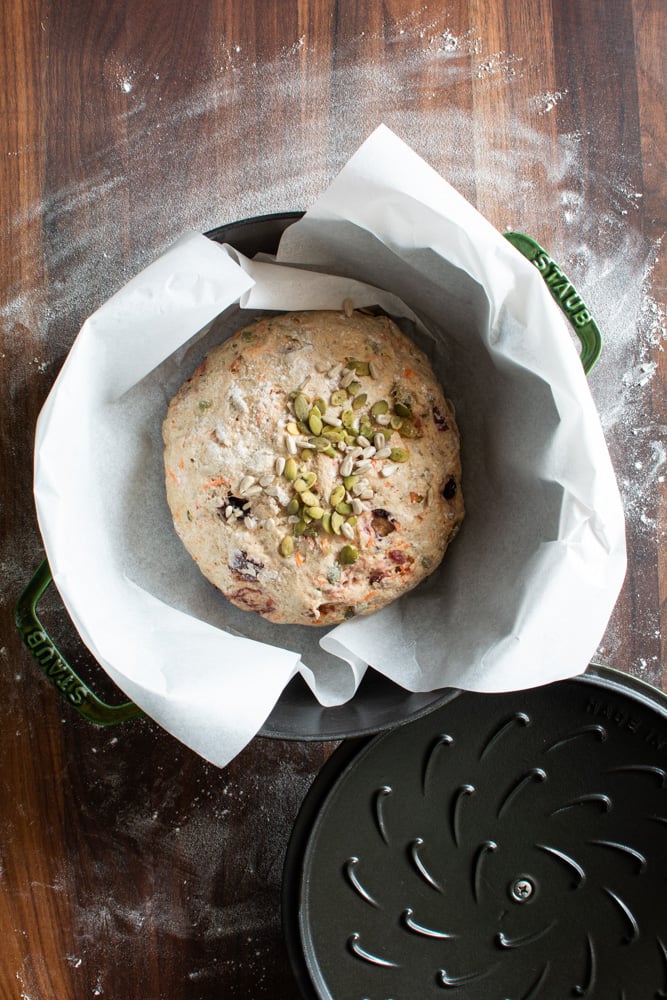
- 30 minutes before heating the oven, gently release the dough from the bowl onto a generously floured surface. Gently shape the dough into a round ball with floured hands and place it on a sheet of parchment paper. The parchment paper makes it easier to lift the dough into the pot and stays in the pot during baking. Cover with plastic wrap and let rest for 60-90 minutes. This is a longer rise time than other no-knead recipes that I have posted. Because of the wheat pastry flour, I like to let the dough rise longer to lighten the dough up a bit more.
- After the dough has been rising for 30 minutes. Heat the oven to 450℉. Place a pot with the lid into the hot oven and heat for 30 minutes.
Time to Bake!
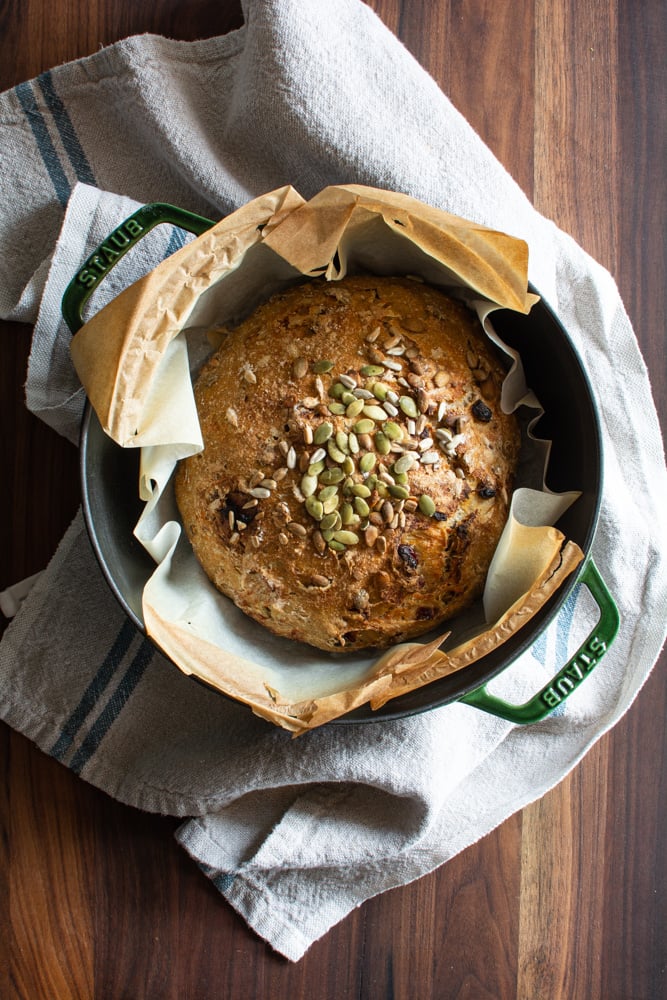
- Remove the pot from the oven and carefully pick up the parchment and drop dough into the pot. Be careful the pan is HOT. Put the lid on the pot and return it to the oven for 30 minutes.
- After 30 minutes remove the lid from the pan. Bake for an additional 15 minutes uncovered until nicely browned.
Tips to Make No Knead Bread in a Dutch Oven
- No-knead breakfast bread is pretty easy and simple. Don’t overthink or complicate the process.
- More or less: Feel free to adjust the ingredients slightly here. You can use less of the dried fruit and seeds, use more of one than the other, or totally omit any you don’t like. Add other goodies in this recipe, like different varieties of chopped fruits and/or chopped nuts like walnuts or pecans.
- Because the dough is so sticky parchment paper makes it easier to drop into a hot pot and then remove it after baking. But it is not necessary. Use silicone-coated/non-stick parchment paper. The regular non-coated paper will stick to the bread terribly.
- This breakfast bread recipe uses whole wheat flour, so the rise time is 30-60 minutes longer before baking than usual no-knead bread.
- Be sure that both the dutch oven pot and lid used can withstand hot oven temperatures. They need to be able to heat to at least 450℉. If there are instructions not to bake in an oven over 425℉, then do not! Simply bake the bread at the temperature recommended for the pot, and add a few extra minutes for baking.
- I suggest that you test the bread with an instant-read thermometer to make sure it’s cooked on the inside. The internal temp needs to be somewhere between 190F and 200F degrees.
- Easily remove the loaf from the the pot by lifting the edges of the parchment paper.
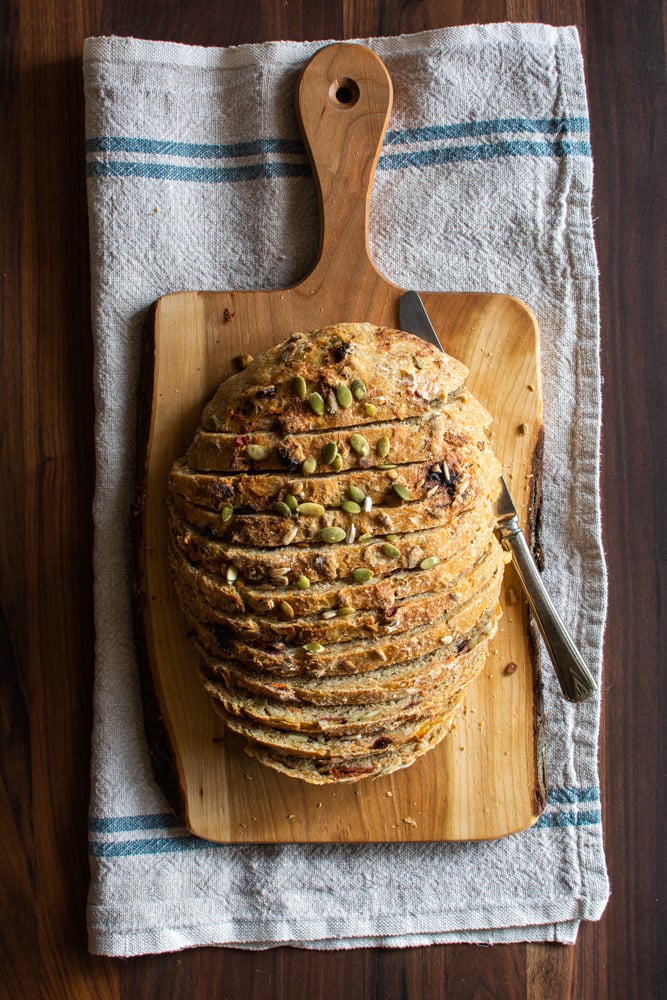
- Cool the loaf completely. It’s hard, I know, but it will slice much easier once it is totally cool to the touch. You can always lightly warm slices in the toaster oven!
Frequently Asked Questions
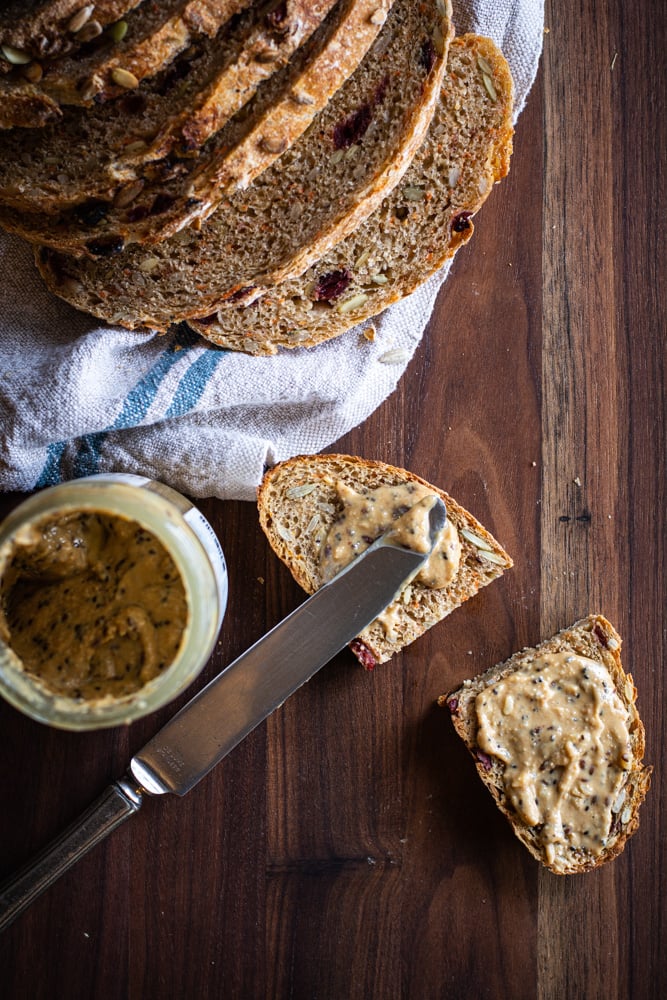
I love to toast no-knead breakfast bread then give it a good schmear with natural nut butter and a drizzle of honey. It’s the perfect snack before a workout or long run.
Warm slice of this bread are also delicious with softened regular butter or your favorite plant-based alternative. Enjoy as-is or spoon on some homemade Blackberry Raspberry Jam, Lemon Curd, or fresh fruit preserves.
Yes, you dough can be over-proofed. This will typically result in a dense and chewy loaf. Also, leaving the raw dough out for longer than 18 or so hours can increase the chances of contracting a foodborne illness.
Yes, it will stick. Definitely use parchment paper to line the dutch oven before adding the no knead bread dough.
Store the cooled fruit bread in an airtight bag (like a ziploc) or wrap in plastic wrap. The bread will keep well for up to 3 days on the counter.
This bread freezes very well. Simply cool completely. Slice the entire loaf of bread and place strips of waxed or parchment paper in between each slice. Lift the slices and carefully in a freezer bag. The parchment paper makes it simple to remove just one slice at a time.
As the name implies, no kneading means less work. Unlike traditional kneaded bread that needs lots of attention, making overnight no knead bread is a more hands-off process. The textures are also quite different: No-knead bread is more dense, like an artisan loaf. Kneaded bread is more light and soft, like sandwich bread.
You May Also Love these Recipes
- Banana Nut Bread
- White Chocolate Pecan Crusty Bread
- Andama Bread
- Giant Cheddar Twists
- No-Knead Pumpkin Pecan Bread
No-Knead Breakfast Bread
This No-Knead Breakfast Bread recipe is filled with dried fruit, shredded carrots, pumpkin, and sunflower seeds. Everything you need to get going in the morning or add some pep to the afternoon!
Ingredients
- 2 cups all-purpose flour
- 1 cup whole wheat flour Can use whole wheat pastry flour
- 1/2 tsp active dry yeast
- 1 1/2 tsp kosher salt
- 1 tsp cinnamon ground
- 1/2 cup carrots grated
- 1/2 cup dried fruit golden raisins, cranberries, cherries, blueberries, etc
- 1/4 cup raw pumpkin seeds
- 1/4 cup raw sunflower seeds
- 2 tbsp honey
- 1 1/2 cups water
Instructions
-
In a large mixing bowl, add flour, whole wheat flour, kosher salt, and yeast. Whisk together.
-
Add the dried fruit, seeds, and carrots Stir well to distribute the ingredients evenly.
-
Add water and honey. Mix just until all of the flour has combined with the water.
-
The dough will look shaggy without any appearance of dry flour.
-
Cover the bowl with plastic wrap and let it sit for 12 – 18 hours on the countertop. DO NOT REFRIGERATE. This is not optional. It takes that much time to proof the dough. The reason why you need a large bowl is that the dough will start to rise.
-
After 12-18 hours, pretty sticky, but that’s ok it’s supposed to be.
-
30 minutes before heating the oven, gently release the dough from the bowl onto a generously floured surface. Gently shape the dough into a round ball with floured hands and place it on a sheet of parchment paper. The parchment paper makes it easier to lift the dough into the pot and stays in the pot during baking. Cover with plastic wrap and let rest for 60-90 minutes. This is a longer rise time than other no-knead recipes that I have posted. Because of the wheat pastry flour, I like to let the dough rise longer to lighten the dough up a bit more.
-
After the dough has been rising for 30 minutes. Heat the oven to 450℉. Place a pot with the lid into the hot oven and heat for 30 minutes.
-
Remove pot from the oven and carefully pick up the parchment and drop dough into the pot. Be careful the pan is HOT. Put the lid on the pot and return it to the oven for 30 minutes.
-
After 30 minutes, remove the lid from the pan. Bake for an additional 15 minutes uncovered until nicely browned. You can test with an instant-read thermometer to make sure the bread is fully cooked on the inside. The temp should be between 190F and 200F degrees. Remove from the oven and carefully remove bread from the pot by lifting the edges of the parchment paper
-
Let the bread cool completely before slicing. This will make it much easier to slice the bread.
Recipe Notes
- No-knead bread is pretty easy and simple. Don’t overthink or complicate the process.
- Because the dough is so sticky parchment paper makes it easier to drop into a hot pot and then remove it after baking. But it is not necessary. Use silicone-coated/non-stick parchment paper. The regular non-coated paper will stick to the bread terribly.
- Because this recipe uses whole wheat flour, the rise time is 3060 minutes longer before baking than usual no-knead bread.
- Cool the bread completely before slicing.
- This bread freezes very well. Simply cool completely. Slice the entire loaf of bread and place strips of waxed or parchment paper in between each slice. Lift the slices and carefully in a freezer bag. The parchment paper makes it simple to remove just one slice at a time. Pop the slice in a toaster for a freshly toasted slice of bread…delish schmeared with nut butter and honey. 😋
I rarely promote products, but I just have to give a shout-out to the best nut butter on the market made by Ground Up PDX. The spread above is Toasted Macadamia Nut with Chia & Flaxseed 🤯 + more flavors – Snickerdoodle Almond Cashew + Coconut butter, Coconut Cardomom with Chia seed Almond Cashew! (my personal all-time favorite). I order a jar monthly!! Check out their Mission & Impact. They are changing the lives of women❣️
**This is not a paid promotion.
Great recipe! Very hearty and filling. I added some orange zest and replaced 1/2 cup of the water for orange juice. I’ll DEFINITELY be making it again.
Yum! I love your additions.
amazing absolutely best bread ive ever made, will definitely be making again!
Thank you so much. I sure love it!
Your bread recipe is everything. Cannot thank you enough. I am middle eastern and after amazing results with the white cheddar bread, i wanted to replicate with middle EASTERN flavors, made a similar one with black kalamata olives, haloumi cheese and dried thyme. Wow amazing!
Thank you so much! I love your Eastern flavors. I can’t wait to try it!
Oh, this bread. Delicious, sweet, spicy (in only the best cinnamon-y way). Just finished a loaf and i’ll be back to bake more tomorrow.
I’m so happy you loved the bread! It’s definitely one of my favorites. Thank you so much for your comment.
Wonderful comforting bread! I made it without the cinnamon and it was still yummy 😋 PS The bottom was a bit too dark for me so I’ll bake 5 min less next time.
I’m thrilled you liked the bread. Try raising the rack in your oven to the upper third of your oven. AND you can place your pot on a baking sheet. Both of these two tips will help prevent the bottom crust from baking too dark. I hope this helps.
Nothing beats Simply So Good’s no knead bread recipes!! They are a must try!
CiNnamon is not listed in the ingredients
So sorry. I made the correction. Thanks for bring that to my attention.