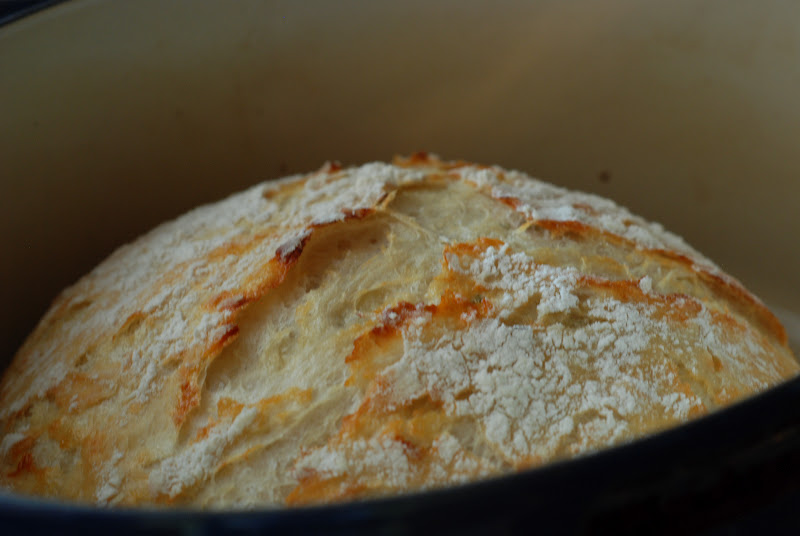
I realize that asking a question and trying to get or even FIND the answer is getting a bit ridiculous on the Crusty Bread page. This is by far the most popular post I have with over 1.2 MILLION page views. Who knew???? Oh my gosh. I knew the first time that I made this bread that I had to share it with the world. It’s so easy, yet so delicious and has SO many possibilities. Here is your turn to share, ask, comment, complain, or rave about your bread success.
Q: Do I have to use an enamel covered cast iron pan?
A: NO. You can use anything that can take the heat. The following have been used that I know of:
Clay pots with lids, Pizza stone with a bowl to cover the bread, insert from a crockpot, pyrex baking dish with a lid, stainless steel pot with a lid, baking dish covered with aluminum foil, old cast iron dutch oven.
Q: Do I have to use unbleached flour?
A: I always use unbleached flour. You can try bleached flour.
Q: Can I use self rising flour?
A: I don’t know. I would just stick to all-purpose.
Q: What size is my pan?
A: My smallest pan is 5.5 quart and the loaf barely fits.
Q: What type of yeast do I use?
A: I use SAF instant yeast. Any yeast should work.
Q: Why is my bread turning out flat?
A: I don’t know. You could try using less 1/4 cup less liquid. Or add a bit more flour. Make sure your dough appears to be dry when you first mix it. It will have more moisture during the rising time. There are many determining factors when bread making. Is your flour old? It does make a difference. Sometimes store brand, sale flour isn’t so great and should probably be left on the store shelf. Make sure your flour is fresh and a good quality brand and make sure your yeast is fresh and active.
Q: Can my dough sit out longer than 18 hours? Does it HAVE to be between 12-18 hours?
A: No. I have let some dough sit as long as 24 hours and the bread was beautiful.
Q: Have you tried Gluten-free?
A: No. I’m still waiting for someone to venture into the realm of Gluten-free. If you try it, let everyone know.
Q: Do I have to grease or oil the pan? Will my bread stick?
A: No you don’t need to grease the pan. I have never had the bread stick when using a cast iron pot. I haven’t tried anything else. The best way to be certain that the bread won’t stick is to form the loaf on a sheet of parchment paper and lift the bread into the pan using the sides of the parchment. Leave the paper in the pan. It’s won’t burn. When the bread has baked, just lift the sides of the parchment out of the pan. Voila!
Q: What temperature should my water be?
A: I just use cool water straight from the tap.
Q: Can I add sugar?
A: Sure.
My most recipe comment that will be so helpful to all of you. Thank you so much, Cory – Falling Star Lane:
Hi! Me again! I have some input – mostly add in ideas that have been huge hits! I found that using the parchment makes all the difference – to any loaf, it makes it easy to put in and take out and never burns.
Also, I reduced the baking time by 5 minutes for each step – more tender bred, and just as crispy crust.
I also add 1 T of raw sugar to each loaf – they rise higher for me.
As to add ins –
1. Turkey bacon and cheddar – huge hit
2. Rosemary, feta and sundried tomatoes – i found the ones in oil to bring a fantastic flavor
3. Jalapeno, and pepper jack – wow!!! used canned peppers – small can
4. Chocolate and cranberry
5. Rosemary and sharp cheddar
6. Chocolate chip and orange infused cranberries
7. Apricot, cranberry, and chocolate – I put too much in – so i had very dense bread – but it got eaten!!
8. Rosemary and Feta
9. Marinated artichokes and raw garlic – sliced 6 cloves very thinly – oh boy!
10. Orange infused cranberry, almond and orange zest
11. Lemon zest, feta, and rosemary
S0 far, none have been rejected, and I have become something of a bread baker to my friends – I bring a couple varieties to potluck, and they are very nicely received! I still need a 2nd dutch oven – days i bake 3-5 loaves it gets pretty hot around here! 🙂
I hope listing these is ok – i spent soooo long scrolling thru to see other peoples ideas, it seemed like this would be a good thing – found a few to try, and in fact making a pistachio and cranberry tonite, and an olive mozerella – new is good – but i get asked for the Jalapeno one most often!!
Thanks again for this blog post!
Most of the comments I receive are pretty fabulous like this comment. Keep them coming.










I have made bread!! Seriously, I was skeptical. I kill yeast. Anytime I touch an unbaked yeast dough with my hands – PFFT! – it dies. But the recipe intrigued me because I figured I really did not need to touch it. When I dumped it out on the floured surface, I used my nifty Pampered Chef spatula and used that to form the dough, which I made oval-ish because I used my mom's old oval 2.5 qt. covered casserole to bake it. I also lifted the dough with the saran wrap to put it in the casserole. No touching of the dough! The bread is beautiful,and tastes as good as the artisan breads that I love at the store that are so pricey. I am going to try some additions to the dough next time. Thanks for sharing the recipe (and this forum.) P.S. The house smelled heavenly while the bread was baking!
A Pyrex dish with a lid has been used with great success. I would put the dough on parchment to bake it just in case the dough sticks to the parchment. I hope this helps.
If you live in Texas we have a grocery store calledH.E.B. and they have acast iron enameled pot for $29.95. My daughters and have them for our bread.
Has anyone used a pyrex container? I don't have a Dutch ove and read the comments earlier about the cracking when using a crockpot bowl. Any suggestions to make sure I bake ths bread right?
Suggestions for storing the bread:
If I want to maintain the crisp crust, is put the bread cut side down on a cutting board and cover it with a dish towel. This will work, but only for a day. Other than that a plastic bag. The bread can be re-crusted by placing the bread in a 300 degree oven for a few minutes. I hope this helps.
Whats the best way to store the bread after you make it?
I have recently tried this recipe and have had nothing but successful. The cinnamon raisin has been a huge hit in my house. I have a quick question… do you have any tips of the best way to store the bread? Thanks
Thanks to everyone for all the cleaning suggestions and for the recipe tips. I have found that my favorite way to clean the enamel is the magic eraser. Works like a charm. As far as baking soda goes – you lost me at "elbow grease". Love to all.
I just made this today to go with a Bean Soup that I'm making for dinner. All I can say is WOW! I am SO excited by how awesome it turned out!! It is beautiful & SO DELICIOUS. I didn't do any mix-ins, rather, after I plopped the dough into my Le Creuset, I sprinkled the top with granulated garlic and freshly shaved Parmesan cheese. Not only did it smell amazing while baking (and I was nervous about the end product!), it tastes wonderful.
Thank you so much for sharing this recipe! Can't wait to try different variations!
Amy
My nephew sent me a copy of your recipe, I will be trying it in the morning,(I promise). I like to cook, and most especially breads. But I'd never managed a successful loaf until I tried my first bread machine. lol So it'll be interesting to see if I can fix-it or flub-it. lol
As to those pretty blue pots of yours. I'd like to suggest Bar Keepers Friend cleaning compound. Use it at home, and have yet to ever find anything cooked on that it couldn't take back off. Metal, glass, or ceramic, all have come clean.
Hi I just made my first loaf of this bread and it came out wonderful, I do however have just a couple of questions, the bread is a great golden brown but is very hard and crusty is that normal? then after cutting the first slice the dough has lots of air holes and looks a little doughy but taste great is that normal? Thank you in advance and I can't wait to make the next loaf with flavors in it.
I think that hard crust comes from heating the pan for 30 minutes. The bottom crust isn't quite so tough if you put the pot in a cold oven then heat the pan with the oven to 450. Plop in the dough and bake as usual. That helps. The bread is supposed to have the holes in it. That's a true artisan bread. My son's think its the best for grilled cheese because the cheese oozes through and gets crispy in the holes. I'm so glad you enjoy the bread. Happy baking.
My 14 year old and I are on our 4th loaf this week. Thank you for sharing this recipe that will undoubtidly become a new tradition in our home! Happy baking everyone!
Hi Natalie, I hope this helps. I borrowed the info from King Arthur flour:
Most yeast IS active dry yeast. I have used both interchangeably in this recipe without having rising problems what so ever. I use the SAF-instant yeast the most because I really like the results. This is what I'd do with your dough…what have you got to loose. Dissolve some 1/2 teaspoon of the yeast that you already have and a pinch of sugar in 1/4 cup warm water. Let it sit for 10 minutes or so. If the yeast begins to foam up then you have yeast that is good. I would stir that into the dough you have. It might be difficult to stir in, but work it the best you can. You could try adding 2 teaspoons of red wine vinegar to your mixture and it will proof in about 4-6 hours. If that doesn't work, I would probably just pitch the dough and start over. If my chance your yeast does not foam up, you probably need new yeast. Let me know what happens. Here is the King Arthur info:
what’s the difference between active dry yeast (ady) and instant yeast?
In days gone by there was a significant difference between active dry yeast and instant yeast. Today, the difference is minimal, and the two can be used interchangeably – with slightly different results. Let’s look at ADY first.
Active dry yeast: The classic ADY manufacturing process dried live yeast cells quickly, at a high temperature. The result? Only about 30% of the cells survived. Dead cells “cocooned” around the live ones, making it necessary to “proof” the yeast – dissolve it in warm water – before using.
These days, ADY is manufactured using a much gentler process, resulting in many more live cells. Thus, it’s no longer necessary to dissolve ADY in warm water before using – feel free to mix it with the dry ingredients, just as you do instant yeast.
However, if you want to make sure that your ADY is alive and ready to work in your bread dough, proof it first, as follows:
Place ½ cup of 110°F water (slightly warmer than lukewarm) in a 1-cup liquid (glass or plastic) measure. Add the yeast called for in the recipe, plus 1/2 teaspoon of sugar, stirring to dissolve. Wait 10 minutes; the yeast is active and healthy if the foam has risen to the 1-cup mark. If you don’t see any activity, buy a fresh supply of yeast. Once you’re sure the yeast is active, continue with your recipe.
ADY, compared to instant yeast, is considered more “moderate.” It gets going more slowly, but eventually catches up to instant – think of the tortoise and the hare. Many bread-bakers appreciate the longer rise times ADY encourages; it’s during fermentation of its dough that bread develops flavor.
Fleischmann’s and Red Star are the two brands of active dry yeasts you’re most likely to see in your supermarket.
Instant yeast is manufactured to a smaller granule size than ADY. Thus, with more surface area exposed to the liquid in a recipe, it dissolves more quickly, and gets going faster than ADY. While you can proof it if you like, it’s not necessary; like ADY, simply mixing it into your bread dough along with the rest of the dry ingredients works just fine.
One caveat: in dough that’s high in sugar (generally, more than ¼ cup sugar per 3 cups of flour), the sugar evens things out, and instant yeast and ADY will perform the same.
SAF instant yeast, produced by France’s LeSaffre company, leads the way among instant yeast brands, with Red Star also commanding a good percentage of the market. LeSaffre is the largest yeast producer in the world, responsible for fully one-third of the total amount of yeast manufactured yearly.
Yeast Question/Comment: First off, thanks for putting your blog together and for taking the time to help all of us out 🙂 I made my first batch of dough last night and was so excited to get up and look into the bowl! But nothing had happened…it had barely risen. Bummer! Now that I have read the forum (should have done that last night), I see that I did not use "active" yeast, but regular, and I did not use warm water to proof it. So I am wondering if you could alter your directions by stating 1/2 tsp of "active" yeast. It may help first-timers like me? Just a thought. So now here I am with a flat little ball of dough that has been sitting for 9 hours. Is there anything I can do to fix it now (like mixing in more activated yeast)? Thanks again for everything. I will try, try again 🙂
Alright, I give up. I have NEVER commented on a food blog ever, though I browse them multiple times per day. I (skeptically) tried this bread, because your pictures are amazing, and I have been searching for the perfect bread recipe. Tried many, all failed. Until NOW!!!! This recipe is hands-down, the BEST recipe I have ever tried. It just came out of my oven 45 minutes ago, smells amazing and has the best crust and texture that I have ever managed to produce. I was worried because the dough came out pretty wet and didn't really hold its shape after taking it out of the bowl, but it came out great (maybe a little flatter than normal), and I will be starting another batch as soon as I am done typing. THANK YOU for posting this, it deserves every view, like, and re-pin that Pinterest can throw at it. I will send you a picture as soon as I can stop shoving perfectly baked bread in my face… 🙂
has anyone added the add in goodies AFTER the 12 hours? success? just curious!
thanks
I kind of decided after the fact that it might be fun to add in the orange and cranberries, but the dough has already been on the counter for 12 hours
let me know!
Catherine Newman has a version of this recipe that I've been using for years; it contains some whole grains and is delicious! http://spoonful.com/recipes/fantastic-fearless-five-minute-bread
Great source. Thank you so much.
HOLY COW!! I just made bread! ME! I'm 60 years old and this is the first time I've attempted it.
Mine looks just like yours. I found this on pinterest (my latest addiction). I'm going to save your blog and read it often. You are a fantastic teacher! I've already got another bread proofing on my counter…can't wait to try all of the variations! Thanks so much for posting this great recipe!!
Well, Dee in Texas. You just made my day! Thanks for the kind comment. Just think about all that bread baking talent that has been waiting to spring out! congratulations on your success.
Is there anywhere I can find different recipes with measurement. I made a plain loaf and it was awesome. I have some garlic roasting right now to mix in but i would love some actual tried and true recipes!
Try the link below. Maybe there are exact measurements there. It looks like it's time for me to start measuring what I toss into the flour. Let me work on a few recipes. I know that someone has used roasted garlic, but I'm don't recall them giving actually amounts. There are so many comments and ideas, I have a hard time remembering and I just can't tell you where to look. I'll see if I can't come up with some figures.
Let me know what you try. thanks so much.
Has anyone tried Rosemary and Olive Oil? I really love that kind of bread, but I am unsure as to the measurements. Any Suggestions?
Yes, someone has tried this version. Somewhere among the thousands of comments and I can't remember their exact measurements. I would start with at least 1 tablespoon fresh rosemary. Maybe 2 tablespoons EVOO???? Start there. I just start playing with my dough and tossing in handfuls of this and that. Sorry I can't be more precise. Let me know what you come up with.
I'd just like to thank you for posting this recipe! Everywhere I bring the bread it's a huge hit! Unfortunately for me, I always open my big mouth and say how easy it is and that I'll email everyone the link to your blog, now they're all going to be able to make it…. Oh well! I've tried a lot of flavours so far. I think my three favourites have been (1) sauteed onions and garlic with cheddar cheese, (2) sauteed mushrooms with mozzarella, and (3) rosemary and cranberry. They're all delicious! I'm intrigued by your suggestion of adding chocolate and may have to try it! If anyone finds a good recipe for a really dark rye bread, I'd love to have it. That's my uncle's favourite and he always complains that he can't find it anywhere! Thanks again!
I am on my 2nd try for GLUTEN FREE loaf!! The first time I mixed my own gluten free concoction of flours, this time I am using the GF all purpose flour and adding xanthan as well – but I see on the side it says yeasted breads may need eggs and vinegar – that will be my next try if needed.
PS – I made this bread, original form, for my husband and kids and it was absolutely delicious.
PSS – I have a Lodge 7.5 dutch oven and it didn't ruin my pot (and I've used this recipe 2x … so I don't think its the brand.
I would like to try cinnamon raisin, has anyone tried it yet & any tips for this?
So, when I first tried this recipe, I put it in my 15 inch cast iron skillet and covered it with tinfoil (my dutch oven had rusted while on a camping trip so I had to clean it-yet- my bread was ready to go in the oven) and it came out beautifully. I have, so far, made it in my dutch oven with the lid as well as in a pyrex bowl(thinking it may shape it) and cast iron skillet both only covered with tinfoil. I have (luckily) NEVER had a problem with what I have put in it either. (my most recent exploration was using 1/2 cup of whey from some home made Greek yogurt I had made in lieu of water- gorgeous!)Also, I have put it in my oven at about 170 and it only took about 3 hours to rise rather than 16. My only complaint is how hard the bottom crust becomes, I can barely cut it with my bread knife! So, next time I think I will not heat the pan beforehand. Additionally, I'm going to try doubling the recipe to make one large loaf since my boyfriend complains "the slices are not big enough for sandwiches". All in all, AMAZING, keep up the good work and thanks for sharing!!
Thanks for your comment, Kelly. This is such useful information. I have had great comments on using whey. I need to try it myself. As far as your hard crust, I would put the pan in the cold oven and let it preheat to 450 with the oven. Then drop in the dough. That has seemed to help because the bottom crust does get pretty hard sometimes. Thanks for your kind remarks.
Well, I have been letting it heat up while the oven preheats. I think it may have something more to do with I'm at 180ft above sea level compared to your 4000. I'm going to try turning the heat down just a bit and see. My science project has lasted months though, at it's delicious too!. I recently started adding 2 tbsp of sugar (based on a sujestion from another poster) to make it rise a little better, and boy did it work! Today: Italian herb and garlic.
Thank you!! what an incredibly easy recipe! wish I could post photos…. NUMMY one Kalamata olives, fresh basil. fresh rosemary,capers, garlic cloves, feta cheese, I substituted the salt with Cavenders greek seasoning,,, sprinkled the top of the loaf with trocomare seasoning salt!
Hi, I just made your bread. It came out great but just had no taste. It really does need sugar. How much do you suggest to be able to notice. I would preferably like to use brown rice syrup.
Thanks, Kristy
I think I'd start with 2 tablespoons. Work up from there, if you want it sweeter. Let me know if you think the bread browns more with the addition of sugar.
I found your recipe 2 days ago= bought the flour and yeast yesterday, mixed up loaf baked today it came out FABULOUS!!! My kids and husband loved it. I can't wait to go mix up more tonight for tomorrow. thanks for sharing.
A million Thank you's for everyone that keeps voting for my husband. Happy baking 🙂
Lynn: I have never activated my yeast. If you use "instant yeast or rapid rise" you just toss the yeast in with the other ingredients. Some comments state that they activated the yeast in 1/4 cup warm water. I have never activated in with great success. If you feel like you need to activate it go ahead and stir it in 1/4 cup warm water, but delete that amount from the water you use in the recipe. Good luck
Thanks you for all the kind comments. I love hearing success stories and I love the combinations you are all creating. Keep it up. Happy baking.
Hi Janet! Thanks so much for this great recipe. Saw it (and pinned it) on Pinterest. Finally got the nerve up to try it. Can read about it here http://meanderingmoodys.blogspot.com/2013/01/we-made-bread.html It was pretty near perfect. It might have needed a tad more time in the oven. Just moved into this house and think the oven might not heat as hot as it should?? If I were to add a few minutes to it, would it be in the covered or uncovered stage? Thanks again!
Thank you for making me look like a super baker! My family loved the bread. It turned out perfectly, just like you said. As an FYI, I have a large enamel cast iron dutch oven and I used the water in the oven technique to preheat the pan. It worked great. Nice chewy crust, soft and fragrent inside. A keeper! Staci
Try using a Mr Clean sponge on your pots and a bit of Bar Keepers Friend if the build up is really stubborn. Both work wonders to keep pots and pans in beautiful shape.
Janet,
Love your blog and wanted to send a thank you! Love the clear precise instructions with pictures!
Here is a my first attempt and it's made my home smell yummy on this 1st day of 2013!
Julie
I have a problem..it was so good my boyfriend and I ate the whole loaf:) Any idea how many calories are in this amazing bread?!
I have no idea and I don't want to know 🙂
I don't know what I did…I did this recipe twice, and both times it was a dense, flat bread. I let the first rise too long by accident because I couldn't get off of work…I planned for the 18 hours perfectly and then I was about 5 hours late leaving for work :/ So I knew it wouldn't come out. But the next, I let rise for 12 hours and it was still a mess. I didn't have a nice LeCrueset cast iron pot…instead, I used a NEW Sur la Table enameled stock pot…and nearly ruined it! I know what happened the first time but honestly I don't know what happened the second time…I finally gave up – all those hours waiting for it to rise, wasted…dreaming of the crusty goodness…I didn't see the comments where you listed what other pots would work…next time I'll use the crock pot insert I have that's ceramic…is it OK if the lid is all glass? Thank you…if the third attempt doesn't work, I guess I'll have to give up LOL…thanks!
Hi Donna, Don't give up. I have left my dough out for a good 24 hours and still had success. I'm sorry our ruined a pan. I am amazed at the various containers people have used to bake the bread in with success. If you use the crockpot insert, make sure you remove the lid knob. I'm sure it's not oven safe. If you have any corningware, that works. Just a baking dish with a lid has worked for many folks. You can even cover an oven proof container with aluminum foil. I hope this helps. If not, I'll just have to come to your home and figure it out with you.
Found this on Pinterest earlier and have been obsessing over this all night. I have a batch proofing on the kitchen counter now…but I'm slightly worried about the house temps. We're in the middle of a snow storm here in NY, lol. Hopefully I can update you with positive results tomorrow afternoon. Wish me luck!
Just wondering; what kind of salt did you use? Table salt? Kosher? I know it isn't really a bit deal, but I was just curious.
I always use Kosher salt.
Hey! I hope this is not a duplicate question because I didn't read through everyones. Can this be done in the bread machine? How would you suggest if so. Thanks
I surely don't know. I have never used a bread machine and I have not had any one comment on using one. I have had several comments stating that they will never use their bread machine again, because this is so easy. You can try it and let us all know about your results. I hope this helps.
My bread didn't brown as nicely as yours. I baked in Pampered chef stoneware. Could that be the reason?
It still tastes good. I'll try again with add-ins.
Just bake the bread a few minutes longer after the cover is removed. Remove the bread when it is nice and brown. The stoneware should not be a problem, but I'm not sure because I haven't used one.
Janet! I have a question. I just got a new cast iron pot for Christmas and am super excited to use it! Is there anything i need to do to season it like you have to for a cast iron pan?? I don't wanna ruin it!!
Is you cast iron pot enamel covered or a black "Lodge" cast iron pot. If it's enamel, it's ready to go no seasoning required. If it's a black cast iron pot like a Lodge brand, sometimes they come pre-seasoned and ready to cook in. Most cast iron pots come with seasoning instructions. If it's "raw" and unseasoned, I would go google for cast iron seasoning because it definitely needs to be seasoned before using. Good luck. That pan will last you forever…really. They are great pans.
I haven't read thru the ba-zillion comments..yet.. so hope I am not duplicating. I used my old cast iron dutch oven. Smoked a bit when heating, but generally was ok. Made one loaf, added fresh parm and oregano. It was beautiful and so delicious. Can't wait to try more combo's this weekend. Thanks so much for this recipe!!
I have been making and giving away loaves of this bread for about a month now. No one has ANYTHING negative to say! "I'll take two loaves a week," came from one friend. For Christmas I made one where I added about a 1/4 cup of fresh rosemary (chopped) and 1 cup of cheddar cheese shredded. Even my fussy thinks-he's-a-foodie son-in-law complimented me on the flavor. By the way, I use my 3.5 quart Corningware casserole dishes. Works perfectly. Found extras at Goodwill for about $5. It keeps the loaves nicely uniform in size too. Thanks Janet! Love this bread!!!
I just made two loaves in my lodge dutch oven. One plain (added 1T of honey) and one with cheese. So delicious and easy to make. I tried using the parchment paper with the cheese loaf and it stuck to the bottom of the bread. I'm guessing because of the cheese. I had no problems without it so I don't plan on using it again. I'm not good at making my own recipes so I had to guess about how much to add and what to put in it. If you share your add ins please please please give some measurements so people like me know what to do. I didn't have anything fancy to throw in it so I made the cheese loaf with what I had lying around. I used 1 teaspoon of salt (instead of 1 3/4 teaspoon) and added 1 teaspoon of spike seasoning (not what it's usually for but I'm not good with seasonings) and 1 1/4 cup of shredded colby jack cheese. I added the spike seasoning because I was worried the mild cheese wouldn't have enough flavor on its own. It came out very good. The flavor was mild enough to go with anything but not so mild that it couldn't be eaten by itself. Thank you so much for the recipe!
Weird. I have never had anything stick to parchment paper. Even with the cheese bread. Your ideas and creations sound fabulous. Thanks for your comment.
Thank you for this wonderful bread recipe! Just made my first loaf and it came out exactly as pictured. Bought a cast iron pot especially for this bread. Can't wait to make more! Your tutorial was also excellent. Thank's again.
My dough was dry when I mixed it. I am using an unbleached bread flour. I added an extra cup of water. I hope it turns out okay. I will know tomorrow.
We love this bread! I have made it several times already, I tried once with chopped kalamata olives and came great! Now I am baking for Christmas gifts for the teachers at my boy's school!
I need to start trying with different favors now and I was thinking about making them in small rolls or something like a ciabatta, without touching the dough too mucho, but I guess I need a bigger cast iron to put several in on pan and they don't become just one bread!
Thank you, love this bread, it just lasts one day in my house of 4……not good for my waistline, so I workout harder when I make!
I just took mine out of the oven. Can't wait to try it. I used your unbleached flour basic recipe and added slivered almonds, a hand full of oatmeal and a hand full of cranberries. Can't wait to try it. I looks amazing. Thank you so much!!!
So I've fallen in love with this recipe and your blog. I've made two loaves that have disappeared. The first was cheddar/colby jack cheese, cracked black pepper, and cayenne (we eat cayenne on everything) and it was gone in two days. The second was whole wheat with honey which was great for our breakfast sandwiches. I'm currently baking 6 loaves of the cheddar/cayenne to send out as Christmas gifts. Thank you so much for the recipe and for everyone's great add ins!! Can't wait to try some of them out. Merry Christmas!!
Hi, thank you for this recipe. I have all the ingredients to start, but want to know if you sift your flour first?
No sifting required.
If you add cheese, can it sit out for that long and not be bad to eat?
I haven't had any problems with letting the cheese sit out. We are all still alive.
I like breads sweeter. How much honey or sugar would you suggest I start with for my own experimenting?
I would probably start with 1- 2 tablespoons
Thanks! I have since made a Cranberry Orange version and a Cinnamon Version. Both came out wonderfully! BTW: I used the "quick" method for the cranberry orange. Tonight, I am going to try a sundried tomato/fresh basil/feta version for dinner gathering. SO EXCITED!!!!
Baked this bread this morning and it is awesome!!! I'm a bread-baking grandma who has baked for years and I love this recipe. I activated 1 pkg of yeast in 1/2 c. of warm water; then added the other 1 c. of water to the flour/salt mixture, along with the activated yeast. Baked it in my crock pot, using aluminum foil for a cover. It worked great! Can't wait to try some of the variations!! Thanks for posting this on Pinterest!
Is there an edit to the plain version to make it just a bit more …. flavorful? I loved the crust but the bread itself was a bit bland.
On a different slant, do you have any suggestions or advice for a successful sourdough version?
Post a comment as often as you like. It's very helpful for readers. It is forgiving. Keep up the great baking.
I am just starting and I've only made one loaf, but I can't wait to try sundried tomato, bacon, and green onion?
No comments for awhile – so I will add something… I came across your bread page and have been a bread making fool.
So far… probable in the neighborhood of a dozen plain loaves (4 today with 8 proofing as I type… the 8 isn't included in the dozen) – sundried tomatoes and fresh basil (my fav) – garlic (too much) – italian herbs x 2; all dried herbs (awesome) – cranberry, orange, almond (good) – lemon/rosemary (meh) – bacon/cheddar (ok) – fresh jalepeno/cheddar (fab) – I will be buying a 50# bag of flour tomorrow or tuesday. Thanks for sharing!!!
So, question – your recipe calls for 1/2 t of yeast… I have since come across the same recipe calling for .25 t of yeast… but they also have a second rise time of a couple hours with a small amount of kneading (I don't know why they call it no knead bread) after the inital 12-18 hours of rise time. Does the 1/2 t make it so the kneading and second rise is unnecessary?
Another question – has anyone ever not given the full 12 hours… I have been wondering if anyone has baked it at hour 4 or 6 or 8 or… you get the idea… how much of a difference does this time make?
A discovery… I am just too cheap or poor (not sure which) to buy a cast iron skillet and I was tired of heaving my crock pot insert in and out of the oven… not to mention I wanted to be able to do 2 loaves at a time. My answer… those cheap steel 6 Qt stockpots made by imusa that they sell at walmart. I find I get the same results as when I was using my crockpot insert. I have tried letting them stay in the oven for the 30 minutes… I have tried putting them in when I turn on the oven and just letting them stay in until the oven is up to temp… and I have tried just putting them in for 10 minutes… I find each method of preheating the stockpots give the same result. I don't believe it would be the same with a cast iron one… but it works well for these $10 stockpots.
Thanks so much for such a great recipe!
Fabulous comments. Thank you so much. It's so great to hear the additions and creations you are making. Yes, I have found a quicker way. I just made some on Saturday and the rising time was 4 hours. Add 2 teaspoons of red wine vinegar and warm water. Cover and let rise in a warm spot. It should be ready to go in 4-5 hours. My loaf wasn't as large as the longer rising time, but still great for a quick through together early afternoon.
I made this today and it is wonderful. I have to step away from it to avoid eating the whole loaf!
Baked it in my old cast iron dutch oven and it turned out perfect. I also ended up leaving it for closer to 24 hrs rather than the 12-18 hrs. Seemed to have no negative effects by letting it rise for a full day.
I love this recipe. I made my first loaf of bread and it turned out great with one exception. The parchment paper stuck to the finished loaf. I used brown paper for package mailing. Is there a special parchment paper? The paper is set the Dutch oven so it is on the sides and bottom and the dough sets in.
Anyone else have this problem.? I don't want to ruin my new Dutch Oven. Thank you, Janet, for sharing this recipe and anwering all of our questions.
I no. I'm sorry. There is a special parchment paper made for baking sheets. I buy sheets by the 100's and use them for baking cookies and other things so I don't have such a mess with clean up. You can buy rolls of parchment paper in the grocery store by the waxed paper and aluminum foil. This should correct the problem. The parchment will darken a bit, but not burn and the bread NEVER sticks. Good luck.
I found you on pintrest last night and went straight in the kitchen and made my dough….got up this morning and baked it!!! I am sooooo proud of myself!! I posted pics on FB and tasted it before my husband gets home…well I tasted 2 slices…but if you turn it around you'd never know!!!! I am so excited I am gonna make it for christmas gifts wrapped in a dish towel like you showed!!!!! THANK YOU!!
What is the best way to store these loaves of bread?
I know I just posted recently, I'm the wife making bread for my husband's sandwiches, but I had to post again. I just made my third flavor combo, this time with caramelized onions and blue cheese. It is AMAZING! So again, thank you for this recipe, and if you haven't tried this flavor combination, it's one that's definitely worth trying! 🙂
~Kristen
I just made my first loaf, and I can't believe how easy this is! I used a Tramontina cast iron Dutch oven that was on sale at Sears, and it worked just fine. After reading some of the comments, I was afraid to take the lid off, but it looks just like yours. Thanks for sharing this recipe! I am going to make some for Christmas presents, along with some flavored olive oil for dipping.
Can I tell you how much I HATE making bread? I don't like messing with yeast, I'm too lazy to knead, and I'm too cheap to buy a bread machine. I fully expected this recipe to wind up on the list of "stuff that looks good on Pinterest, but sucks when you try to make it." I can happily report that our house is now fully obsessed with this recipe!
Our first loaf was just the plain white. Fantastic. Next, we had to go with cinnamon raisin. I decreased the salt to 1 teaspoon and added 1/4 cup of brown sugar, 1/2 cup of raisins, and 1 teaspoon of cinnamon. Just stirred it right in. Absolutely delicious. My husband said he wanted it a little sweeter, so I mixed up a thick powdered sugar glaze and poured over the top. Fantastic!
Last night, we tried black olive parmesan. I have a recipe for black olive focaccia that I sometimes make, so I decided to throw those same ingredients in: 1/2 cup of finely chopped black olives and 1 cup of parmesan. I didn't add any dried herbs this time, but might throw in some oregano or basil the next time.
I'm using a big Pampered Chef stone bowl with the stone pizza dish that doubles as a lid. Today, I totally forgot to even put the lid on when I baked it! The bread was a little dark, but tasted just fine.
This is so easy that I'm planning to make TWELVE loaves for our church's bazaar this Saturday. Four of each kind. And I'm going to check my local thrift store for some additional things to bake them in so I don't have to use the stone bowl for 6 straight hours!
Fun to make and a JOY to eat and to share with others. Made a white loaf this AM, had warm bread, butter and Huckleberry Jam. Tonight put together a rosemary, thyme, sage, Asiago cheese, Kalamata olives and toasted pine nuts. Don't know what is going to happen, but I am looking forward to it. I have been wanting to do pine nuts but really don't know what mix they would go in—-so, it will be a surprise. I have done all the other mixes, I like savory over sweet. I found out about your site from someone on AR, what a lucky find that was for me. I enjoy this bread so much. I love to share it. Thank you.
Thank you so much for your comment. You HAVE to let me know how the new concoction turns out. I think it sounds amazing. It makes my mouth water just thinking about it. Thanks for sharing and I'm so glad you found me.
My loaf did not do all that great, BUT, made a very good Fratata. Guess I put too many things in my loaf and I did get carried away with the olives. Live and learn. Just took out a WW loaf about an hour ago. I use 1 c WW and 2c white, Love the WW bread. Again, thank you for all the info and pictures you have placed in your blog. Friends are always asking for MORE bread. I do not do store bought bread any longer. Mine is better. I have several friends doing their own bread now, it is so easy and so good. Thank you.
crockpot ? how ?
Use the crockpot insert to bake the bread in. Follow instructions for baking bread and heating pot. I believe most comments say that they have filled the pot with water while preheating to prevent cracking. Then remove the plastic knob from the pot and bake. You can also just cover the pot with aluminum foil.
Has anyone tried substituting baking powder for the yeast? I am very allergic to yeast and wonder if this easy recipe could be modified. I miss bread.
That's a good question. I personally have not tried baking powder. Hopefully someone out there will have the answer for you. I would miss bread terribly.
I made this bread for the first time for Thanksgiving (got recipe from Pinterest). Everyone ate the dinner rolls I baked instead since they were soft and light. So I put the crusty loaf in a large ziplock bag and sliced it the following day to make turkey pepperjack cheese paninis and OH MY GOD, they were fabulous. I have since made another loaf and served paninis to my neighbors. They are SOLD. If you haven't made grilled cheese or other grilled sandwich with this bread, you must try it!!
Grilled cheese sandwiches are the BEST with pepper jack cheese bread. So fabulous dipped in homemade tomato soup. I have even cubed the bread for croutons on top of soup. Thank you so much for passing this on.
Has anyone tried using a sour dough starter withg this recipe?
Scroll up a few comments and you can see the results. Yes it has been done with great success. I believe they added 1/2 cup start.
My husband was wanting a sweet cinnamon loaf, so I gave it a whirl. To the basic recipe I added 1/2 cup sugar and 1 1/4 Tbsp cinnamon. I also added a couple of handfuls of cinnamon chips that I had made. The taste was great (a bit sweet for me, but what can I say, the guy has a sweet tooth) BUT the bottom burned. (I am assuming it was because of the sugar???) Any suggestions on changes to recipe or cooking temp/time/ etc to have a non-burned-bottom loaf? I would love to hand these out as Christmas presents this year not so crispy!
The bottom turns pretty brown with the addition of sugar and the cinnamon chips. We had the same result with chocolate chips. Try heating the pan right when you turn the oven on. When the oven heats to 450 add the dough. You may want to add only 2 tablespoons of sugar.
Hi all–I call this "the miracle bread." I have always been an aspiring bread maker, but I have historically had little success–this is the first bread that turned out for me. Just one tip for high altitudes: I have made this bread quite a few times now. It has always turned out well, but the first couple times the inside was just barely undercooked (I have a somewhat picky audience). So…I think this was because I live at just over 5000 feet above sea level. To fix my little problem, I now cook the bread for 38 minutes with the lid on and 15 minutes with the lid off…turns out perfect…
Can you make this with whole wheat flour? If so do you just do everything else the same?
yes you can, it is more dense, but works. You can try 50/50 as well. You will find that the flour does not absorb the water as well. Try this: 1/4 cup flour less and 1/2 cup more water and cooked it 5 less minutes. I hope it works.
I am really having fun with this recipe. Made about 6 or 7 loaves now, using parchment paper in my Le Creuset. My only complaint that i have with the way it's turned out is that while the outside looks perfectly beautiful, the inside always seems a little too moist. Like it hasn't cooked all the way through. I have toyed around with the cooking time, but I just ended up with a burnt bottom crust (even with parchment paper). Any suggestions?
-Kealani
Place the pot in a cold oven and heat oven to 450 degrees. As soon as the oven reaches temp then drop the dough in. Bake as usual. This tends to help with the darker bottom. Happy baking.
Just wanted to say thanks so much for this recipe. I made my first loaf today. And despite the smoking pot (when I took my pre-heated pot out of the oven, smoke came billowing out. I was quite thankful for my range fan today.) it came out wonderfully! I tried the rosemary and feta add-ins, and it is simply amazing. I will be making this every weekend for a while. My husband is starting a trooper academy, and will need to make a 6 hour trip every Sunday to the academy. I wanted some special bread to use on his sandwich I will send with him for his on-the-road dinner. So thank you again! 🙂
~Kristen
What a great wife you are. Rosemary feta sounds amazing. Thank you for your comment. Happy baking.
i just made this, and added olive oil (half a cup OO, plus one+ cup of water) and rosemary. it smells amazing! we are going to have it with dinner