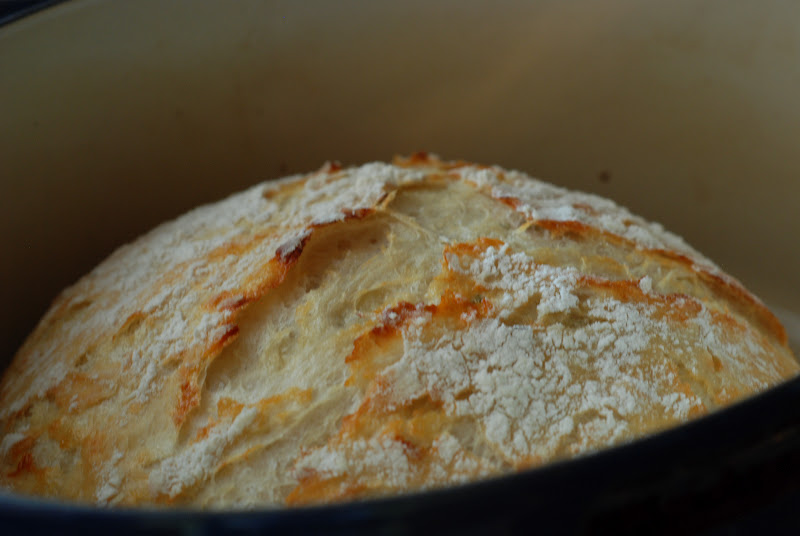
I realize that asking a question and trying to get or even FIND the answer is getting a bit ridiculous on the Crusty Bread page. This is by far the most popular post I have with over 1.2 MILLION page views. Who knew???? Oh my gosh. I knew the first time that I made this bread that I had to share it with the world. It’s so easy, yet so delicious and has SO many possibilities. Here is your turn to share, ask, comment, complain, or rave about your bread success.
Q: Do I have to use an enamel covered cast iron pan?
A: NO. You can use anything that can take the heat. The following have been used that I know of:
Clay pots with lids, Pizza stone with a bowl to cover the bread, insert from a crockpot, pyrex baking dish with a lid, stainless steel pot with a lid, baking dish covered with aluminum foil, old cast iron dutch oven.
Q: Do I have to use unbleached flour?
A: I always use unbleached flour. You can try bleached flour.
Q: Can I use self rising flour?
A: I don’t know. I would just stick to all-purpose.
Q: What size is my pan?
A: My smallest pan is 5.5 quart and the loaf barely fits.
Q: What type of yeast do I use?
A: I use SAF instant yeast. Any yeast should work.
Q: Why is my bread turning out flat?
A: I don’t know. You could try using less 1/4 cup less liquid. Or add a bit more flour. Make sure your dough appears to be dry when you first mix it. It will have more moisture during the rising time. There are many determining factors when bread making. Is your flour old? It does make a difference. Sometimes store brand, sale flour isn’t so great and should probably be left on the store shelf. Make sure your flour is fresh and a good quality brand and make sure your yeast is fresh and active.
Q: Can my dough sit out longer than 18 hours? Does it HAVE to be between 12-18 hours?
A: No. I have let some dough sit as long as 24 hours and the bread was beautiful.
Q: Have you tried Gluten-free?
A: No. I’m still waiting for someone to venture into the realm of Gluten-free. If you try it, let everyone know.
Q: Do I have to grease or oil the pan? Will my bread stick?
A: No you don’t need to grease the pan. I have never had the bread stick when using a cast iron pot. I haven’t tried anything else. The best way to be certain that the bread won’t stick is to form the loaf on a sheet of parchment paper and lift the bread into the pan using the sides of the parchment. Leave the paper in the pan. It’s won’t burn. When the bread has baked, just lift the sides of the parchment out of the pan. Voila!
Q: What temperature should my water be?
A: I just use cool water straight from the tap.
Q: Can I add sugar?
A: Sure.
My most recipe comment that will be so helpful to all of you. Thank you so much, Cory – Falling Star Lane:
Hi! Me again! I have some input – mostly add in ideas that have been huge hits! I found that using the parchment makes all the difference – to any loaf, it makes it easy to put in and take out and never burns.
Also, I reduced the baking time by 5 minutes for each step – more tender bred, and just as crispy crust.
I also add 1 T of raw sugar to each loaf – they rise higher for me.
As to add ins –
1. Turkey bacon and cheddar – huge hit
2. Rosemary, feta and sundried tomatoes – i found the ones in oil to bring a fantastic flavor
3. Jalapeno, and pepper jack – wow!!! used canned peppers – small can
4. Chocolate and cranberry
5. Rosemary and sharp cheddar
6. Chocolate chip and orange infused cranberries
7. Apricot, cranberry, and chocolate – I put too much in – so i had very dense bread – but it got eaten!!
8. Rosemary and Feta
9. Marinated artichokes and raw garlic – sliced 6 cloves very thinly – oh boy!
10. Orange infused cranberry, almond and orange zest
11. Lemon zest, feta, and rosemary
S0 far, none have been rejected, and I have become something of a bread baker to my friends – I bring a couple varieties to potluck, and they are very nicely received! I still need a 2nd dutch oven – days i bake 3-5 loaves it gets pretty hot around here! 🙂
I hope listing these is ok – i spent soooo long scrolling thru to see other peoples ideas, it seemed like this would be a good thing – found a few to try, and in fact making a pistachio and cranberry tonite, and an olive mozerella – new is good – but i get asked for the Jalapeno one most often!!
Thanks again for this blog post!
Most of the comments I receive are pretty fabulous like this comment. Keep them coming.










This bread sound out of this world. How do I get the recipe?
Have been using a very similar recipe but adding olive oil, a bit of honey and oats at the start as well. Im always using "fresh" yeast and it´s been working with cold water. Have put it in a preheated oven at 225 degrees but in a so called Ultra Pro. Same idea otherwise though, stick it in for 30 minutes with the lid and then remove the last 15 minutes;) So keen to try it your way as well to taste the difference!
http://www.tupperware.se/produkter/produktserier/ultrapro
I love this recipe! 🙂
One of my first concerns in trying this bread was the cool temperature of my home (we keep the winter thermostat set at or below 63F, dropped to 55F at night) – my first loaf, mixed in the evening and left out on the counter, was little different after it's initial rise time than one I put in a prewarmed (but turned off) oven for it's rise.(Starting it off using the warmed oven does create a slightly larger and finer air bubble loaf for me) That was good to see!
However, I've learned that my cooler home definitely affects the 30 minutes allowed for the 2nd rise – that cool counter top seems to zap the very life out of the bread and allowing it to set longer has helped – but the best help has been to time it to need to run the under counter dishwasher, wait until it's run long enough to warm up the counter, then continue with the process.
Yes, I've had one loaf stick very badly with the stuck parts being slightly burnt, but the unstuck part not burnt – I had followed a suggestion to put the dough in flour side UP and where there wasn't flour on the new bottom, it burned and stuck to the enamel.
That caused me to have to bake the second loaf I had prepared on a pizza stone with a stoneware bowl cover – and learned that if your cover bowl is very large (as mine was), then the bread will spread, not be as tall (can't call it flatter, since it started off okay)and cook faster.
I've been experimenting with unbleached flour,whole wheat flour, vital wheat gluten and ground flaxseed as my base – my most successful base combination is using 2 cups unbleached, 1/3 cup ground flaxseed and 2/3 cup whole wheat flour, 4 tsp vital wheat gluton. It's still a slightly smaller finished product because the flaxseed and whole wheat make it so much more dense, but the texture and flavor work well for me.
Thanks for your blog, your continued responses and continued patience with us when we repeat already answered questions. 🙂
Melody, Thank you so much for the info on sour dough. I have to try it. It just sounds like amazing bread. Thanks for your kind comments. I hope to keep this blog going for life 🙂
Amazing Bread recipe, Thank you! I have been baking Sour Dough Bread for several years and have never made a more delicious loaf than the two that just came out of the oven this morning. I used your recipe, doubled it, used 1 cup whole wheat flour for 1 cup of the unbleached, and used 1 liquid cup of my 3 year old sourdough starter for 1 cup of the water! ( I used warm water for the other two cups because my starter was cold out of the frig!) No knead, just mixed as shown, put in oven with oven light on overnight, then took risen dough out of the oven, preheated oven to 450 degrees while pewter casseroles were heating too, fomed the two round loaves, placed in preheated casserole, lid on and baked in pewter casserole dishes with fitted pewter lids. AMAZING! My husband can't wait to get home and eat the whole loaf with his speghetti dinner tonight. THANK YOU for the wonderful recipe and the NO KNEAD TO KNEAD RECIPE!My two loaves will be just the first of many! Just fabulous! Blessed, a follower for life!
If you are worried about the bread sticking, just place a piece of parchment paper on the bottom on the baking dish. OR put the dough onto the parchment and lift the parchment to lower the dough into the dish. Works like a charm.
Not that you need another 'oh my gosh this bread is fantastic and the easiest baking I've ever done in my life' comment, but OH MY GOSH THIS BREAD IS FANTASTIC AND THE EASIEST BAKING I'VE EVER DONE IN MY LIFE!
To add: I used my crock pot insert and some heavy duty aluminum foil as the lid since I didn't want to fiddle with taking the plastic handle off of the crockpot lid and it turned out JUST fine, in case people are in the same boat I was (the boat of crockpot owners who don't have an enamel pot but are too lazy to take off the plastic handle from the crockpot)
Can't wait to try this fabulous sounding bread, but I have a question about using the correct pan. I have a very old (over 40 years) white Corningware 5 quart pan with a glass lid. I'm sure it can take the 450° heat, but since the finish is not as smooth as it was when it was new, I'm concerned about sticking. I've read the comments, but haven't seen many comments about the bread sticking. Thanks for any info about this.
Did this in the mile high city this morning. I was a bit wary due to altitude adjustments. I added a pinch more salt to delay the yeast and a tad more water but followed everything exactly. My hubby is still raving about the bread.
Yes, you can make rolls with this recipe. You could just make smaller loaf shapes or bake them on a pizza stone uncovered. Works great. Check out the Roasted Tomato sandwiches on my blog. That should help.
Found this receipe last week. have been making bread non stop. Cant keep it in the house. Did not have great results with cinamon and raisin bread. I made garlic herb bread and it was great. I had to add a little mre water to the receipe. I have been using stainless pans with foil lids. seems to be working great. Love the receipe. Wondering if i could make rolls out of it ?
OMG!!! We all love this bread!..now watch as my backside grows..oh well! it will be worth it!I like to add rosemary and roasted garlic, it is good to dust the top with chunky salt. Also, kalamata olives with feta and herbs mmm…a great addition. Thanks!
Just to let everyone know. This bread is more dense than regular bread. Don't expect a light fluffy bread.
For the very first time, I tried the plain bread and also the cranberry one. The breads turned out this beautiful golden brown colour, I was quite impressed. I haven't sliced the breads yet…they are cooling off. My question is, I found that the breads were quite heavy – can this be a sign that they aren't properly cooked inside? I am so excited to find out but at the same time, I am quite scrared to maybe find out that they aren't properly cooked inside.
Anon: I don't know what to tell you about your last three loaves. Especially if you haven't changed anything. How is your flour and yeast? Fresh??? Did you open new flour?
Sorry if this does not go to the right place, I’m a cook not a blogger! The best way to clean your cast iron or ceramic pots is to put them in a self-cleaning oven (you can also use this trick for your burners). Turn it on to clean and when you take them out just wipe off the soot. Your pots will look brand new!
To my friend in Norway: For whole wheat flour use 1/4 cup flour less and 1/2 cup more water and cooked it 5 less minutes. Many bakers have had success with this formula. Good luck.
Has anyone made this with all wheat flour, that is all I have. I live in Norway and that is the most common flour used here. Are there any modifications I need to make to account for all wheat? More water or more yeast? Any advice would be really appreciated:)
Thank you for all of your great suggestions and helpful tips and ideas. You are all fabulous bakers.
This is bad,bad,bad…..FOR YOUR WAIST LINE!!!! OMG, it's delicous, easy and smells wonderful baking!!!! Can't wait to make more. And I am passing along the recipes to my friends and family
I just made TWO loaves! I used bleaced flour, because that is all I had. I did a rosemary, lemon and parmesan cheese one, and then I did a rosemary, roasted garlic, and sharp cheddar one. I think I didn't leave my first loaf in with the lid off long enough, but I got nervous about it getting too dark so I took it out at about 10min, not 15min. Still tastes great, my second one I did the full 15min, and it seems a bit firmer. It is still cooling though. I used a food network enameled cast iron 7 quart pot. I had no parchment paper, so I lightly brushed the bottom with olive oil, and had NO sticking!! They came out beautifully. I also heated my pot with some water in it after reading the warnings about heating some of them empty. I did my first batch and while that one was still going, I got the other one resting on the counter and swapped them out, worked great since I only have one pot! 🙂 I will be making this ALL the time!! Thanks so much for the recipe! My children (4 yrs, and 18mo.) and husband all love it too! 🙂
I used to make a Tomato Basil bread. I added tomato paste (more intense flavor without too much liquid) and dried basil. Maybe a sprinkle of garlic as well. Can't wait to try it today with this new found, easier way to make bread!
I just have to say that your bread is strengthening family bonds!! I made this bread for the first time today. When my son, who is seldom complimentary of me, got home from school, he took a piece and walked away eating. One bite in and he came back just to say, "Mom, this bread is awesome!" thank you so much for making my week! I will be making this a lot from now on.
Found this on Pinterest, gave it a shot and I was so happy and surprised with how my bread turned out! My picky three year old can't stop eating it! It is so delicious… Thank you! I used my Home and Garden Party Bean Pot to bake it in and it came out perfectly! 🙂
I made this bread on bet from my husband he said i couldnt make it. It was easy and the taste was great. However it seemed to be wet in the middle it was done and the taste was great. My second attempt on it to make cinnamon raisin bread failed. The rasin burned on the outside of the bread and this bread lacked the flavor i was looking for. It was very wet,heavy in the middle and a bit chew. Any idea how i can change that.
Angela: I'm so happy to hear your son is making the bread. Yes, it's that easy. This will give him so much confidence in the kitchen and his friends and family will love him forever.
Anon: The pesto bread sounds amazing.
My 14 year old son started this bread last night. He got up early to start the baking process before his early morning class (he leaves the house at 6 am!). I had to finish the baking process and pull it out of the oven. It looks and smells so good. I'm just waiting for him to get home so we can taste it. It's killing me!
I think this will be his new chore on Saturday night's so we can have fresh bread for Sunday dinner.
I just made some of this and would call it pesto bread. I used fresh basil, parmesan cheese, a little minced garlic and pine nuts. Came out delicious!
Also, I have added about and 1/8 cup of each of flax seed, wheat germ and oat bran to give it a little more fiber to each loaf. Works great!
Have also found I need to proof active dry yeast as it rises better in high altitude rather then just adding the yeast to the flour.
I haven't posted a list of the ingredient amounts for the add ins. For the cheddar jalapeno, I added 1 1/2 cups cubed cheddar and 2 chopped fresh jalapeno's. I hope that helps. You can start with these amounts and adjust to your liking. Good luck.
Do you have a list of add-in amounts on all the different flavors mentioned ? Like how much jalepnos and how much cheese etc….?
I hope this isn't a duplicate question, but I'm wondering if you could double the recipe as 1 loaf instead of 2…would like a larger loaf. Don't know if that would compromise the "times" and "results" of the finished product. Thank you in advance, can't wait to try it!
Michele,
This does make great toast. If you want fabulous french toast, add 1/4 cup cocoa powder to the flour mixture and about a cup of chocolate chips. Great topped with strawberries.
I finally got around to making this bread after having pinned it months ago and my mom picked up a cast iron pot for me for christmas and here it is February. PROCRASTINATOR IS MY MIDDLE NAME! Believe me, not a good thing. Anyway I was happy with the bread. I screwed up a little as I didn't have instant yeast and put some warm water with the yeast and neglected to remove that amount of water. So it came out a little flat. But tastes very good. And last night I found out that it makes WONDERFUL TOAST!!! I think my next loaf is going to be made close to the weekend so we can try french toast. I'm sure that will be amazing. Thanks!
Can I use wheat flour with this recipe?
Mary
I am going to try this recipe this weekend. I've wanted to learn to bake bread for as long as I can remember. I tried once and ended up with a rock hard football shaped loaf. I can't wait to start. Thanks and wish me luck!
I tried this recipe and it came out great! Always wanted to know how to make bread and this made it so easy!!!
The bread can be frozen. Just remove from the plastic bag when thawing. You can reheat in a 300 degree oven for a few minutes to "re-crust" the bread.
can this bread be frozen and heated up at a later date?
I just tried this with 2 cups of white and 1 cup of coarsely ground wheat flour. I added sunflower seeds and caraway, and just a touch of raw honey. It is so good! Great actually, I did cut down on my salt just a touch because my sunflower seeds were salted.
Omgawwwwwwwwwwshhhhh, just tried this bread for the first time!!! It is fantastic! My daughter (who is 16) wants the receipe so she can make it at her Dad's. We have been coming up the 'flavours' we would like to try. This will definitely be something I will be baking on a regular basis. And to think I used to bake bread the old fashioned way…with a whole package of yeast and kneading…… thank you again for sharing… we love it!
You can use a glass covered casserole just as long as it can take the high temp. I don't think anyone has lowered the temperature and has great success. Good luck.
Is it ok to use a heavy glass cassarole dish with a fitted lid to bake my bread. Is there any time or heat adjust in bakeing because is a glass container???
That's just crazy, Jordan, that your bread stuck to the parchment. My bread has never stuck to anything. ????? I appreciate your input so much.
I have just made bread for the very first time! After the first rise, I dumped the dough onto floured parchment which, after a two hour second rise I had to lift and lower into the heated pot because the dough was kinda stuck to it. Next time, I will purchase and use a silicone baking mat instead of parchment paper. Reportedly, nothing sticks to silicone.
Thanks for this blog and the forum Janet and everyone else!
I used the whey from some yogurt I strained for the liquid. It gives the bread a great sourdough flavor. It's fabulous toasted. Thanks for giving me the idea whoever you are.
Tyler: Great idea to use beer for a sourdough flavor as well. Let us know how the flavor is using 100% beer for the liquid.
I was introduced this recipe by a friend and i absolutly love it. i love useing this recipe as my base and adding my own flavors. being a beer lover its been on my mind for a while about how to use beer in this bread. i just pulled a loaf out of the oven that i replaced one cup of water with beer, and its great! its kind of like a sourdough, the air pockets are larger. i think next time ill try replacing all the water with beer and maybe using a darker more flavorful beer. thanks for this amazing recipe!
Just whipped up a very successful gluten-free batch! I personally am not gluten-free, so I have the advantage of being able to do a taste comparison between the two versions. I have to say, I shockingly prefer the gluten-free kind!
I only made a couple deviations from the recipe – the flour mixture and the cook time. Everything else is the same. For the flour, I used Jeanne's All-Purpose Gluten-Free Flour Mix, the recipe for which can be found here (http://www.artofglutenfreebaking.com/2009/11/the-story-behind-my-gluten-free-flour-mix/). This is seriously the best flour substitute I have ever found – it works and tastes great in a wide variety of foods. Added a tiny bit of extra water (maybe 2 tbsp) to get the right consistency. Also cut an X in the top before going in the oven so the bread could flower instead of raise. Cook time was about 15 minutes longer, for a grand total of 45-50 minutes covered and 10 minutes uncovered.
What I like most about this version is that it doesn't taste like it's trying to be healthy (like many gluten-free breads do), and is more dense but not in a bad way. I would highly, highly recommend giving it a try!
By the way I used fresh yeast – maybe that is why it almost exploded!
I nearly died laughing – I left my bread to rise all day and when I went back into my kitchen after work the dough was coming over the side of the dish it had risen so much!!!! I wish I had taken a piccie – I went into panic and cleared it up before it attacked the dog! the rest that was in the bowl I tipped out and placed into a larger bowl and left until this morning when it had risen almost to the top on the larger bowl that it was now in I then tipped it out on to a non stick baking mat(the floopy silicone type) and shaped and left for one hour whilst my oven was heating – I lifted the whole baking sheet into my le creuset and put the lid on – 30 mins in the oven uncovered and was amazed – left another 15 with no lid – This bread is amazing – thank you so much for sharing. I am going to try it with Tiger topping next time.
Pat S. Yes you can use your glass dish. As far as I know everyone just follows the directions and bakes as usual. Unless you baking dish cannot take heat over a certain temperature. Your bread should turn out beautifully.
I don't have a cast iron pan but I do have a heavy glass cassarole dish with a lid. can I use this??? Do I have to make any adjustment with tempature or baking time because of it being glass???
Thanks Pat S.
WOW…This is a defiant winner…the recipe and website. I'm a landlord, a Mr. mom, and full time chef to five. Never been a baker, but gave it a shot when we got invited for a super bowl party. I did one basic 'test' loaf…bam! Awesome! Then gave some of the others a shot…including a chipotle – pepper-jack – ghost pepper salt – man loaf…oh yeah! It got turned into Mexican pizza sandwiches. Freaking insane…I'm now a legend, thanks to this recipe
I've made the plain loaf several times and it's delicious. Toasted with butter and strawberry jam — awesome. I want to add some cheddar but have no idea of amounts. Help please!
I made this for first time yesterday and it was absolutely amazing!! Can't wait to start trying variations. I don't have a LeCruset pot but an old Lodge and it worked beautifully. I served this at my superbowl party and it was beyond a hit. Can't say enough good about this recipe!!
I'm having problems loading all of the comments during the remodeling of my site. I will try to answer questions and hope this goes through ok.
Pizza here is the link: https://www.simplysgood.com/potato-rosemary-pizza/
Cinnamon raisin and other sweet variations have been tried with great success. I hate to make you scroll through the comments to find out, but there are several or you can just create your own. Just throw in a handful of raisins and a teaspoon of cinnamon.
This is amazing!!!! I have tried (and failed at) so many home made breads before, but this turned out great!!!! Thank you so much!
I always grease my bowl when letting the dough rise, is this something I can do with this recipe? Also would it be easier to remove from the pan if you put parchment paper, or lightly greased ONLY the bottom of the pan?
I have to admit I was skeptical.. but now I'm hooked. I used plain white all purpose flour that |Ihad on hand and it worked great. Can't wait to try more recipes.
It turned out amazing. I wanted to immediately make one of the other variations.
My bread is about 4 inches high. Sometimes higher if I add a lot of cheese. I have had some only about 3 inches. Just depends on the day really.
How tall does your bread end up? I know that may sound strange ut mine was not as "tall" as I expected it to be. It was beautiful and yummy and definitley rose, but just wanted to see how it measures up to yours (I know that they vary, just curious on average how tall it is!)
Thanks!
Good day !
I tried to read most of the comments and questions before asking mine…
Did anyone tried this recipe by making rolls with it?
Sorry about my "not so good" English…
Thanks
Pixie 19: The bread is a denser bread. It's definitely not light and fluffy. There will be air holes in the bread. Don't fret. It seems to have a moist heavier texture like an artisan bread.
I have a question. I've made this bread twice and it is delicious! The first time it was too wet, but it still rose when baked, it was however, very dense (still has air bubbles in it but its a heavy bread). The second time I added 1/4 cup more flour, so it was less runny and it rose beautifully in the oven but it's also super heavy. Is that the way it's supposed to be? Or am I doing something wrong. I followed the instructions. Oh and my flour is fresh, I go through it like nobody's business.
I did it !! I can not believe it is so easy, thank you so much, can not wait to try the different flavors.
Found this recipe this morning on Pinterest (damn you Pinterest!) and am going to try it today, leaving it to rise overnight as advised. Last year was going to be "The Year of Bread", but I never even made one loaf as we are living in Germany and the ingredients all look a bit different over here. But this? This I'm going to try. TODAY. Thanks, am now a follower.
I followed the directions exactly and the bread came out perfect. It looked just like yours and tasted delicious. It did take a full 18 hours to rise probably because my house gets pretty chilly at night. Thank you so much! I will now be baking bread often.
I didn't take time to read all of your posts but you mentioned that you would like to know how to clean up your pots…I used a Magic Eraser on mine and it cleaned them right up!
Hi Janet,
My first time in bread making and it's been perfect every time. Am on my third boule – asiago cheese and sundried tomato in oil.
Thanks again,
Valerie
Hi Janet,
Thanks for the recipe. Am on my third boule – asiago cheese and sundried tomatoes in oil this time. This is my first venture into breadmaking and it's been perfect every time. Go, go me!! Kudos Janet
Valerie
Hi Janet! I'm so glad I ran across this recipe in Pinterest, as I have now the best bread on earth in my kitchen… (Not for long, though, I'm sure.) I'm a bit sad I have to eat the bread all by myself – don't get me wrong, it's utterly delicious, but I can't wait to try all the cool alterations! Cranberry-dark chocolate is going to be the one to start with… Yum! Maybe I just have to make all my friends happy by donating them some yummy bread, so I can try more variations? Sounds like a plan.
All in all, thanks for the recipe!
I had never made bread before, and this recipe was so easy I had to try it. I used your guyere-lemon-rosemary version. The first batch I made, I forgot to scroll down and had already mixed the dry ingredients with water before adding the gueyere, etc. Since I had already the guyere etc. prepared I made another loaf, and ended up with two. What a lovely mistake! This was so easy and so delicious! Thanks for sharing the recipe. I can't wait to try different ingredients.
love this bread-thank you for the recipe! Do you think I could add coconut and almond (real almonds or extract) to make a sweet loaf?
I used non-GMO, organic flour for the first time with this recipe. I had to reduce the amount of water. It is a little more "golden" in color. The taste is incredible. I also use just plain cast iron. YUM!
Just wanted to thank you for this post! I know I am very late to the game (I found it on pintrest) but am super excited about this bread! I made it a couple days ago for my picky 3 little ones and they loved it! I was able to easily sub in half white whole wheat flour and love being able to know I am giving them fresh, unprocessed bread with great flavor options! Love your writing style and personal attention to your blog as well. Will be trying your other recipes!