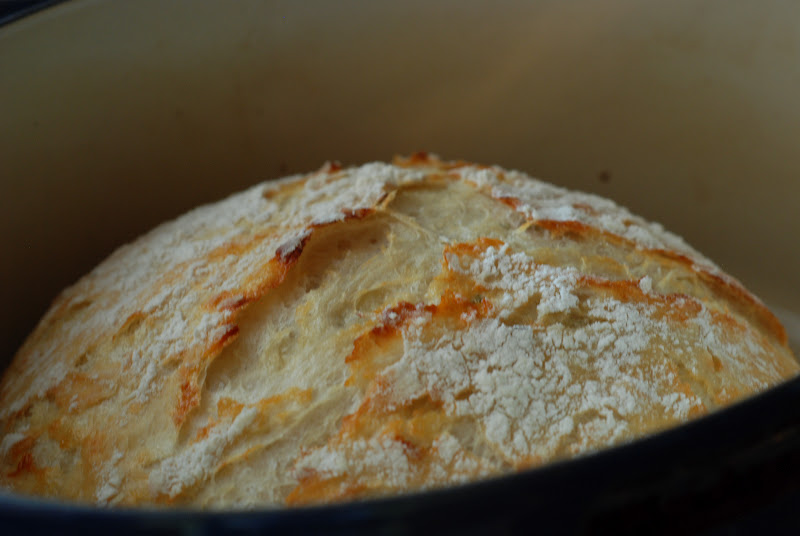
I realize that asking a question and trying to get or even FIND the answer is getting a bit ridiculous on the Crusty Bread page. This is by far the most popular post I have with over 1.2 MILLION page views. Who knew???? Oh my gosh. I knew the first time that I made this bread that I had to share it with the world. It’s so easy, yet so delicious and has SO many possibilities. Here is your turn to share, ask, comment, complain, or rave about your bread success.
Q: Do I have to use an enamel covered cast iron pan?
A: NO. You can use anything that can take the heat. The following have been used that I know of:
Clay pots with lids, Pizza stone with a bowl to cover the bread, insert from a crockpot, pyrex baking dish with a lid, stainless steel pot with a lid, baking dish covered with aluminum foil, old cast iron dutch oven.
Q: Do I have to use unbleached flour?
A: I always use unbleached flour. You can try bleached flour.
Q: Can I use self rising flour?
A: I don’t know. I would just stick to all-purpose.
Q: What size is my pan?
A: My smallest pan is 5.5 quart and the loaf barely fits.
Q: What type of yeast do I use?
A: I use SAF instant yeast. Any yeast should work.
Q: Why is my bread turning out flat?
A: I don’t know. You could try using less 1/4 cup less liquid. Or add a bit more flour. Make sure your dough appears to be dry when you first mix it. It will have more moisture during the rising time. There are many determining factors when bread making. Is your flour old? It does make a difference. Sometimes store brand, sale flour isn’t so great and should probably be left on the store shelf. Make sure your flour is fresh and a good quality brand and make sure your yeast is fresh and active.
Q: Can my dough sit out longer than 18 hours? Does it HAVE to be between 12-18 hours?
A: No. I have let some dough sit as long as 24 hours and the bread was beautiful.
Q: Have you tried Gluten-free?
A: No. I’m still waiting for someone to venture into the realm of Gluten-free. If you try it, let everyone know.
Q: Do I have to grease or oil the pan? Will my bread stick?
A: No you don’t need to grease the pan. I have never had the bread stick when using a cast iron pot. I haven’t tried anything else. The best way to be certain that the bread won’t stick is to form the loaf on a sheet of parchment paper and lift the bread into the pan using the sides of the parchment. Leave the paper in the pan. It’s won’t burn. When the bread has baked, just lift the sides of the parchment out of the pan. Voila!
Q: What temperature should my water be?
A: I just use cool water straight from the tap.
Q: Can I add sugar?
A: Sure.
My most recipe comment that will be so helpful to all of you. Thank you so much, Cory – Falling Star Lane:
Hi! Me again! I have some input – mostly add in ideas that have been huge hits! I found that using the parchment makes all the difference – to any loaf, it makes it easy to put in and take out and never burns.
Also, I reduced the baking time by 5 minutes for each step – more tender bred, and just as crispy crust.
I also add 1 T of raw sugar to each loaf – they rise higher for me.
As to add ins –
1. Turkey bacon and cheddar – huge hit
2. Rosemary, feta and sundried tomatoes – i found the ones in oil to bring a fantastic flavor
3. Jalapeno, and pepper jack – wow!!! used canned peppers – small can
4. Chocolate and cranberry
5. Rosemary and sharp cheddar
6. Chocolate chip and orange infused cranberries
7. Apricot, cranberry, and chocolate – I put too much in – so i had very dense bread – but it got eaten!!
8. Rosemary and Feta
9. Marinated artichokes and raw garlic – sliced 6 cloves very thinly – oh boy!
10. Orange infused cranberry, almond and orange zest
11. Lemon zest, feta, and rosemary
S0 far, none have been rejected, and I have become something of a bread baker to my friends – I bring a couple varieties to potluck, and they are very nicely received! I still need a 2nd dutch oven – days i bake 3-5 loaves it gets pretty hot around here! 🙂
I hope listing these is ok – i spent soooo long scrolling thru to see other peoples ideas, it seemed like this would be a good thing – found a few to try, and in fact making a pistachio and cranberry tonite, and an olive mozerella – new is good – but i get asked for the Jalapeno one most often!!
Thanks again for this blog post!
Most of the comments I receive are pretty fabulous like this comment. Keep them coming.










Post the actual recipe/measurements for the add in ingredients. I'm interested in rosemary and sharp cheddar bread!! I made this bread the other day and it was awesome except the bottom was super tough. Next time I'll use the wax paper and cut the time by 5 minutes during each baking step.
I would add 2 tablespoons fresh rosemary (because I LOVE it) and 1 cup cheddar cut into small cubes. You are going to LOVE the cheese in the bread. You can correct the dark bottom by not preheating the pan for 30 min. Just put the pan in the cold oven and heat the oven to 450. Drop in the bread. This should help. I probably wouldn't use a waxed paper. I think the pan is just too hot, but parchment paper works fabulously.
Put the recipes/measurement up for all the new add on ingredients! I'm trying out the cranberry, almond and orange zest recipes on your first page! The regular bread is a hit! Thanks
I'm sorry I don't have lists of amounts. I rarely measure the amount of the stuff I just toss it. I should really spend time to figure this out. The bread is quite forgiving and seems to work no matter how much or little it toss it. I'll see what I can do.
How much sugar would you add if you were making the cinnamon raisin bread? Or would you wait and add afterward w butter?
You could add 2 tablespoons more if you like it sweeter. The raisins add some sweetness. The addition of sugar may make it rise quicker. There was a comment where someone added brown sugar, I'm not sure of the amount you can just play with it. Yum.
Thank you so much for this recipe! After 10 years of failure, I've recently become a bread-making addict! I'm working on making regular bread as good as my mom made it (I'm getting close!), but in the meantime I tried this recipe last night. To the basic recipe I added 1.5 cups of cheddar cheese, and 1 tsp each of basil, oregano, and rosemary. I loved it and so did all my friends! I've passed on the recipe for them to try, and I'm quite sure I'll be making more very very soon! Photos of my bread are posted here: http://www.toaprettylife.com/2012/11/herb-and-cheese-crusty-bread.html
Wow! Amazing photo's of your bread. Thanks for sharing.
Can I use bread flour to make this recipe?
Yes, I believe you can based on other comments. I have not tried it, but it does work just great.
We just returned from Europe where the bread is so great. I couldn't wait to try your recipe. It is easy, but my dough is dense and kind of damp in the middle. I tried baking it longer, but the top of the crust really got dark brown (like burned)
What am I doing wrong? I really want to get this recipe down.
I read the comments and will buy fresh flour next time. If you have any suggestions, let me know. I used the exact measurements you gave.
Thanks, Ruthie
The bread is a bit denser than most. Plan on that, but shouldn't be doughy. I would put your pan in the oven at the same time you begin to preheat. When the oven just reaches 450, put the dough in. Leave the lid ON for 35 minutes. This will help the bread to continue to cook and not brown as much. Remove the lid and bake until it's the color you want. I hope this corrects the problem for you. If you don't get the results you want, you just might have to go back to Europe…I'll meet you there. Thanks for your comment.
Just found this, really can't wait to try it. About cleaning your pots, Just use baking soda n water make a paste let set a minute or two then scrub. should take care of them.
I made this bread yesterday using gluten free flour (Cup4Cup brand) and it was so beautiful! Really crispy crust, soft inside. Next time I will definitely add flavoring because I think it needs a little something, and I didn't use instand yeast so it didn't rise as much as it should have, but it was totally worth the effort.
The bread is baked, out of the oven, and I've already had a slice with some homemade strawberry freezer jam. Because my baker is rectangular, I elongated my round loaf for a better fit. Is there a way for us to post pictures of our creations?
Some observations: *I have decided that I need one of the round or oval dutch ovens that have HANDLES!! It was very hard using the Pampered Chef covered baker – VERY HEAVY, VERY HOT, not much to grab onto!!! *The bottom crust IS hard to cut and eat! Do you think that might have been because of the stoneware? *Also, I was afraid mine was going to burn (there's a small ridge that did get overly brown), so the last 15 minutes without the lid, I turned the oven down to around 400. *I love the ease and flavor of this bread (can hardly wait to make some flavored varieties), but though I love "crusty" bread, this seemed a bit too crusty. If I brushed the crust with butter after I take it out of the oven and pan, then wrap with foil, do you think that might lessen the crustiness? I don't want to cut it out completely, just tone it down some.
All in all, this was a pleasant baking experience and I'm totally happy with the results. I can see me getting everything ready in the afternoon, then getting up in the morning and popping it in the oven before going to school. YUMMY warm bread for the faculty lounge!!
I made it with only whole wheat flour. I just added an extra 1/4 c. of water and everything else was the same. Then I added 2 T. Cinnamon, 3/4 c. raisins, and 3/4 c. chopped pecans. Turned out amazing!! Tonight I'm making a whole wheat jalapeno cheddar. I'm hooked. So excited about it.
I don't make bread since I have arthritis in my hands and can't knead dough for 10 minutes. So I tried Jim Lahey's recipe. Mixed it up last night and just baked it now. I can't get over how easy this was AND how beautiful and tasty it came out. I will never be held hostage by the grocery store again when I want fresh crusty loaves. Thank you so much!!
Hi Rhonda, I think you are supposed to put the pan in the oven while the oven heats to 450 degrees, THEN put the bread in the pan, cover and bake for 30 minutes with the lid on then 15 minutes with the lid off. I would probably start with water in the pan to preheat, just to protect your pan…just in case.
Thank you so much for the whey idea. Love it. I will try that. I just throughout the whey…what am I thinking????
just set my bowl of flour, salt,water and yeast to rise! Bet this will REALLY go well with the meatloaf that hubby just made and is in the oven! He made 3 loaves!!
I have a question about the Pampered Chef covered baker that I will use to bake my bread. I've read all the posts here and saw 2 "ideas" – one was to put water in the baker to preheat it, and the second was to not preheat, just put the bread in, then put it in the oven and turn the oven on to 450 and bake for 30 minutes covered. Does anyone have any results from either way, or can recommend which way is better???
Also, about the sourdough flavor: I make my own homemade yogurt. Whey is often a by-product of this process. I drain the whey off my containers into a separate container and keep kt to use in baking and cooking. I've used the whey in bread machine bread recipes to replace water or milk, and it gives a wonderful sour tang to the finished product. I've also used the actual yogurt in bread recipes instead of milk or water. If you don't make your own yogurt (I HIGHLY recommend doing so!), you can take a container of plain yogurt and strain it (I often use a coffee filter in a strainer over a bowl) to get the whey. In that case, your finished product will be Greek Yogurt plus the whey that has drained out.
I'm SO looking forward to my beautiful loaf of fresh bread with dinner tomorrow night!!
I replaced 1/2 cup of the water with some sour dough starter that I had. Was wonderful. Can't stop making this bread. Did an italian herb with parmesan.
Thank you for trying the sour dough start. I'll give it a try. Sounds so delicious.
How long will these stay in the freezer? If I make them tomorrow (Thursday 11/14) and put them in the freezer later that night, will they be ok in the freezer till NEXT Thursday (11/22)? When should I take them out to thaw? I am needing to make 6 loaves for two Thanksgiving dinners and two for this Friday, so wondering if I can make them all together and then freeze 6?
Curious to know the answer to this as well. Thank you!
This bread freezes well. Just remove it from the plastic wrap while thawing or the crust will go soft. It should stay good in the freezer for at least a week or more.
Hi there, I love this bread, I've made about a half dozen loaves already of the plain and want to try some add-ins, but I'm a recipe girl. What's a good rule of thumb for how much stuff to add in??
I would start with half a cup to see if you like the flavors. I add about 1 1/2 cups cubed cheese, because it's so dang good. But with raisins, chocolate chips or other things I'd start with a lesser amount and add more
Is there a place where you list the amounts of the extra goodies you put in the breads??? Like how much of each ingredient you put in to the loaf. Thank you and I can not wait to try this. diannescrappycreations@yahoo.com
Hmmm…I haven't listed ingredient amounts. I just start tossing in. I think I add about 1 cup of cubed cheese, sometimes more. I usually just add the ingredients by a handful. I know this isn't helpful what so ever. It's amazing how it just always works out. I would start out conservative until you decide how chunky you like your bread.
I just made my first two loaves, plain and Cranberry Citrus (3/4 c of craisens and the zest from one lemon and one orange) and I am just flabbergasted that they're just as gorgeous as the loaves I saw on this blog.
Thanks for sharing this discovery! I know what nearly everyone on my Christmas list will be getting this year. :^)
Your friends will love you forever. What a great gift.
Sooo good! The first one I did was plain, using part white whole wheat flour. added a bit more water but came out great. Next one I'll try is rosemary lemon (no cheese – forgot to buy the gruyere!). Then I'll probably try orange zest, a bit of the orange juice as part of the liquid and ground cardamom! Yummm!
Oh yum. Orange and cardamom. What a great combination. I would love to try that. Thanks for sharing.
Has anyone posted about the amount of ingredients used in this bread recipe if you live in higher altitude? Have not been here in the Springs, CO that long and find baking to be a challenge at times.
I live at about 5000 feet above sea level and I haven't made any changes to the recipe. It works great at my altitude. Are you higher than 5,000?
Never baked a thing in my life before this bread. I cook quite a bit(im a picky dude and the restaurants in Topeka are …lacking), just never baked. I followed the instructions and used my enamel cast iron dutch oven and it came out absolutely perfect and delicious (jalapeno/cheddar). Thanks so much for this.
Way to go Kevin. Give yourself a big pat on the back you are an official baker.
Hi Janet! Thank you so much for this recipe! The first time I made it I followed the recipe exactly, but my bread turned out pretty flat and I found it to be too chewy. After reading some of the comments on the recipe as well as doing some research of my own, I changed up the recipe a little bit on the weekend: I used warm water instead of water at room temperature; I added the yeast to the warm water, along with a teaspoon of sugar, instead of mixing it in with the flour and salt; I waited a few minutes for the yeast mixture to become milky before adding it to the dry ingredients; and I reduced the baking time by 5 minutes for each step. It worked a treat! If you would like to see a photo, you can visit my blog at http://misslings.blogspot.de/2012/11/caramelised-onion-gruyere-and-bacon.html
I'm telling everyone about your amazing recipe! Thank you thank you thank you!
Ling =)
I did a Red, White & Blue bread with Cinnamon: Cranberry, Blueberry & Almond. It was AMAZING.
I bake bread every week for my family. It's a different recipe, but I found if you take only a third or less of rye and whole wheat flour and use more than half of all purpose flour it's not too heavy. Also you might need a little more yeast to have it rise more.
I like to play around with the liquids. I use potato water (makes it moist), buttermilk, a little olive oil and some molasses in my bread.
I don't know if it'll work with this recipe though.
I will try it for sure!
Thank you so much for the information. I think it's worth trying. Someone commented that they used orange juice for the liquid. I would like to try potato water for sure. I would think it would make for a softer bread. Let me know if you try something that's wonderful.
Hey try baking soda and water to clean your pots…. someone told me it works awesome… haven't tried it yet but I will.. make a thick paste and let it just sit on it for hours.
Good Luck… can't wait to try this bread.
Debi
Okay here goes nothing, I made my dough yesterday at four and I'm popping it in the oven in 30 min. The pot is heating up now. I'm so excited, it's my first time. I'm making my famous Chk salad and taking it over to my girlfriends house at noon. I'll let you know how it turns out. So far it looks perfect! I can't wait to try every version I love to bake and maybe I'll become the bread lady in my neighborhood! Janet you're so kind to respond and take your time out to help everyone on here. I'll let you know how it turns out… One more hour!!
BAHHHH! I can't wait to here about the results. Good luck with your luncheon. I'm sure you will be the new bread lady. Let me know how you fancy it up. Thanks for your kind comment.
Thank you for all of your great success stories. You are awesome bakers. I'm so impressed with the creative breads you are baking. They inspire me.
Gosh, I feel so guilty-proud… so, so easy! I was sure it wouldn't work or it certainly wouldn't look like yours if it did. My timing was off so my dough actually sat for about 27 hrs. I wasn't sure about it but it still looked okay and I didn't want to waste it, so I decided to go for it. I made it plain for my first attempt. I baked it in my Pampered Chef Deep Covered Baker. IT'S BEAUTIFUL! Thanks for sharing 🙂
For anyone looking for a more affordable pot than the Le'cuisette Costco is currently selling an 8qt enameled cast iron kirkland pot. I have a round one they have now discontinued. The one they are selling now is more of an oval gore 49.99. Great pot for the money. They are stamped made in France. I am guessing they are probably make at the same plant.
I cannot thank you enough for putting this recipe up for all of us – everyone now thinks I am a bread master, all because I spent 3 minutes prepping this dough. I'm making a loaf a day – insane!
Tomato, basil, and parmesan is my favorite.
Hello Janet….do you know how to make sour dough bread with this recipe? Any suggestions?
Thanks for a great recipe, I can't stop making bread all kinds!!! I think I'm obsessed with it 🙂
I had one comment suggesting to add lemon juice to the mix. I added 2 tablespoons of lemon juice. I didn't notice a strong sour dough taste, but I loved the large holes it acid produced in the bread. I have, also, noticed that the wetter the dough the larger the holes will be, which I love. I have added red wine vinegar and still don't think it was a strong sour dough flavor. Letting the dough proof longer just made the bread taste yeasty. Unless you added a sour dough start to your first mixture. Why not. I need to get a sour dough start so I can try this. I hope I haven't completely confused you while I ramble. Best of luck.
I think the best way to get a real great sour dough flavor would be to add a bit of a sour dough start. I have had a comment that someone added lemon juice to their mix. I tried this and didn't notice a strong pronounced sourdough. flavor, but I loved the texture and the bread had large holes in it, which I love. I have added red wine vinegar as well and didn't notice a strong sourdough flavor, but loved the texture. I hope this helps. Looks like I need to get a sourdough start and play with it.
Sucess!!! I'm a domestic goddess. I did a plain loaf yesterday and it came out BEAUTIFUL after a little trial-error issue with yeast. I used the non-instant yeast, but didnt realize I needed to prep it (put it in warm water, etc.). Then, once I realized this and it wasnt getting bubbly after about five hours, I tried adding some more yeast with water that was apparently too hot and killed the little yeasties. Waited a few hours, nothing happened, then, third try adding yeast came out just right. Anyways, despite a drama filled dough-rise-watching day, it finally came out and it came out perfect! I was so impressed with myself, I went ahead and started preping new dough immediately after and added dates and walnuts to it. And it just came out of the oven perfect again! I feel incrediable! Thank you, Janet!
Has any one tried apple pie spice and apple chips with nuts?
No, but you SHOULD. That sounds fabulous. Ok…that's my next bread. I will definitely add the nuts. Thanks for usch a great idea.
Does the water need to be a certain temperature? I have not tried the recipe yet, but I plan to soon. Looks amazing!
The water does not need to be a certain temperature. I just generally take it straight out of the tap.
Wow. This recipe is great! The first one I made was the cranberry, orange, almond – turned out great – so easy! (King Arthur flour worked great!) I have two more loaves waiting to bake tomorrow: blueberry/ lemon zest/ toasted almond slivers and a roasted garlic/sharp cheddar/rosemary one. I also want to try to figure out the gluten free and was thankful to see the posts on GF versions. I have a quick question – if anyone knows – the kind lady who said she tried Pamela's mix and it worked great – did she just use the mix in place of the 3 cups of all purpose flour and then do it exactly like your recipe shows or did she make it with the eggs, etc, that the Pamela's mix calls for? I would really like to figure out the GF version. Also the gentleman who used the Williams Sonoma flour – did he do the same – just follow your recipe and substitute the all purpose flour for the GF flour? Thank you so much! I am going to try to make the breads tomorrow in my pampered chef rectangular baker/bowl. The Le Creuset worked great! Friends asked if you had to use the enameled cast iron and I told them no after reading through your blog – so I am going to try the stoneware next. THANK YOU SO MUCH! I am looking forward to giving these for gifts!
I hope you get an answer regarding your GF questions. Sounds like you are baking up some awesome bread.
Have used this recipe many times. Regular loaf, orange cranberry, pepperoni and cheese just to name a few. Tonight the recipe is roasted pepper and cheese with some red pepper flakes. Now comes the hard part waiting. Fixed a 2nd loaf for my son, he will be so happy. Thanks for sharing all the great ideas.
I have had this recipe for a month or so now and have been dieing to try it! I even went to a local flea market with the mission of finding a cast iron pan to bake it in! 🙂 I finialy had time to mix up a batch and baked it this morning! All I can say is WOW!!! LOVE IT!! It came out perfect. Just like the picture….Thank you so much for sharing this wonderful recipe. My favorite part is listening to it crack while it is cooling. 🙂 Cant wait to try the flavored breads. Thanks again…
I LOVE LOVE LOVE this recipe! For my first attempt, I decided to stick with the original recipe. I actually left the mixture sit out on my kitchen counter for almost 19 hours of which I was a little worried that it would be too long. I don't have a dutch oven or Le Crueset pot, so I used my Pampered Chef Rectangular Baker w/lid. I had read in the comments about using parchment paper so I was prepared to try that. I have the Reynolds Genuine Parchment Paper and on the box it said it was only good to withstand oven temperatures up to 420°F. I was a little worried since the recipe calls for the baking temp to be 450°F. So I actually called the Reynolds Customer Service hotline to ask if it would be OK. The gentleman I spoke with said the paper would start to break down after being exposed to that high of a temperature for 30 minutes. It would be OK for a shorter time like maybe 5 minutes, but not recommended for anything longer than that. So I decided to not use the paper and just lay the dough directly in the pan. So as to avoid the risk of my Pampered Chef stoneware pans from cracking, I put them in the oven and let it rise to the 450 temp and still kept it in for 30 minutes before putting the dough in. The end result was amazing as it all worked beautifully! The bread was gorgeous, came out easily without sticking and…my oh my…tastes wonderful! I can't wait to try it with other variations!!!
Thank you for doing your research. My parchment does brown a bit and is a bit brittle, but still withstands the temperature. I hope you will start to play with the flavor variations. You have a lot of great information for others in your comment. thank you so much.
WONDERFUL RECIPE !!!!!!!!!!!my family loves this and I am making a bunch as a gift I wanted to thank you for sharing this recipe everyone should make this bread >>>>>>>>>>> it is AWESOME
I agree. Thank you for sharing your success.
I haven't had any problems with the cheese going bad when I mix it in with the flour then letting it sit for 12+ hours. So far so good.
Thank you so much for this awesome recipe. Just made bread today! Put dough together last night and baked in am! This mother of three kids under four years old needed something quick and easy. Can't wait to try other flavors!
So you add the cheddar, for instance, before you let it sit for 12-18 hours? I wasn't sure if the cheese was ok to sit at room temp that long. But would it mess the bread up to add the cheese in later?
i just found this recipe and i cant wait to try it..i've never made bread before so i'm excited. my kids and husband all want me to make it. i am gonna make it this week and if everyone likes it i plan to make it for thanksgiving. my husband will love to eat turkey sandwiches on fresh bread the day after thanksgiving.
KAREN LANGSTON/ FROM SELMA ALABAMA
Oh and what is the consistency on the inside supposed to be. Mine seems a little spongy.
I'll have you know I am now required to bring at LEAST one loaf of bread to every holiday get together and family dinner. And I don't mind it at all, because it is SO easy. I really would love to try the lemon, gruyere and rosemary. So far I have only gotten as adventurous as cinnamon raisin, plain, herbed and my favorite (which is currently in the oven to take to my parent's for dinner) is roasted garlic and cheddar. I take a bulb of garlic, set the oven to 400. Cut the top off so all the cloves show. Rub in about 1-2 tsp olive oil with your fingers, wrap in tin foil and put on the rack for about 30 minutes. Take it out and unwrap, cool till you can handle. You can use your fingers to squeeze the garlic out of it's coverings. Sometimes I slice it really thin, but this time I just mashed it and added one cup of cheddar to mix with the dough. Turns out DELICIOUS!
Thank you so much for this recipe. My husband, who has grown to love my bread making, asked if I would like a breadmaker for Christmas. I told him 'thanks, but those are for amatuers,' but I DID send him to the le crueset website 😀
I use the parchment paper. It works great. However I have a lot of flour on the bottom of my loaf. Could I be using too much flour to let my loaf rest on while the pot is heating up??? Can you post a picture of the bottom of your loaf so I can what it is supposed to look like? Thanks.
Made my first loaf yesterday morning, baking it last night after I got home from a long day at a festival and dinner with friends. I must say making this recipe was pretty painless and the result is awesome. I added garlic and Colby Jack cheese to mine as I'm making spaghetti for dinner tonight. Thanks for sharing the recipe. I'm sure I'll be making loaves all the time now. Can't wait for the next one and am now pondering what mix in's I'll be using for that one. The possibilities are endless!
LOVE this! I made it for the first time last week for a family gathering. No one could believe that I had actually made it and not purchased it! I made my second loaf a few days later. It was a bit flatter but still tasted great! I borrowed my sister's LeCruset the first two times. Tonight I went out and bought a Food Network Cast Iron Dutch Oven. I'm hoping tomorrow's loaf turns out just as well as the first two!
HELP! I just went to take my bread dough out of the bowl and it's very runny, can I add flour to this now? And will it turn out okay if I do?
Alecia, I'm sorry I did not get your comment earlier. I have been away from my computer. I'm sorry you had a runny mess. I have not tried adding for flour after the proofing time. Next time either add 1/4 cup more flour or reduce the amount of water. The dough should look more dry that wet when first mixed. It's ok if all of the flour isn't completely mixed in. Don't give up. Let me know if you try again.
I just made my first loaf. I have to tell you I was worried because I made it with 1 cup whole wheat flour and 2 cups white flour than saw the comments about the problems with whole wheat flour. I did not need to worry. I just took the bread out of the oven and it is gorgeous. I looks like it came from a bakery. It smells wonderful. I cannot wait have a slice for breakfast tomorrow morning.
Give yourself a big pat on the back. You are a fabulous baker!
The recipe looks like something even "I" – the non baker – could make. Question though, before I go shopping. My house is kept a pretty constant 68 degrees in the fall/winter (energy conservation and heating bill reduction) – will that make a difference in rising time???
I don't think so. The 12-18 hours of rising time should be fine in a cooler home.
Ack,it is not coming out! I store my flour in the freezer. Should I have let it warm up before mixing? I am not a cook at all…5 pounds of flour a year. I will try it again.
It's not your baking skills its the dang pot you are using (I always try to blame something else). Try some parchment paper on the bottom of your pan. It will change your life. Yes, you keep the parchment in while baking. You will never have an issue with the bread sticking again.
I would recommend dry canning your flour instead of freezing it. It keeps it out of any moisture, is simple to do, and frees up your freezer.
http://voices.yahoo.com/how-flour-dry-goods-long-term-storage-11293640.html
Can you shape these into long loaves like baguettes? I was thinking of trying that for sandwiches but don't like to handle it much. Also it is delicious but kind of dense. Ideas? Thank you!
As long as you can fit them in a pot. You could put them on a pizza stone then figure out a way to cover them. I put them on a stone and didn't cover them and I thought the were great. They were so crusty, which made it easier to eat. And yes the bread is a bit denser.
Has anyone ever tried using a covered roaster? I have one that has a smooth bottom, the blue-speckled type?
you can shape dough – place on stone, or big sheet pan then cover with a big foil throw away type baking pan (like for turkeys etc)
Hi new this forum…love it! i have a question I couldn't find instant yeast so I purchased the 3 pack of Fleischmanns active dry yeast. Would anyone know if I can use this?
thanks
jane
Of course you can. Some people just throw it in with the flour and salt. Other's like to activate the yeast by dissolving it in 1/4 cup warm water then adding it to the dry ingredients. Either way should work.
I have just used that yeast and throw it with the flour a d salt and worked perfect!
I used Fleichmanns active dry yeast and just threw it in with the flower and salt. Worked great for me.
When using feta cheese how much?
??? How about 1/2 to 1 cup. Depending on how strong of a feta flavor you want.
When you use cheese etc. in the bread is it ok to leave it out for the 18 hrs? I am always paranoid about food spoiling.
I haven't had a problem with the dough going bad. It seems to be just fine. I worried about that at first, also.
Cheese is fine to leave out… In fact, if you visit a cheese monger, you'll see most familiar cheeses are at room temp! flavor will be even more developed after the rising time.
Mixed ingredients last night…added garlic salt and parmesan cheese to recipe……baked this morning….Mmmmmmmm. Second batch in bowl right now. Tomorrow I want to try a cinnamon loaf, maybe with cranberries…..
Oh yum! Pat yourself on the back.
Added cinnamon & raisins to the dry …..Put some warm honey in the water….. My favorite so far!
Hi Janet
I'm the online development manager for Shipton Mill in the UK. We mill a range of organic, stoneground flours for artisan bakers both professional and home bakers. We are also the Royal Millers for the Prince of Wales Duchy Estate. We are very keen to get people baking and use our website and social media presence to encourage people to try new reicpes. One of our readers posted a link to your fabulous blog on Crusty No Knead Bread on our Facebook page. We think it's one of the best we've seen and would love to feature it on our website. Would that be OK with you?
Sam Livy
@Tortepane
Buono come il pane. Like to eat. Love to bake.
Shipton Mill Ltd
Long Newnton
Tetbury
Gloucestershire GL8 8RP
(+44)1666 505050
http://www.shipton-mill.com
Janet, I just finished my loaf and it came out flat,the bread was a bit dense. Not sure what i did wrong. I am wondering if I handled it too much once I took it out of the bowl…..I only turned it onto the flour a few time. Just took the second loaf out of the oven and although is not as flat, it is smooth on top. Darn it….it has to be something that I'm doing.
Ok Louisa, let's do a check list. Is your yeast and flour fresh? Do you think your dough was too wet? Did the dough somewhat hold it's shape after you turned it out of the bowl? If your dough seems too wet while mixing, try adding 1/4 cup more flour. After I add the water and mix it into the dry ingredients, it still appears to have flour that is not completely incorporated into the mixture. That's ok. I just leave it and the standing time takes care of that. I generally turn my dough on the floured surface a few times like you did. So I don't think that's the problem. Let's start with the moisture in the dough first. If that doesn't work, it looks like I just might have to come to your kitchen and and see first hand the problem. I hope you live some where fabulous and exotic 🙂 Good luck. Let me know if you have success.
I just tried your recipe. Love it!!! So easy. Thank you so much for sharing!! One thing, the bottom of the bread was tough. I used a crock pot liner & covered it with foil. Could that have been it?
Thanks again. My husband loved it!
Yes the bottom of the bread is a bit tough and sometimes takes a little muscle to cut through. I find that putting the pan in the oven right when you turn it on, then once the oven temp reaches 450 drop in the dough helps with that. It will still be a bit crunchy.
The only thing I have with a lid that is oven safe is my Pampered Chef, covered baker. BUT….it says not to preheat (or it'll crack). Read one comment about someone preheating another type of dutch oven with water in it… Any tips or anyone used their covered baker to make the bread…?
Steph
Can anyone out there help. I don't have never used Pampered Chef. You don't want to crack your baker. I think using water is the way to go.
I just backed my bread in Pampered Chef stone ware (round straight edged pan with the bowl as the cover). I did not know about the preheating. Mine worked well. I have had other stones crack in the past but there was food in that item.
I used a pampered chef and it worked great!! Didn't crack (knock on wood!)
It'll crack if you preheat and then put something frozen on it. I've never had a problem with room temperature items on a PC stoneware.
I use my PC deep dish covered baker to bake mine! It hasn't cracked, yet. I don't know if this info will keep me from making this divine bread! ;)I've made garlic parmesan, plain and sharp cheddar loaves. My family LOVES it. I do about 3 loaves each time and give 1 or 2 away!
I use my Pampered Chef Deep Covered Baker for this recipe all the time. I put about an inch of water in the baker when I preheat it, then just pour out the water (carefully, it is hot!) before adding the dough. It works perfectly every time!
For Canadian readers, this KitchenAid cast iron pot normally goes on sale at Canadian Tire for about 29.99 every couple of months – just keep an eye on the flyer:
http://www.canadiantire.ca/AST/browse/8/KitchenBath/1/Cookware/Roasters/PRD~0428577P/KitchenAid+Cast+Iron+Roasting+Pan.jsp?locale=en
Here you go Canadians…great tip.
Do you have to activate the active dry yeast before adding to the flour? Also if you do not activate do you need to use warm water in the dough or will cool work as well?
I never have. I just toss in the yeast and water straight from the tap. Other readers have mentioned that they did activate their yeast. It's not going to hurt to try it.
I have made both plain and cinnamon raisin and they turned out beautifully. Has anyone made this bread with pumpkin puree? Just curious if you add the pumpkin in addition to the water and how much to use??
I did. I add 1/2 cups pumpkin puree in place of 1/2 cup water. I added pumpkin pie spice and pecans. It was delicious, but just a little denser. It was great toasted for breakfast.
I wonder if you could do apple sauce instead of the water then as well? Has anyone tried?
Thanks! That sounds like a winner for thanksgiving dinner.
I was also wondering about Banana… I don't suppose anyone has tried that?
Hi Janet – I wanted to share with you my trick to make 2 loaves at once of this fabulous recipe. I make 2 separate bowls of the recipe (using 2 cu flour, 1 tsp salt, 3/4 tsp rapid rise yeast, 1 cu warm water). One recipe I make savory or plain, the other recipe I make as sweet bread such as cranberry/walnut/orange – I make the recipes up at night – then bake first thing in the morning. I place my cheap Sam's 6.5 qt. knockoff pan in the cold oven and allow to warm up to 450. Using parchment paper as you suggest I place both loaves in my pan (shaped long and narrow) baking 2 loaves at the same time. They fit snugly but rise beautifully. I enjoy reading how your followers have adapted this recipe and the delicious new breads they have created. Thanks for your commitment to this blog so we can continue to learn how to make new delicious recipes !!!
Fabulous suggestion. I never thought of putting both loaves in the same pan. I'm so glad someone told us all about the parchment. It sure makes this recipe much easier. Thank you so much.
What is the self life of the bread once it is done baking?
Hmmm. I've never had it last more than a day. I would say it could last 3-4 days, but would be a bit on the stale side.
I have had my first loaf last almost a week. Being my first loaf it was too wet and turned out more flat than round. I just reheated a chunk in the toaster oven and it brought it back to life!!! Almost like it was fresh out of the oven. And since it is flatter like a ciabatta, I am going to use it for my chicken sandwich tonight. http://www.closetcooking.com/2012/05/tequila-lime-grilled-chicken-club.html
I have left a small crusty heel wrapped in plastic wrap for up to a week, but one loaf started to mold sooner than that. If you wrap it in plastic, it keeps well without going stale for several days. I am trying to find a non-plastic way though to keep the bread longer (since its only my husband and I).
OK, just made this bread per instructions and all I can say is WOW!!!!!!!!!! this was my first foray into making bread and the results were stunning!!! I can't wait to play about with flavored versions!!! this rocks!!! I used my Calphalon 4.5 qt sauce pan and lid – oven safe to 450! score!!! I swear that was my biggest obstacle!!! came right out of pot too!!! just stunning and wicked good! Used King Arthur's flour (I think they rock) and it couldn't have been easier!!! give it a whirl today!!! Thanks for the post found via PInterest!!!
You rock! Thanks for sharing.
There are far too many posts for me to read through to see if anyone else has achieved gluten free success. I made a loaf of bread today using 2 cups of the Cup4Cup gluten free flour (from William Sonoma) and 1 cup of Bob's Red Mill oat flour. I added a little extra xantham gum (the C4C flour has some) to ensure the bread would not be dry and crumbly, especially with using the oat flour. My bread came out wonderful, with a crusty exterior and a lovely, doughy center. Although the bread is a bit more dense than its glutenous counterpart, the taste is reminiscent of my pre-gluten free days. Thank you so much for a wonderful recipe that was not intimidating and easy to follow. After being gluten free for over two years, I finally felt brave enough to try baking my own bread thanks to this recipe, which I found on Pinterest (of course)!
Fabulous! We have many comments on people wanting to try gluten-free. I'm glad you sent us a success story. I have a couple of other recipes on this long list of comments as well. You have made some bakers very happy. thank you so much for sharing.
Comment from Jayne:
Janet, I tried to read ALL the posts, you are a very popular lady! Just a quick note, when using whole wheat flour add 2 Tbsp. of lemon juice to 4 cups of water. Got this off a Rogers flour bag in Canada. It is a natural dough conditioner when baking with no additive flours. Love all the variations on this bread! I was very fortunate to have my mother-in-law show me how to make bread step by step. I'm sure there are many happy families out there because of this recipe.God bless
Thanks for the great tip Jayne.
This must be miracle bread. My yeast was expired AND I forgot to activate it. So my dough looked fairly limp and flat when I put it into the pan. However, just took the lid off after the first 30 min of baking time and the loaf looks BEAUTIFUL. Smells amazing too. I mixed in garlic powder and dried herbs (basil, dill, rosemary). Cannot wait to taste it! Thanks for such a great recipe!
Yes, it is pretty forgiving. So happy you had success.
Janet, I assume you have an electric oven. How would this turn out in a gas convection oven? That is my newest toy. I haven't had much chance to bake in it yet, so don't know the quirks. Anyone else had luck with gas convection and have an idea how to adjust the temperature settings or time? Thanks!
When ever I use convection, I lower the temp by 25 degrees. Time is generally the same.
Thank you! I will try it that way!
Fantastic recipe. Made my first with Rosemary (from my garden), 3 tbsp olive oil and 1 tbps cracked pepper. Wow – it disappeared in the first 10 minutes!
Next batch is almost ready: cranberries, orange zest and walnuts.
I have just GOT to try the cracked pepper. Sounds amazing. Thanks for sharing.
I tried mozzarella and cracked pepper with absolutely awesome results! I am definitely going to try the Rosemary & olive oil!
I just took out my first loaf of bread!! It is a beautiful Cheddar/Jalapeno and I have another loaf in now….Cranberry/Pistachio. I would like to make a Cinnamon/Raisin and a pumpkin spice. Any ideas about the amounts of add in ingredients to use for these? Thank you sooo much for your blog….looks like I need to head to Costco for a huge bag of flour to fuel my new obsession!
I'm pretty sure I mentions that I went through 100 lbs of flour in 3 months with this bread baking obsession. I started purchasing 200 lbs at a time from my local Costco. Thanks for your photo's. Fabulous looking bread. I think I used about 1/2 cu raisins, 1/2 walnuts (optional) and at 1 teaspoon cinnamon you can add the same pumpkin pie spice as well. Sounds divine!
Bar Keeper's Friend will help make your pans sparkly clean. Thanks for the wonderful recipe!!
I just read your narrative and looked at the beautiful pictures. I love BREAD!!
I love to bake. I'll be baking this sometime soon and hope it turns out as goo as it looks.
Anne