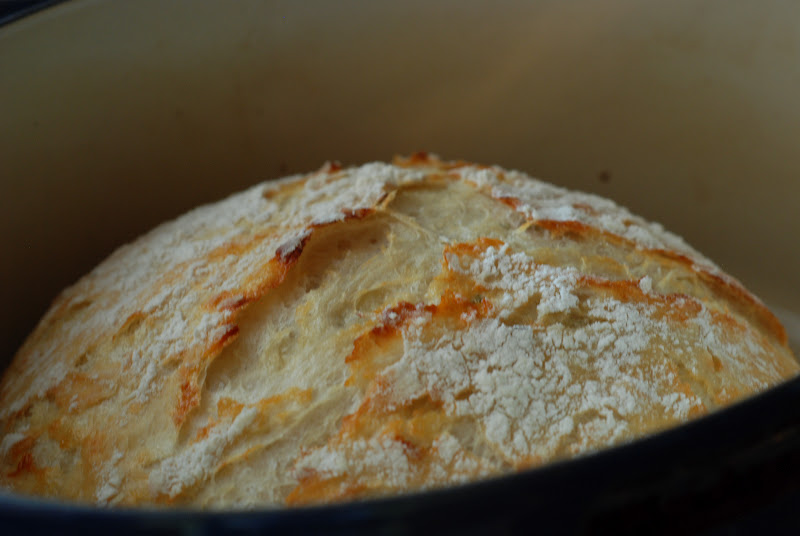
I realize that asking a question and trying to get or even FIND the answer is getting a bit ridiculous on the Crusty Bread page. This is by far the most popular post I have with over 1.2 MILLION page views. Who knew???? Oh my gosh. I knew the first time that I made this bread that I had to share it with the world. It’s so easy, yet so delicious and has SO many possibilities. Here is your turn to share, ask, comment, complain, or rave about your bread success.
Q: Do I have to use an enamel covered cast iron pan?
A: NO. You can use anything that can take the heat. The following have been used that I know of:
Clay pots with lids, Pizza stone with a bowl to cover the bread, insert from a crockpot, pyrex baking dish with a lid, stainless steel pot with a lid, baking dish covered with aluminum foil, old cast iron dutch oven.
Q: Do I have to use unbleached flour?
A: I always use unbleached flour. You can try bleached flour.
Q: Can I use self rising flour?
A: I don’t know. I would just stick to all-purpose.
Q: What size is my pan?
A: My smallest pan is 5.5 quart and the loaf barely fits.
Q: What type of yeast do I use?
A: I use SAF instant yeast. Any yeast should work.
Q: Why is my bread turning out flat?
A: I don’t know. You could try using less 1/4 cup less liquid. Or add a bit more flour. Make sure your dough appears to be dry when you first mix it. It will have more moisture during the rising time. There are many determining factors when bread making. Is your flour old? It does make a difference. Sometimes store brand, sale flour isn’t so great and should probably be left on the store shelf. Make sure your flour is fresh and a good quality brand and make sure your yeast is fresh and active.
Q: Can my dough sit out longer than 18 hours? Does it HAVE to be between 12-18 hours?
A: No. I have let some dough sit as long as 24 hours and the bread was beautiful.
Q: Have you tried Gluten-free?
A: No. I’m still waiting for someone to venture into the realm of Gluten-free. If you try it, let everyone know.
Q: Do I have to grease or oil the pan? Will my bread stick?
A: No you don’t need to grease the pan. I have never had the bread stick when using a cast iron pot. I haven’t tried anything else. The best way to be certain that the bread won’t stick is to form the loaf on a sheet of parchment paper and lift the bread into the pan using the sides of the parchment. Leave the paper in the pan. It’s won’t burn. When the bread has baked, just lift the sides of the parchment out of the pan. Voila!
Q: What temperature should my water be?
A: I just use cool water straight from the tap.
Q: Can I add sugar?
A: Sure.
My most recipe comment that will be so helpful to all of you. Thank you so much, Cory – Falling Star Lane:
Hi! Me again! I have some input – mostly add in ideas that have been huge hits! I found that using the parchment makes all the difference – to any loaf, it makes it easy to put in and take out and never burns.
Also, I reduced the baking time by 5 minutes for each step – more tender bred, and just as crispy crust.
I also add 1 T of raw sugar to each loaf – they rise higher for me.
As to add ins –
1. Turkey bacon and cheddar – huge hit
2. Rosemary, feta and sundried tomatoes – i found the ones in oil to bring a fantastic flavor
3. Jalapeno, and pepper jack – wow!!! used canned peppers – small can
4. Chocolate and cranberry
5. Rosemary and sharp cheddar
6. Chocolate chip and orange infused cranberries
7. Apricot, cranberry, and chocolate – I put too much in – so i had very dense bread – but it got eaten!!
8. Rosemary and Feta
9. Marinated artichokes and raw garlic – sliced 6 cloves very thinly – oh boy!
10. Orange infused cranberry, almond and orange zest
11. Lemon zest, feta, and rosemary
S0 far, none have been rejected, and I have become something of a bread baker to my friends – I bring a couple varieties to potluck, and they are very nicely received! I still need a 2nd dutch oven – days i bake 3-5 loaves it gets pretty hot around here! 🙂
I hope listing these is ok – i spent soooo long scrolling thru to see other peoples ideas, it seemed like this would be a good thing – found a few to try, and in fact making a pistachio and cranberry tonite, and an olive mozerella – new is good – but i get asked for the Jalapeno one most often!!
Thanks again for this blog post!
Most of the comments I receive are pretty fabulous like this comment. Keep them coming.










Just read through all hundred million comments! You are a popular lady, and for good reason! Okay, I tried GF! In fact, I've been making them and selling them at our Farmer's Market for the past 4 weeks. I sell out every time! They are beautiful, but not quite as round and smooth as yours. Can't wait to try leaving it on the parchment paper, what a gooey mess!
I have to increase the water by 50% so I use 2 1/4 C water. I have tried Pamela's Bread Mix and Better Batter Bread Mix, they get pretty close to the same results. The only other alteration that I've had to make is I throw it in my stand mixer and let it go on low for 5 to 10 minutes. When it's GOOD AND BLENDED, I add the extras! The one that I came up with that sells out fastest is the "No Thyme" loaf. It has parsley, sage, rosemary and …. oregano?
WaaLa! Thanks for making "That Gluten Free Lady" look like she knows what she's doin'!
This was posted by Kathleen the gluten free lady. Thank you, Kathleen, so much for the fabulous information.
I tried this recipe, it started off fine, looking like all the pictures, but when I tipped it out the bowl it kind of slopped onto the counter and was crazy sticky! I scraped it into a roundish shape and left it covered for half an hour before dumping it into the pre heated clay pot that I was using. Even after half an hour it wasn't done, and after the time I left it to cook it then wouldn't come out, being stuck to the bottom. Should I have greased the pot before I put it in? And then the inside was still slightly doughy, not like bread, if you press it it stays with your finger print, but the crust was super crunchy, like too hard to cut through! I'm in Scotland so converted the oven temp to 230 degrees celsius. I'd added the cheese, rosemary and lemon zest like suggested, and used active dried yeast instead. Should I have done something differently??
Looks like I need to make a trip to Scotland so I can see what went wrong. Apparently this dough sticks to clay pots. If you have access to parchment paper, I would suggest using that in the bottom of the pot. I just put the dough onto the parchment paper, then lift the paper and sit it into the hot pot. It's ok to bake the parchment in the pot. It won't burn. It just appears that you did everything right. Try adding 1/4 cup more flour. It's possible the dough was just too wet. Increase the baking time with the lid ON. Try 35 minutes with the lid on the remove the lid for an additional 15-20 minutes. If the dough still appears too wet add an additional amount of flour. It could be your humidity, altitude, flour, etc. I hope I have helped in some way. Let me know if you are able to correct the problem. Happy baking, Janet
Maybe the dough was over manipulated after the rising? I get the best bread when I use an enormous amount of flour in my cloth and then I barely touch the loaf.
Oh, and the cornmeal in the bottom of the clay pots, like when you make the pizza, works like a charm.
Hi, just to let you know, don't use the insert from a crockpot to make this bread at the temperature it says to use. I tried making it with my insert and didn't realise until afterwards that a crockpot insert is not meant to cope with that high heat. Mine cracked and is now useless. I'm thinking if you are going to use a crockpot insert you would need to lower the temperature and cook for longer to compensate. Not sure if this would work as I can't try it out now! lol
Oh that just breaks my heart. I'm so sorry about your crockpot. I have not tried that method. I'm glad you posted this comment. It will help others avoid this same heartache.
Janet, I just posted on the original thread about GF. Can you move that comment over here or should I repost it?
Yes, we'll…this bread is great! All versions have worked for me except……oat flour. The good news is, I have a 5 lb. hockey puck for sale if anyone is interested.
BAHHHHHHH!!!! My family is wondering why I'm laughing. I have produced a few hockey pucks myself. Thanks for sharing the oat flour results. You made my day.
Just found this on Pinterest and am excited to try my first loaf of homemade bread…EVER! Has anyone used a clay pot for this? I also have a Calphalon dutch oven. I'm not fortunate to own a Le Creuset…yet (HINT to Santa). And from the sounds of it I should probably wait until Texas cools down a bit 😉
Both should work. I'm not sure if the dough sticks to these surfaces. You may want to try some parchment in the bottom to prevent sticking. Other than that…happy baking.
This is officially my new favorite thing! I have made this bread twice in the last week and am having so much fun experimenting with add-ins. Today I made it with raw garlic and shredded parmesan — YUM!!
My question is this (and I tried to search the comments to make sure it wasn't already asked, hope I didn't miss it!): how do you measure your flour? Because I tend to fluff my flour up in the cannister, then sprinkle it into the measuring cup and lightly, carefully level it off, so I am never packing or shaking down my flour to level it. My breads are coming out fantastic but FLAT, and the second time I made it I used 1/4 c. less water which helped but it still wasn't right. I'm wondering if maybe you are using more flour than me simply because of how we might be measuring it out differently?
I pretty much measure my flour the same way you do. I do not pack in the flour. I lighten up the flour by stirring it a bit then gently shake off the excess. You may want to try a bit more flour into your recipe next time. That should do the trick. Use any where from 1/4 cup to 1/2 cup more flour.
clean the outside of your Le Crueset pots with a can of Barkeeper' Friend. It is also super and safe for glass cooktops – gets the cooked on goo without damaging the surface.
or you can use Bon Ami…. works GREAT!
Hi Janet! Yesterday, a very, VERY picky Brazilian chef came to dine with us, at a friend´s house. He went ABSOLUTELY NUTS with this bread!! I made the simple version, split in two, rub both loafs with olive oil before cooking and give them a ciabatta shape. Result: crispy bottom, soft silky-shine top and a lot of large holes. Once again, the same problem came to the table: both loafs were gone within five minutes 😉
PS: I made the potato pizza last saturday for a couple of friends (only that I switched the shallots for leeks). Guess what? New Girls´ Night In tradition.Yesterday a very, VERY picky Brazilian chef dine with us at a friend´s house. He went ABSOLUTELY NUTS with this bread.
Oh my if you didn't just make my day!! You must have made some fantastic bread to knock the socks off of this picky chef. Kudos to you.
Thanks! It was a great experience, being able to cook with not only a professional chef, but also a foreing one. Tomorrow after school, i´m trying the whole wheat version, maybe a longer rising time is better? About 24 hours?
I'm just dying to try this recipe it looks fabulously easy. I want to address the problem of your 'well used' cast iron cookware. You asked for hints to clean. I use oven cleaner, spray on Easy-Off. I leave it on for 5 minutes and then wipe off. It'll do the trick. 🙂
I LOVE LOVE this bread I have never baked my own bread before, made a double batch my first time and they turned out
great. Made one rosemary asiogo cheese the other plain. Have a pumpkin spice and jalapeno cheddar rising on the counter right now, Thanks so much
I just made this today (I used a stainless steel pasta pot with lid). It looks beautiful and tastes great but I did have similar issues to others with the smooshy blob that baked into a flat loaf. But after having read all the comments I can't wait to make it again! Thanks so much for this awesome recipe!
One question…how do you gauge how much mix-in to add for the single loaf?
Try adding more flour to your dough by 1/4 cup to 1/2 cup. I hope that solves the problem. I add pretty much 1/2 cup to 1 cup of add ins. Depends on how much you like in your bread. I tend to add about 1 1/2 cups cubed cheese. I put in about 1/2 cup nut, raisins, etc.
This is an awesome recipe! I love making bread from scratch for my family and have for several years. But this recipe is much faster and I can mix this and go vs. the waiting and kneading ect. it usually takes several hours. I used whole wheat flour that I grind myself. And this made an amazing loaf as well. I have found that my whole wheat flour is ground much smaller than the whole wheat flour bought in the stores. So bread is a bit more healthy than white flour and just as yummy!
Thank you for your blog….I love it!
I need to perfect my whole wheat version. I personally prefer whole grain breads. Thank you so much for sending us your comments.
I will be trying this bread very soon and I'm super excited. So if you had to choose the rapid rise vs. the method you've been doing all this time, which would you choose?? I'm so impressed with your keeping up on all these comments and questions, thank you so much. You are committed to our success with bread! 🙂
Either. It depends on your schedule. If you find it convenient to make before you go to bed because of a busy morning schedule, then do that. Or if you're like me and forget the rapid rise is a great way to go. You should try the vinegar method and let me know what you think. I thought there were large holes in the bread, which my sons's love for grilled cheese sandwiches because the cheese melts through the holes and gets all crispy. My son's are 26 & 30 and still love their grilled cheese. Thanks for your comments.
I haven't read all the posts but felt that probably no one had mentioned using einkorn flour in their bread yet. I tried it today. It's very nice – nice taste, crust and chewy.
Einkorn is a cousin to emmer wheat, which is the ancestor of modern wheat. Einkorn has more beta-carotene in it and has a higher protein content – thus makes a denser bread. It is much more expensive, and harder to find, but creates less insulin resistance than modern wheat. In the States, Jovial is one supplier. I get my grain (which I usually grind in my home mill) from Prime Grains in Saskatchewan.
I reduced the salt to 1 tsp but still found it too salty (maybe because of the salt in the butter I spread on it – yum!)but I would reduce the salt again to 1/2 tsp. I increased the yeast to a scant tsp. I used parchment paper and a round metal enamel roasting pan that most people have. Since I'm assuming that the thinner metal heat faster, I only pre-heated the pan for 15 minutes.
I think my total "overnight" time was about 13 hours.
I took a couple of photos but don't know where to put them, if anyone is interested in seeing them. It mostly looks like regular bread – a bit different in colour.
I found your post most fascinating. I have never heard of Einkorn OR Emmer wheat. I'm going to start looking for it. Thank you so much for the tip. Salt is definitely a subjective ingredient. I agree with you, I don't love the bread too salty. My altitude requires a bit more salt to flavor foods. I generally reduce like you do. Thank you so much for opening my eyes to a different grain.
I know most people are saying the bread doesn't last long in their homes… but, here with just the two of us…. how would you store it for the next day without loosing the qualities of the bread?
Anyone try the new faster rising Lahey recipe for this bread?
He uses the basic recipe and adds a 1/4 tsp of red wine vinegar and uses hot water instead of the tepid. Rise time is 3-4 hours vs. the 12 – 18.
It is hard to store and retain the same crisp crust. I leave the bread cut side down on a cutting board then cover the bread with a clean dish cloth. That works for a day.
I actually DID try the rapid rise method just this past Saturday. I actually loved it. I had forgotten how much red wine vinegar to use so I threw in 1 tablespoon. I loved the texture and flavor of the bread. Yes I did notice a difference. I even noticed that the bread had more of an uneven texture with large holes, that I just loved. It worked great. I did let it rise for about 7 hours, just because that's when I got around to baking it.
We put this in a brown paper bag, and loosely closed it. The bread crust doesn't soften, and it still remains tender the next day. It doesn't last more than 3 days around here, with just the two of us!
I place the bread cut side down in a large brown paper bag and use a clip to keep the bag closed, that seems to keep the bread crisp.
Ken
Tried it … great bread. One thing, crust was way crusty. Almost too crusty to cut. Was my oven too hot maybe? Can't wait to try the variations.
It is pretty crusty and can be tough to slice. You can try putting it to cool on a cutting board rather than a cooling rack. I think it would soften up the bottom crust a bit. You could, also, try only preheating the pan for 20 minutes instead of 30. I hope this helps.
I had same problem. I lowered to 425. and only 5 min. after took lid off. it turned out beautiful. Love that bread. Cant wait to try some of the flavored ones.
can you freeze this bread, and if so, what is the best way to thaw it out so that it maintains it's crispy crust and tender inside?
You can freeze the bread in a plastic bag. Just remove from the bag to thaw to help maintain the crisp crust.
I didn't have unbleached flour, so I made it with regular all-purpose flour. I just took it out of the oven, and it is so good. I added lemon zest, rosemary, and sharp cheddar to my recipe. OH-MY-GOODNESS!! I just had a slice with butter and honey. I'm thinking it might not make it until my hubby gets home at 6:00 p.m. 🙂 Thank you so much for the recipe. This may replace some of my candy and cake balls for Christmas gifts this year!
Sherri
Oh my yum!
I love, love, love this recipe! Made it the normal way sevwral times and always turns out perfect! However, I got kinda lazy reading through all the posts, I am curious about the add-ins. Do you add at the beginning? How do you decide how much of each ingredient to put in? I aleays double the batch since it never last long. Thanks for a great recipe!
You put the add-ins at the same time as the flour, salt and yeast. Add water and let it sit. The amounts depend on your own personal taste. For cubed cheese, chocolate chips, nuts and add anywhere from 1/2 cup to 1 cup. Depends on how loaded you want your bread.
Oh my gosh! I made this today. I was SO nervous to take the lid off after the initial 30 minutes that I'm pretty certain I wasn't breathing! IT WAS BEAUTIFUL! Wow! My lovely round loaf is cooling right now and I can't wait to see if the taste lives up to the comments! My head is swirling with the possibilities!!! I have a loaf of cinnamon raisin rising right now because I just couldn't wait to make more! Thank you, thank you for this recipe!!
Oh my gosh! I'm so excited for you…really! Make sure you pass on whatever swirls through your head. Thanks for sharing.
I agree with Cori! I made this today and it was delicious!!! Both my boyfriend and I loved it! I'm so excited to try the different possibilities! He got all excited when I mentioned trying the jalapeno pepperjack! I also wonder how the rosemary feta is and maybe more of a dessert one with white chocolate chips and cranberries!
Thanks again!!
I have made this wonderful bread several times and have been delighted each time I have taken it out of the oven. I live in the mountains at 7000 feet and even though I often baked bread when I lived "down below" have been unsuccessful up here until this recipe came into my life. I use Fleischmann's Active Dry Yeast in the jar and King Arthur's bread flour. Not sure if this makes any difference. I do bake the bread in my vintage Descoware (pre Le Creuset) dutch oven. Thanks so much for this recipe!
Thank you for sharing your success. I'm sure King Arthur flour plays a big part in your bread turning out so well. I'm a believer in good quality flour. Happy baking way up there.
Hi!
Does anyone know if this bread freezes well? It sounds like it'd be a great gift and so easy to make a bunch at a time!
Thanks!
It does freeze quite well. Just make sure you take it out of a plastic bag to thaw. That way the crust will remain chewy instead of going soft.
You can remove the plastic knob from the lid. You can cover the pot with aluminum foil. I believe the person that tried the pizza stone covered the bread with a stainless steal bowl. I don't think I'd chance pyrex exploding. That's a huge mess. Scroll up and Steve put up a link to buy a stainless steal knob for the lid of Le Creuset on Amazon. Good luck.
I would love to make smaller loaves to use a bread bowls for soup. Any suggestions, such as adjustments for baking time?
If you divide the dough into 4th's, you could cut the baking time down to 20 minutes covered then just keep watching until they are golden brown. I made some individual rounds on a pizza stone and didn't cover them. They weren't as crusty, however.
You mentioned that one could use an inverted Crockpot insert on top of a bread/pizza stone in lieu of the fancy enamel-covered cast iron. I looked on the Crockpot website, and they say that their inserts are only rated to 400 degrees F, which is less than the 450 degrees F required for the recipe. Has anyone chosen this route, and if so, did the insert withstand this extra 50 degrees?
I have not tried a crockpot insert. Those who have tried it, do remove the knob off of the lid. They haven't mentioned having any trouble with the insert cracking or heat issues. If you are concerned, try lowering the heat 50 degrees and add a few minutes of additional baking time before removing the lid. I hope this helps.
I use my crockpot insert with it's own glass lid ( the handle is glass as well) and have not had any problem with heating up to 450 empty or baking the bread… For the past 5-6 years! I don't have the directions to my old crock either!
I, too, have used my crock insert with all-glass lid and so far have had no problems. (though I secretly wish I might so I would have a good excuse to get a beautiful new enamel coated cast iron pot, lol!)
-Renee
This has become my go-to bread, it is so incredible. A friend told me that it was published by Mark Bittman (How to Cook Everything, The Minimalist in NY times), although as you say, it has been around. Thanks!
So is it Mark Bittman or Jim Lahey??? Anyone know??
I believe, the original recipe was by Jim Lahey, and Mark Bittman did an interview with him and made it go viral. I just got a dutch oven for Christmas and this bread recipe was the first I got to try in it! So delicious! I have a loaf of roasted garlic and rosemary rising now! We'll see how it comes out.
According to the video above, its Jim Lahey's recipe, Mark Bittman published it under his byline in the NYT.
Jim Lahey. Mark Bittman did put the recipe in the Times but the recipe is that of Jim's.
jim lahey as reported and videotaped with and by Mark Bittman of the times. great job with the rolls, i need to try that and with the tomatoes!
i too haven't had my LC black knob crack yet. also getting very discolored in the pot now that I've been making bread. i was surprised because roasts don't discolor it, but a hunk of dough that plops in and out turns it all kinds of brown??
I have been making this bread…daily! We've had carmelized onion with swiss cheese, jalapeno with jack cheese, rosemary herb bread, sun dried tomato with smoked provolone, pumpkin spice (I added raisens)…every loaf is a huge hit!
Oh yum pumpkin spice. Love it. In fact I think I might try adding 1/2 cup pumpkin puree with the water and throw in some pecans. Thanks for inspiring me with your fabulous ideas.
Just want to know if you can divide the dough into individual servings…like buns?
Sure can. I baked them on a pizza stone. They turned out just great. You can check out the post at: http://simplysogood.blogspot.com/2012/05/another-use-for-no-knead-bread-dough.html
Oh dear… I'm so worried. My dough was not shaggy at all and very goopy. I have my fingers crossed for it to be ok, but right now it's just sitting at the bottom of my bowl in a soupy pool?
I used good quality flour and active dry yeast! :/
Uh oh 🙁 You may need to add more flour. Try 1/4 cup more and let me know if that helps.
I tried brioche dough from this blog: http://www.artisanbreadinfive.com/2008/09/24/brioche-dough-recipe-and-all-of-its-wonderful-uses
I treated it the same way I would the no-knead bread recipe. The dough was pretty lumpy. It made a ton and after refrigeration it was still very sticking. I just quickly made the dough into cinnamon rolls. The tasted really good. I'm going to play around with the recipe and tweek it a bit here and there. It makes a ton of dough, but it can sit in the refrigerator for 5 days. It has potential. I ordered the cookbook hopefully after I read that I will produce a better brioche. I keep you all informed.
I recently was fising on-line for no-bake recipes, found yours and another one using pilsner beer. Now I cannot find the beer one, after I went out and bought a six pack of the beer. I don't usually drink beer.
Hahaha. Let me know if you try the beer version. Does it give the bread more of a sourdough flavor. I would think that it would.
i have made this bread several times and tried a bread using Herbs de Provence and it was delicious. The hint of lavender made it a good bread to eat with butter and/or marmalades and coffee. I can get really carried away eat it warm right out of the oven.
LOOOVE lavender. I'm going to have to try that one. Thanks for sharing.
We love bread in our house and once I saw this recipe I knew I had to try it! I just took my first loaf out of the oven and I am amazed that I actually created this wonderful smelling masterpiece! Can't wait to try different flavors!
You are such a great baker. Way to rock the bread.
I'm so excited to try this! My mom-in-law is here and she's vegan. The base recipe definitely qualifies as vegan acceptable! Yeah! Another recipe I can serve when she's here!
For great Vegan recipes click the link "my new roots". It's listed on the blogs I follow. She has a Vegan Cashew Corn Chowder that is simply AMAZING!!!! She has many wonderful vegan recipes as well. Good luck with that Mother-in-law.
Just sliced my bread and it is sooooo good…. want to submit a photo, but don't know how to do that…….
Hmmm. Email me with an attachment to simplysogood@hotmail.com I'd love to see it.
My mom, grandmother, and I have made this several times now and in several flavors. We've shared it with several people. It's so good. We bought a bag of shredded cheese for one loaf and had the best toast for breakfast ever. Even just the plain loaf was fantastic bread!
I really like baking it in stoneware – there's no clean up – dust off the flour once it's cool. We have a big stone bowl with a lid that we have made large loaves in – we also usually proof it in a big ole' tupperware bowl.
Thanks so much for your recipe! It's a family fave!
Thank your for sharing your ideas. I guess I need to invest in stoneware.
Glad to see someone using stoneware. I plan to use my Pampered Chef stoneware baker for my first go at this recipe. Can't wait!
Hey Janet. Did you know the guy who developed this recipe has amended it for a shorter proof time of about 4 hours? He did a video with a gentleman from NYT's. The recipe is SLIGHTLY different.
Thank you so much, Anon. Everyone should watch this. So fun to see. I'll try the changes and report.
Just found this recipe via Pinterest and now have two loaves proofing on the counter. One plain and one black pepper parmesan. The dough was a little wet so I added a bit more flour, but was afraid to add too much. Guess I'll see how it turns out. Very excited to try many variations of this recipe! Thanks, Janet, for a great blog!
~Merridith
Please report back and let me how your bread turns out.
Love it, love it. this recipe is awesome. I added minced garlic with parmesan cheese. Yum! my son ate up almost the entire loave. Today I am making bacan bits, monterey jack cheese and raw sunflower seeds. I cannot wait to taste it.
Thank you for sharing.
Love you post, I am SO trying this! BTW I love my L cast iron pot too! All you need to do to clean them is combine some baking soda with water to make a past, gently scrub that in and on you pot, I use a sponge. You can then rinse off or let it sit for a few minutes, they should shine up quite a bit…you may have to repeat that process a few times before your pots are back in ship shape order.
-Ashley
In the instructions for my Le Creuset oven, it states that the "black phenolic lid knobs have maximum use temperature 375 degrees F". But your picture shows them in your oven. I assume you have had no damage at the excessive temperatures? Thanks. I am trying the recipe right now but was concerned for the lid.
I seriously have not had any damage to my pots and my black knob is in good condition.
I just made my first loaf tonight, and it came out fabulous! But, sadly, my black nob lid did crack while it was heating up. Oh well! Just mixed up a double batch for tomorrow. Can't wait to try all the different "add-ins"
You can buy a stainless steel knob from Amazon that will hold up under any oven temperature. Just search for "le creuset knob replacement." That's what I did for my Rachel Ray plastic knob which was only rated to 350 degrees.
Thanks for the help re replacement nob. I will try out for one as I hate to damage my gear.
Just adding to that, when I bought my Le Creuset last year, the store told me the black nobs were okay up to 450*. I purchased a stainless one just in case, but I never made the switch. I have made this bread multiple times (with AWESOME results) and my pot and knob are both still in perfect condition. I hope that helps! 🙂
I bought a 5 and half quart Food Network brand dutch oven from Kohl's, which has a stainless steel knob and it's oven safe to 500°F. Perfect for baking bread! :o)
My le creuset knob melted at 425* and smoked up the kitchen! but the bread was fine! Now how to get the melted plastic mess off my pan lid?
LC makes two different black knobs!! One is only guaranteed to 375. But… you can replace the knob very inexpensively in any hardware store, just use an all-metal cabinet knob.
Thank you for such wonderful ideas and comments about cleaning pots. I can't believe what fabulous bakers you all are. Your mix-ins sound fabulous. I'm trying them all.
Janet, thank you for the great recipe!!! I have been making bread everyday, so excited to try different ones. So far I have made regular and Cinn. and sugar….put cinn. in the bread and when ready to cook, I sprinkled sugar and cinn on top…..it was so yummy was gone in about 5 min.
Just mixed my first batch cant wait to be able to bake it tomorrow – Annette (U.K.)
Just pinned your recipe on Pinterest and I want to try the raisin, walnut & cinnamon bread.
My question is how much of these ingredients go into the flour mixture before adding the liquid
You asked about cleaning your lovely Le Creuset pot. I agree with you I love mine. It is really precious to me. Chef's catalog has an enamel cleanser and it is what I use to keep my pieces clean. So worth the price. I love the recipe
I use Oxiclean to soak the pan… comes out awesome.
I just use baking powder mixed w a little bit of water to make a paste, and just scrub when the pot is a little warm (or warmed up under hot water)
I use Barkeepers. It comes as a powder for similar to Ajax or a liquid form. I prefer the powder form. It's safe on all metals and glass.
All my Le Creusets love SoftScrub.
This bread recipe has been my absolute favorite find to date! I posted early about using my Grandfathers cast iron dutch oven, I am happy to report it turned out beautifully! My first venture was the regular bread, then today I made two more loaves one was your Cranberry, Almond, Orange zest. I served C,A,O bread at breakfast and within minutes it was gone. I then served a Cheddar, Black Olive loaf with lunch and again I was met with an empty serving bowl after a few short minutes. Everyone wants the recipe and ask where I got it, I tell them Pinterest and they are shocked, I have given several eager people your blog page, much excitement in our building over these breads. Thanks for the share!!!
I have become an official family bread baker in our home thanks to your blog. I have played around with cheeses, fruits and seasoning. I even did a fajita seasoned bread which was a hit! The loaves barely have time to cool and the cutting begins! Thank you !!!
I just want the recipe without all the comments.
ditto!
copy, cut & paste onto word
http://simplysogood.blogspot.com/2010/03/crusty-bread.html
Copy this address and paste it in your web address area, it will take you to the recipe! It is also posted at the top of this page in the article.
In the process of making my first loaf, super excited to try it out on my co-workers. Will be using my Grandpas old cast iron Dutch oven that has been collecting dust for years, he would be thrilled to know it us bring used again. Cannot wait for the a.m.!
Let us know how your bread turned out. My fingers are crossed.
All I can say is AMAZING!!! I couldn't wait for it to cool down, with Peanut Butter it was so good!! I can't wait to make more with the "add in's" Thank you!!
Please pass on any great "add-in" ideas. Peanut Butter??? Yum!
peanuts and dried blueberries. I call it my "peanut butter and jelly bread"
I tried this recipe last month and became an instant fan! I found myself at the King Arthur Flour store in VT last week, and bought a bag of their "Instant Sourdough Flavor," thinking that might be a nice addition to the recipe. I found that you need to add about 50-100% more than is called for to get the sourdough flavor to come through (they suggest 1 tsp. per cup of flour, I used a tablespoon and a half last time, will try 2 tbsp. next time). The two batches I've made so far came out a bit flatter…not sure if that is a result of the significant humidity we have had lately, or if it's the flavoring. Next time I'm going to add 1/4 more flour and see if that helps. Anyone who is interested in trying it can order the flour from the King Arthur Flour website.
Thank you so much for the tip. I wish I could find myself in King Arthur Flour store. I was in VT for a "whisk-a-way" weekend at NECI (so much fun) with my sister and a friend. We stopped in King Arthur and literally filled the trunk of our rental car with fabulous finds. When we were checking in our luggage and man lifted my suitcase and asked if I was taking home New Hampshire granite. I laughed and said Vermont maple syrup and king arthur flour. He slapped a "heavy" sticker on my bag. Sorry you just flooded my head with fabulous memories. Next time I place an order I will try the sour dough flavor. Just keep playing with that dough. You'll get it to work.
I LOVE King Arthur Flour ( and VT, where I live)!!! I "find" myself inNorwich once a year and do mail order inbetween.
I've tried making this bread twice and while it always tastes good, it always falls flat when I put it out onto the floured surface before baking it and it doesn't look like yours above when covered by the plastic wrap on the counter. It also doesn't seem to rise when in the oven. One thing I have noticed is that when it's rising in the bowl for the 12-18 hours, it looks like your above picture by 6-8 hours. By the time it gets to the 12-18 hours it looks like its falling. What am I doing wrong? Thanks for anyone's help!
Your kitchen is too warm!! It happend to me with the 2nd loaf…
After a while, the yeast will eat all the sugar available y then it will start to produce alcohol instead carbon dioxide. The alcohol kills the yeast and then the dough collapses.
There you have it. You could, also, try reducing the rising time if you find your kitchen is too warm. I have only had this happen when I used rye flour. It is frustrating. Keep trying it will work out.
This is really interesting! We living Oklahoma where it's 80+ degrees 10 months of the year, and we keep our house at about 80 degrees during the heat to keep energy costs down. I noticed that 8-10 hours is really the best rising time for me, it starts getting a bit flat after that, but I didn't really know why. I bet this might be why? Thanks for the new forum page, Janet! I love this bread!
I live in AZ where it's pretty warm all year, too. In December, my ideal rise time was 12 hours. By 13, it starts to fall. My family absolutely loves this bread! 🙂
I must say that I live in southern NM and I ran into the same problem, our house is usually very warm. However, I did find that when the bread essentially over proofed because it was too warm it tasted like a yummy sourdough instead. Everyone still loved it 🙂
Yikes. I just mixed up my first loaf and it's rising now but I forgot to activate the yeast with warm water. I used warm water in the dough so hopefully it will rise…. :/
Let us know if you still have success. I think it will still work.
I did the same thing and it turned out fine. I'm about to make another and try activating the yeast and see if it makes much of a difference
I thought you didn't have to activate the yeast!
Now I'm confused. No where in the directions or the pictures does it say to activate the yeast with warm water. Help!
Maybe in the recipe on the original post you should put that you use the instant or rapid rise yeast and that if using regular yeast to activate in warm water first. I did the same thing and am hoping it rises too. Thanks for the recipe! Can't wait to try it (and will try it again and let the yeast activate if this one doesn't work!)
Lahey uses water which is 55 – 65 degrees. I just mix it all together and don't activate the yeast separately.
Does anyone know if you can put your crock pot insert in the oven with the lid? I know the glas can take the heat, but I wasn't sure about he handle. I don't want to ruin my handle, but I really wan to try this bread!
I believe that everyone that has tried this removes the handle or knob from the lid.
I have read about this before, Yes take your plastic handles off. Go to a hardware store and replace yours with one that can take the heat. I may have read this tip in "Mother Earth" magazine, they have an issue that is all about breads.
I have used my crock pot instert many times for this bread. I simply put the dough in and then cover with foil instead of the lid. The bread comes out great every time!
Made this bread today for the first time and it turned out great! I added cinnamon, sugar, and raisins. I used an old cast iron dutch oven (not sure of the brand), which had already been "seasoned." It produced a lot of smoke during the pre-heating phase. The bread was already quite brown when I removed the lid, so I did not need to add the 15 min. uncovered baking time. Question: Should I reduce the oven temperature, or maybe just reduce the baking time at 450? Did notice that the crust tasted slightly burned.
Sometimes that old cast iron still has some oil left in it from seasoning and other cooking. It can really smoke up a storm. I have placed my old dutch ovens out on my grill and close the lid until the old grease has smoked off. That helps it from smoking up my bread. That old oil can also leave a rancid taste in the pot that transfers to food. Heating it up is a good idea. You can try adjusting the temp down 25 degrees. I hope that helps or preheating it for 20 minutes instead of 30.
Well I followed the directions exactly as the recipe states, and my dough looked exactly like the pictures here! I let it sit in a covered bowl to rise for about 18 hours and when I was ready to bake it it looked just like your picture here of your dough after it had risen. I preheated the oven, then the pan and went to dump my bowl of dough onto the flour covered counter and it just went totally flat.. it was a blob that I could do NOTHING with, it would not stay in a round shape at all.. I put my blob into the pan and baked it for 30 minutes just as the recipe says and it came out smelling lovely, looking crusty, golden… and flat and shapeless.. Any ideas what I did wrong? The yeast was in date so I don't think that's the problem… ??? =(
I wish I could just run over to your house and check out your dough. Flour can be a huge part of a baked item turning out or not. If the dough raised well, then we know it isn't the yeast. The dough pretty much is a blob. The first time I made it, the dough stuck to my hands fingers and anything it came it contact with, but the end result was successful. Try again. Don't give up. Keep in touch.
I've made five loaves, the first three turned out great. The last three were flat and heavy. I feel I've done everything the same. What should I change????
In the Lahey book there is a second rise after the 18 hours. After the 18 hours you fold into shape and then rest another 1-2 hours.
I followed the recipe EXACTLY! and my dough looked exactly like yours in the pictures at each step! I let it rise for about 18 hours and it was GREAT! … Until I dumped it out of the bowl… Then it just went flat.. shapeless… blob.. I did put the blob into the heated pan and baked it for 30 minutes.. and it came out golden.. and crusty and smelling delicious… AND FLAT AND SHAPELESS! … What did I do wrong? =(
OH dear. This makes me sad. When you dumped the dough out did you knead it at all? I try not to fuss with it too much. I use my dough scraper to shape it into a somewhat round loaf. I don't deflate the bubbles out of the dough. Try adding 1/4 cup more flour to see if it will give your bread more substance. One other suggestion is to add 1/4 cup sunflower seeds, 1/4 cup pumpkin seeds and two tablespoons poppy seeds. This is the best looking loaf I produce. The addition of the seeds gives the bread substance and it's a bit firmer to work with. Tastes great as well. Let me know if this helps. 🙁
Hi,
I have made this recipe several times now. I had your trouble the first two times. I changed to the instant yeast and let the bread rest a full 30 minutes before putting it in the heated pot and since then I have had no trouble. It comes out great. The flat loaves tasted good, but were flat.
I have also been making a double batch of whole wheat. I use two tablespoons of honey, and half whole wheat flour with half unbleached all purpose. I have used several types of flour, bread flour, all purpose and whole wheat with no problems (it all depended on what I had in the pantry).
Great recipe, thanks
Thank you so much for the helpful tips. It's great to hear that most flours work. I think this is pretty much fool-proof.
From Anon:
Made the bread this morning using whole wheat flour. It is awesome! I used a cast iron Dutch oven. I brought used for about $30 at a flea market. Cleaned it up, seasoned it, and it worked like a charm.
Thank you so much for sharing your success story. I love hearing that the whole wheat works well.
Hi, everyone. I know there are a lot of questions about whether or not this recipe can be tried gluten free. Just wanted to say, I did the recipe with gluten free flour blend (2 parts brown rice flour, 2/3 potato starch, and 1/3 tapioca starch), and it turned out great! I will say, however, it's not very good the next day. So if you're doing it gluten free, I would suggest eating it still warm from the oven. Also, don't forget to add some xanthan gum or similar product to keep the bread together; otherwise, you will have a crumbly mess. Has anyone tried to make these into small rolls, instead of loaves?
This entry is from Blair:
We love you!! Thanks for giving GF a try. This will be extremely valuable information for many readers.
Oh dear making bread is my passion, i've just made this loaf for the first time, i missed kneading it i love doing that, so i was quite happy for this bread to be a failure, i thought the amount of yeast 1/2TSP would quarentee failure, no chance this is the absolute best loaf to date i've made, real crusty crust, airey light crumb, oh and by the way i don't understand bleached or unbleached flour so i just used my strong white bread flour, beautiful loaf.
YES! Another one hooked. Thank you for trying the recipe when in doubt. I loved your comment.
Sounds like you are from the UK… you will probably get even better results using plain flour, or 2/3 plain flour and 1/3 strong flour to give you a flour protein around 12%. (All UK flour is unbleached btw)
Also, for anyone with a Meijers near them – they had 5 qt enameled cast iron casseroles on clearance for $15.99. I bought a bunch for myself , my boys, and for friends 🙂
Kathe
Ok… I've got a whole grain version shaggy 🙂 I'm not a whole grain expert, so I went to whole foods and bought 50cents worth of about 6-7 kinds. I also got some whole oats to put on top. I used 2C white wheat and 1C whole wheat, so I had to add a little bit of water. Maybe a couple of extra tablespoons. Does it sound like I'm on the right track?
Kathe in IL
Way to play with this recipe. I can't wait to hear about the results. Sounds amazing!
So, my first try bombed. I went back and read every comment for ideas and then made a few modifications for round two. I added 1T each sugar and vital wheat gluten. Then I did NOT add extra water. It looked less shaggy at first, more like a regular bread dough, but it looked right after the overnight rise. I also let it rise on the counter for an hour before I baked it. I now have a beautiful, crusty, gorgeous, yummy loaf of whole wheat whole grain bread! Go me!!
Thanks Janet 🙂 your blog is a lot of fun to read –
Kathe
I used 2 1/2 cups of unbleached bread flour and 1/2 cup of whole wheat bread flour and my grown sons thought it tasted like a store bought Artisan bread! (High complement in deed!). It was delicious!
A note to Lodge Dutch Oven users: the pot cannot be heated empty, so fill it about 1/3 full with water for the 30 minute heat up phase. Dump out the water after the pot is hot and you go to put your bread in.
Great advice. Thanks, Kate.
If it is a aLodge enamel covered pan it has to have water. The regular cast iron & seasoned cast iron are fine.
Whoa, thanks! I've been doing this wrong, since that's the brand I have. Good to know from now on!!
I heat my Lodge enamel-cast iron pot without the lid and it does just fine. Remember, too, that it's made in USA (Tennessee). WM has similar but made in China. No, I don't work for Lodge!
Bread is fantastic. All the blogs are so helpful. Thanks to all of you.
I have a Lodge brand and knew to take the knob off as it is only good for up to 400 degrees, but had no idea about the pre-heating with it empty. I have done this about 3 times and the pan seems fine. Not sure if need to start using water or not.
Nonsense, cast iron can be heated empty or full.
I have preheated my Lodge Dutch Oven with no problems. It initially smokes a little but after that no problem.
What problems have you experienced with preheating?
Thanks
Love it! So amazing! I have made two loaves. One all white flour no mix ins and one 2 parts white flour 1 part wheat. Amazing!
Thanks for sharing. So great to hear success stories.
Yay! I did it! Thank you for the recipe! We are getting excited to eat it and make the herb butter on your blog!:)
This is a perfect match for the herb butter. Oh yum!
If i double the recipe to make a larger loaf, how much baking time should I add?
I think that I would make two separate loaves instead of one large one. I just worry about the bottom getting to dark with and extended cooking time. I reuse the same pan when baking two loaves. Once one loaf is removed I just plop the other dough into the same pot, put the lid on and start the timer and repeat the process. I hope this helps.
I am making a rosemary and roasted garlic loaf tonite, I will let u know how it comes out, I can only imagine that it is going to be great.
Oh Yum. I can't wait to hear about the results.
I'm on my third batch of Fresh Rosemary, roasted garlic, and parmesan! I can't try anything else because everyone just wants this kind!!! It's rising right now and my mouth is WATERING!!!
I did this one last night and it was "freaking good" according to my family!
I did this and it was a huge hit with my friends. (I know that this is a year old. Sorry.)
Wha, wha, I followed the recipe exactly and mine didn't rise very much after 17-1/2 hours. The yeast was new with a 2013 exp date and the water was not cold nor hot….what/where did I go wrong?
Did the dough every look like it was kind of bubbly? Generally after several hours it looks like a sourdough sponge that starts to bubble…kind of. I would start by adding 1/4 cup more flour. How fresh is your flour? I use to buy store brand, whatever was on sale flour. I had a terrible time with my breads. I changed to a flour that was consistent with it's protein content. If you have King Arthur flour available, that might be a good start. Try some good all-purpose unbleached flour. This is a start. Let me know what happens.
Sometimes chlorinated water affects the yeast. Try using spring water if you don't have well water.
Cindy B
I made my first loaf with All-purpose Gold Medal Unbleached flour and it was a little soggy & hard to shape into a ball – but still turned out okay. Then I made two more loaves with King Arthur unbleached bread flour…bingo!
A little off subject- Janet – do you think brand name sugar makes a difference in your baking & if so which brand do you recommend? Thanks!
If you used a metal bowl that might be the problem. for some reason it affects the yeast.
If you seal the plastic wrap to tight (or put it in Tupperware), the bread can not get any air and will not rise.
I have a cast iron pan but it is only about a 3 quart, I think. Do you think I could cut the dough in half and make smaller loaves back to back?
Love your blog by the way!!
Tracey
Sure. You could, also, make the full recipe then just bake half of the dough at a time. You would have 2 small loaves. I would think that your baking time would be less. Watch it carefully so it doesn't burn.
I have the 3 1/2 quart Oval Le Creuset, and the loaf fits in perfectly without making any adjustments if you want just one big loaf. (it just has more of an oval shape, but not much.) My family and friends love this!
I have two 3 1/2 qt. cast iron pots: A taller Cuisinart and a wider Chantal. The recipe fits perfectly in both. I actually like the taller Cuisinart because the bread has less room to spread out and turns out higher. I was worried that the 3 1/2 qt. pots would be too small, but they are most definitely not!
can I use rye flour, and if so, how much?
I tried a Rye loaf. It didn't rise as high. It was actually pretty flat with hardly any air bubbles, but I loved the flavor. I didn't play around with it too much. I really should because I love Rye bread.
Rye is a lower-gluten flour so you would need to use about 1/4 rye and 3/4 wheat to get enough gluten to make a decent-rising yeast bread. The gluten is what provides the framework for the rising. You may also find that part of what you actually like is the caraway taste that we often associate with rye bread, so adding a few caraway seeds or crushing them up into your dough may give you the flavor, combined with replacing about 3/4 cups of your flour with rye flour….. 🙂
To make Rye Bread, use 2 cups White flour and 1 cup Rye flour. It comes out Great! Use the same amounts for Wheat bread.
I know this is an older message but this might help someone.
If you substitute flour like rye, whole wheat, etc. there is less gluten in those flours, thus the flour doesn't rise as high. Buy some Wheat Gluten (its in the baking section, sometimes called Vital Wheat Gluten). You can also find it in Natural Food Stores or the Natural Foods Section in the store.
For every cup of flour you substitute regular white flour with a different type of flour, take out 1-3 Tablespoons of your "other" flour and add in that much gluten.
Voila! Your bread will rise beautifully. 🙂
The gluten is the stuff that traps the air bubbles that the yeast creates, and that is what gives bread its rise and character. Taking out gluten decreases the air-trapping factor, thus lower rise bread. That is also why there are many breads that are marked "Better For Bread". Their protein count (ie, gluten) is higher, thus making them better for trapping the yeast borne gas. 🙂
I make a rye loaf that turns out pretty good. Use 3/4C rye four and 2-1/4C bread flour. 1T caraway seeds make it tasty. Add 3T vital wheat gluten which will help it rise and make the crumb nice and airy, full of pockets.
I just picked up some coconut flour the other day 🙂 I will have to try a gluten-free version of this bread now! I will mess around with the recipe a little bit and see what happens…
Nicole, I would very much like to know how this goes for you. My mother-in-law is gluten free and I would love to bake some for her.
Hi, I was curious how the coconut flour turned out?
Since the first time a made this bread I can not longer go to my parent´s home without AT LEAST one loaf. It´s crazy good, and the last time (I put cantimpalo and onion in it) only last five minutes on the table!!
Thanks for sharing a fabulous idea.
Janet you are the best!
I made my very first loaves (3) for Christmas and everyone LOVED them. Thank you soo much, I made 1 plain, 1 italian seasoning, 1 whole wheat (2 cups whole flour and 1 cup all purpose) I might have sprinkled a little more yeast so it raised beautifully! Thank you sooo much. Merry Christmas and Happy New year!
XOXO
Can the dry ingredients be put into a plastic bag say? And given to someone ( not to sell as a gift) ?