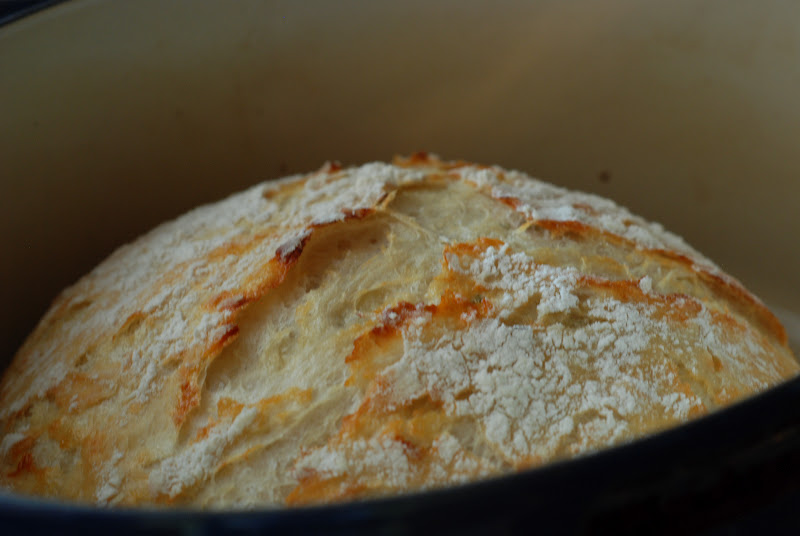
I realize that asking a question and trying to get or even FIND the answer is getting a bit ridiculous on the Crusty Bread page. This is by far the most popular post I have with over 1.2 MILLION page views. Who knew???? Oh my gosh. I knew the first time that I made this bread that I had to share it with the world. It’s so easy, yet so delicious and has SO many possibilities. Here is your turn to share, ask, comment, complain, or rave about your bread success.
Q: Do I have to use an enamel covered cast iron pan?
A: NO. You can use anything that can take the heat. The following have been used that I know of:
Clay pots with lids, Pizza stone with a bowl to cover the bread, insert from a crockpot, pyrex baking dish with a lid, stainless steel pot with a lid, baking dish covered with aluminum foil, old cast iron dutch oven.
Q: Do I have to use unbleached flour?
A: I always use unbleached flour. You can try bleached flour.
Q: Can I use self rising flour?
A: I don’t know. I would just stick to all-purpose.
Q: What size is my pan?
A: My smallest pan is 5.5 quart and the loaf barely fits.
Q: What type of yeast do I use?
A: I use SAF instant yeast. Any yeast should work.
Q: Why is my bread turning out flat?
A: I don’t know. You could try using less 1/4 cup less liquid. Or add a bit more flour. Make sure your dough appears to be dry when you first mix it. It will have more moisture during the rising time. There are many determining factors when bread making. Is your flour old? It does make a difference. Sometimes store brand, sale flour isn’t so great and should probably be left on the store shelf. Make sure your flour is fresh and a good quality brand and make sure your yeast is fresh and active.
Q: Can my dough sit out longer than 18 hours? Does it HAVE to be between 12-18 hours?
A: No. I have let some dough sit as long as 24 hours and the bread was beautiful.
Q: Have you tried Gluten-free?
A: No. I’m still waiting for someone to venture into the realm of Gluten-free. If you try it, let everyone know.
Q: Do I have to grease or oil the pan? Will my bread stick?
A: No you don’t need to grease the pan. I have never had the bread stick when using a cast iron pot. I haven’t tried anything else. The best way to be certain that the bread won’t stick is to form the loaf on a sheet of parchment paper and lift the bread into the pan using the sides of the parchment. Leave the paper in the pan. It’s won’t burn. When the bread has baked, just lift the sides of the parchment out of the pan. Voila!
Q: What temperature should my water be?
A: I just use cool water straight from the tap.
Q: Can I add sugar?
A: Sure.
My most recipe comment that will be so helpful to all of you. Thank you so much, Cory – Falling Star Lane:
Hi! Me again! I have some input – mostly add in ideas that have been huge hits! I found that using the parchment makes all the difference – to any loaf, it makes it easy to put in and take out and never burns.
Also, I reduced the baking time by 5 minutes for each step – more tender bred, and just as crispy crust.
I also add 1 T of raw sugar to each loaf – they rise higher for me.
As to add ins –
1. Turkey bacon and cheddar – huge hit
2. Rosemary, feta and sundried tomatoes – i found the ones in oil to bring a fantastic flavor
3. Jalapeno, and pepper jack – wow!!! used canned peppers – small can
4. Chocolate and cranberry
5. Rosemary and sharp cheddar
6. Chocolate chip and orange infused cranberries
7. Apricot, cranberry, and chocolate – I put too much in – so i had very dense bread – but it got eaten!!
8. Rosemary and Feta
9. Marinated artichokes and raw garlic – sliced 6 cloves very thinly – oh boy!
10. Orange infused cranberry, almond and orange zest
11. Lemon zest, feta, and rosemary
S0 far, none have been rejected, and I have become something of a bread baker to my friends – I bring a couple varieties to potluck, and they are very nicely received! I still need a 2nd dutch oven – days i bake 3-5 loaves it gets pretty hot around here! 🙂
I hope listing these is ok – i spent soooo long scrolling thru to see other peoples ideas, it seemed like this would be a good thing – found a few to try, and in fact making a pistachio and cranberry tonite, and an olive mozerella – new is good – but i get asked for the Jalapeno one most often!!
Thanks again for this blog post!
Most of the comments I receive are pretty fabulous like this comment. Keep them coming.










You wanted to know how to clean your blue pots.
There is a produce called Barkeepers Friend you can find it at Wallmart in the cleanser section in a gold can like kitchen cleanser comes in.
It may take a little elbow grease since it looks pretty burnt on.
Put it in a damp pan swish it around and let it soak for a few minutes and use a Scotchbrite pad and scrub the crud. It should look like new. We use it on my wife's stainless steel cookware that is from the mid 60s and it looks like new.
I doubled this recipe and used 1/2 white and 1/2 spelt flour. Made the full double loaf. It came out fantastic! Looks like it came from a french bakery!
HI Sandi, I like the bread hot from the oven as well. I guess it's a bit easier to slice after it's cooled a bit. I personally love the crust when it's hot.
I thought I would share this. I have made my second loaf of this wonderful bread. I used a 1 1/4 cup sharp cheese cubed tiny. (thinking now I should have just grated it) 3/4 teaspoon dry flaked parsley. 3/4 teaspoon minced roasted garlic. It turned out great!!!!
Now due to the fact that the kids and older adults were having a bit of a problem with the crustiness of it, I decided to try wrapping it in foil after taking out of the pan. And it worked. The kids love it even more and so do the older adults who appreciate the fact that it isn't quite so hard to bit into. So you might want to give it a try if you have people who would like the crust to be a little softer.
I just baked my first loaf and everyone loves it. One thing though I will be using the original time and not cut it down as someone had done (or suggested) I love that the curst was not super crusty but it was a little bit doughy after cooling. But the taste was still amazing!!! I usually make hockey pucks when making bread. My husband was teasing me about that when I began mixing this bread lol. And to even his amazement it was delicious. can't wait to try different versions. Thank for publishing this.
We love our homemade bread still hot straight out of the oven! Is there a reason you suggest we let it cool completely before devouring it?
Hi Kathy, Way to go! I'm so happy your bread was a success.
Kenny & Karissa, just check the small pot more often. After removing the lid just cook until golden brown.
Yay, it worked! I used yeast that expired 7 and 1/2 years ago because it was late and that is all I had and it actually turned out great. I used Magnalite roasting pans (I think they are aluminum) that I inherited from my grandmother. I took them out five minutes early and the one in the 8 qt. pan was perfect but the one in the 4 1/2 qt was a little over done. Any ideas why?
I tried this yesterday with a double batch, one plain as the recipe directs, the other with Romano Grated Cheese, Garlic, Rosemary and Sesame Seeds. Both were out of this world. My guests were loosing their mind eating this pre dinner. I made a beef stew and it was the perfect dish to go with. Now I think I'll be planning what I cook around what kind of bread I feel like making 🙂 Thanks KATORA
Hi Amy, Thank you so much for sharing your great ideas. It was so fun to read your comment. Happy baking!
Thank you for this awesome recipe! My friends and family love when I bring bread to dinners and get-togethers. To all of my loaves, I mix the water with 3/4 tsp yeast and 1 T sugar first. Some of our favorites loaves have been cranberry orange almond (didn't have a fresh orange to zest, so I used 1/2 cup oj and 1 cup water), garlic parsley cheddar, cinnamon raisin nut, and my most recent honey roasted sunflower (served with homemade honey butter). But whenever I bake a new creation, I still have to make an original loaf to eat with homemade jams and apple butter. 🙂
I have not heard word on the coconut flour yet. Hopefully we'll hear soon.
Rae: Whoa, you just blew my mind away with the banana. I have not received a comment from anyone that has used banana. Mash it up and throw it in and see what happens. Be sure to send us a report.
Have you ever tried adding oatmeal in place of some of the flour? Love oatmeal bread!
Just spray your pot (remove the knob) with oven cleaner, put it in a plastic garbage bag outside for a few hours, spray it off with the hose and it is like new. Ovens are baked on enamel. I do this with my Le Creuset pots and they look like new.
i make this bread all the time. It comes out fine. But its not very shaggy. Its actually dry and I have a hard time incorporating all the flour into it. Should I add more water?
Alix: I would add more water. Start with 2 tablespoons and go up from there. You probably could add an additional 1/4 cup. Let me know how this works out. Good luck
i make this bread all the time. It comes out fine. But its not very shaggy. Its actually dry and I have a hard time incorporating all the flour into it. Should I add more water?
Just made my first loaf and it is perfect but wondering … has anyone tried sugar instead of the salt?? I like a sweeter taste. Any suggestions for this??
I have made this recipe several times sometimes adding fresh rosemary from my garden or roasted garlic – it always comes out WONDERFUL! Today, I added a little bit of my SOURDOUGH STARTER to it! Can't wait to try it!
I made bread!!! This recipe was awesome, thank you! (I was so excited, my 4 year old was concerned)
Hi there,
I love all the recipes you have shared. You are an amazing cook! Do you have any recipes/ideas for me to make a sourdough crusty "no knead" bread?
I LOVE THIS BREAD!!! I make loaves for gifts all the time. People are so impressed. I have to dab flour on my face (like the old rice crispy treats commercial!) to make it look as if this was any work at all =) I am currently working on sharp cheddar and minced garlic and sharp cheddar and jalapeno! I will let you know how it goes. Curious on your opinion…could I add little dibs of butter to the minced garlic/sharp cheddar loaf before baking or would that screw everything up? I feel like you can't go wrong with this bread. Thanks so much for the recipe!
Hi Shelley, I just love your Trudy. I'll start with the dark bottom of your bread. Try preheating the pan in the oven when you turn the oven on. When the oven temp reaches 450, drop the dough into the hot pan. Bake as usual. So instead of preheating the oven to 450 THEN adding the pot to heat for 30 minutes. Just put the cold pan in the cold oven and let them heat together. This has worked for me. I notice that bread with sugar in it, tends to brown more. As far as your sugar cinnamon bread…how much sugar are you putting in? Sugar turns to a liquid when baking, so maybe you should add 2-3 tablespoons less water. How much sugar are you putting in??
That's the only thing I can think of. I hope this helps if not, call Trudy and get my number and call me
Hi Janet! (I'm a friend of Trudys by the way! Loveeee your blog!) Anyway, I've been trying to make a cinnamon/sugar loaf and it won't rise right. I'm wondering if you have any recommendations on what i need to compensate…less flour? or same amount of flour? or more water? The taste is delicious, but it just comes out sort of flat. Also, all of my loaves have been burning on the bottom when I've cooked them for the recommended time. I've just adjusted my baking time and they are better! (maybe its California altitude difference?)
Anyway, thanks for the great blog and your great ideas!!
Shelley
If your pot says not to heat it empty, put a couple bags of dried beans in it while heating. Then just dump them out before adding the bread dough. Keep the beans, they can be used again and again for heating the pan (you can also use them in a pie shell if baking it without filling,the beans will keep it from bubbling up and having to be broken down to get the filling in). I doubt you would want to eat those beans though after heating them dry.
For those asking about pizza stones, you can use a concrete stepping stone from the hardware garden department. I learned that from Alton brown on the Food Network. You can probably find his pizza episode online somewhere, maybe Hulu or Youtube.
Rebekah, I am so sorry to hear about your pan. I can't tell you have many loaves of bread I have baked in my Le Creuset. Did you enamel crack or was it the cast iron pot that cracked? I would be so devastated. Does Le Creuset have a warranty??
Very sad. I made this last night and my beautiful blue LeCruset pot (exactly like yours) cracked. SO upset. The bread was good.
Regarding adding chocolate to the bread dough: I have added both cocoa powder and chocolate chips. The bread was amazing and makes fabulous french toast.
I received a comment on high altitude baking of this recipe. At 7,000 feet above, no changes were necessary. I hope this helps.
Not sure if you will see this comment, but I live at a high altitude now (6,600 feet), and was wondering if I should do anything differently?
Thanks! Looking forward to making this.
Just wondering how Cory from Falling Star Lane adds chocolate? Is it chocolate chip cranberry bread or chocolate bread ( which I have eaten and loooved) with cranberries?
I'm making my first loaf today. Wish me luck! A tip on cleaning your le creuset pots is to use Mr. Clean's Magic Eraser on them. It works great on corning ware, too.
I soak my creuset over night in slightly soapy room temp water. After that it's easy to clean.
White Lily brand flour (found only in the South) does not work for this recipe. I made this recipe several times at home without fail. When I made it when visiting family in SC, using their White Lily flour, the recipe was a huge flop. It didn't rise nearly as much, and the dough was super wet. I had to add in at least an extra cup of flour to get the dough consistency simliar to how it is when I make it at home. The bread didn't rise at all. When I returned home and made it with normal flour, no problem. I also gave the recipe to my brother (in Atlanta) and he said it didn't work. The first question I asked him was what type of flour he used…White Lily.
Why only 1/2 teaspoon yeast??? Well, if you use too much yeast the dough will get the yeasty fermentation smell and flavor. If you are trying to raise the bread for a short period of time like 4-6 hours 1 teaspoons would be ok. The 12-18 hours rising time just requires 1/2 teaspoon. It works…trust me.
why such a small amount of yeast? 1/2 teaspoon doesn't seem enough. why not the whole packet like most other recipes?
My first try and it came out beautifully. The hardest part is waiting for it to cool enough to slice.
Thanks so much for a great recipe.
Oxi Clean is great for cleaning Le Crueset
I'm making 2 loaves today to watch the rising progress of both. One loaf is white (always turns out perfect!) and the other is cinnamon raisin. I've noticed that the cinnamon raisin does not seem to be rising like the white. I added 1 tsp more water but I'm afraid that it will be too dense (had the same problem with my Whole Wheat loaf last week). My question is when adding in the add-ins to the basic recipe do you add additional yeast and/or water so that the add-in loaf ends up like the white loaf?
I love this recipe. I have tried the cranberry, almond, orange. It's awesome. I love the plain too. When I want something special and don't have ingredients I add a packet of Italian salad dressing spices.
Thanks so much for sharing all of your wonderful ideas and creations. Yum!
Have made this recipe with black olives, Italian spice mix and Parmesan cheese, when you first take the lid off brush with olive oil and sprinkle kosher salt then bake the next 15 minutes it makes great foccacia! Also tried it with a cup of sharp cheddar and a tablespoon of dry dillweed. Another tip for people whose kids have braces is to brush the bread with melted butter after it comes out of the oven then put in a plastic ziplock bag to soften the crust.
You do not have to use plastic wrap. Just make sure the dough doesn't dry out or get crusty on top. Perhaps waxed paper and a damp towel might do the trick.
What can I use instead of plastic wrap, which is terrible for the environment? Would wax paper work?
hello, i'm from Indonesia …start the first time today with your bread. After 14 hours came out little bit to " wet" /dough was "running" add some more flour,hope getting better. If fail, shure to want try again with less water( could have been the only reason ) 1 1/2 Cup of water…you can find vary results in Net how much grams actually. But have one suggestion…If you heating up the pot directly together with the oven…your pot should have the same temperatur when the oven reach it. So it's save some time ( and energy )…let you know how everything worked out.Greetings from Indonesia
Anon:
I'm not sure about coconut milk. I have never tried it. Why not? If anything, you might need more liquid. I will try it tonight. Let me know if your try it as well.
Can I use coconut milk instead of water?
I don't think anyone has responded about using a roaster. Why not? I think it should work. I would just use parchment paper to bake the bread on, because I'm concern the dough would stick in a roaster. Good luck.
If you don't have enough people to eat a loaf or 3 a day (it's very easy to get carried away…..)try this technique—I slice the cooled loaf, stack them offset so you can get your fingers between the frozen slices to separate them, put in a lg ziplock bag in the freezer. THEN when you want some, pop it into the toaster just long enough to thaw/warm & it's like it just came out of the oven. Our humidity is too high to keep a crusty loaf happy on the counter, this works beautifully & the bread never gets tough.
AnnieHall
For those whose mix went flat just add 1/2 to 3/4 c. flour more and knead. Then add the mixture to the hot contain and bake. That's what I did and it turned out great. Thanks for a great recipe!!
This bread is excellent! I used better for bread flour and a stainless pot (that's all I had) and mixed in olive tampenade with feta. Wow! Now making a garlic/rosemary/beer loaf. This bread will not disappoint, even the flat dough rose up faithfully, beautifull thin, crisp crust and chewy texture. Yum! I've got a chocolate cherry dough (with a touch of cinnamon) rising and can't wait to taste the finished product, I'm SO hooked!
Thank you so much for the info on Sour dough bread. I can't wait to try it. Fabulous info. You're the best!
I made it with a sourdough starter with the following recipe:
Sourdough Recipe
2 cups white wheat flour (such as
King Arthur Flour), plus additional
for dusting
1 cup Sourdough starter
2 3/4 teaspoons salt
1½ teaspoons sugar
1 cup water, at room temperature
This is the same basic recipe. The cup of starter is roughly the equivalent to one cup of flour and a half cup water. Flavor and texture is great!
I used silicone baking mats as a resting place for the boules of dough while the pots heated up. When it came time to transfer to the hot pot, it was very easy to gently roll the dough into the pot, and the seam side ended up as well. This was the first time I made bread in this style, and they came out very beautifully – and tasty, too!
I tried with einkorn flour, not good. it was super sticky and a pain to work with before putting in the oven, and it tastes sort of green. I'm disappointed with that flour. I make this bread all the time and just love it (with regular flour). I've made loaves, rolls, even pat it down a bit and put sliced deli meat, cheese, caramelized onions, etc inside and pat into mound before baking — this is terrific but it's easier to clean with parchment lining if cheese gets out. I use a crock pot insert with all-glass lid, or casserole dishes with glass lids. Super easy recipe!
I made the plain bread and both my husband and I think it's too salty. Can I reduce the amount of salt and still have the bread turn out?
I cover the bread with a dish towel and place it cut side down on a plate to store overnight. If I'm storing the bread longer, I put it in a plastic bag for a day or two. Left over bread makes great croutons or bread crumbs.
Hi Cara,
I have not heard of anyone having a "slimy" bread before. The bread is denser and has a moist consistency. I just can't tell you what to do. I'm at a loss ???? Hmmm. If you think it needs a longer baking time you could leave the lid on and bake an additional 5 minutes. Then remove the lid for the remaining 15 min. That's where I would start. OR maybe too wet of dough????
Hi! I've just really started learning to cook in the past few years and have steered clear of most things that include flour or yeast as I seem to be quite intimidated by these words. HOWEVER, this recipe looked easy enough and my bread is beautiful! Crusty just like I like it. But I have one question. When I chew it the bread seems kinda, well, almost slimy. My husband's pancakes sometimes have the same quality. Are we stirring too much? Old flour maybe? It is 100% thoroughly cooked and looks right inside and out. Any ideas? I'm excited to try this again and would love any input. Thanks!
I'm making my first loaf today, in fact it is resting while the pot is heating. I cannot wait to see what it turns out like! Thank you for sharing this super easy recipe 🙂
This really is a very quick and easy bread. I have NO luck with homemade breads, but this turned out beautifully!
This is one of my favorite bread recipes (and that's saying something)! Sun-dried tomatoes, fresh lemon-basil, and mozzarella cheese is another favorite my family LOVES. (My mom has also tossed some frozen bacon bits in with it, and it was surprisingly good. Funky, but good.) I've basically thrown in any combinations of flavors with the basic recipe and it comes out great.
Question:
Does wheat flour or half-white half-wheat work?
Does the order you mix it together matter? I usually try to to the dry ingredient, water, then flavors. But even with the recipe doubled, I only have a enough dough to really make two good-sized loaves. Suggestions?
Where did you get your dishtowels? I love this recipe and have made a loaf almost every day since the first time we tried it. But I am loving your idea of wrapping the loaf up in a pretty dishtowel, and I can't find any I like as much as yours!
Hi, All….
I have seen several comments on the forum saying not to heat a Lodge cast iron pot empty. I contacted Lodge and that is true only if it is an ENAMEL coated pan. Here is their response. Hope this helps clear up any confusion.
"If it is the black cast iron cookware it can be heated without water just wipe it down with vegetable oil before preheating. If your oven is the Lodge Enamel cookware then never heat the oven empty.
Thank you,
Janice Patterson
Customer Service
Lodge Manufacturing"
ah, I've now made this bread SO many times! My family and friends rave about it every time I make it! Thanks for sharing! 🙂
Someone above asked about using the Pampered Chef Covered Baker. I baked my first loaf this morning, using the baker. It turned out PERFECT. I followed the directions exactly, preheating the baker for the 30 minutes. I'm excited and anxious to experiments with some of the suggested add-ins!
I have not noticed a difference in name brand sugars. I use C & H sugar for all of my baking.
I have made your recipe and LOVE it! It is amazing how it turns out every time with little effort. I have not bought store bought bread in 4 months since discovering your recipe. I have made the traditional recipe, Italian herb and cheese (asiago, parmesan, and provolone cheeses mixed with basil and oregano), Garlic cheddar, and Mozzarella Oregano bread. I made the italian herb and cheese bread and wrapped it like your gift suggestion mentioned and donated it to our church youth group auction. It went for $25! Afterwards I had numerous people tell me if I ever wanted to make a loaf for them they would be thrilled. Thank you for sharing this wonderful recipe and the gorgeous pictures.
Bev
Love this recipe……..have probably put on 5 lbs. since a friend told me about it.
Wanted to let you know not to use White Lily flour. Tried it today and it was almost pourable when mixed.
Was going to add more flour but threw it out and went back to unbleached King Arthur Flour which worked great as always.
Thanks
Phyllis
Thanks anon. for the GF version.
To Joy: I have 4 Le Creuset pots. I haven't had any trouble with them and I have used them several times to bake the bread. HOWEVER, I probably wouldn't chance ruining and brand new Le Creuset. You should probably fill the pan with water to preheat it so be on the safe side. Better safe than sorry – right?
I want to make this but I have a question! I just bought my first Le Creuset piece (to make this bread) and in reading the booklet that came with it it states to “never preheat a dry, empty pan” and it also states to never “dry cook” any foods – always grease/spray/prepare the pan before cooking. I certainly don’t want to ruin my brand new, expensive pan the first time I use it……but since you do this all the time, I’m assuming its really NOT an issue?????
I cannot buy store bought bread ever again!!! Perfect recipe flavor or just plain. Have been following your recipe for several months. Just wanted to say thanks!! I live at 10,000 feet, use an all clad dutch oven and didn't change a thing! Perfect each time!
My family absolutely raves over this bread! I live in GA and it rises great for me despite my using cheap flour. When I forget to set the dough out the night before I use highly active yeast and it reduces the rise time and still turns out beautifully. For Saint Patrick's Day I added green food coloring to the water before I mixed it with the flour. A few hours later I had a delicious andfestive loaf. I also usually throw a spice mix in the bread that has rosemary, thyme and a few others in it. This bread recipe is perfect!