
The first Saturday in October was reserved for picking apples at the Farnsworth apple orchards. I would gather up my little ones and we would drive across town to pick as many apples as we could. U-pick apples were just ten cents a pound. That was about $4.00 a bushel. The kids would spend their time trying to find the largest red apple in the orchard. The biggest apple was taken to school the following Monday to give to their school teacher.
We would take the apples home and make homemade applesauce, grandma’s apple dumplings, apple pie and of course caramel dipped apples.

Thank goodness I had the sense to copy my grandmothers caramel recipe. Grandma used to cut the caramels into squares and dip them in chocolate for Christmas. Why not try the recipe wrapped around an apple? Who on earth would spend the time unwrapping all those little squares of caramel? Not me. By the time I had driven to the grocery store to buy the caramel squares, I could have a batch of grandma’s caramel hot and ready for the apples to take a dip.
As I have made my grandmothers candy recipes I have kept notes in a cooking journal. I have determined the exact temperature that I like my caramel for apples. I must admit there have been times when I have overcooked the caramel just a few degrees and the caramel would pull right off of the apple. Leaving my kid with a handful of caramel that they would eat after tossing the apple. Follow my directions and you can make some fabulous old fashioned caramel apples. The only thing you will unwrap is the butter.

For the caramel you will need:
2 cups heavy cream
2 cups sugar
3/4 cup corn syrup
1/2 cup butter
1 teaspoon vanilla

Sugar crystals can be a problem in candy making. I like to stir all of my ingredients in a bowl and then transfer the mixture to the pan. For this reason: When the mixture is stirred together, sugar crystals are going to stick to the sides of the pan as you stir. We don’t want the sugar crystals hanging around to cause problems later during cooking. This way the sides of the pan will stay nice and clean. You’ll see…
Pour the sugar into a 2 quart bowl.

Add the corn syrup.

Add half of the cream (1 cup).

Stir until the ingredients are very well combined.

Gently pour into a large heavy sauce pan. Having a heavy bottom pan is essential to making caramel because it can scorch so easily at the end of cooking.
Note that because I mixed my ingredients in a separate bowl, the sides of the pan are clean and sugar crystal free.

Add 1/2 cup butter.
I have to point out that this pan is probably 30 years old. I have used it to death. I love it because it’s so heavy and fits this caramel recipe perfectly. Until I find a replacement that is heavy enough that doesn’t break the bank, I will keep this gem tucked away in my cupboard.

Over medium/low heat, bring the mixture to a boil.

As the mixture begins to boil it will rise up the sides of the pan. If you notice any sugar crystals hanging around, take a wet pastry brush and wash down the sides of the pan. Remember sugar crystals that are hanging around the sides of the pan could cause the caramel to turn to sugar later.

Slowly pour the remaining cream into the boiling mixture. Try to keep the mixture boiling. Once again the mixture will rise. As it lowers look for sugar crystals and if you see them, wash the sides of the pan down again with a wet pastry brush. I haven’t had any problems because I kept my pan clean from the beginning.

Turn the heat to low. You will now need to stir the mixture constantly to prevent burning and scorching and stirring makes a nice a creamy caramel.

Clip a candy thermometer onto the side of the pan. If you don’t have a candy thermometer, I will show you a cold water test you can do to ensure the caramel is cooked to the right temperature and consistency.
Note: If you purchase a candy thermometer, it needs to be adjusted to your altitude. This is what I do: I put my thermometer on the sides of a pan of water. Bring the water to a boil. Once the water comes to a rolling boil, check the temperature. Boiling point is 212F. My thermometer was a few degrees off of 212 degrees. I make the adjustment while the candy is cooking. I need to add a few degrees onto the final temperature. For instance, If the caramel needs to cook to 234F, I add three degrees and cook it until it reaches 237F. If the water boils below 212F just drop the temperature. If you thermometer reads 210 then drop the temperture to 232F. Does this make sense? If it doesn’t just let me know and we can have a chat.

You will notice that the mixture will begin to thicken and the bubbles will pop. Be careful. Hot caramel can feel like dropping glue from a hot glue gun onto your skin. It can burn!

My thermometer reads 232F. Time to do a water test.

Pour a spoonful of the hot caramel into a bowl of cold water and then try to pick up the caramel. It should form a soft ball. This isn’t quite ready, so I’ll cook it a bit longer.

The temperature is close to 234F. Notice how the caramel is holding it’s shape better as it hits the cold water.

The caramel is holding a nice soft ball shape.
Eat the test piece. It’s delicious.

Remove from the heat and add 1 teaspoon of vanilla extract. Stir gently. Let the caramel cool for about 5-7 minutes.

You can cut a few pieces from the apple tree or use Popsicle sticks, chopsticks…whatever works.

Carefully dip the apple into the hot caramel.

I like to tip the pan so I can submerge the apple into the caramel.

Let the caramel drip for a bit.

I like to tip the apple upside down and hold it there for a few seconds.

Place on a non-stick mat. Whatever you do don’t place it on waxed paper. It will stick like crazy. A good option is to butter a baking sheet or butter a sheet of aluminum foil.

I was able to dip about 8-9 medium size apples with a bit left over.

I want to save the caramel hanging out in the bottom of the pan. I brush a piece of aluminum foil with butter.
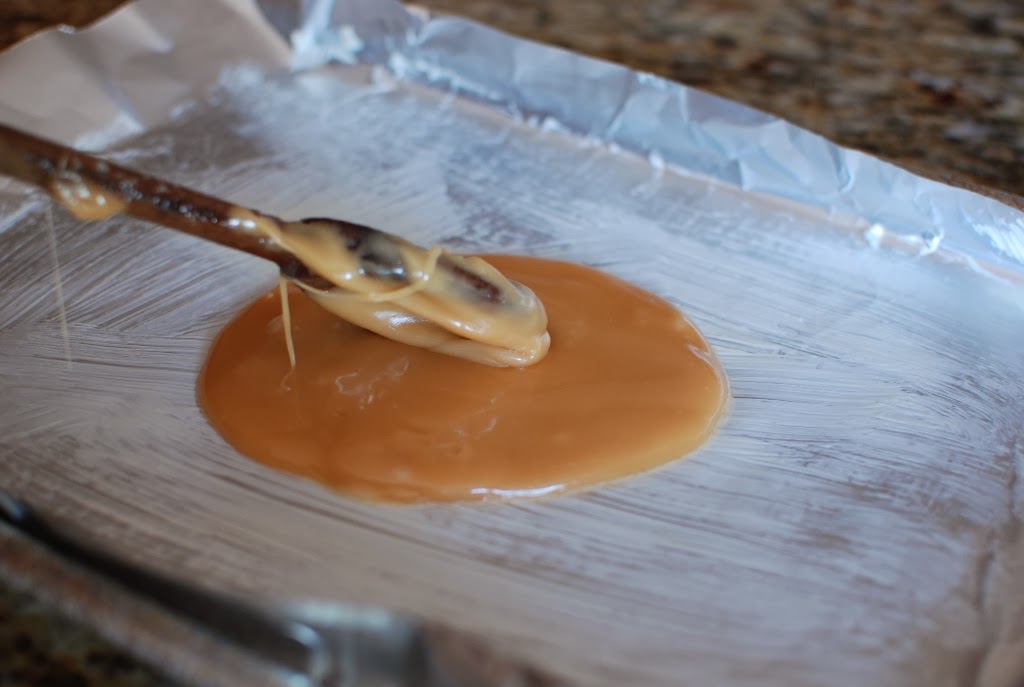
Pour the remaining caramel onto the foil.

Cut an apple and scrape anything remaining in the pan. I want to get every last drop.
Ahhh…the perfect bite. I love pecans with my apples and caramel.


Of course you can roll the dipped apples in your choice of toppings. The only topping that could make this better would be fresh mammoth pecans from Sunnyland Farms in Georgia. They are harvesting right now and hopefully my order will arrive soon.

Take advantage of the crisp apples during the fall. Dip a few.
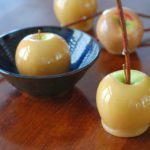
Old Fashioned Caramel Apples
Simple 5 ingredient old-fashioned caramel apple recipe.
Ingredients
- 2 cups heavy cream
- 2 cups sugar
- 3/4 cup corn syrup
- 1/2 cup butter
- 1 teaspoon vanilla
Instructions
-
Mix sugar, corn syrup 1 cup of the cream in a large bowl. Once the mixture is smooth and well combined pour into a large heavy sauce pan. Add the butter. Cook over medium/low heat until mixture begins to boil. Wash the sides of the pan with a wet pastry brush, if sugar crystals are present. Stir constantly. When butter has melted and mixture has come to a rolling boil, slowly add remaining cream trying not to let the mixture stop boiling.
-
Clip on a candy thermometer, turn heat to low. Stir constantly and cook until caramel reaches 234F. Drop a small amount of the hot caramel into a bowl of cold water. If you can pick up the caramel and form a soft ball the caramel is finished.
-
Remove from heat and add vanilla. Gently stir. Let cool for 5-7 minutes. Carefully dip apples that have been washed and thoroughly dried. Place on a non-stick mat or a buttered baking sheet. Allow to cool.
I love your story…salted or unsalted butter 🧈
Salted!!
By far THE BEST caramel recipe ive found!!
What a perfect recipe! It's elegant and simple. And the finished project looks amazing! Where were you last Christmas when I was trying to master caramel and learning about altitude adjustments? I ruined three batches until I finally got it right.
Candy making is a true science. I made 6 batches of english toffee trying to perfect the recipe.
Those are gorgeous! And I love the stems you used!
Thanks, Kim.
These are lovely! I just made my salted caramel sauce but it is too runny to dip apples. Great to have another alternative!
You are making my mouth water. Good thing about caramel sauce is that you can slice apples and dip them into the sauce. So much easier to eat. Thanks for your comment.
Janet, those are the most beautiful caramel apples that I have seen in my life. They look like they just come out of a fary tale…
Ha ha ha. You should have seen my blogging blooper apples the day before. I should never try a new recipe when I know my grandma's are best.
Dear Janet, last wednesday I made your apple pie. And then my head exploded.
What an amazing texture! and the flavor was incredible. I took a chance and used lard instead of shortening and the crust came out so flaky that everybody thought that is was puff pastry.
I don't know if it was because here is very common to eat bread and tortillas made with lard or if it was because I have a very good quality one (it has barely any smell and is always soft, even refrigerated), but the flavor of the crust was the best i have ever had. Two days after is still very good. I'm in the office now, daydreaming about getting home, make tea and curl up around the leftovers of my pie. Just him, a fork and me…
I'm so happy you loved the apple pie. You must be one fabulous cook. Tea leftover pie sound so heavenly. Thanks again for such a fun comment.