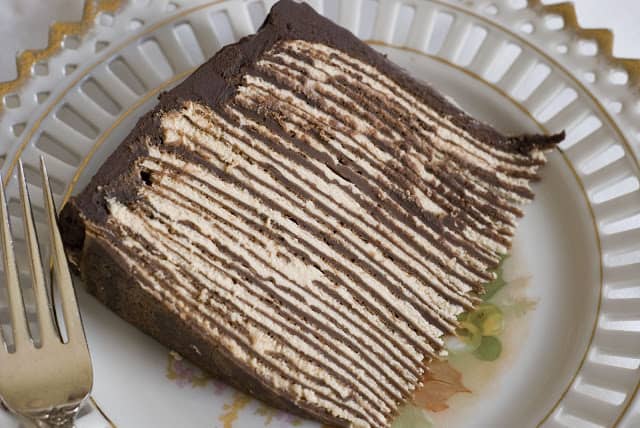
This Saturday is LaNae’s birthday and she requested that I make her “THE Crepe cake”. I then had a request that I post on my blog a “How to” on the crepe cake. So here goes….The recipe is just a bit complicated. It consists of several chocolate crepes layered with a Hazelnut filling that is basically a Swiss buttercream (I think). It is finished off with a glaze of chocolate ganache. TO DIE FOR!!
After watching Martha Stewart make this my daughter decided to make this for me for one of my many birthdays. After she gave it to me she told me to enjoy every bite because she would never make it again. It had taken her hours of preparation. Then when my younger daughter turned 16, she requested the “crepe cake”. Oh no! I decided to break up the recipe into steps. Make the crepes – freeze- make the buttercream- layer – freeze – thaw – glaze – serve! So much easier. Are you ready? Here is step # 1:
Above you will see the ingredients for the chocolate crepes. Butter, semi-sweet chocolate, flour, sugar, salt, milk, eggs and vanilla.
Start with 1/2 cup water, chocolate and the butter.
About the chocolate. I have a 10 lb. bar of Peters Burgandy Semi-sweet chocolate that I keep in a cool place. I just use cut off what I need. Weigh your chocolate. Don’t put it into a measuring cup up to the 8 oz. mark. It is 8 ounces by weight. Yes, you can use semi-sweet chocolate chips. My favorite is Guitard.
In a small sauce pan, bring the water to a boil.
Add butter one piece at a time, whisking after each addition.
When the butter has all been whisked in, take the pan off the stove.
Add the chocolate to the butter mixture.
Let set for just a few minutes to melt the chocolate.
Whisk in the chocolate.
Whisk until creamy and all the chocolate has melted. Set the chocolate mixture aside for just a moment. This mixture will be added to the crepe batter.
You can whisk the batter together in a mixing bowl, but one day I thought “what the heck” I”ll just whip it up in my blender and it worked just great.
Put the milk and the eggs in the blender and mix on low until smooth. If you are using a mixing bowl, just mix the mill and eggs until smooth – same.
Don’t over mix. Just a few seconds is long enough.
Add the flour, salt, sugar and vanilla. Mix on low speed just until smooth.
This isn’t a very good picture. What was I thinking? Oh well, while the blender is still on low, slowly add the chocolate butter mixture.
Scrape down the sides to make sure you don’t have any flour or chocolate left hanging there. You want everything to be mixed well. But NOT over mixed. Don’t turn the blender on high speed and walk away for a few minutes. Keep it on low and blend just enough to mix the ingredients.
Get a bowl and a strainer.
Strain the crepe batter into a bowl. You want the batter to be very smooth. This will strain out any lumps that may exist in the batter. There will be a few. It’s better to be safe the sorry.
Remove the strainer and cover the bowl with plastic wrap and refrigerate for an hour or two. You can even refigerate overnight.
You are going to need a crepe pan or a small skillet. I love my crepe pans. They are from France, but I found them at Williams Sonoma several years back. They had a special and cost me $11 each. What a deal. I later bought another one. So I have three crepe pans. One just happens to be going to college with my daughter. I miss it.
I like to use an off-set spatula to flip the crepes. It works so slick. I love it.
Place the crepe pan over medium-high heat. My pan is seasoned very well so I don’t have to add butter. But if you think your crepes will stick lightly butter your pan.
I like to tilt the pan just a bit and pour the batter in starting at the top.
Let the batter run down a bit then start to swirl the batter around the pan. I wanted to have a picture of the swirling, but for the life of me I couldn’t pour, swirl while trying to take a picture. You might just have to practice with a few. It’s ok. If some of the crepes don’t work out, put them aside and eat them.
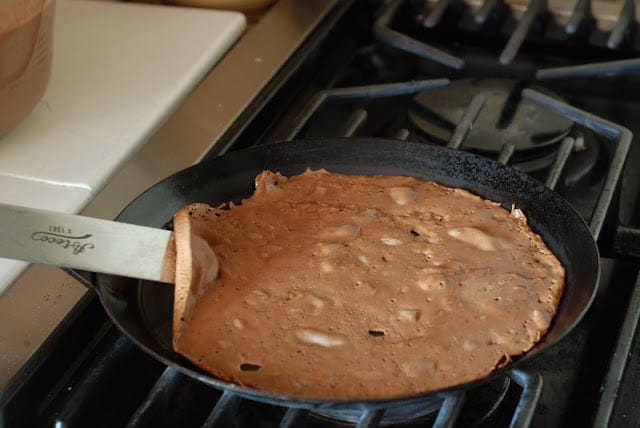
Continue to cook until the batter starts to look “dry” on top. Look at the holes I have in this crepe. My pan was a bit too hot, but it doesn’t matter. The holes will be covered up with the hazelnut filling. Even if you accidentally rip a crepe, DON’T throw it out. Just repair it when you layer the crepes. No big deal. Unless you are looking for an excuse to eat one.
Carefully slide the spatula under the crepe and slowly lift the crepe off the pan.
I roll the crepe off the spatula. You’ll have to practice and just do what works best for you.
After the crepe has been flipped over, it only takes about 5-10 seconds to cook the other side. Remember you have chocolate in the batter, which means it will burn easy. So don’t walk away. You will need to give this all of your attention for several minutes until all of the crepes are cooked. Turn your phone off until the crepes are complete.
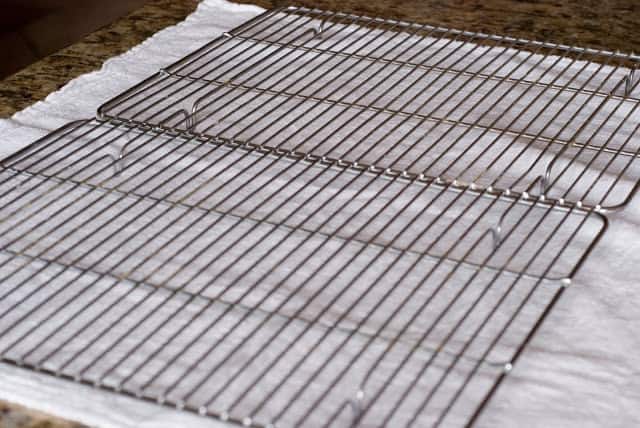
You will need a place to put your crepes to cool. I use a cooling rack. It works great.
Lay the crepes out to cool. This recipe will make about 30-40 crepes. It differs for me all the time. It depends on how thick you pour the batter. The crepes get thinner the more you make them. So don’t fret if you only get 25 crepes. It’s ok.
After the crepes have cooled you can stack them.
I place the cooled crepes on a cookie sheet. First put a piece of waxed paper or plastic wrap. I used a silpat because I have it (thanks Trudy). Put a piece of plastic wrap or waxed paper in between EACH crepe. Do not use paper towels…ugh big mistake!
Keep layering the cooled crepes and plastic wrap.
Cover with heavy duty aluminum foil. Place in the refrigerator overnight OR freeze for up to one week. That’s it! You have just completed step #1.
Now you have some homework. You are going to need Hazelnut paste for the filling.
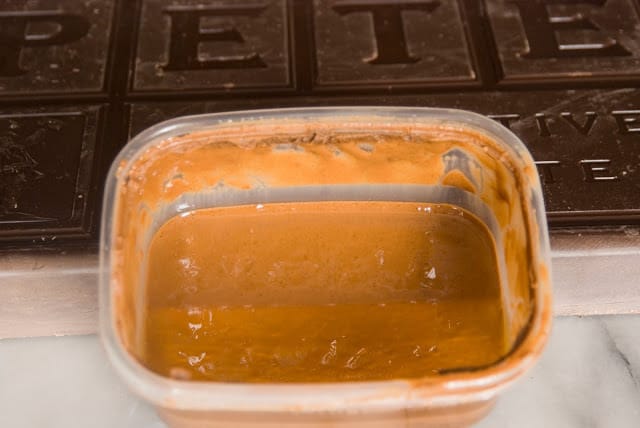
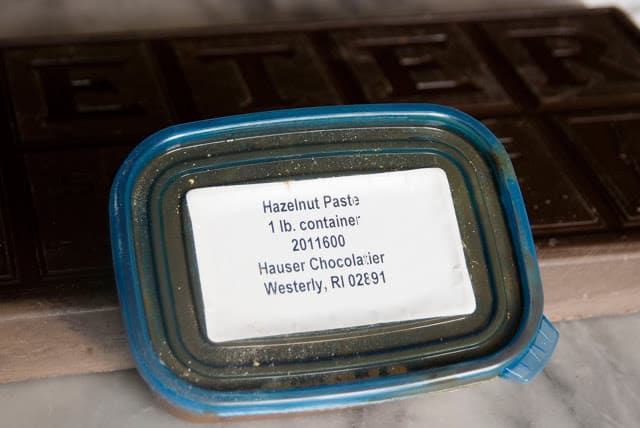
Hazelnut paste in NOT Nutella or any other spread. It’s like peanut butter or almond butter. As you can see the oil has separated from the hazelnut paste that I have. You will need this for the hazelnut filling. I purchased this at Christmas from Hauser Chocolatier in Rhode Island. You can purchase it from local stores. I have found it in the Salt Lake are at Liberty Heights Fresh. Call around and see if you can find some. It’s fabulous stuff! You could call a bakery to see if they would sell you some? Did you notice my 10 lb. block of chocolate?
I order truffle shells from Hauser Chocolatier. Check out their site. I don’t have a problem having specialty items shipped. They have a great price for their hazelnut paste. The best I have found. I keep it in the refrigerator and it lasts for months. It will come in a container just like this.
One last piece of advice. Take care of your crepe pan. I NEVER wash mine with soap and water. I just wipe it clean with a paper towel. This keeps my crepe pans well seasoned and non-stick.
Dark Chocolate Crepes
3/4 cup (1 1/2 sticks) cold unsalted butter, cut into pieces.
8 ounces semi-sweet chocolate, finely chopped (weigh the chocolate)
1 1/2 cups flour
1/3 cup sugar
1/2 teaspoon salt
2 1/2 cups whole milk, room temperature
6 large eggs, room temperature
1 tablespoon pure vanilla
1. Bring 1/4 cup water to a rolling boil in a small saucepan over medium-high heat. Add butter, 1 piece at a time, whisking to combine after each addition. Remove from heat and stir in the chocolate until completely melted. Set aside.
2. In a blender or a mixing bowl. Blend milk and eggs. Add the flour, salt, sugar and vanilla. Blend until smooth. Do not over blend. Mixture can be whisked together using a mixing bowl. Slowly add the chocolate butter mixture while the blender is still running. Blend until smooth. Pour through a fine strainer into a bowl. Cover with plastic wrap and refrigerate for 2 hours or overnight.
3. Lightly coat an 8-inch crepe pan with butter, if needed. Heat over medium heat until just starting to smoke. Remove pan from heat and pour about 2 tablespoons or more of the batter into the pan, swirling to cover bottom. Reduce heat a bit and cook until the top of the crepe looks dry. Flip once and cook until the edges are golden brown.
4. Place the crepe on a cooling rack and cool completely. Repeat the process until the crepes are cooked. When they have cooled completely layer between waxed paper or plastic wrap. Cover with foil and refrigerate overnight or freeze for up to one week.
Crepe options: You can use the crepes for other desserts or breakfast. They are fabulous filled with berries and whipped cream then drizzled with melted chocolate ganache.








Hi Janet, i made this cake and presented it yesterday, since my family was celebrating birthdays, and it was a success!!!! Thank you so much for posting this crepe cake recipe, I always wanted to make a crepe cake!!! It took all day, but was completely worth it!!! If you would like to see a picture of it, it is on my instagram account, julia_r29 and thanks again!!! 🙂
Way to rock the crepe cake. Looks amazing. Like you say it's so much work but so worth it. Thanks for sharing.
Hi janet. I'm from Penang,Malaysia. Can the hazelnut paste replaced with any other ingredient? Because i can't get hazenut paste in my place.
You can. You can melt 1/3 cup chocolate and let it cool and add to the filling. You can, also, use a chocolate hazelnut spread (like Nutella) and mix in according to directions. I hope this helps.
what could you replace the hazelnut paste with if you're not a huge hazelnut fan? i don't care for nuts with my chocolate._.
You could try 1/3 cup cool melted chocolate and have chocolate with your chocolate. Or just add 1 tsp vanilla. The sky is the limit with a buttercream. You could even add 1/3 cup raspberry puree. Any way you make it, it will be amazing. Good luck.
Link for assembled cake is under crepe cake #3
http://simplysogood.blogspot.com/2010/03/dark-chocolate-crepe-cake-step-3.html
Hi there. Where is the pic of the assembled cake?
Hi Sara. You can check you hazelnut paste by tasting or smelling it. It can go rancid after time. If it tastes great then use it. If it has an off taste what so ever, then I'd buy new. I usually store my container in the freezer so it will keep longer. Good luck.
Hi Janet,
So I followed your recipe and made this cake in April and it turned out amazing. I want to make it again next weekend but I'm not sure if I should buy a new container of hazelnut paste or not. I have a lot left over from April, but is it still good to use it after this many months? Please write back asap would really appreciate it.
Thanks =)
Wow, Sonya from Switzerland! I'm so impressed. Way to make the recipe your own. You must be a very creative person to come up with the substitutions that you used. It sounds amazing. I would love to have seen the finished product. Kudos to you. Thank you for sending me the great ideas on how to re-do this recipe.
Hi Janet
just wanted to tell you that my husband has gone bonkers. He LOVED it and I think I'm a legend in the making- as I am slicing some pieces to share.
I am on a budget and didn't have essentials like the hazelnut paste or even an offset spatula at hand. And thats the only thing which was a bit difficult- making the crepes. But once you get the hang of it, its smooth sail from then on.
Also, being a devoted chocoholic, I like everything to be over-chocolaty. I used a mixture of chocolate glaze and some salty, crunchy peanut butter for the layering.
To be honest I first saw this on Martha Stewart's website. In spite of the video instructions, it was no where as helpful as your step by step instructions.
I also added the hazelnut caramel topping- it just made it look so complicated and gorgeous. I wish i could send you a picture!
Anyways- long post. You can tell how excited I am on being successful with this recipe. Thank you SO SO SO Much!
Sonya from Switzerland-
Absolutely. I broke the recipe down into steps so that you wouldn't be overwhelmed with the time it takes to create the entire cake. You can do the entire cake in once, no problem.
Is it ok if I make it in one day instead of refrigerating the crepes over night?
Oh I'm so glad you took the time to make this cake. It's a journey to heaven! The crepes can be tricky. I got a great deal on my crepe pans – 2 for $22 through Williams-Sonoma. I keep hoping they offer this deal again.
Thank you so much for this recipe and posting all the pictures! I read through all the steps and comments before making anything so I also wanted to thank everyone for sharing their comments! This cake was absolutely delicious and definitely worth all the effort. =)
The only thing I can say was difficult was making the crepes. Since I've never made them before it was really hard for me to flip them, so they started to look like pancakes lol but after a few I started getting the hang of it. Maybe I should invest in a crepe pan since I plan on making this cake again many more times! Yum!
Emelina, you can find pictures of the completed cake on the post for Dark Chocolate Crepe cake Step #3. I hope that works for you 🙂
Awww, where is the end pic, like on foodgawker? 🙁
I made this many years ago when Martha had it on her show – it is a lot of work – but so incredibly good – yours looks amazing.
Holy cow! Look at all these wonderful comments. I just know you all must have exquisite taste for chocolate and divine desserts.
What a stunning cake! I had a crepe cake recently at a French bistro in San Francisco. It was not chocolate like this one, though. Still, I loved it. And I'm hooked on these cakes now.
looks great I have been dying to make a cake like this.. Cheers
This is just perfect for my sweet tooth! I'm gunna try this although it needs a lot of work!!!
This looks so easy with the step by step photos as a guide, but I suspect it is not as simple as it looks lol!
You can do it! Just take your time and do it in steps so it's not so overwhelming. Good luck!
Wow. I have ALWAYS wanted to make a cake out of crepes but I never knew how. Thank you so much for posting this. The photos are going to help me out so much!
woww! some much work! i would definitely try this when i have.. the time ( :
I can't believe I'm saying this, but is really IS worth the effort. Some WEEK when you have nothing to do…hahaha like that ever happens.
OMG! this looks amazing. so much work though!