• Skip to primary navigation
  • Skip to main content
  • Skip to primary sidebar
  • Skip to footer

Simply So Good

  • Home
  • About
  • Recipes
  • Contact
You are here: Home / Recipes / Pies and Tarts / Pie Crust 101 Tutorial

Pie Crust 101 Tutorial

November 5, 2016 Updated November 3, 2020 10 Comments

49 shares
  • Share
  • Tweet
Jump to Recipe Print Recipe
Pie crust 101 tutorial will help to make melt in your mouth pie crust every time.


With the holidays upon us, I thought I’d share my pie rust recipe with you again.  I have started stocking up my freezer with discs of pie crust dough, pie shells, and tart shells pre-rolled ready to be filled and baked.

 
My daughter received an invitation from a neighbor who announced that her family loves pie so much they decided to have a pie night every Sunday during the month of November.  How fun is that?  They invite different families to their home each Sunday for pie.  I love this idea.  Maybe next year?
 
Disclaimer:  The following photo’s are from a post from 6 years ago.  I apologize for the photography. As you can tell I’m still working on that skill.  Seriously still working on photography!!!
 
 
Gather and measure all ingredients needed for the pie crust.

I like to use a food processor to make my dough.  A large bowl with a pastry blender or two knives will work just as well.  If you use a food processor, but careful not to over process the ingredients. Pie dough does not like to be handled very much.  The least attention you give it the better. Mix the dry ingredients first then add the frozen butter and lard.  Pulse a few times to work the fats into the flour.


Pulse until the mixture and butter is about the size of small peas.
 
 
In a measuring cup add the egg yolk and lemon juice. Mix together. Add water until the liquid comes to the 2/3 cup measure. Mix water in with the egg yolk lemon juice mixture. Pour the water over the flour mixture. Pulse food processor just until the dough begins to hold together. Do not over process or you will have a tough pie crust.
 
If mixture seems to be too dry add more water one tablespoon at a time until the dough holds together.


Divide dough in half and form two flat discs.  Wrap with plastic wrap or waxed paper and refrigerate for at least 30 minutes prior to rolling out.
 
 
Pie crust discs can be placed in a plastic bag and frozen for a good 3 weeks.  Thaw in a refrigerator for a few hours before rolling out.


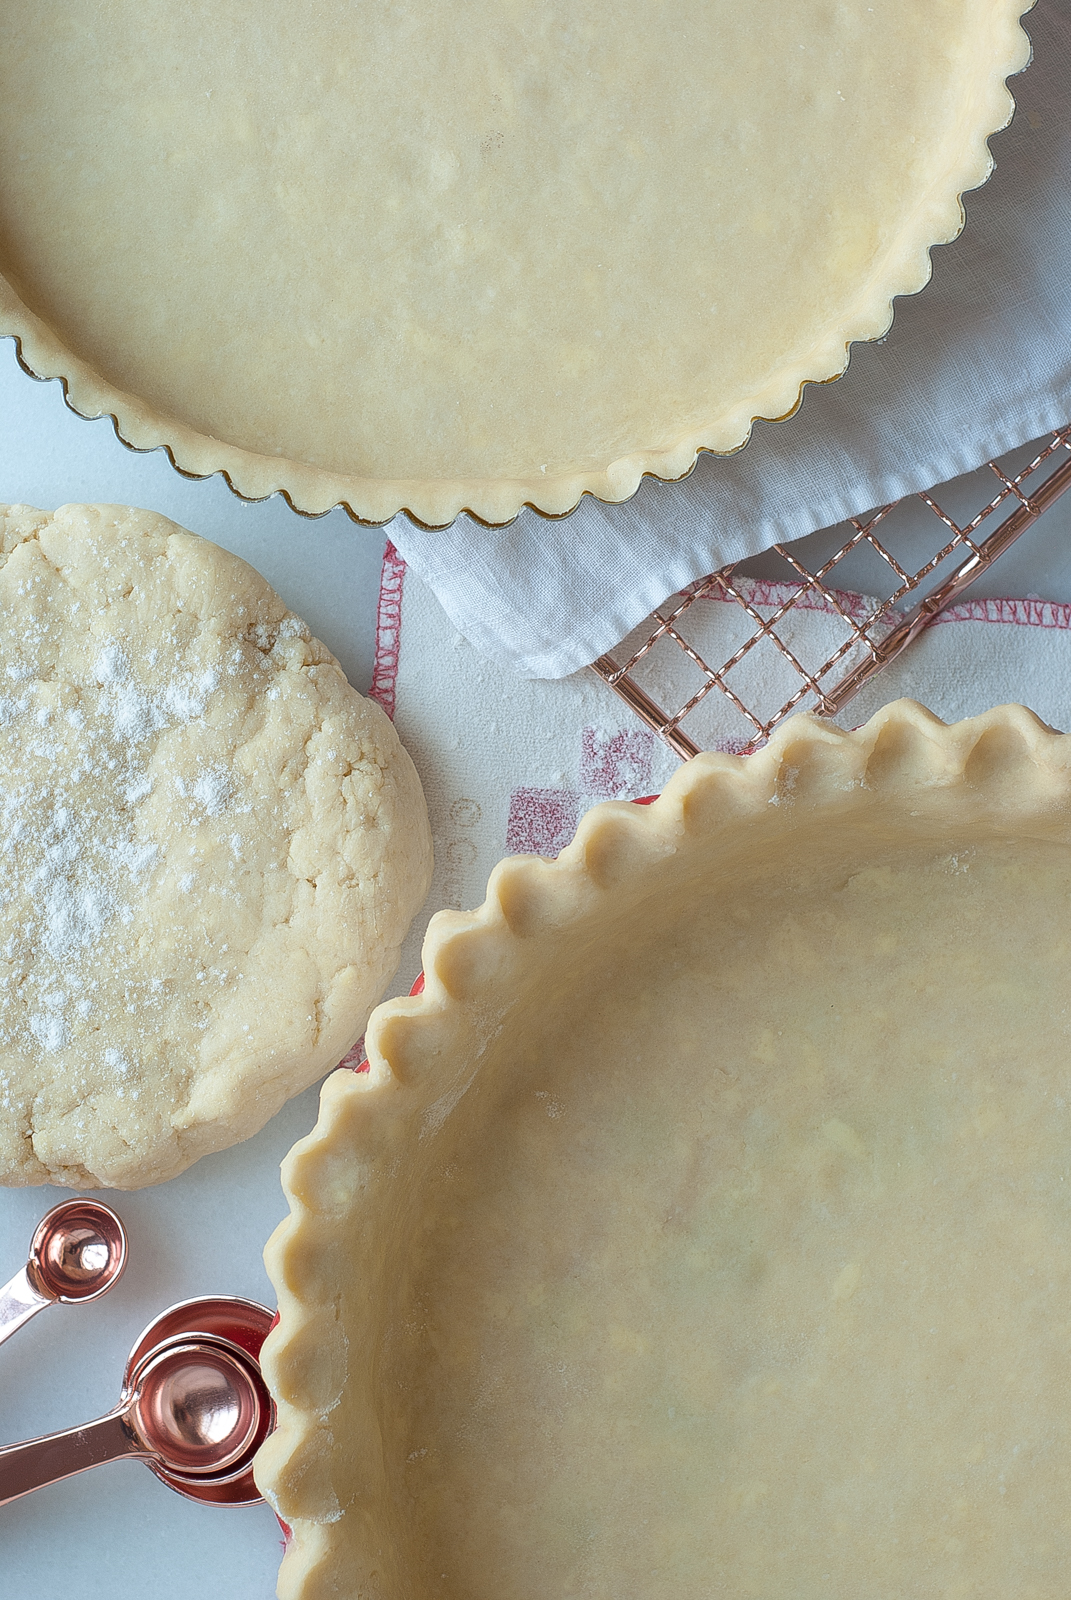
More great news.  I have pre-made a tart shell crust to use for a Chocolate Pecan Pie.  I carefully wrap the tart pan and crust with plastic wrap then I wrap it again in foil to prevent any frostbite. Place in freezer until ready to fill.  This step really simplifies Thanksgiving pie making for me.

A pie crust with a fluted edge takes a little more care.  I like to place the pie crust in the freezer until completely frozen so I don’t mess up the edges. Then I carefully wrap the frozen pie shell in plastic wrap then in foil and return to the freezer until ready to bake.

Easy as pie.  Right?

 
I hope this post will help inspire you to get a jump on your holiday baking.  If you’d like more detailed step-by-step photo’s and instruction for rolling and baking pie crust please click on this lin
Melt in your mouth pie crust
5 from 1 vote
Print

Melt in Your Mouth Pie Crust

Tutorial 101 Pie Crust that will melt in your mouth is easier than you think.  This will be your new favorite pie crust recipe

Course Dessert
Cuisine American
Keyword Pie Crust tutorial
Prep Time 20 minutes
chill 30 minutes
Total Time 30 minutes
Servings 8 serving
Calories 463 kcal

Ingredients

  • 1 cup butter cut into pieces and frozen
  • 1/3 cup lard or shortening frozen
  • 3 cups flour
  • 1 tablespoon sugar
  • 1 teaspoon salt
  • ½ teaspoon baking powder
  • 1 egg yolk
  • 1 tablespoon lemon juice
  • Ice water

Instructions

  1. Cut the butter and lard into pieces and place in the freezer. In the bowl of a food processor add flour, sugar, baking powder and salt. Pulse a few times to combine. Add the pieces of butter and shortening. Pulse several times until the mixture is the size of small peas. In a measuring cup add the egg yolk and lemon juice. Mix together. Add water until the liquid comes to the 2/3 cup measure. Mix water in with the egg yolk lemon juice mixture. Pour the water over the flour mixture. Pulse food processor just until the dough begins to hold together. Do not over process or you will have a tough pie crust. Divide the dough into two balls. Flatten each ball into a disk, wrap in plastic wrap or waxed paper and refrigerate until cold. Can be refrigerated for 1 day or frozen for 2 weeks. Makes two (9-inch) pie crusts or 1 double.
  2. For a single pie crust: Roll out half of the dough. Fit into a 9-inch pie plate. Prick bottom and sides with a fork. Bake at 425 for 10-12 minutes or until golden.
  3. Option: You can line the unbaked pie shell with parchment paper then fill with beans or rice and bake for 10 minutes. This is called blind baking the crust and helps it from not shrinking. Remove the parchment paper and beans after the 10 minutes and continue baking until golden. About an additional 4-5 minutes.

Recipe Notes

  1. Remember it's all about keeping everything cold.  Cold butter, cold lard, cold water
  2. Refrigerate rolled out pie for at least 30 minutes prior to baking.
  3. Allow your dough to relax a few minutes after rolling out before laying into pie plate.
Nutrition Facts
Melt in Your Mouth Pie Crust
Amount Per Serving (8 g)
Calories 463 Calories from Fat 288
% Daily Value*
Fat 32g49%
Saturated Fat 16g80%
Cholesterol 85mg28%
Sodium 495mg21%
Potassium 82mg2%
Carbohydrates 37g12%
Fiber 1g4%
Sugar 1g1%
Protein 5g10%
Vitamin A 740IU15%
Vitamin C 0.7mg1%
Calcium 28mg3%
Iron 2.2mg12%
* Percent Daily Values are based on a 2000 calorie diet.


Share this:

  • Click to share on Twitter (Opens in new window)
  • Click to share on Facebook (Opens in new window)

Related

Filed Under: Pies and Tarts Tagged With: pie crust, pie crust how-to, thanksgiving menu ideas, thanksgiving preparation

Previous Post: « Halloween Tricks and Treats
Next Post: Pecan Chocolate Tart »

Reader Interactions

Comments

  1. jewel cooke says

    January 2, 2017 at 7:40 pm

    I can't use the vinegar or lemon or anything like that but that I use to substitute ?
    Ty

    Reply
    • Janet Barton says

      January 4, 2017 at 10:16 pm

      Just omit them completely. Just use the water and egg.

      Reply
  2. Anonymous says

    November 7, 2016 at 7:58 pm

    Can I use any other thing instead of lard or shortening ? Or may be increase butter ?

    Reply
    • Janet Barton says

      November 8, 2016 at 4:09 pm

      Absolutely. Just increase butter.

      Reply
  3. Cathleen says

    November 6, 2016 at 8:50 pm

    Yum! I love making pie, but I always seem to screw up the crust. This is super useful!

    Reply
    • Janet Barton says

      November 8, 2016 at 4:09 pm

      Thank you. You can do this!

      Reply
  4. Anonymous says

    November 5, 2016 at 6:53 am

    Hi again…are you doing anything Paleo, I thought you were doing some Paleo recipes some time ago ?

    Reply
    • Janet Barton says

      November 5, 2016 at 3:42 pm

      I'm not 100% paleo. I have posted some grain free recipes here and there for my daughter who has UC and can't have grains. If you are looking for a good grain free pie crust recipe, try Against All Grain. She has fabulous paleo recipes.

      Reply
  5. jewel cooke says

    November 5, 2016 at 6:15 am

    I'm so excited to see this, I can't wait to try this recipe, thank you so much for posting.

    Reply
    • Janet Barton says

      November 5, 2016 at 3:39 pm

      Thank you so much. You'll love the recipe.

      Reply

Leave a Reply Cancel reply

Your email address will not be published. Required fields are marked *

Recipe Rating


This site uses Akismet to reduce spam. Learn how your comment data is processed.

Primary Sidebar

About Me

Janet Barton

Hi I'm Janet and this is where I share my delicious made-from-scratch seasonal recipes that I make at home for my family every day.

I believe cooking from scratch, using unprocessed and whole foods is an important part of healthy eating. My goal is to help you create amazing recipes by providing easy step-by-step photos and instructions.

Read More »

Trending Recipes

  • Lemonade and raspberry lemonade in tall glasses Old Fashioned Lemonade
  • No-knead Crusty Bread in a Dutch oven No-knead Crusty Bread
  • Glass of almond milk with 2 gray striped straws on wood board with container of almond milk in background Quick Homemade Almond Milk
  • Lemon Curd Ice Cream in bread pan with spoon Lemon Curd Ice Cream
  • Several chocolate drop cookies on white background Chocolate Drop Cookies
  • Oatmeal cookies on cookie rack Old-Fashioned Oatmeal Raisin Cookies
  • pink iced heart sugar cookies Sour Cream Sugar Cookies
  • vanilla and chocolate party cakes for kids Vanilla and Chocolate Party Cakes for Kids
  • Cabbage with veggies and cashews Raw Cashew Mango Cabbage Wraps
  • green Witch Finger Cookies standing in a black bowl Creepy Witch Finger Cookies

Subscribe to our email list for exclusive tips and recipes

  • Facebook
  • Instagram
  • Pinterest
  • RSS
  • Twitter

Latest on Instagram

Follow on Instagram


Footer

Featured on

The Daily Meal Logo The foodgawker-logo reddit Logo BuzzFeed Logo halfbaked Harvest Logo Browneyed Baker Logo BLOGHER Logo FOOD52 Logo University of Washington Logo sheknows Logo

Copyright © 2022 Janet Barton
Privacy Policy