Several years ago my oldest daughter was studying in Paris. I went to visit her for a rainy week in November. While she was attending the class I wandered around Le Marais. I strolled in and out of every Patisserie on my route. I was particularly drawn to a tender brioche studded with semi-sweet chocolate flakes. It was golden with a buttery flavor and a soft texture. I was in love.
During the months that my daughter was there, she was in search of an authentic French Boulangerie and Patisserie cookbook that was written in English. Thank goodness she finally had success. This recipe has been adapted from that cookbook written by Linda Dannenberg with recipes from thirteen outstanding French bakeries.
As i have studied and experimented on several brioche dough recipes I have found that the slow overnight rise required in this recipe is necessary. Jacques Pepin stated that the finest brioche requires lots of kneading and several periods of long, slow rising at low temperatures, in order to develop the gluten and to absorb a large amount of butter. This particular recipe requires a few rising periods. The results are so worth the extra time.
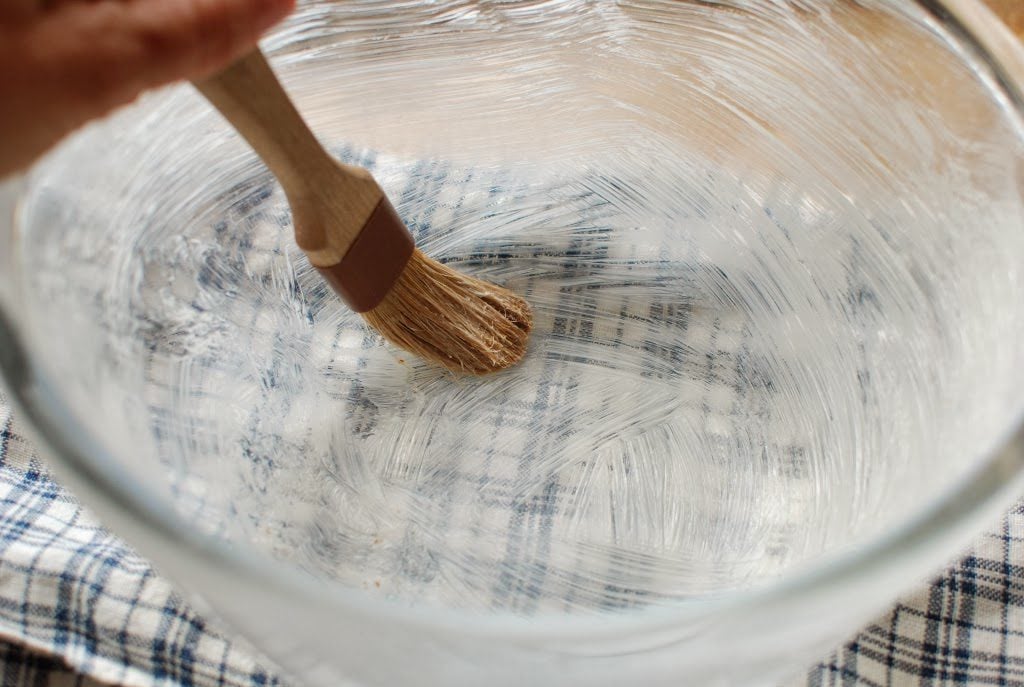
Butter a large mixing bowl. Set aside.
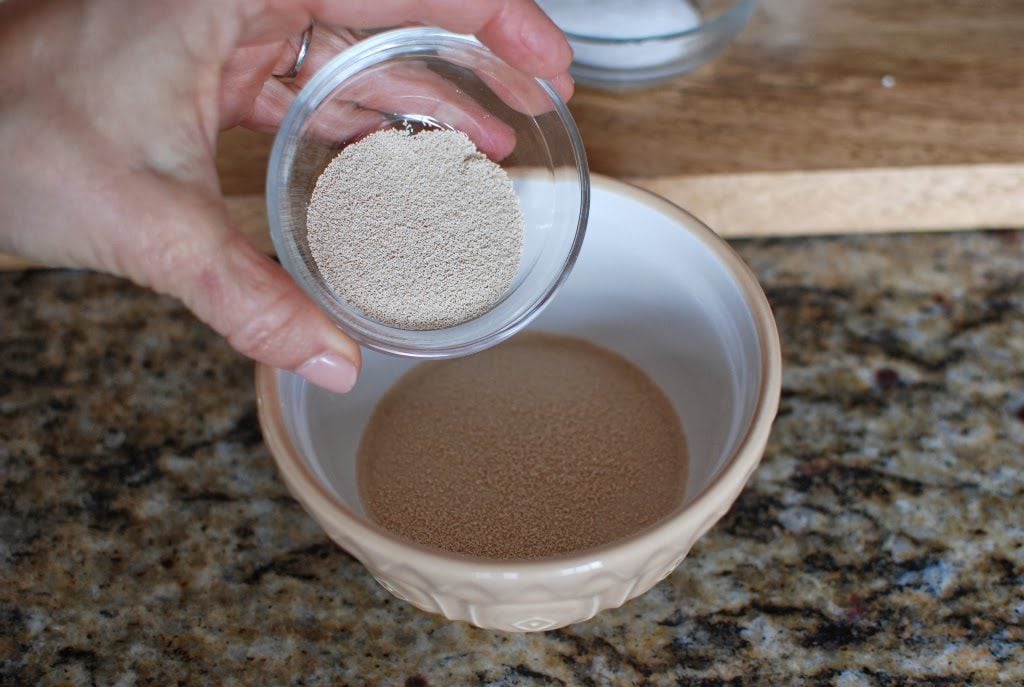
Sprinkle 2 teaspoons yeast over 2 tablespoons warm water. Stir. Let stand for 5-10 minutes.
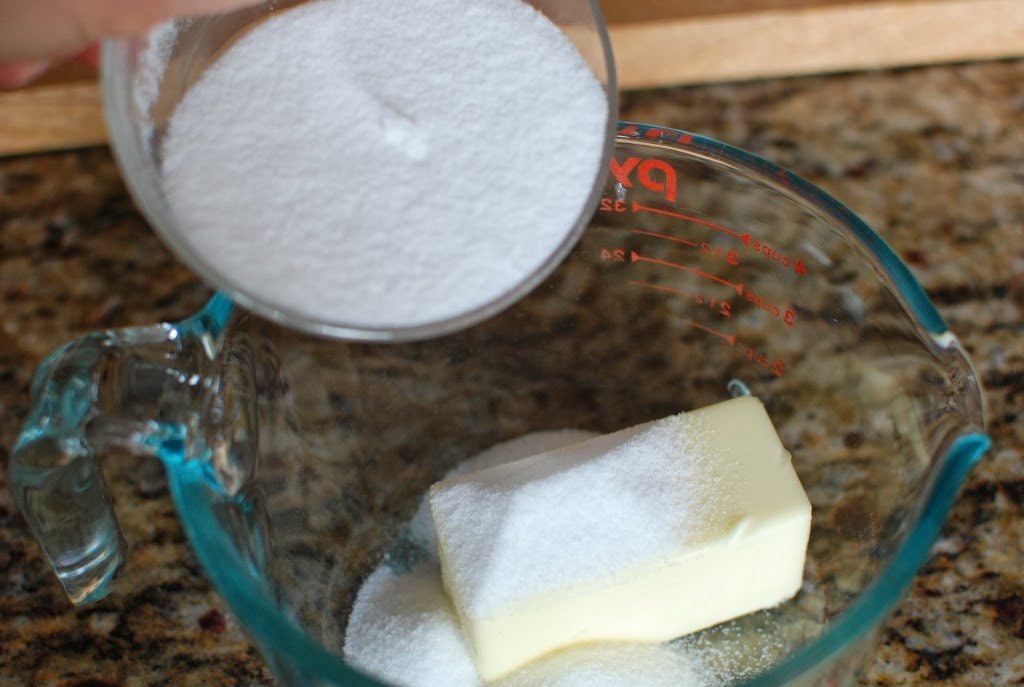
In a small mixing bowl, add softened butter and sugar.
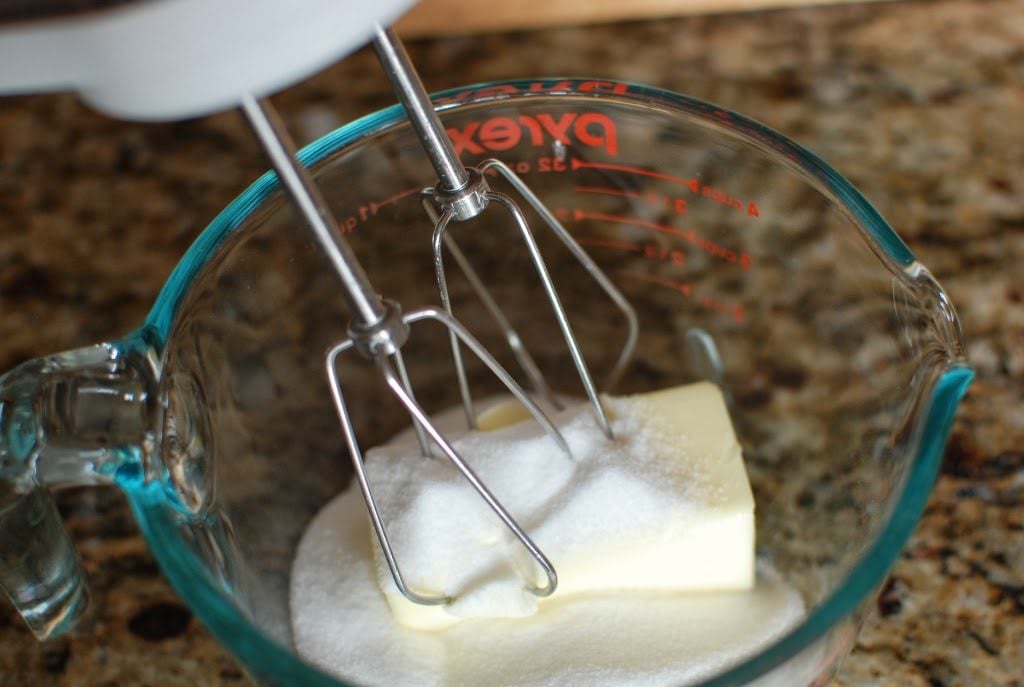
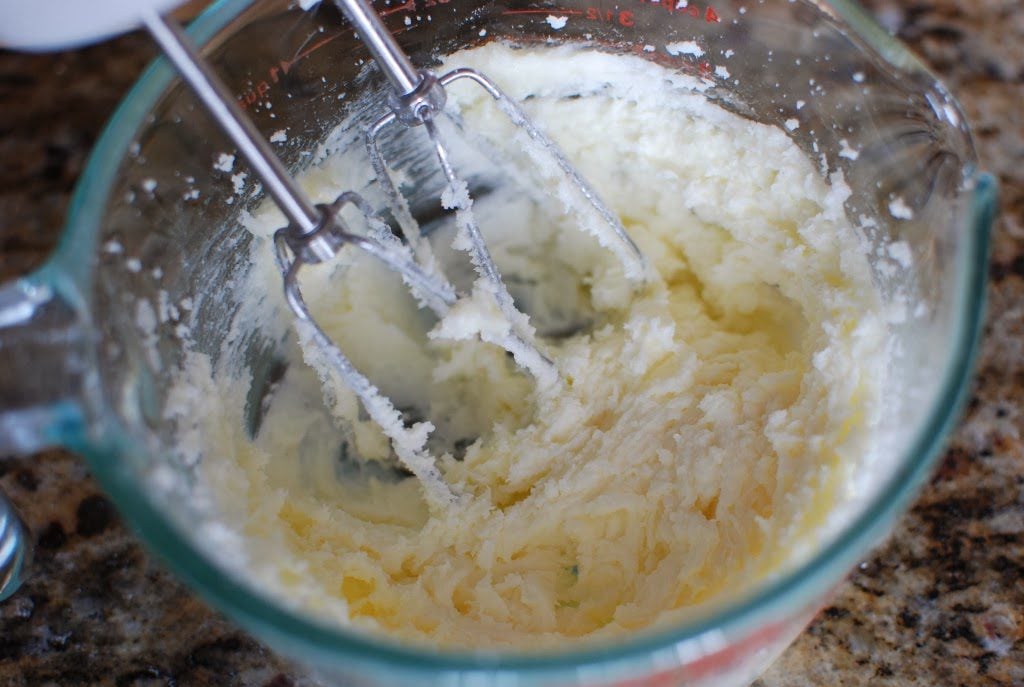
Mix until mixture is smooth and pale yellow. Set aside.
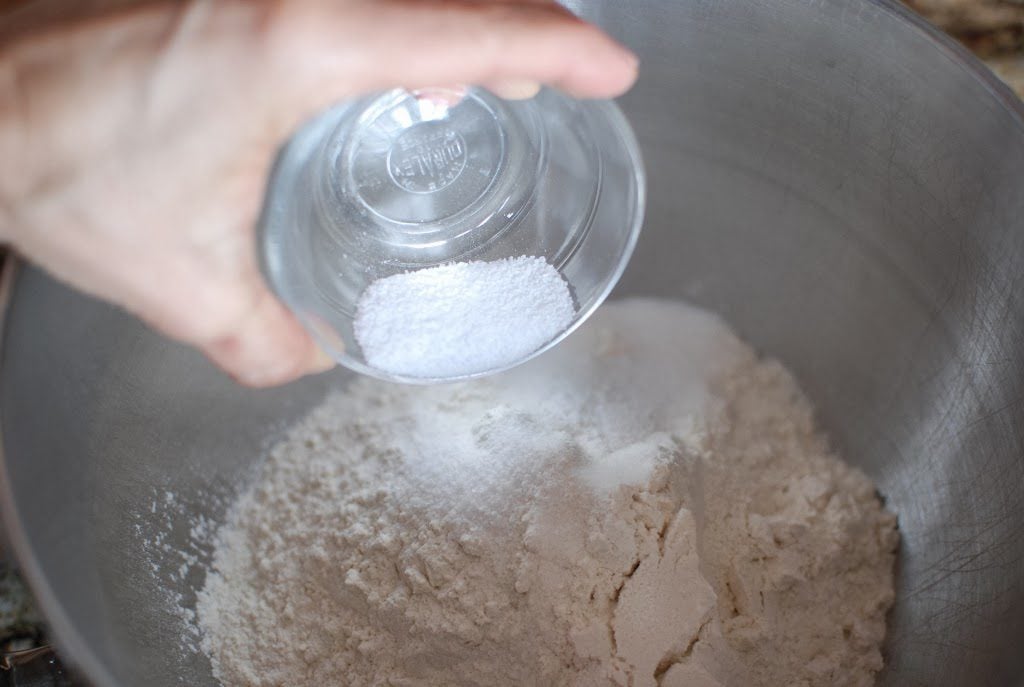
In a large mixing bowl add flour and salt.
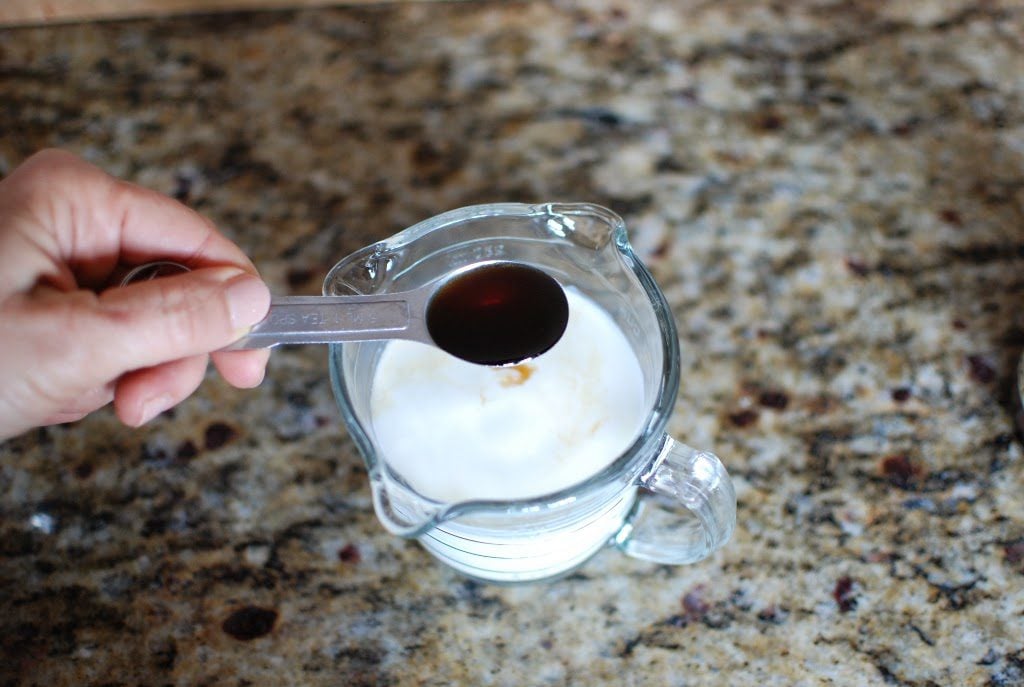
Heat milk to lukewarm. Add 1 teaspoon vanilla to warm milk.
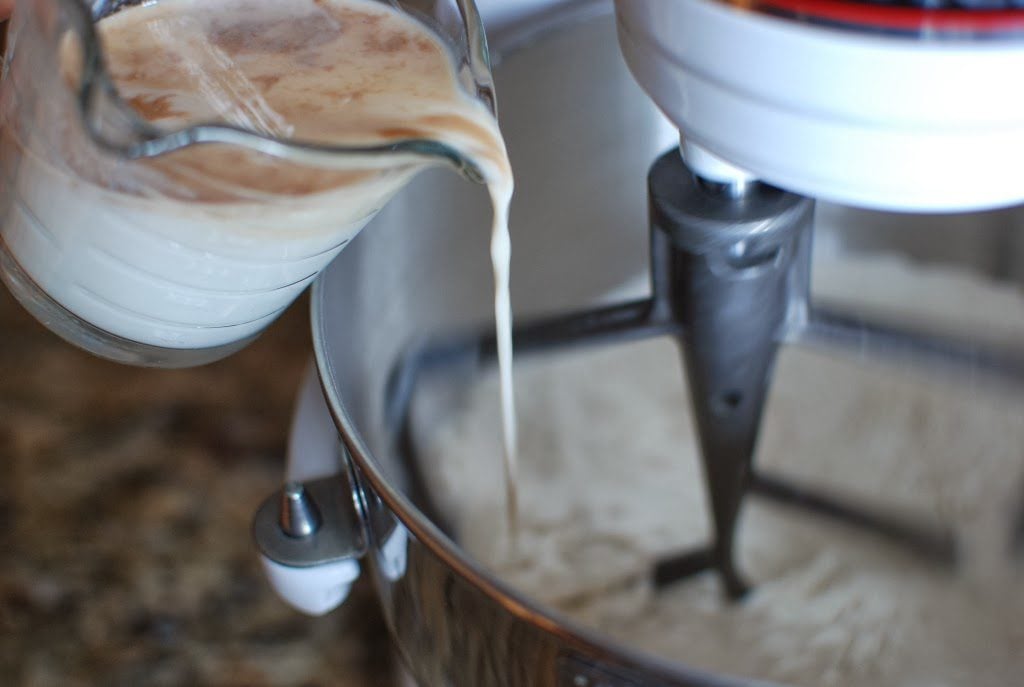
With the mixer running slowly add milk mixture.
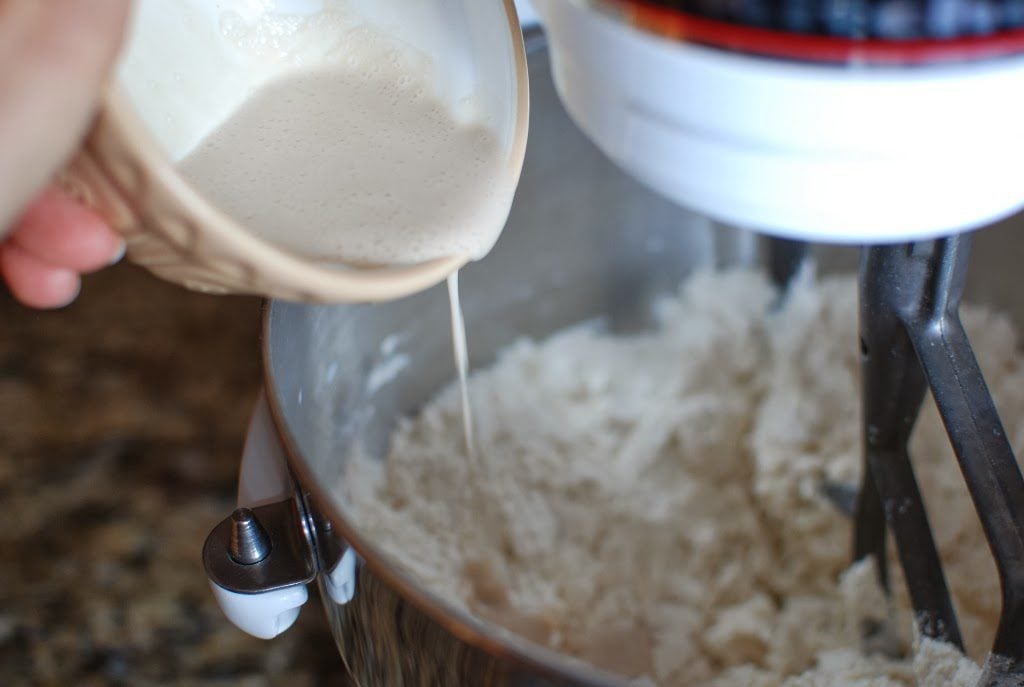
Add dissolved yeast.
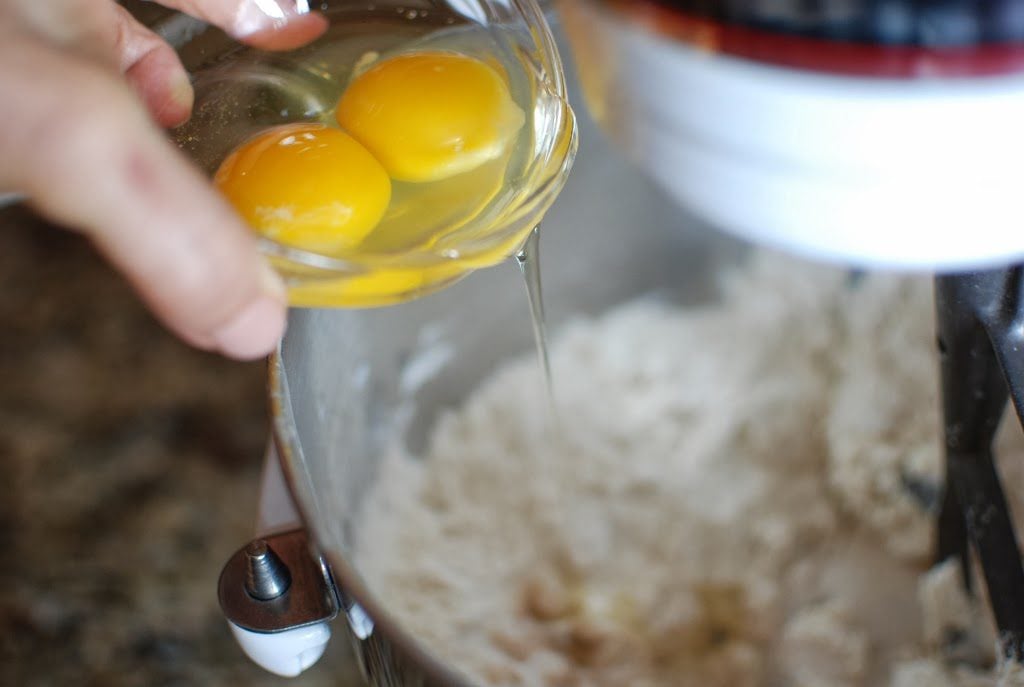
Add 2 eggs.
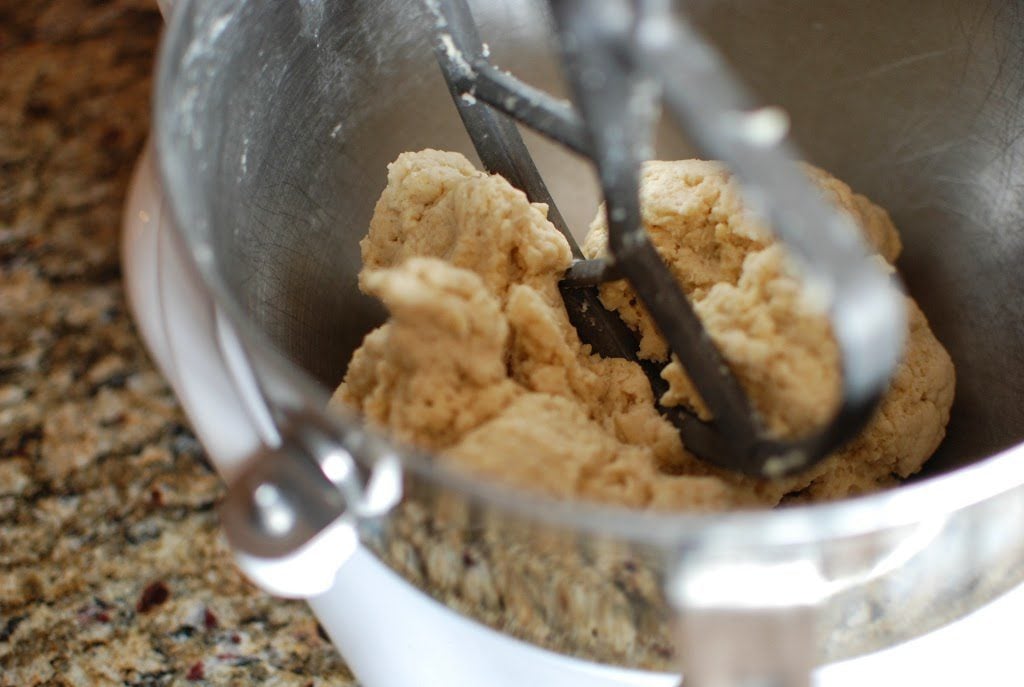
The dough will be very stiff.
You will notice that I’m using a paddle attachment. You can use the dough attachment. It just takes a little longer to mix.
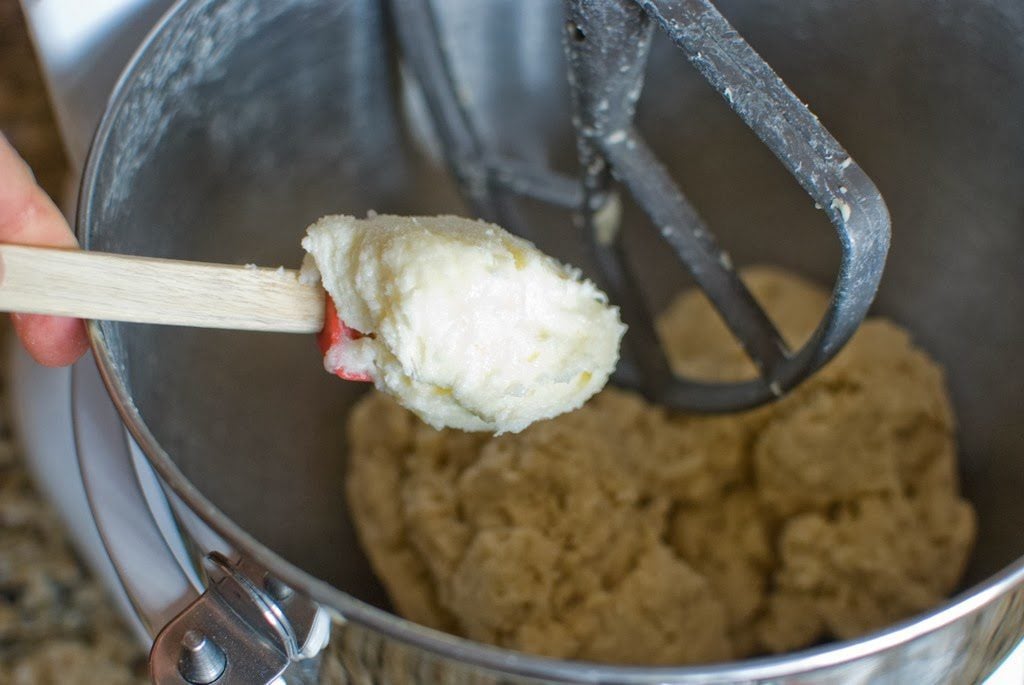
Add the butter/sugar mixture 2 tablespoons at a time. Beating well after each addition.
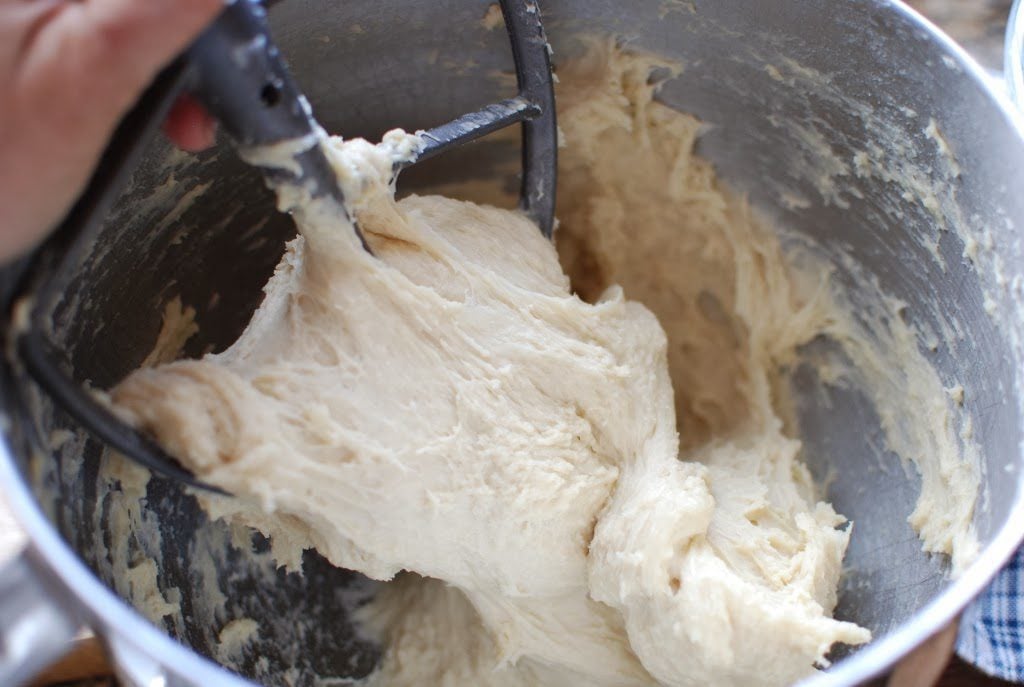
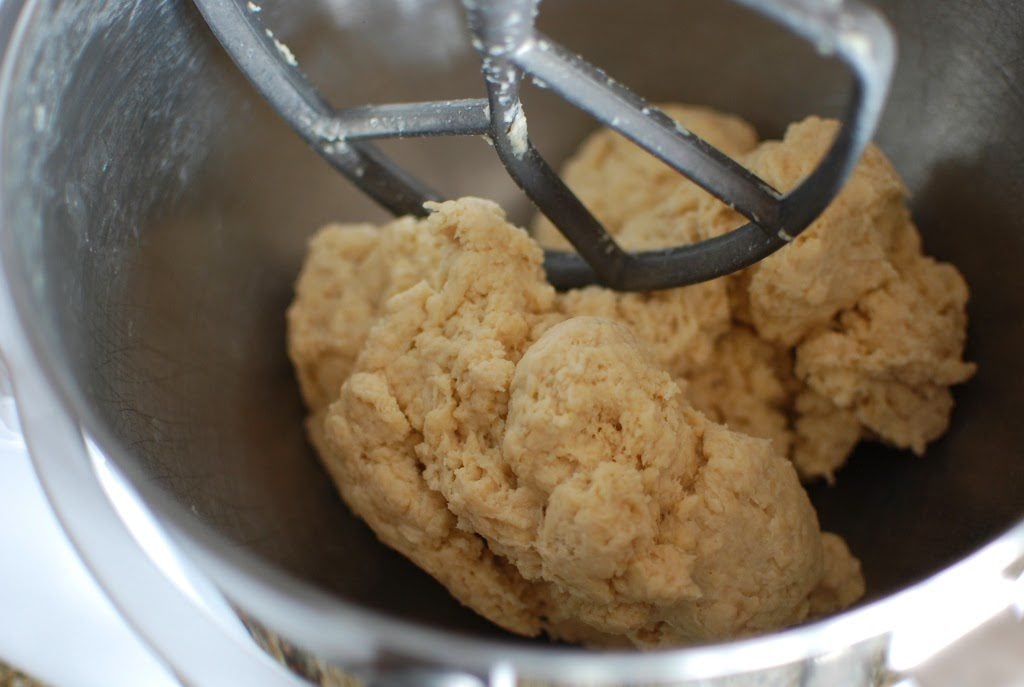
After the butter has been mixed in, allow the mixer to run for 3-5 minutes to create a smooth dough.
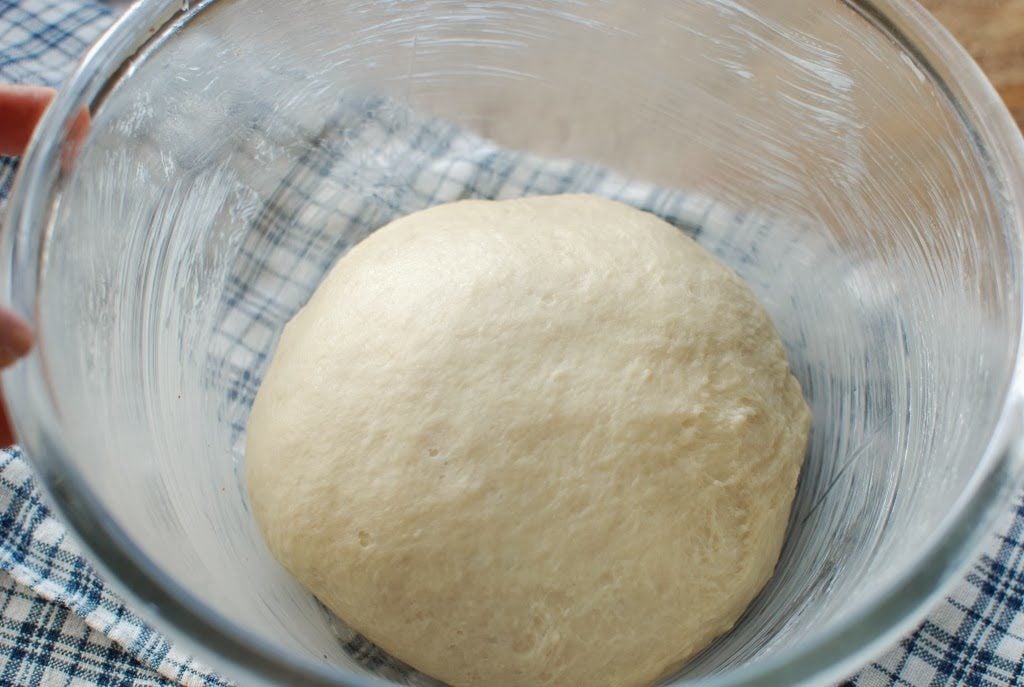
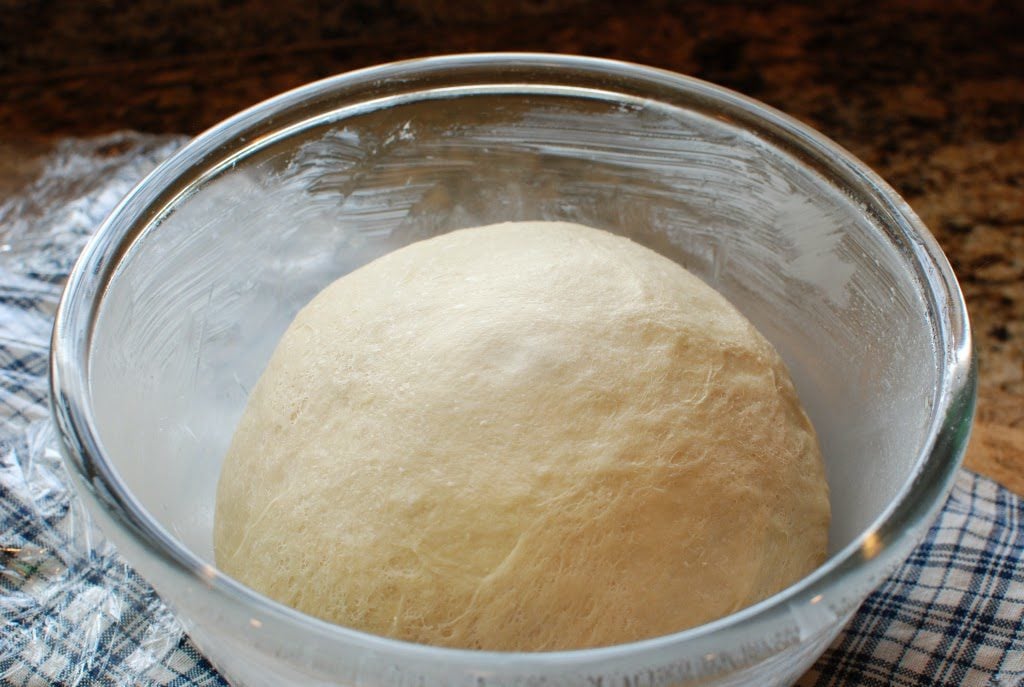
Place the dough in the buttered bowl.
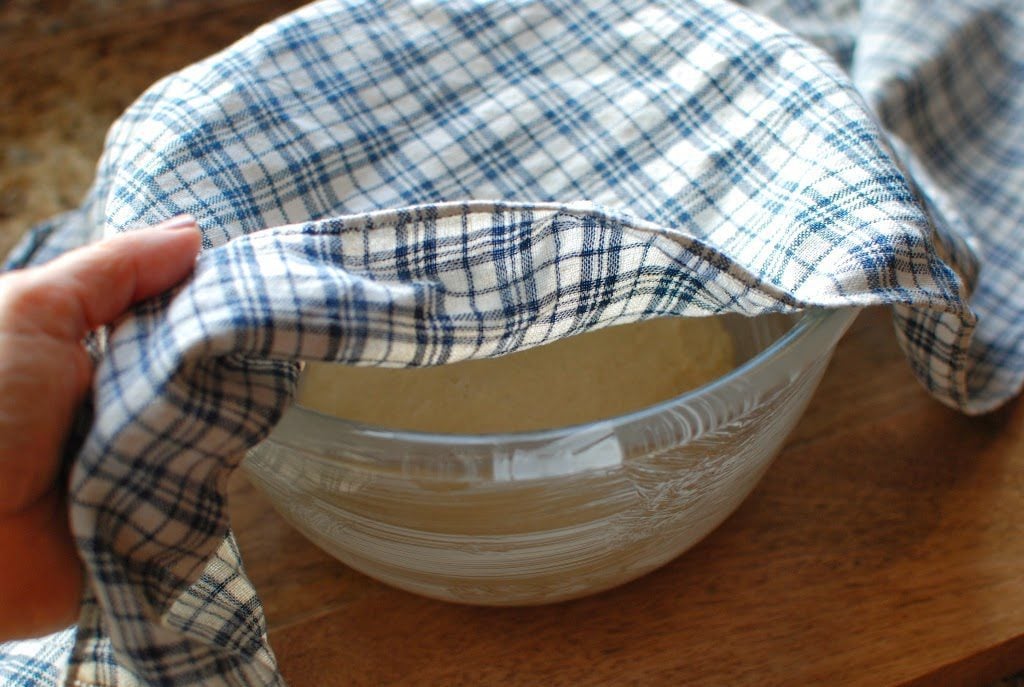
Cover and allow to rise at room temperature for 1 3/4 hours. After this rise time, punch down the dough and reshape into a smooth ball. Cover with plastic wrap and place in the refrigerator overnight.
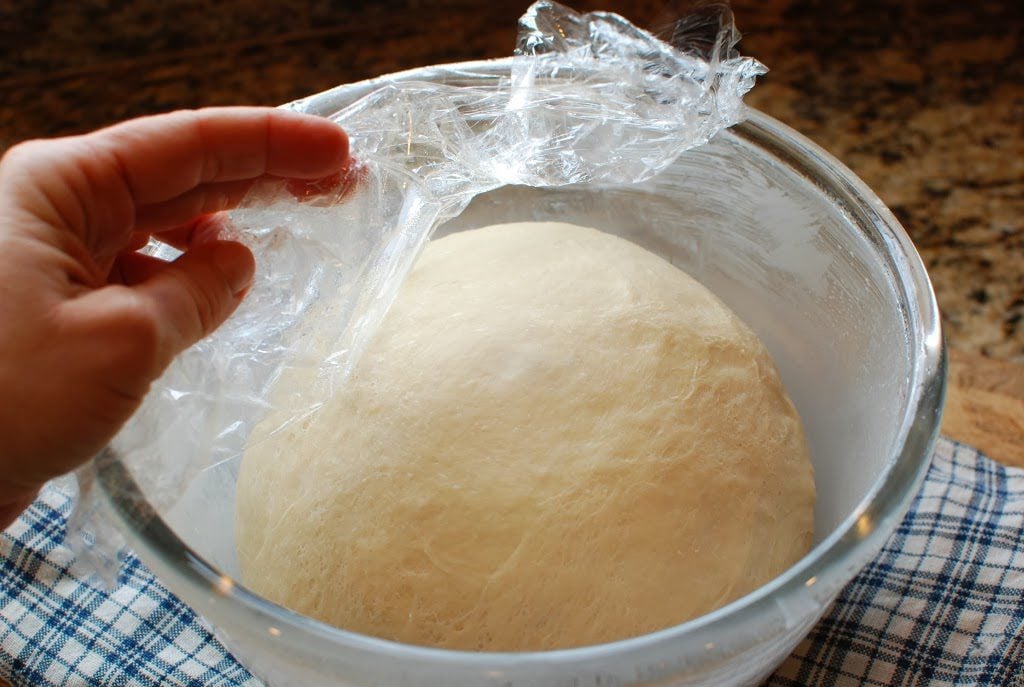
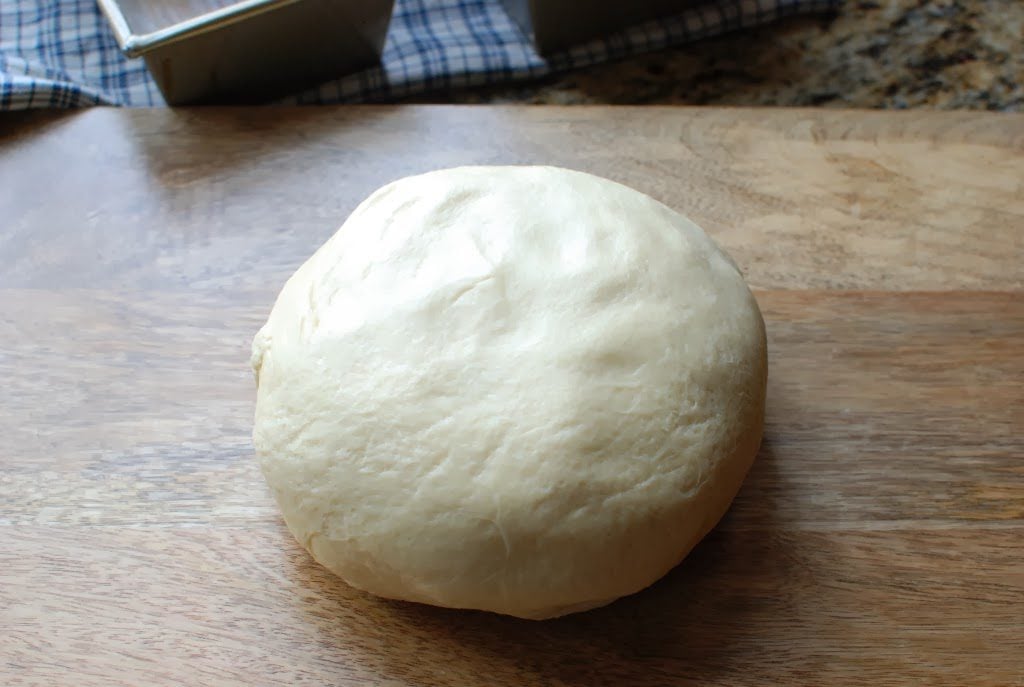
The next day, remove the dough from the refrigerator and let stand in the bowl at room temperature for 1 hour.
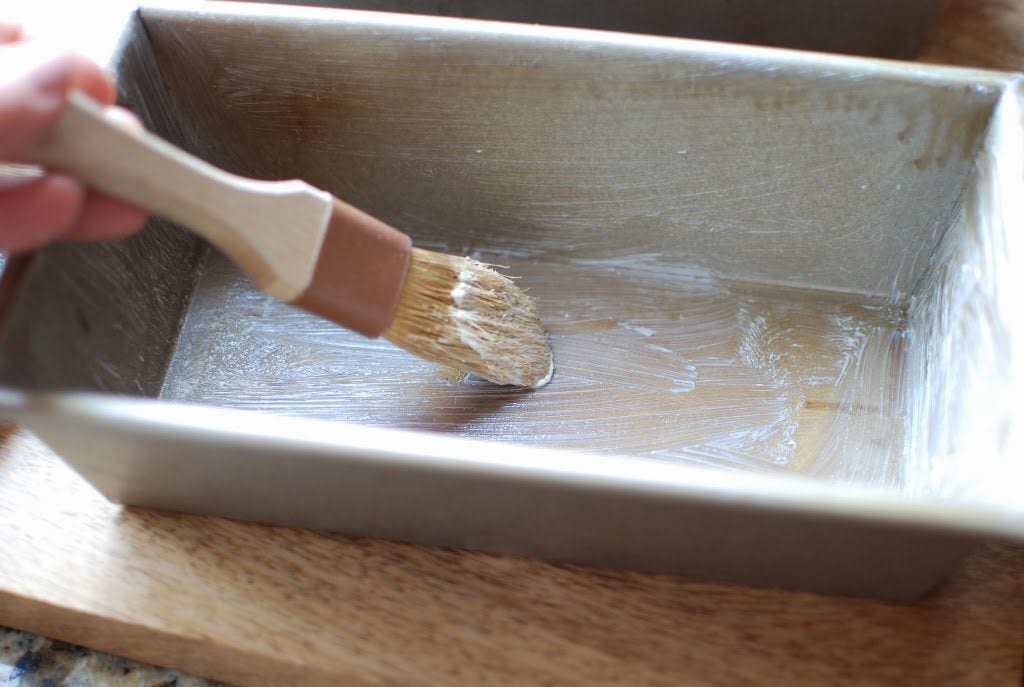
Meanwhile, butter two 8 x 4-inch/20 x 10 cm loaf pans.
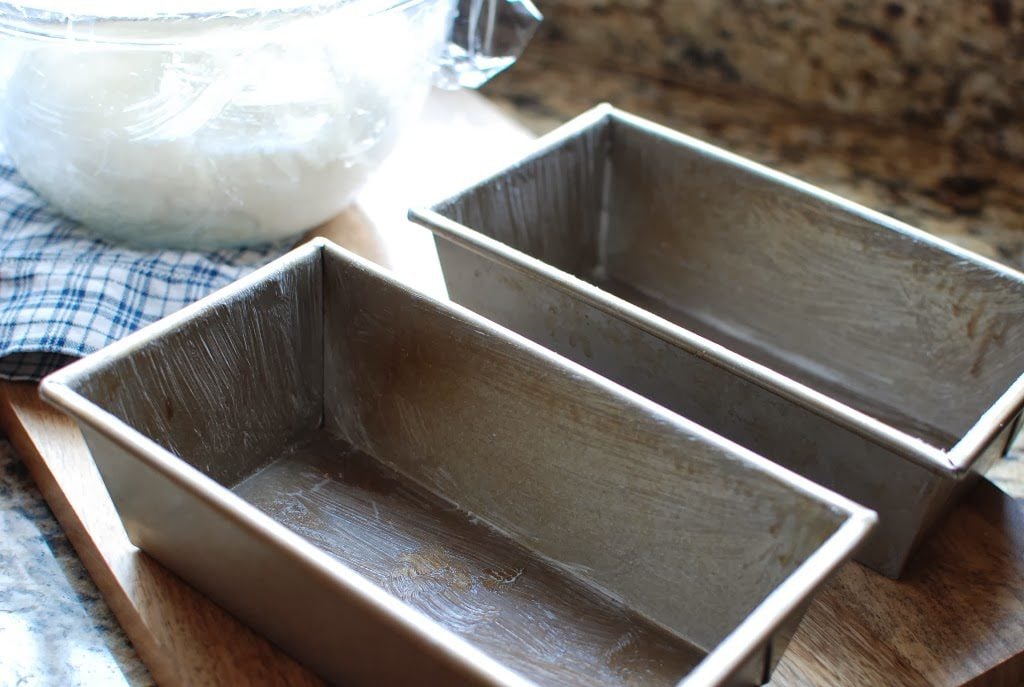
Set aside.
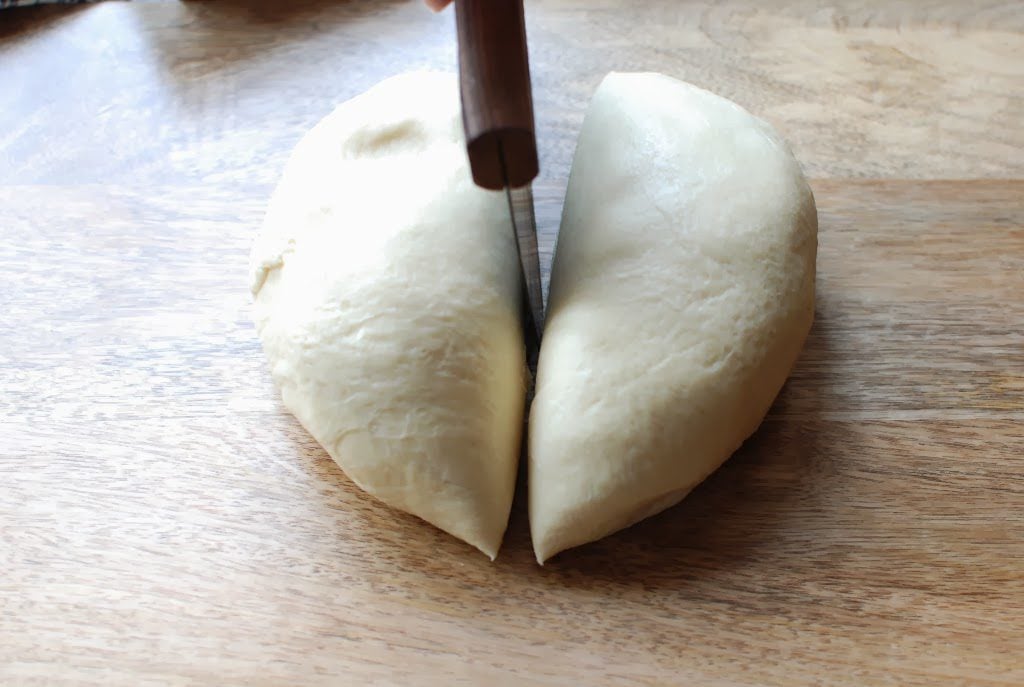
One the dough has sat at room temperature divide the dough into 4 equal portions and form each into a ball slightly smaller than a 4-inch/10 cm wide.
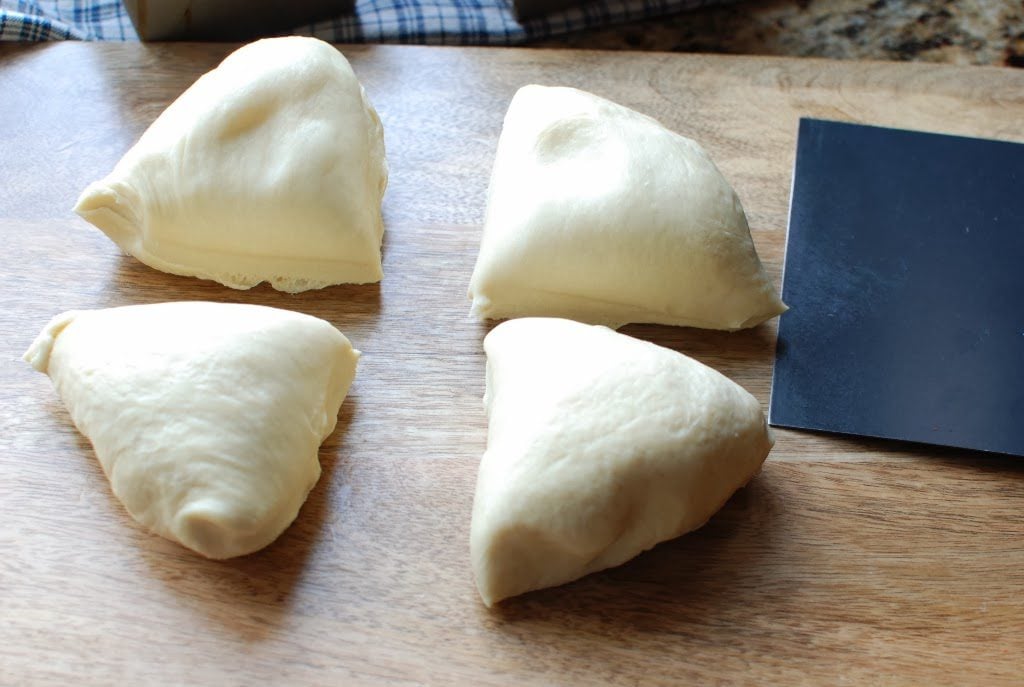
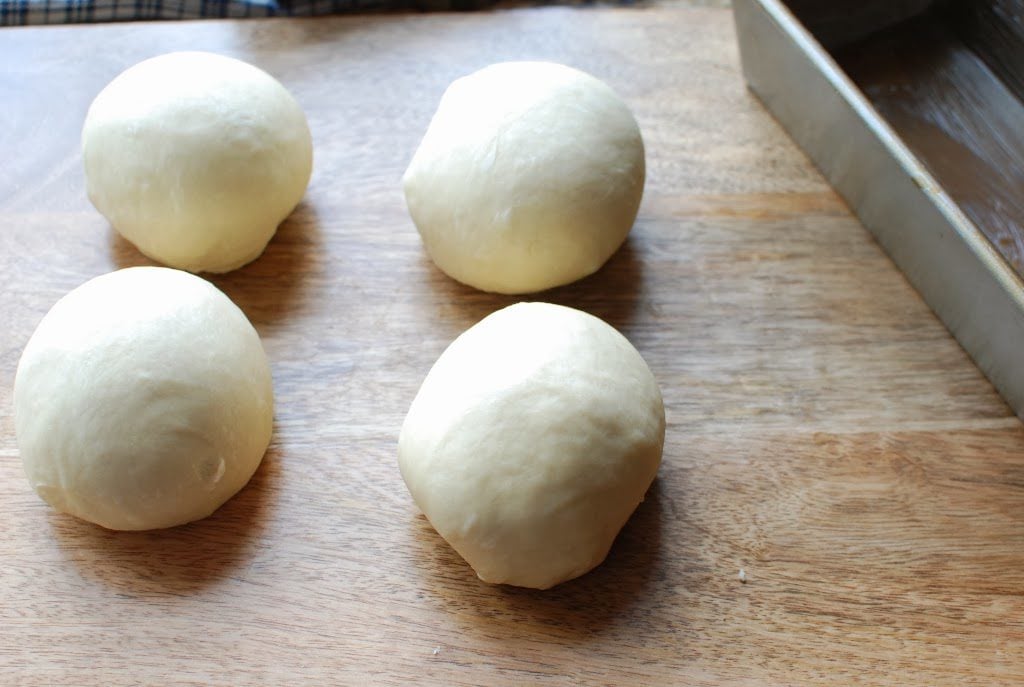
Smooth out any air bubbles that may appear on the surface of the dough.
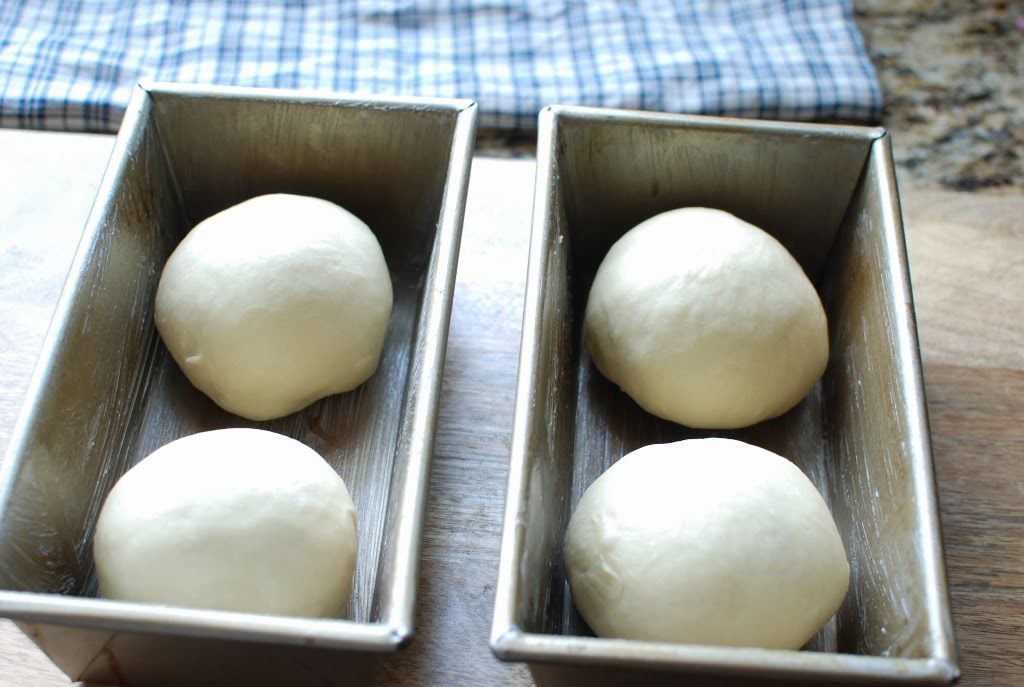
Place one ball at each end of the pan.
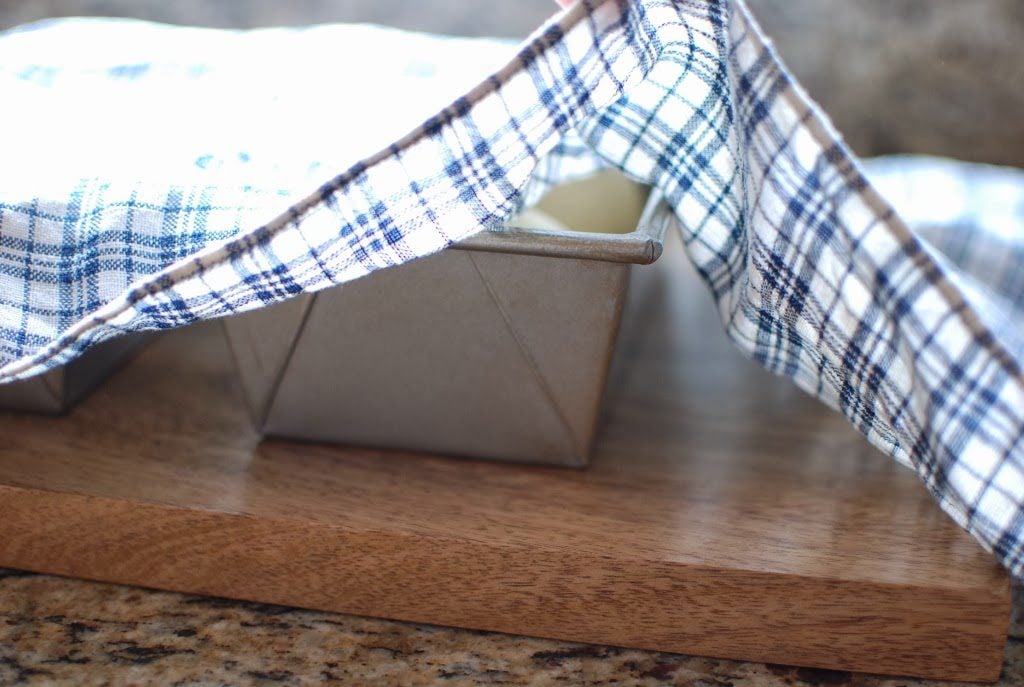
Cover and let rise to the rim of the pan.
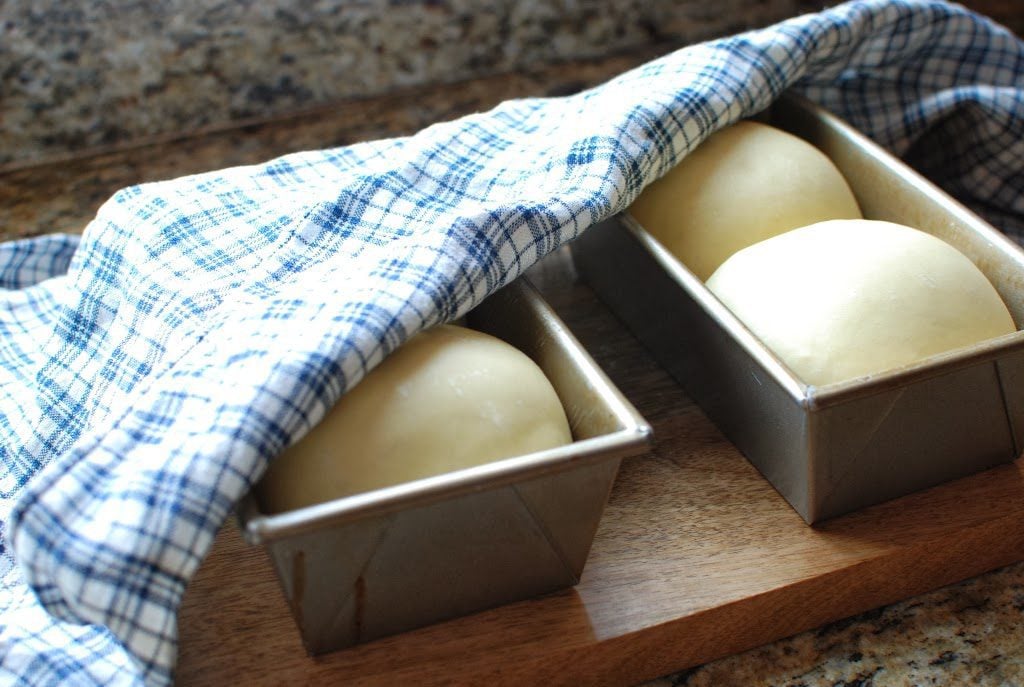
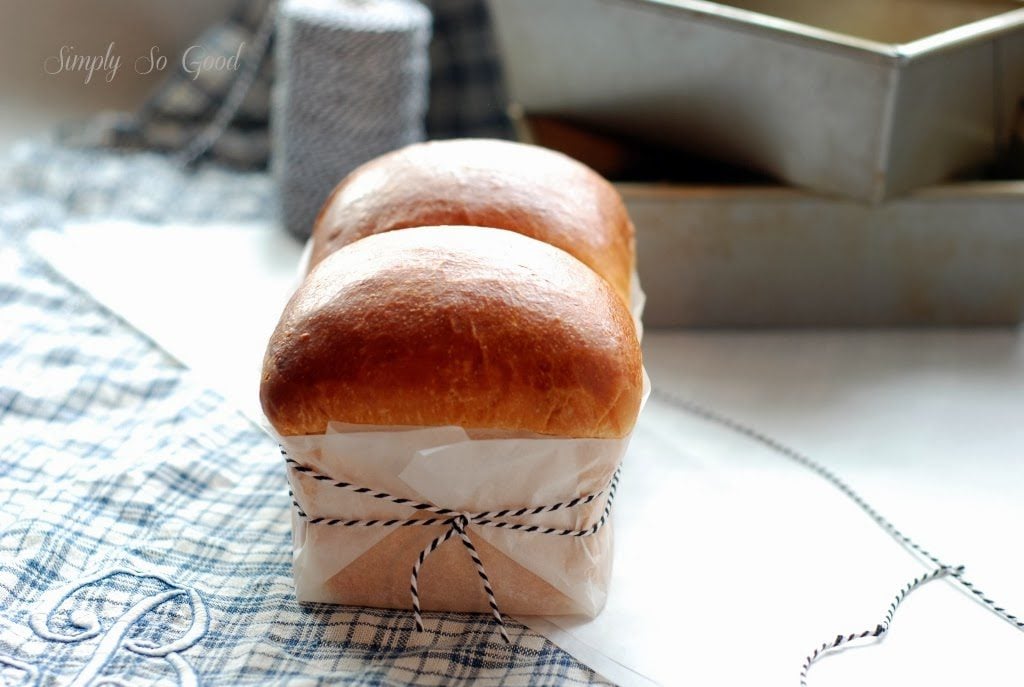
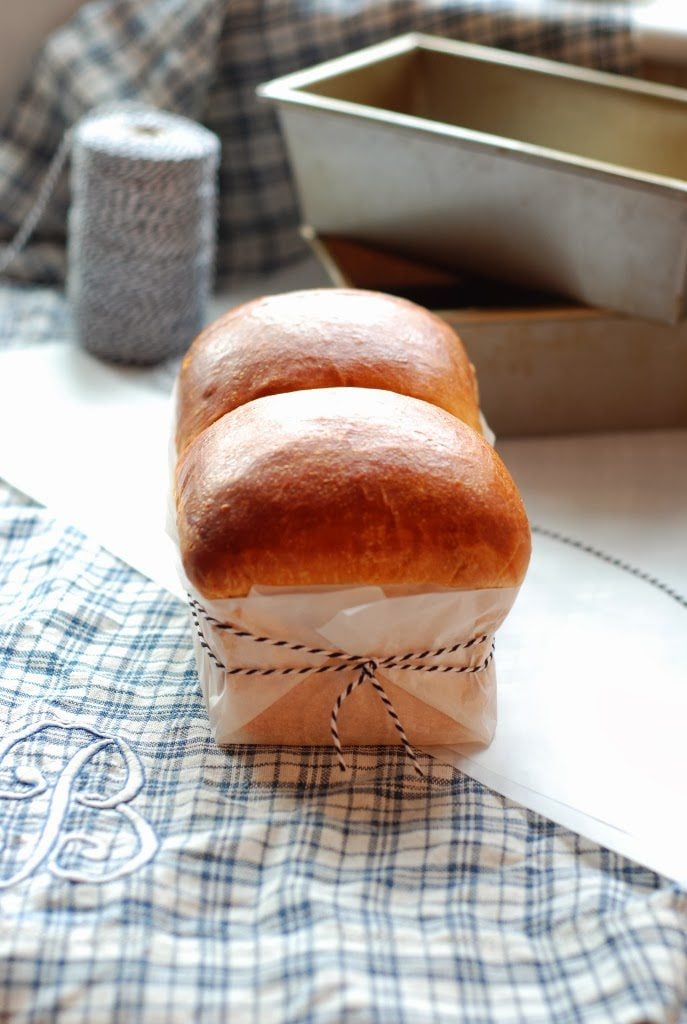
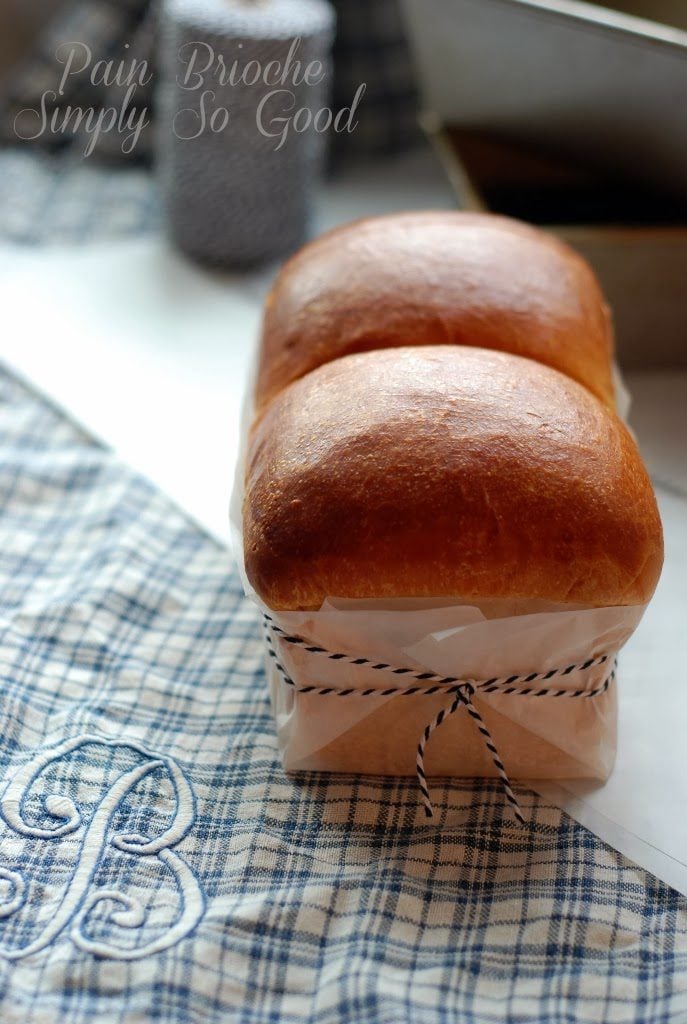
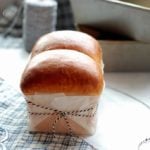
The dough will expand to fill the pan, creating a “2-humped” loaf with a seam in the middle.
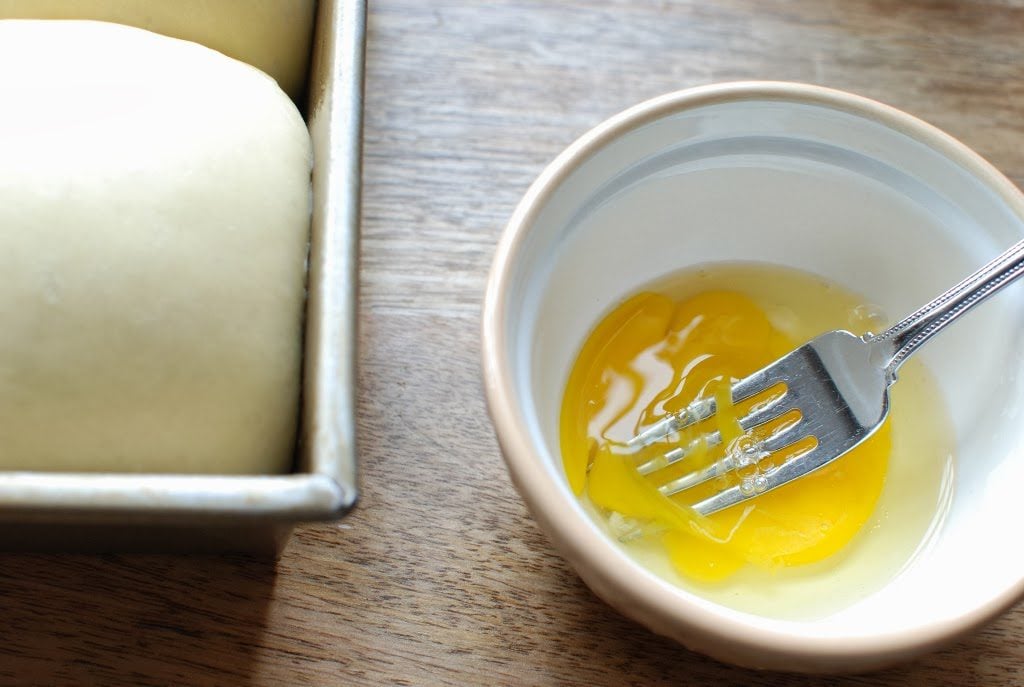
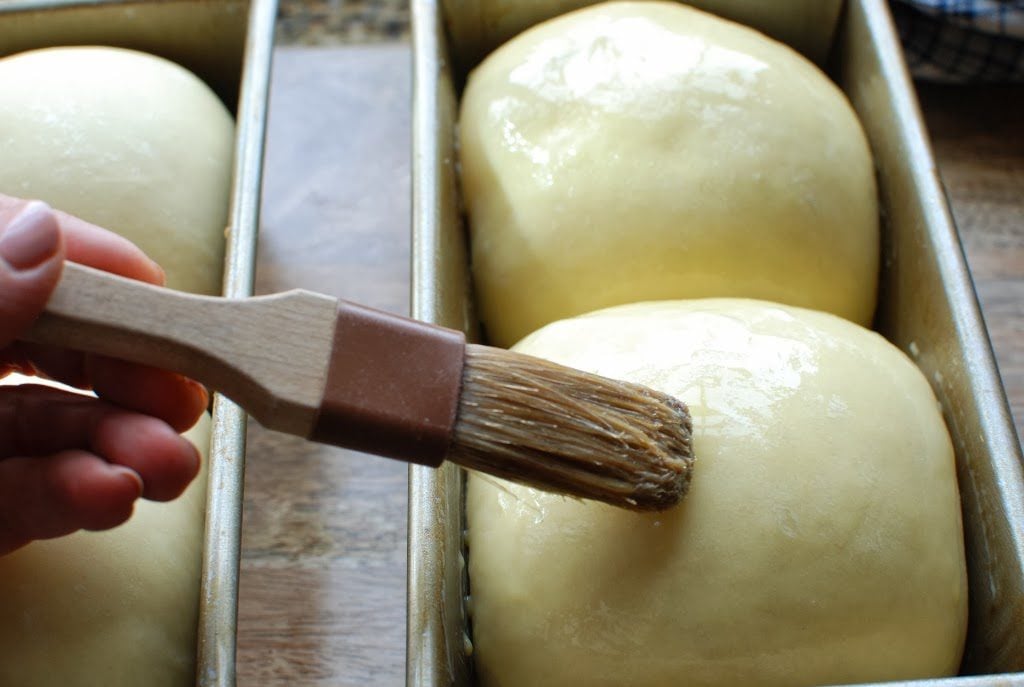
Beat one egg.
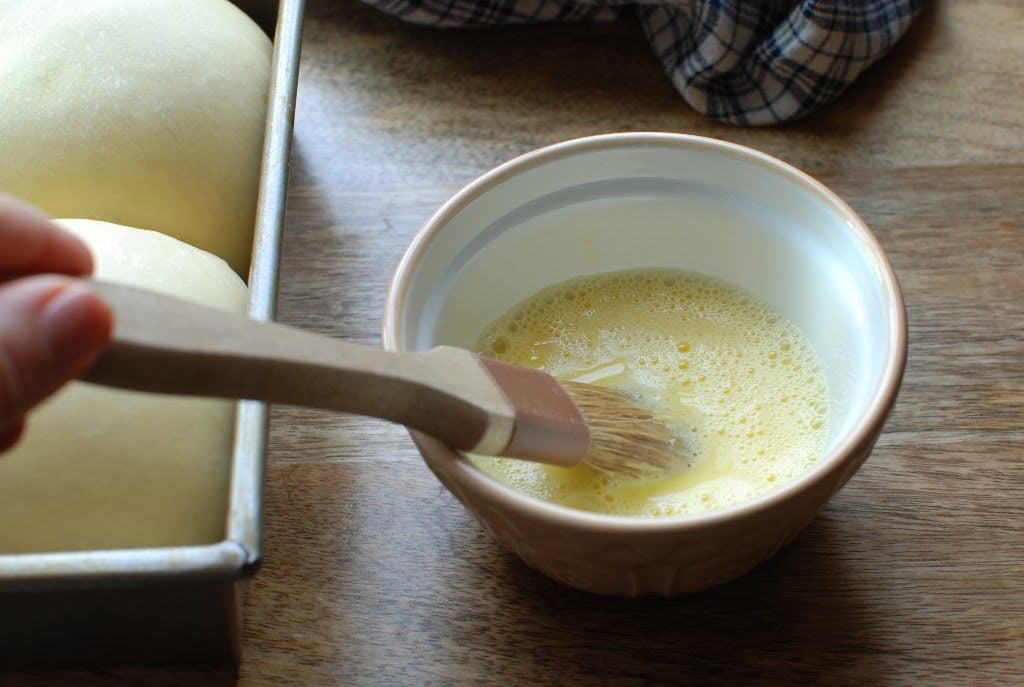
Carefully brush the tops of the dough.

Place in a preheated 350 degree F/175 degree C oven.
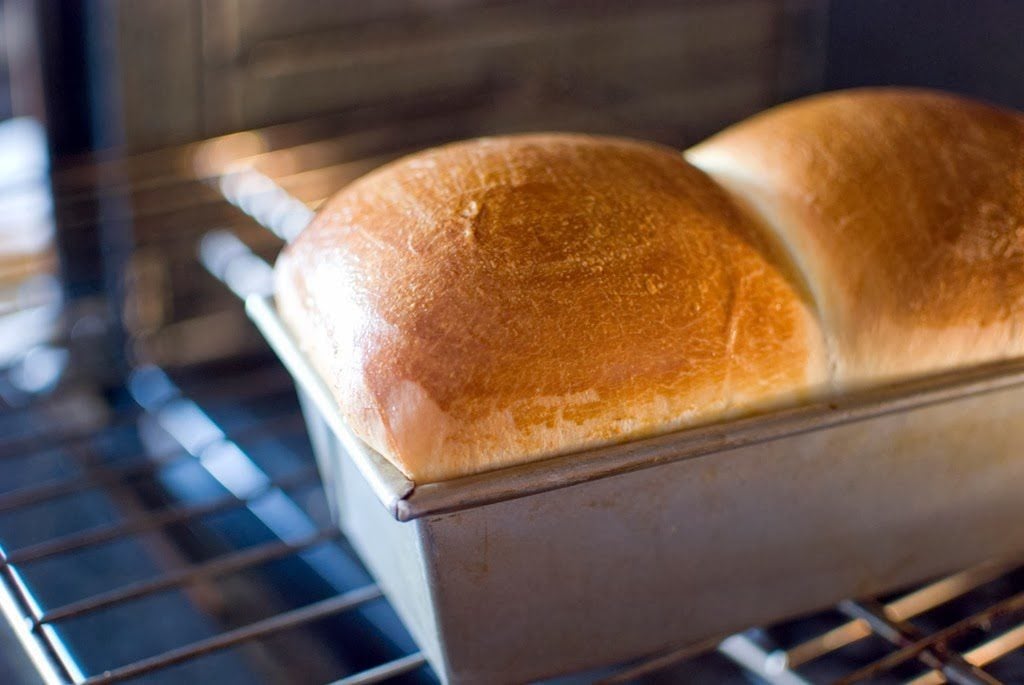
Bake for 30-35 minutes or until golden.
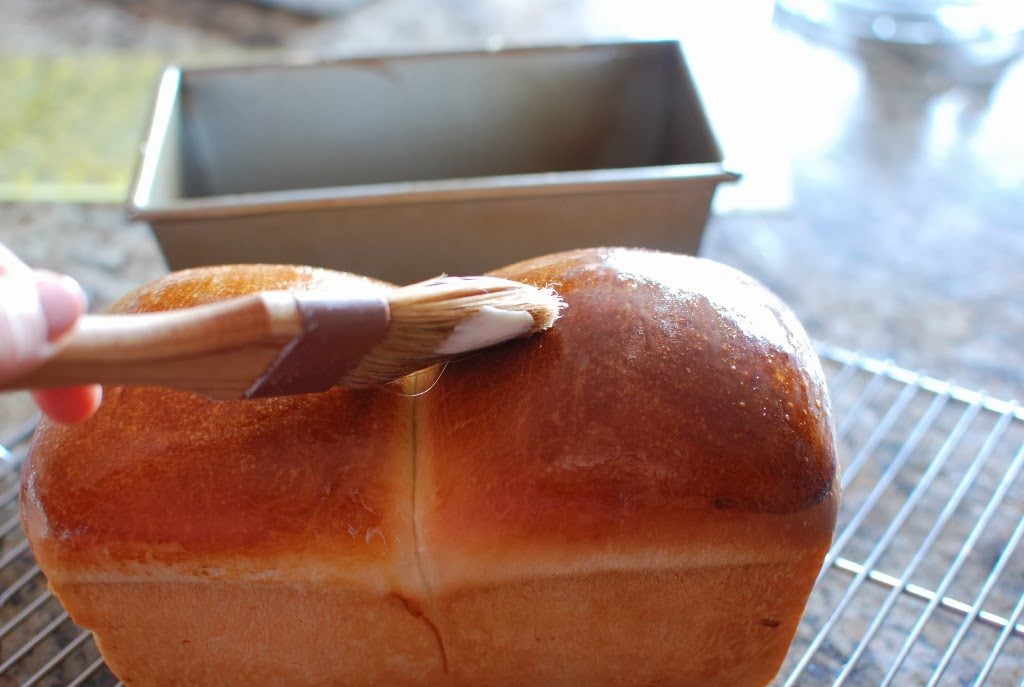
Remove hot bread from pans and place on a cooling rack. Brush hot bread with butter.
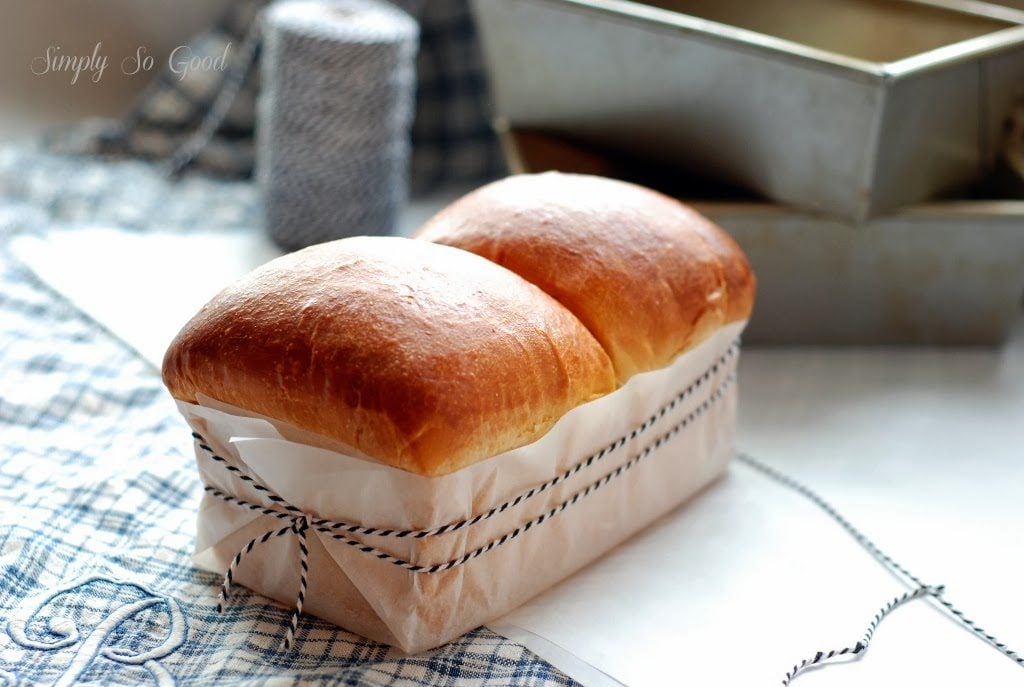
Makes two beautiful loaves of bread. One to eat and one to share…maybe share.
Pain Brioche
As I have studied and experimented on several brioche dough recipes I have found that the slow overnight rise required in this recipe is necessary.
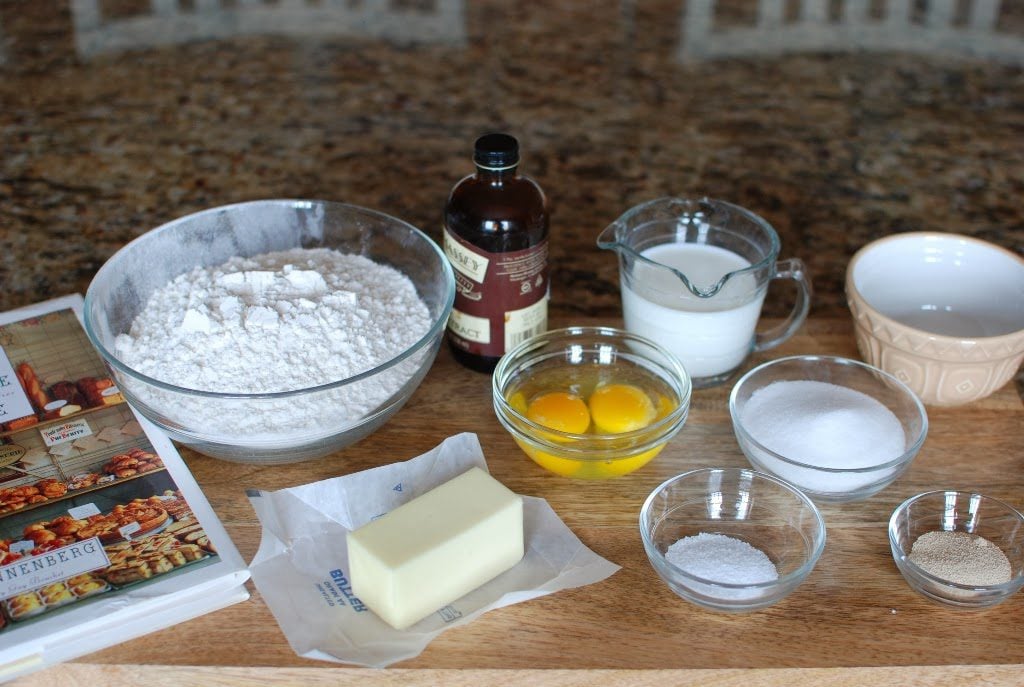
Ingredients
- 2 tablespoons lukewarm water 30 mL
- 2 teaspoons yeast 3/4 of an envelope
- 4 cups all-purpose flour 500 g
- 3/4 cup warm milk 175 mL
- 1 1/2 teaspoons salt
- 2 large eggs
- 1 teaspoons vanilla extract
- 1/2 cup unsalted butter, softened 1 stick/125 g
- 1/4 cup plus 3 tablespoons sugar 90 g
- 1 egg for brushing the dough
- softened butter for brushing hot bread
Instructions
-
Place the lukewarm water in a measuring cup, sprinkle with the yeast, and set aside for 5-10 minutes. In a small bowl, combine the butter and sugar, beating until smooth and pale yellow. Set aside. In a large mixing bowl, add flour and salt. With the mixer running add, milk mixture, yeast and eggs. Mix until dough comes together. Add butter/sugar mixture 2 tablespoons at a time. Mixing well after each addition. Continue to mix for 3-5 minutes or until the dough is smooth and elastic. form the dough into a ball and place in a buttered bowl. cover and allow to rise for 1 3/4 hours. Punch the dough down and reshape into a smooth ball. Return to bowl and cover with plastic wrap and refrigerate overnight.
-
The next day, remove the dough from the refrigerator and let stand in the bowl at room temperature for 1 hour. Then divide the dough into 4 equal portions about a 4-inch/10cm size ball. Place 2 balls in each of 2 buttered 8 x 4-inch/ 20 x 10cm loaf pan, 1 ball at each end. Cover and let rise to the rim of the pan. Beat remaining egg and lightly brush the tops of each loaf.
-
Preheat oven to 350 degrees F/175 degrees C. Bake for 30-35 minutes or until the loaves are golden brown. Remove the loaves from the pans and place on a cooling rack. Brush with softened butter. Allow to cool for 1 hour. Makes two loaves
I, too, had the little “lumPs” (abOut sesame seed size) show up in the dough, but they seem to have disappeared with the baking. I did the overnight rise in the fridge, and baked half the dough as a Brioche a TEte, with the other half as “buns” but in a loaf pan. I like your recipe because it doesnt include half a pound or more of butter, and half a dozen eggs! Very light and tasty! Thanks so much for all yOur work on this!
Awesome. Thank you so much! I’d love to et your Brioche a tete. One of my favorites. Thanks for taking the time to make such a positive comment.
The bread Tastes great, but I keep getting small lumps in my dough. I follow each step precisely and don’t have this issue with other yeast breads so I’m unsure how to correct this problem. Any suggestions?
Hmmm. Interesting. I haven’t had that problem. Try this: Add the warm milk into the mixing bowl along with the vanilla AND salt. Slowly add the flour to the milk mixture. Mix well after each addition just until the dough pulls together and makes a soft dough. It’s possible you won’t need all of the flour. Follow the directions for the rest of the recipe as it appears. My fingers are crossed, but I think this should help solve the problem.
Wow!
Great recipe!
I tried it YESTERDAY afternoon with some leftover yeast and baked it this morning and it came out great!
I wish I’d added a little more salt but that was my mistake.
It is really soft and really fluffy!
Thank you! I love brioche so much. You must be a fabulous baker!
Hi Janet! May I check with you, how long do we need to keep it in the fridge? OVERNight for how many hours?
It’s in the fridge now and I’m waiting…. excited!
Hi Nicol, 8 hours should be enough time to refrigerate. It can go longer up to 12-18 hours.
its a great and easy to follow recipe! my best friend and i are trying a handmade bake for the first time and are currently waiting for the bread to rise. we DECIDED to flavor it and added cocoa powder to the dough and will be garnishing it with mint in the morning and eating it with RASPBERRY jam. i hope it goes well, thank you so much!
Yum! 😋That just sounds delicious. Thank you for sharing such a great idea!
Thank you for this great recipe! I made this bread today. It is so rAre to find a DECENT recipe to work with. So rich and delicious like you said! Perfect!
Thank you so much. I love hearing success stories. You just made my day.
I do not have a mixer can I make and knead by hand following exact guidelines? Thanks
Absolutely. By hand works great.
WOW I made in the day today and cooked it tonight and my results were amazing. The only thing I did different is I used half/half because I didn't have milk in stock. I have decided to keep both loaves, and I plan on making french toast in the morning with the bread. Thank you for a very very excellent pain brioche.
Im trying this recipe now.. the hardest part until now is to accept that i will have to sleep and see if it works only tomorrow 🙁
I can NOT wait to make this bread! They sell a bread very much like this in Quebec (Canada). Years ago, when the villages in Quebec still had a baker, a butcher, a grocer etc. the bakery in back of my husband's family farm used to bake this bread – and we were able to buy it when it was still warm – HEAVEN!!
That would be my dream. Thank you for sharing this story. I would love to have lived in that village. Warm brioche? That would be heaven.
My daughter and I made this bread tonight. I hope it's really good. I had it one time before, I thought it was really good,and wanted more.
I made this yesterday. I made it into one loaf. It was gone in about 10 minutes with my 3 guys digging into it. They loved it. I've got two loaves in the oven as we speak. It is very much like my husband's grandmother's Easter bread. Easy recipe! I didn't put it in the refrigerator overnight. I used the proofer on my oven and proofed it 3 times. Worked great!
I love that you skipped a step of proofing in the fridge. Great idea. Thank you so much for sharing.
I wanna try this recipe…. i love bread so much….. thanks for the recice
Ótima receita, Tks.
Leopoldo
Brazil
Do you think this would be possible to make form by hand? or would it be sticky?
this will work by hand. Just mix with a wooden spoon until it is easy to handle then begin to knead by hand until smooth.
I let the bread rise until it reaches the brim of the pan. It could take about 1 hour maybe a bit longer.
How long do i let it rise when in the bread pans?
Yum! I will definitely be trying this out this week!
It's devine. Merci.
Dry active yeast will work great. Not a silly question. Good luck.
Sorry if this sounds like a silly question (this is my first time baking… anything). I only have dry active yeast, how can I substitute that for the yeast you're using in this recipe?
Thank you for this recipe. You're photos are beautiful! I am new at bread baking so I am excited (and a little nervous) to try this!
I have one quick question, do I have to put the dough in the fridge over night? I was hoping to make this to go with dinner tonight.
I'm sure you can bake it tonight. Knead it longer. The slow rise helps fo the gluten. Knead until the dough is very elastic cover and let rise. You could let it rise throughout the day. Shape, put in pan let rise at least 90 min before baking. Let me know how it turns out.
Thank you for your reply. I went ahead and let the dough sit in the fridge for around 6 hours and actually baked it last night. It turned out wonderful! Thank you for your amazing recipe. This is officially my go-to recipe for brioche!
I wish my food pictures looked JUST like yours 🙂 They're perfect!
Ha ha. I was having a good day. Besides families don't care so much about the look. Just as long as it's good. Thank you so much.
Hi. I've tried your crusty bread recipe with my gluten free flour blend and it works great. I notice this quote from your text: "Jacques Pepin stated that the finest brioche requires lots of kneading and several periods of long, slow rising at low temperatures, in order to develop the gluten and to absorb a large amount of butter." Does this mean Brioche cannot be made gluten free?
That is a very good question. I researched your question and found this site: http://ruhlman.com/2011/08/gluten-free-brioche-recipe/ I think it's totally worth a try.
I LOVE this!! Thank you for doing all of this research. I am definitely going to try this. Your pictures are beautiful and thank you for being so detailed in the instructions.
Thank you so much. I hope you love the bread. It's so rich and delicious…not on my running diet 🙂
Well, the main thing is that you read them before deleting! If you didn't, that's OK too! LOL!
Ha ha. Yes I read them and I clicked "delete" instead of "publish". Oh I have my days….
Your photos are just exquisite. I've made brioche before, but it's been a long time. I think I'll give this a try this week. Thank heavens for bread! 🙂
What a nice thing to say. Thank you so much. I struggle with my photography skills and it just makes my day to receive a compliment on my photos.
I'm sorry to all of you who made comments. I inadvertently deleted them. What was I thinking…seriously?