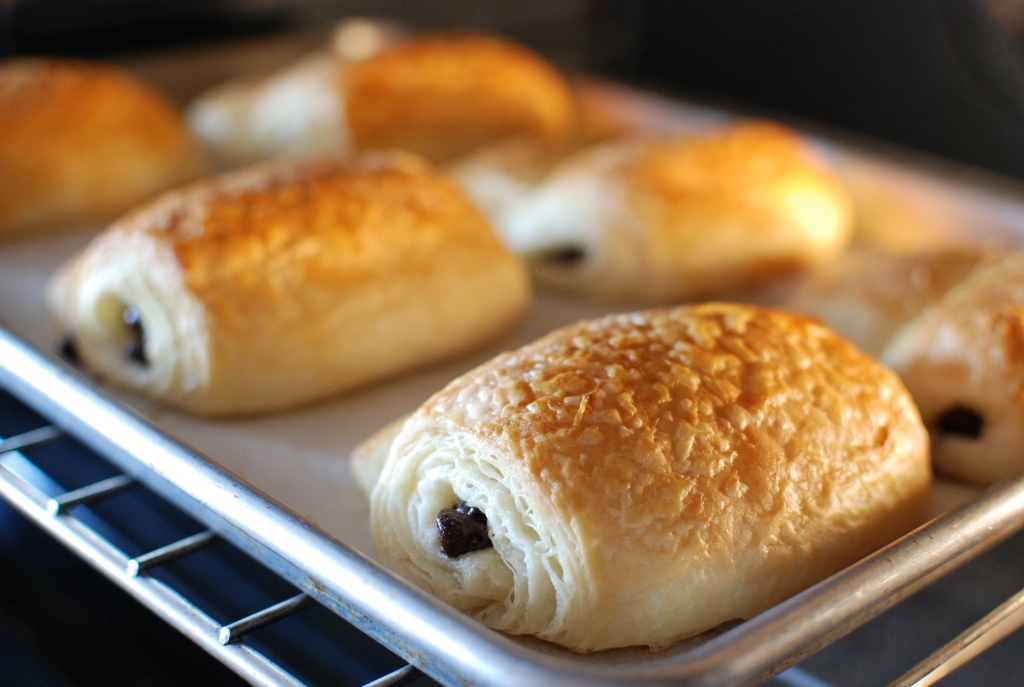
Just imagine opening your oven door to the sight of Pain au Chocolat baking in your oven.
The smell of buttery croissant dough wafting through your home.
Hot, crisp Pain au Chocolat baking in your oven…in just four days.
Four days????
Yes. I’m sorry to say it will take a few minutes of your time for four days.
Several years ago a good friend and I traveled to Essex, Vermont for a “whisk-a-way weekend” at the New England Culinary Institute (NECI). One of the best weekends of my life!
The classes were all about breads. They were all amazing hands on classes. The class I remember the most was taught by Gayle and Joe Ortiz (artisanal bread expert and author the The Village Baker and The Village Baker’s Wife). I purchased both of their cookbooks, where I found this recipe.
I’m taking your through this process step-by-step, day-by-day. Rolled in butter dough is not hard, just a little time consuming…4 days worth BUT only minutes a day.
For all you avid bakers…this one’s for you. Here we go.
Day 1:
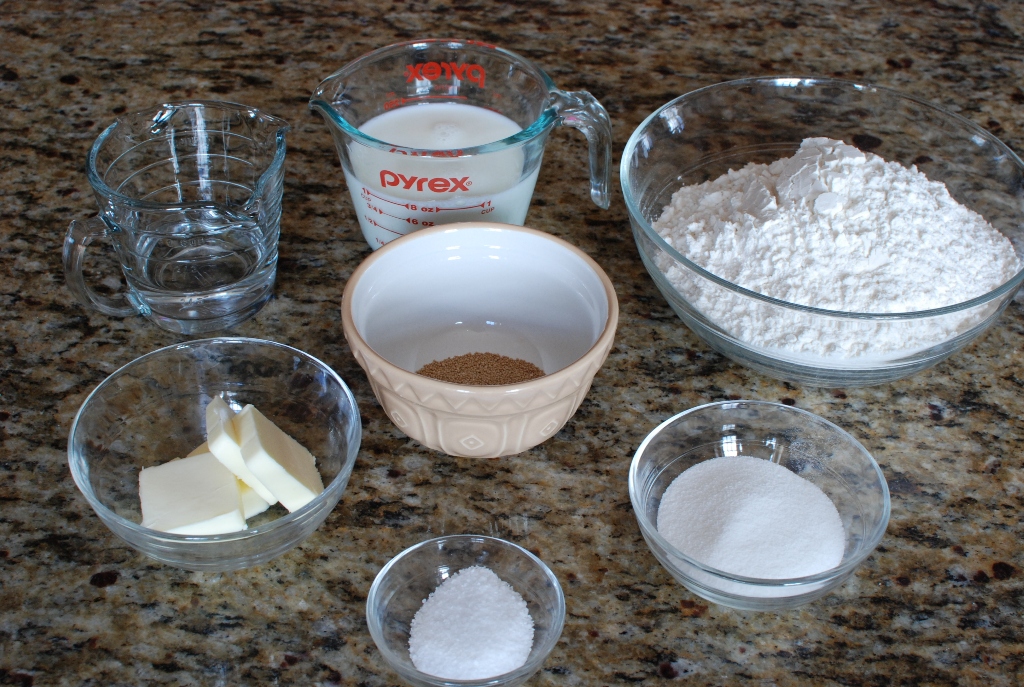
You will need:
1/4 cup warm water
1 tablespoon active dry yeast (NOT INSTANT)
4 cups unbleached all-purpose flour
1/4 cup sugar
1 tablespoon salt
1/4 cup butter, at room temperature
1 cup cold milk

This is active dry yeast. NOT instant or rapid rise. Just regular active dry yeast.

Add 1/4 cup warm water.
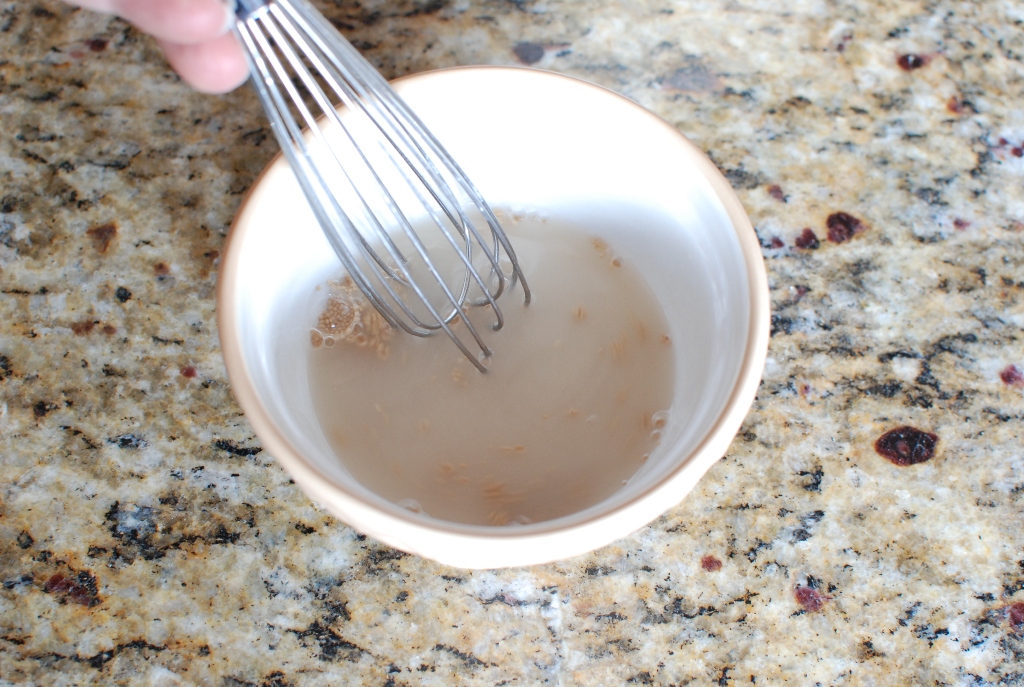
Stir until dissolved. Let stand for 10 minutes or until it begins to foam up.

Place the flour in a large mixing bowl and add the salt (yes that’s 1 TABLESPOON)

Add sugar

Whisk together.
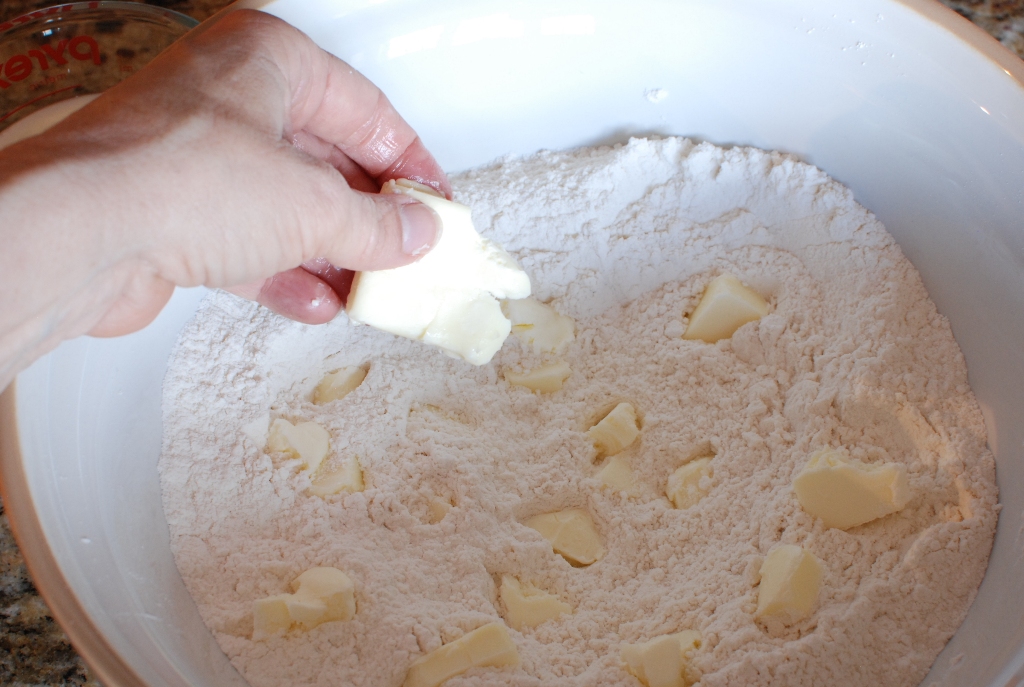
Pinch pieces of the softened butter into the flour mixture.

Rub the butter and flour together with your fingers and hands.

The butter will almost be fully dissolved.

See how the yeast is foamy on top? This is how your yeast should look.
This means it’s alive and active.
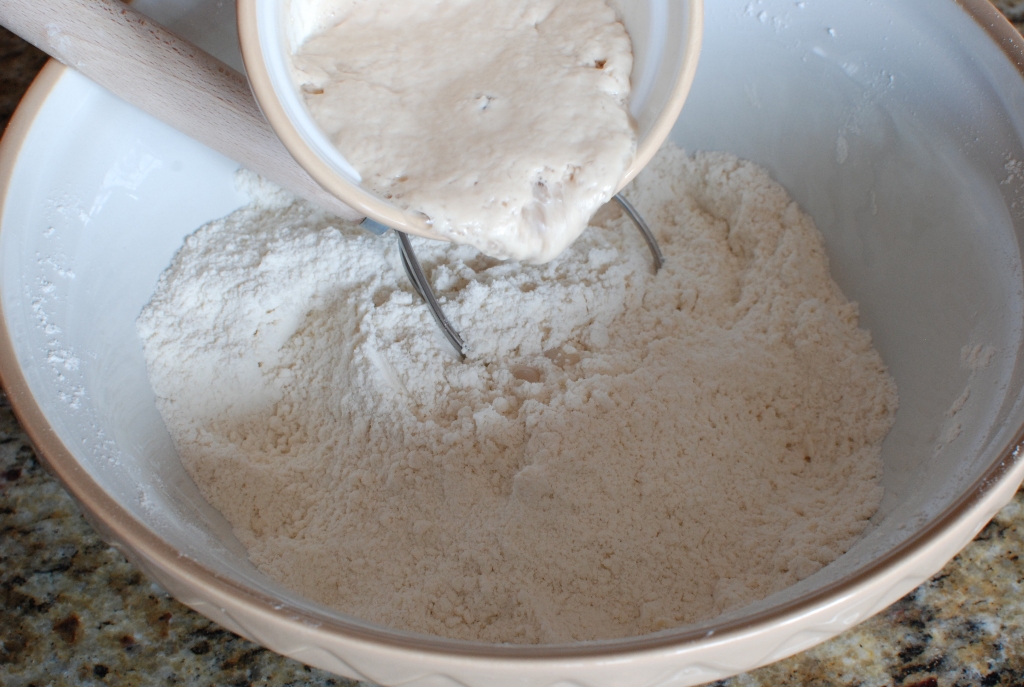
Pour the yeast into the flour, butter mixture.
Stir.

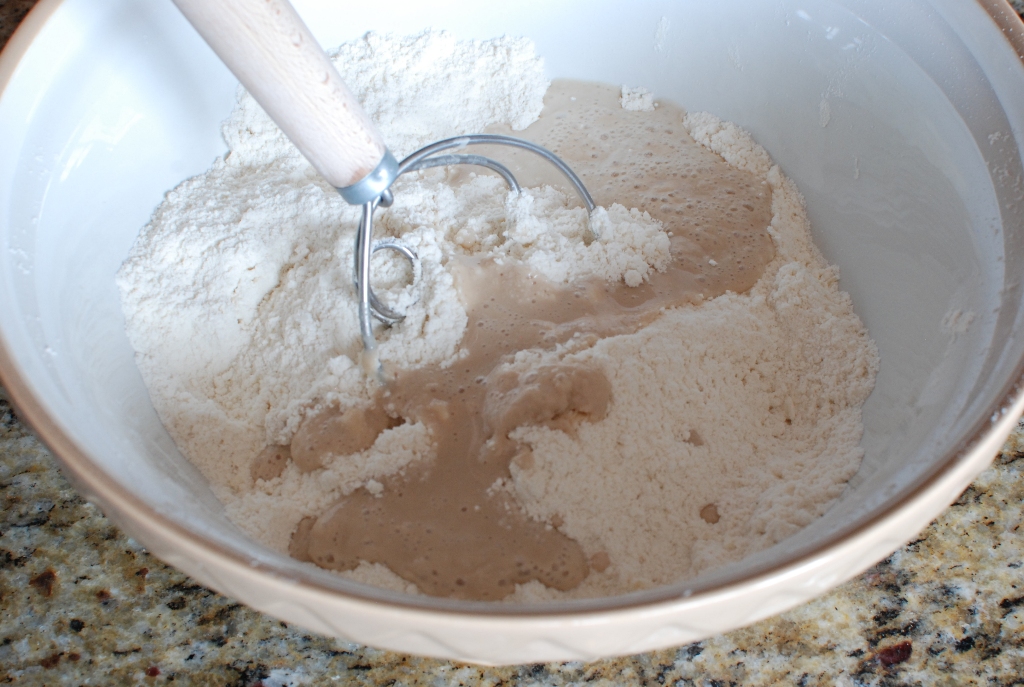
Add the cold milk.
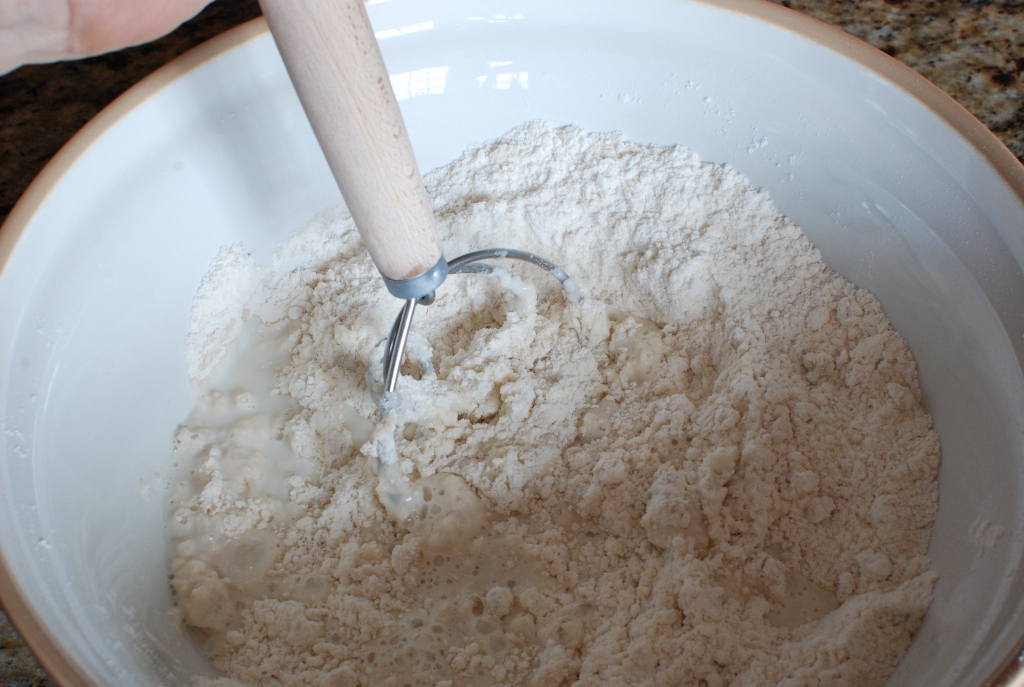
Mix until evenly combined and no dry spots appear.

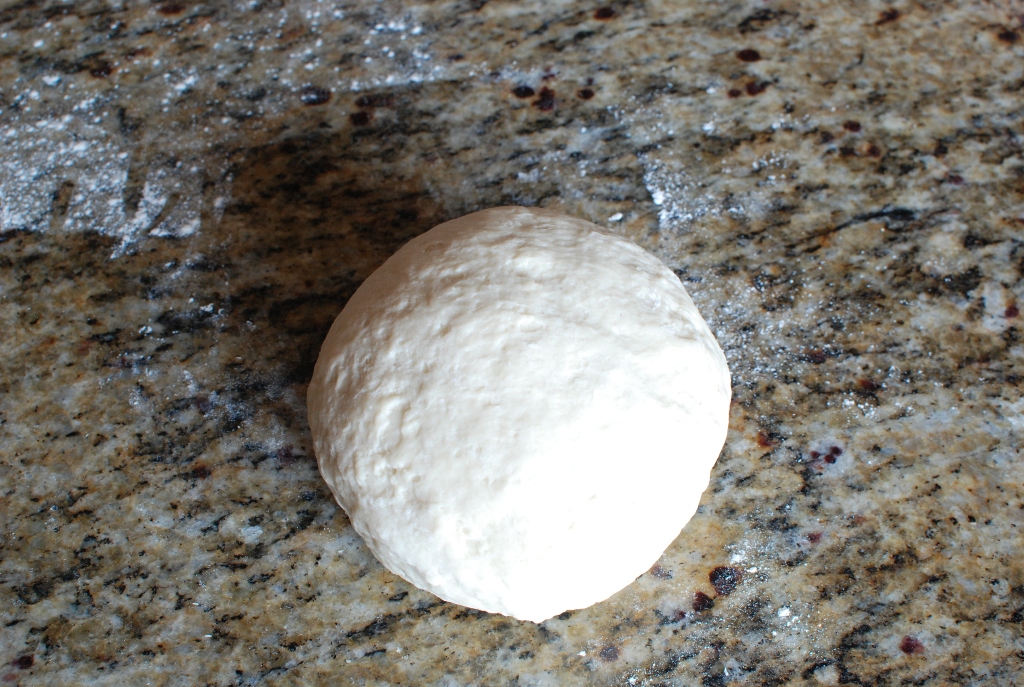
The dough will begin to form a ball.

Place the dough on a lightly floured surface.
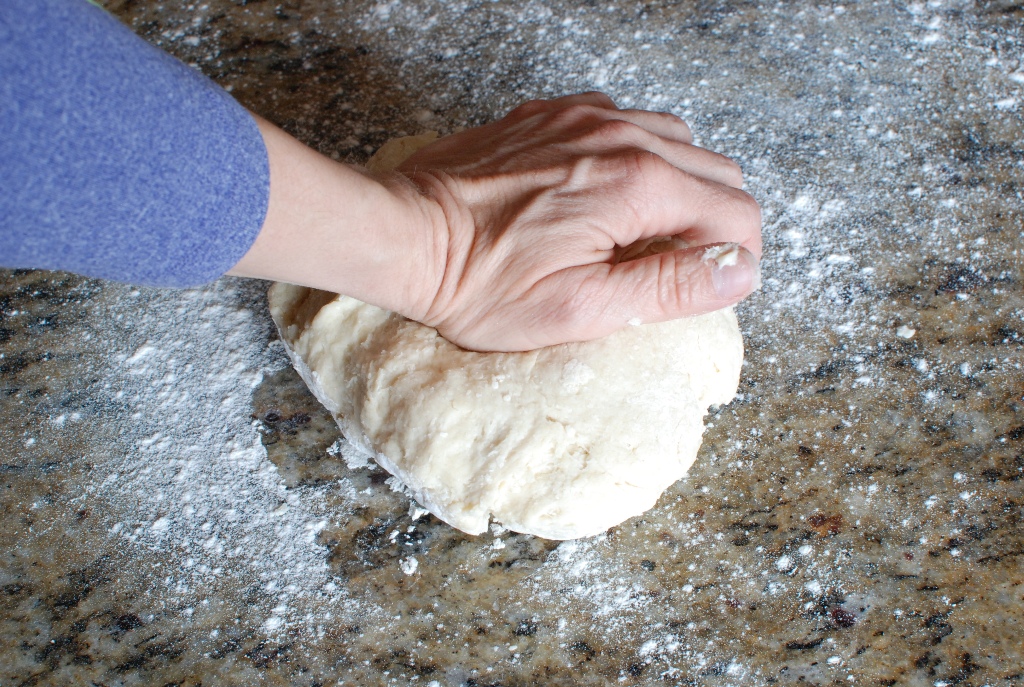
Knead for just one minute.
Do not over mix or knead or the mixture will become too elastic to roll out. Trust me you’ll regret over mixing on day 2.

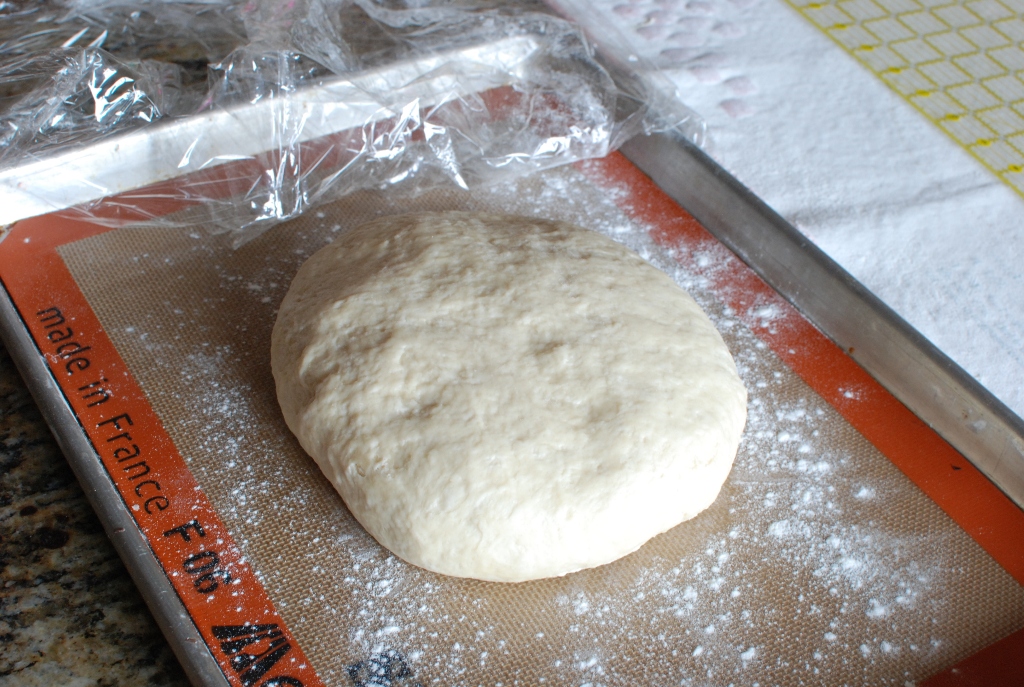
Place the dough on a lightly floured baking sheet. I like to pat the dough into an oval shape and flatten in down.

Cover with plastic wrap and place in the refrigerator overnight.
THAT’S IT. You have just completed day one. That probably took about 15 minutes.
Day 2:
This day has the most steps and will take up the most time.

Before you remove the dough from the refrigerator, you will need 3 cubes (3/4 pound or 1 1/2 cups) UNSALTED butter. DO NOT use salted butter. You just put 1 tablespoon of salt in the dough…get it?
The object is to keep everything as cold as possible.

You need to soften the butter just a bit to make it easier to roll into the dough. You DON’T want the butter room temperature. Take a rolling pin and start to pound the butter. Pound the butter on all sides until it just begins to soften. If the butter softens too much, return it to the refrigerator.
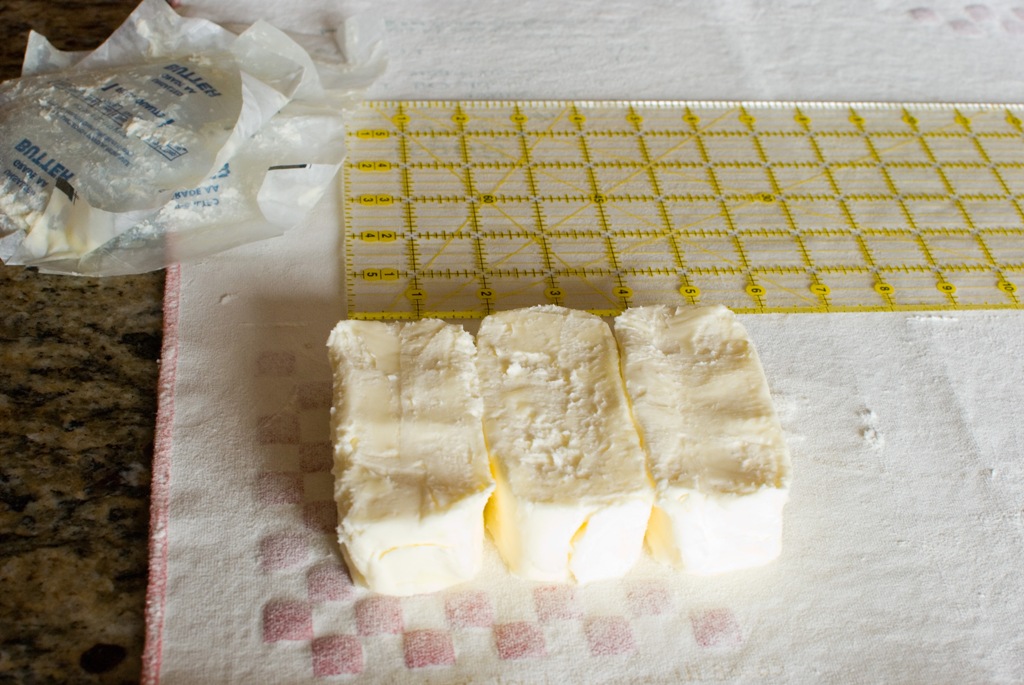
Once the butter has softened a bit, unwrap the cubes and place them together on a lightly floured surface. Your goal is to create a flat block of butter that measured 5 x 5 x 3/4-inch. Or as close to that at possible without the butter becoming too soft.

I just take my rolling pin and roll, pound, and flatten.

You might have to tip the butter on it’s sides to help flatten.

My butter is just a bit rectangular shape, but I don’t want to over work it. It’s close enough and will work.
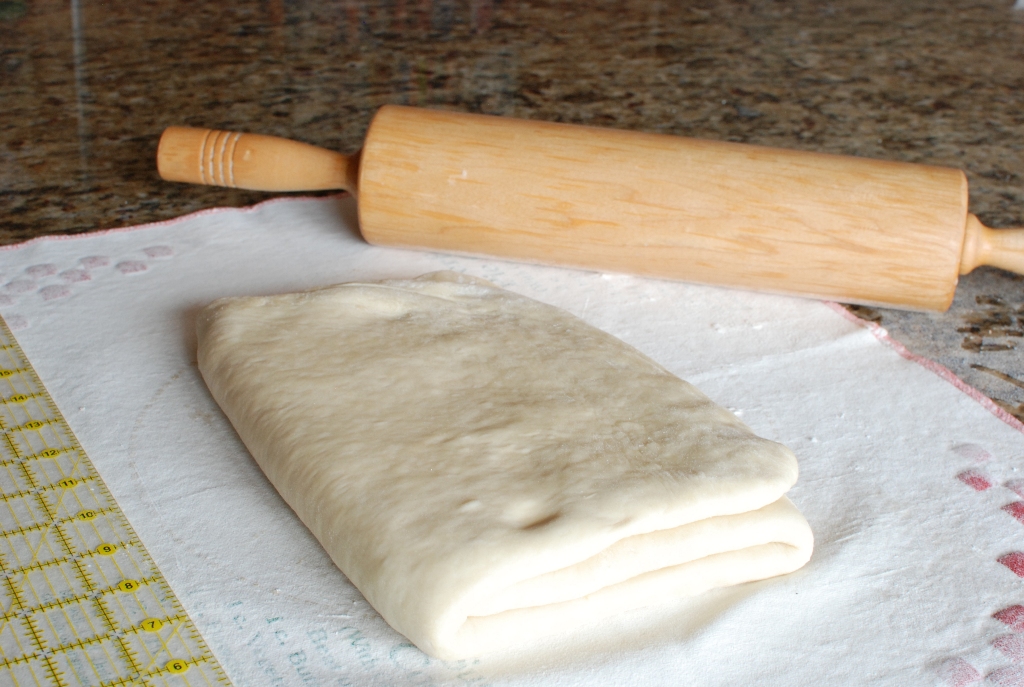
Now you can remove the dough from the refrigerator that you made on day one.

Place the dough on a lightly floured surface.
You will need a good, sturdy rolling pin. It’s going to get a good workout…so are you!
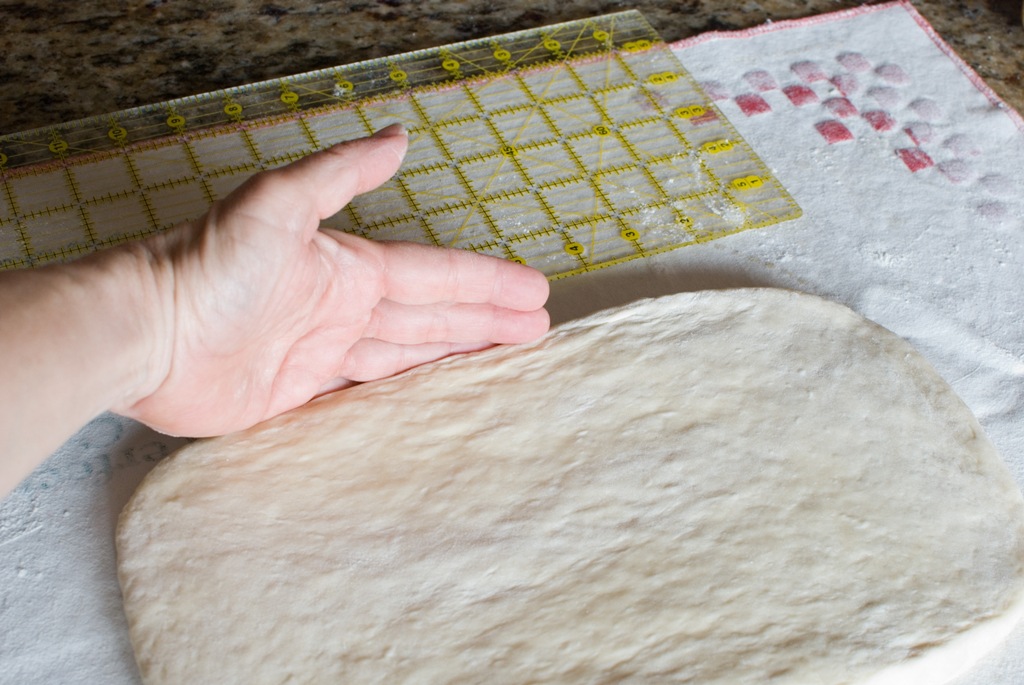
Roll the dough into a rectangle that is 12 x 6-inches.
I take a push the sides of the dough with my hands to create straight sides.

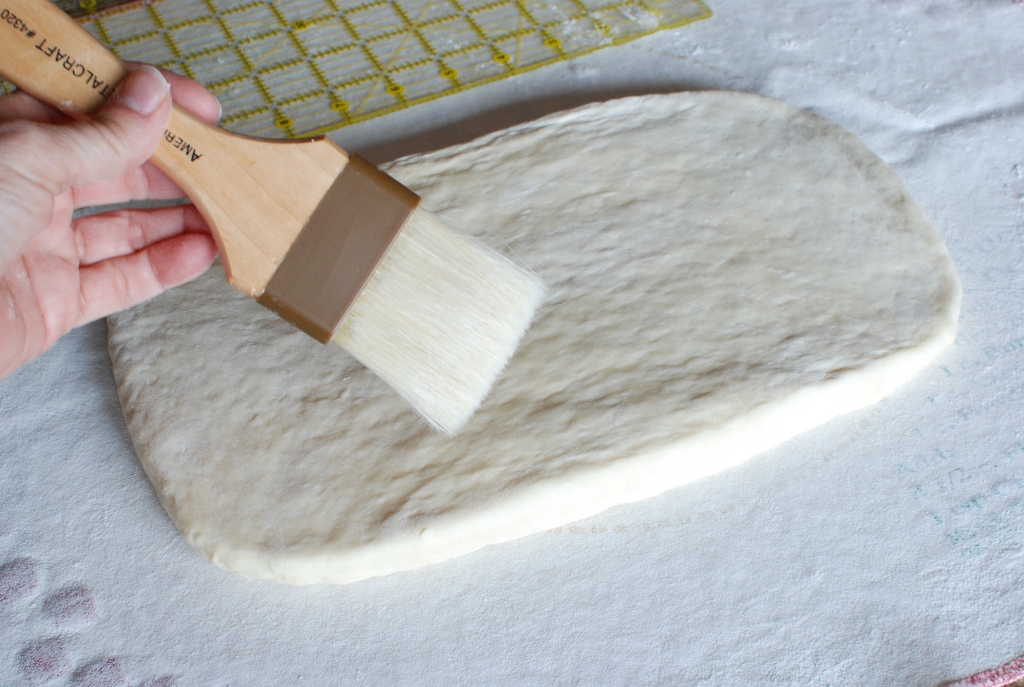
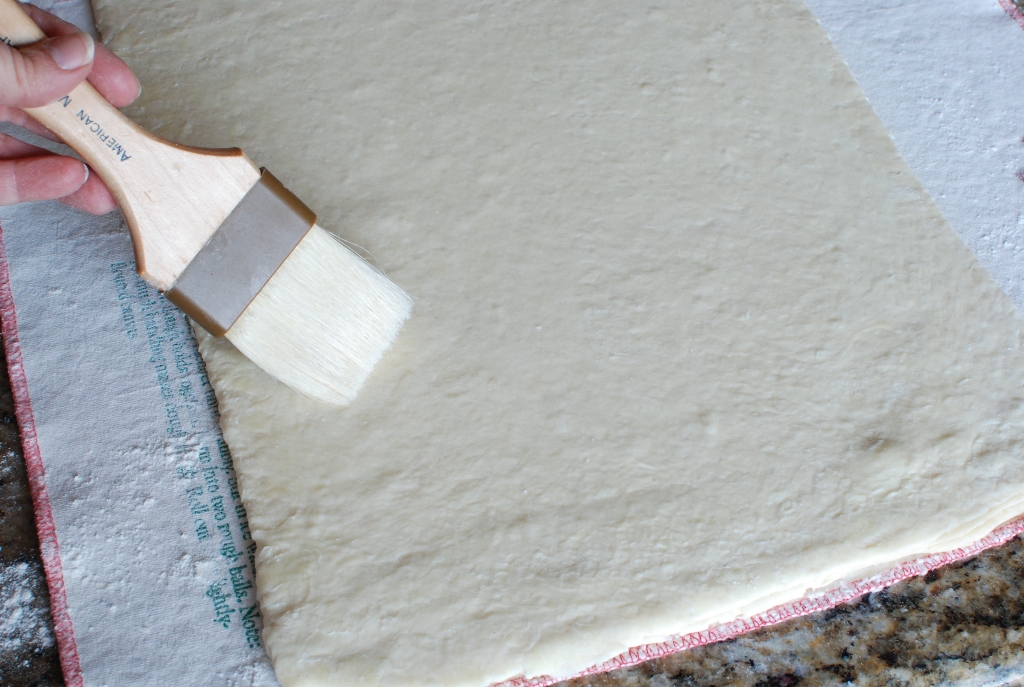
I have a pastry brush that I keep for brushing flour off of my dough. I never get it wet or use it for anything other than brushing flour off of dough. If any family members use it for anything other than that, I will beat them with my rolling pin! It’s best to just hide it somewhere safe.

Place the butter on the right side of the dough.

Lift and fold the left side up over the butter.


Pinch the edges together.
Throughout this process keep the folded side to your left. You’re asking why? Because that’s what Gayle said to do in her book. So I do it! It helps.
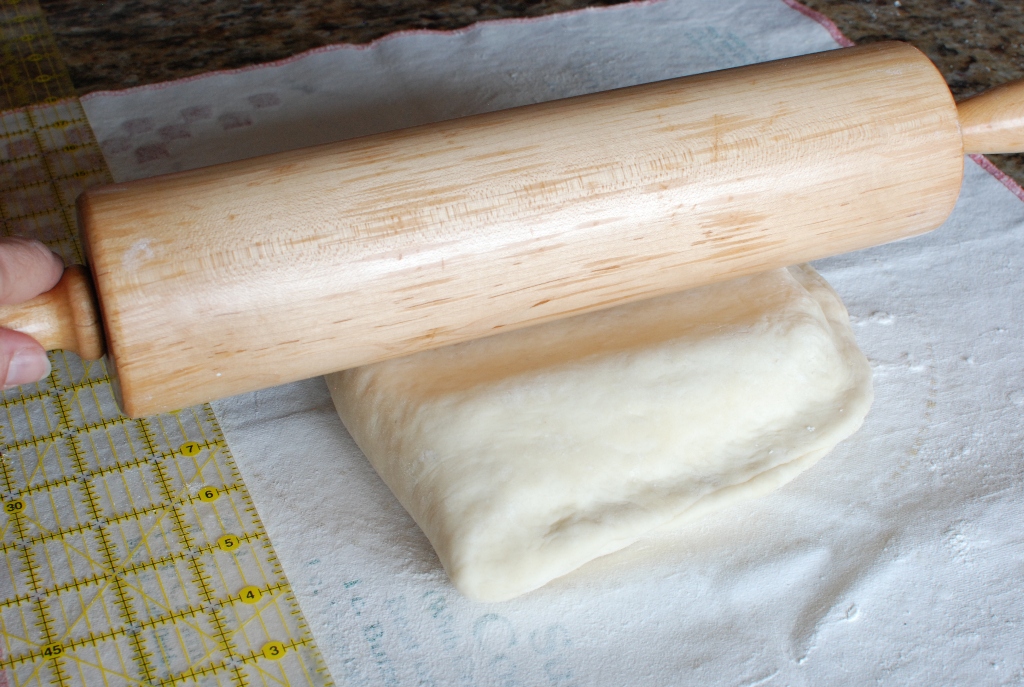
GENTLY very gently begin to roll the dough. You are going to roll it into a rectangle that is 10 x 22-inches.
You goal is this: NOT to rip the dough. You NEVER EVER want to see any of the butter coming through the dough. You are going to ever so gently mold and roll the rectangle until it becomes 10 x 22-inches.


I did it!
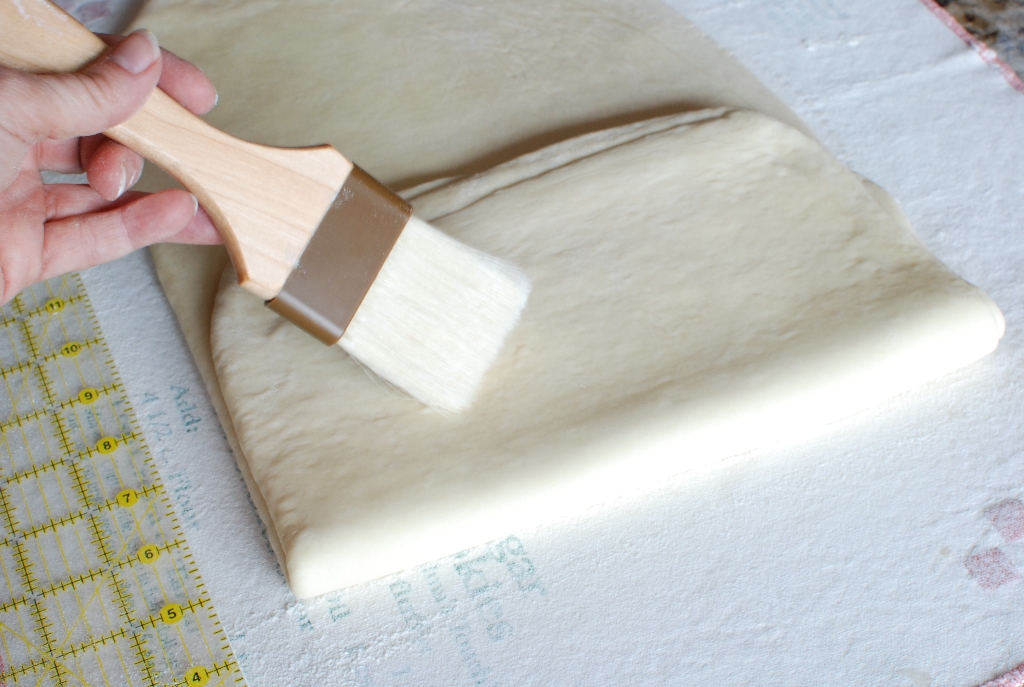
Brush off any remains of flour.

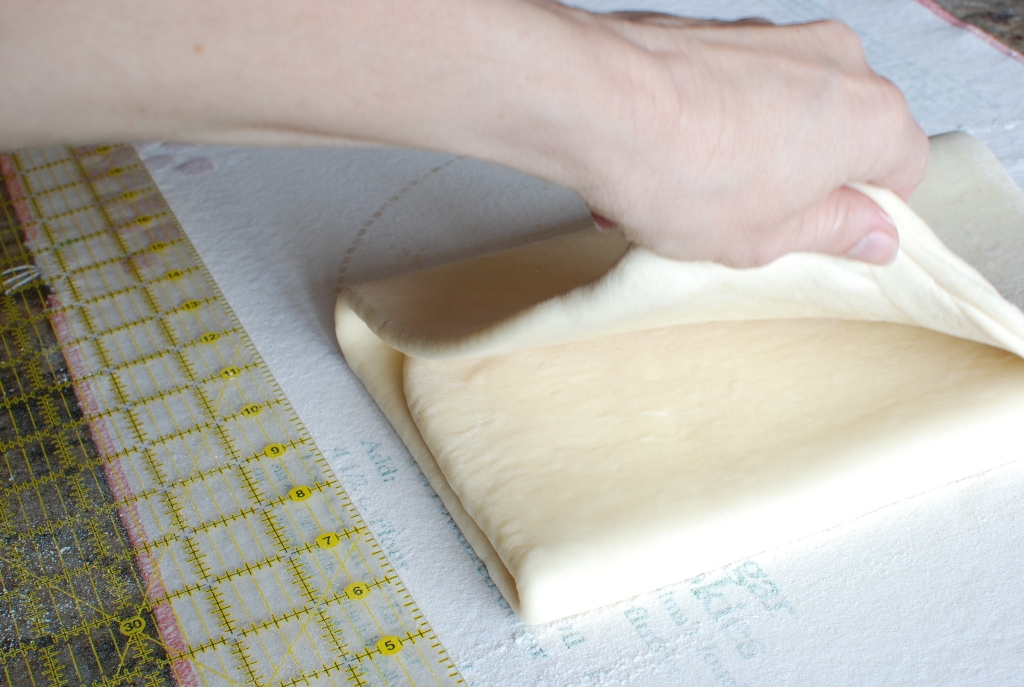
Fold the bottom third up to the center.

Brush off flour.

Fold the top third down over the lower third of dough. This is called the beurrage.

Brush off flour.

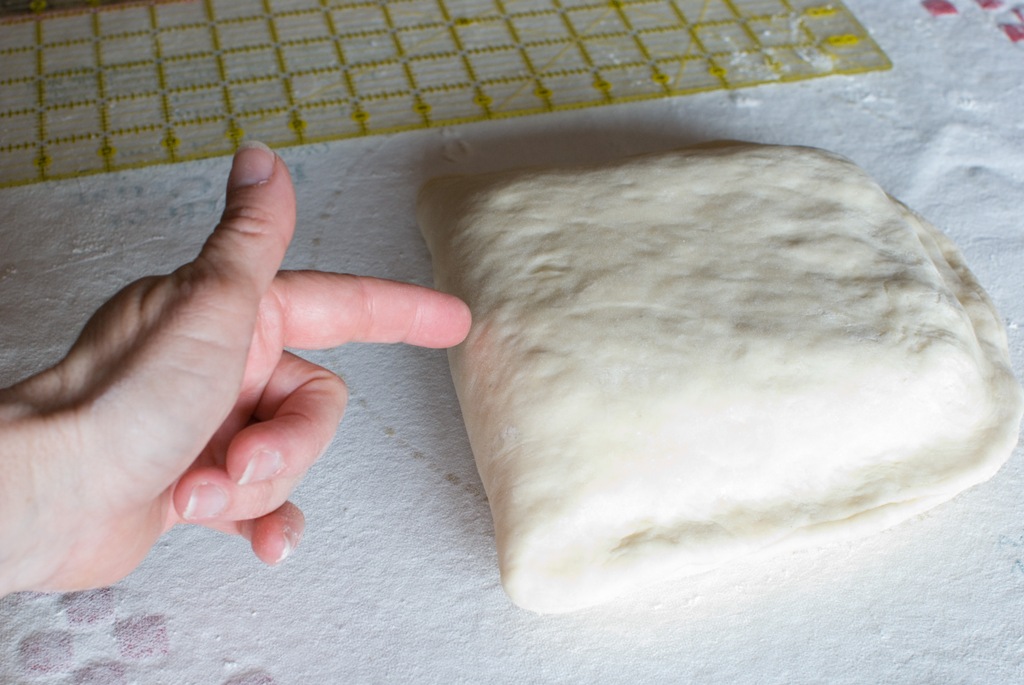
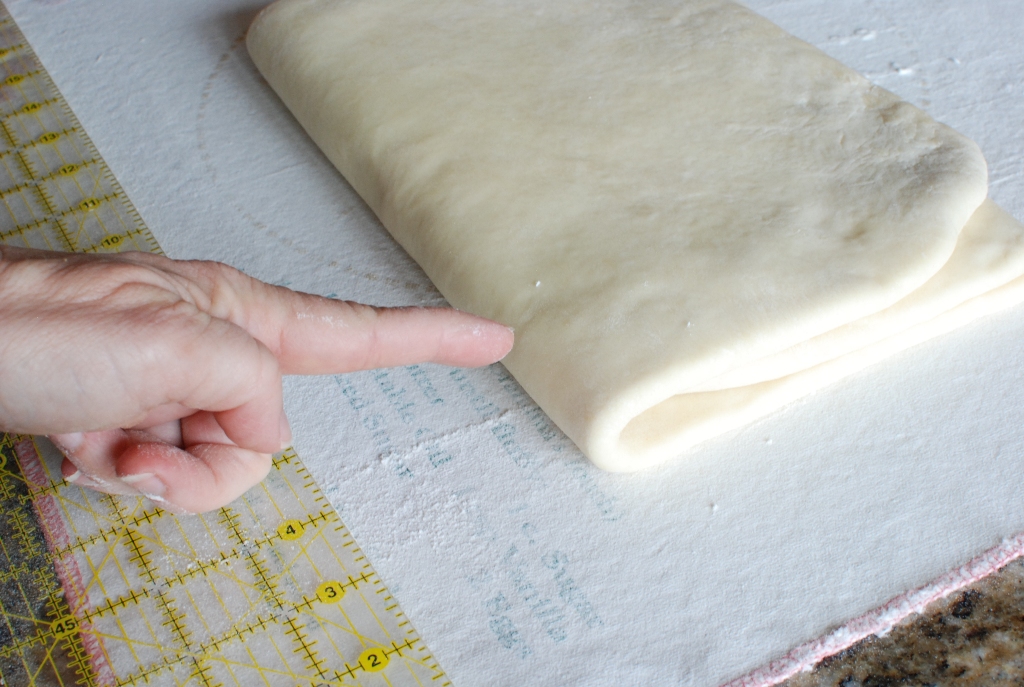
Return the dough to the lightly floured baking sheet.
Notice that the fold is to my left.
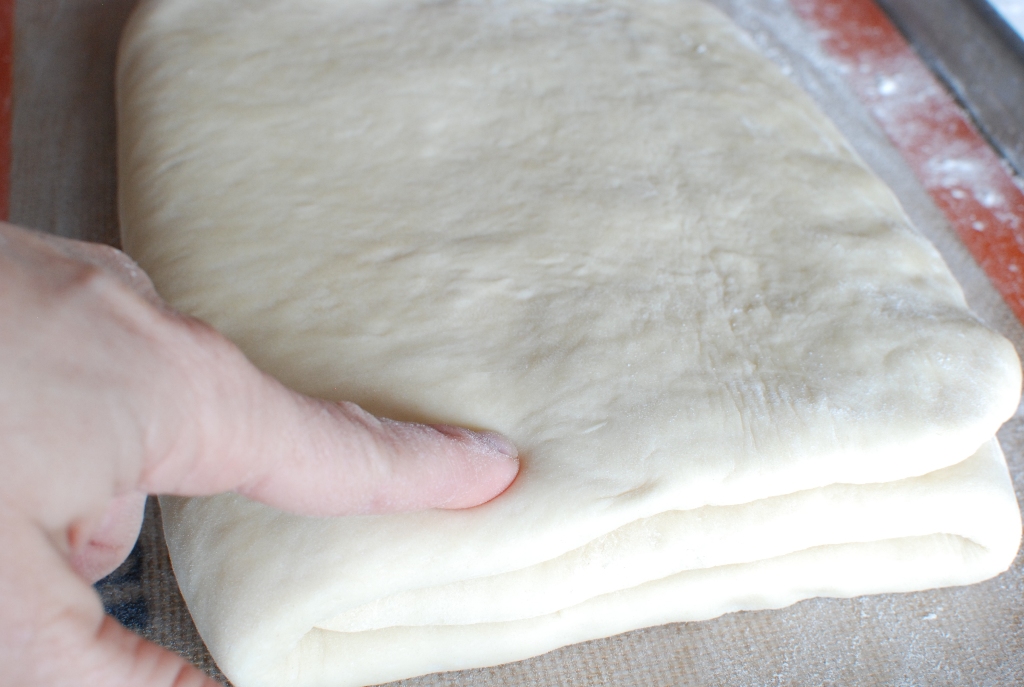
Take your finger and make an indentation in the dough. This signifies that you have just completed one “turn” of rolling in the butter.

This, also, helps if you are menopausal and forget EVERYTHING these days.
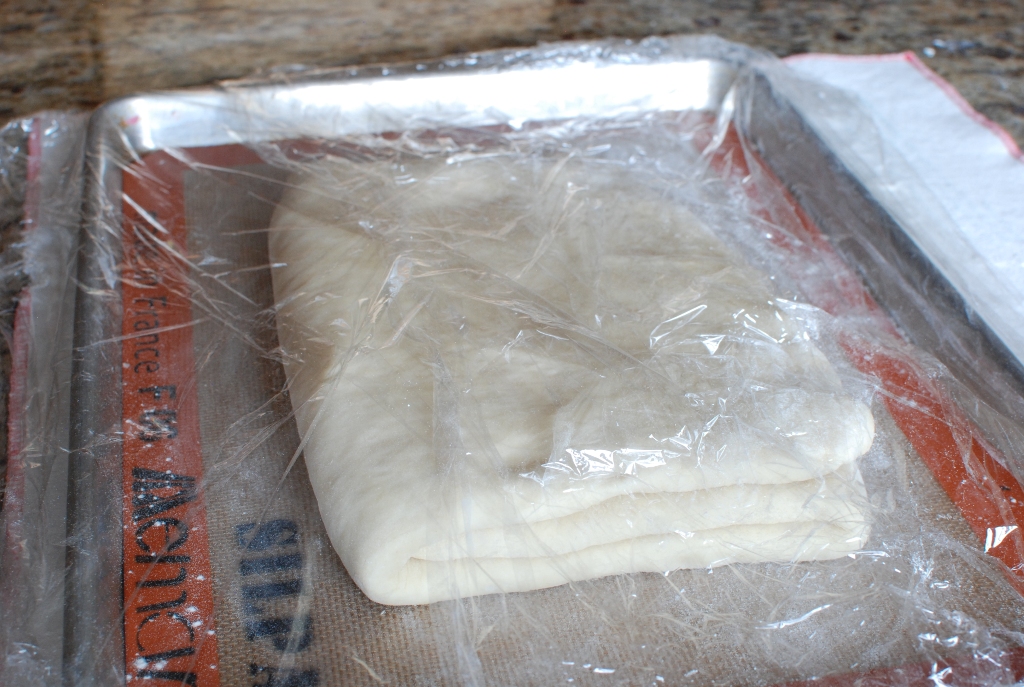
Cover with plastic wrap and return to the refrigerator for 45 minutes.

Set a timer for 45 minutes. Just plan on staying home for a few hour until you have completed three turns of rolling the dough. #1 – check!
The timer just went off. Your dough has been in the refrigerator for 45 minutes. Remove the dough from the refrigerator and place it on the floured surface. Repeat what you just did.

Roll the dough into a 10 x 22-inch rectangle.
Brush off the flour.

Fold up lower third of dough.

Brush off flour.
Fold over upper third of dough.

Brush off flour.
turn the rectangle so the fold is on the left.
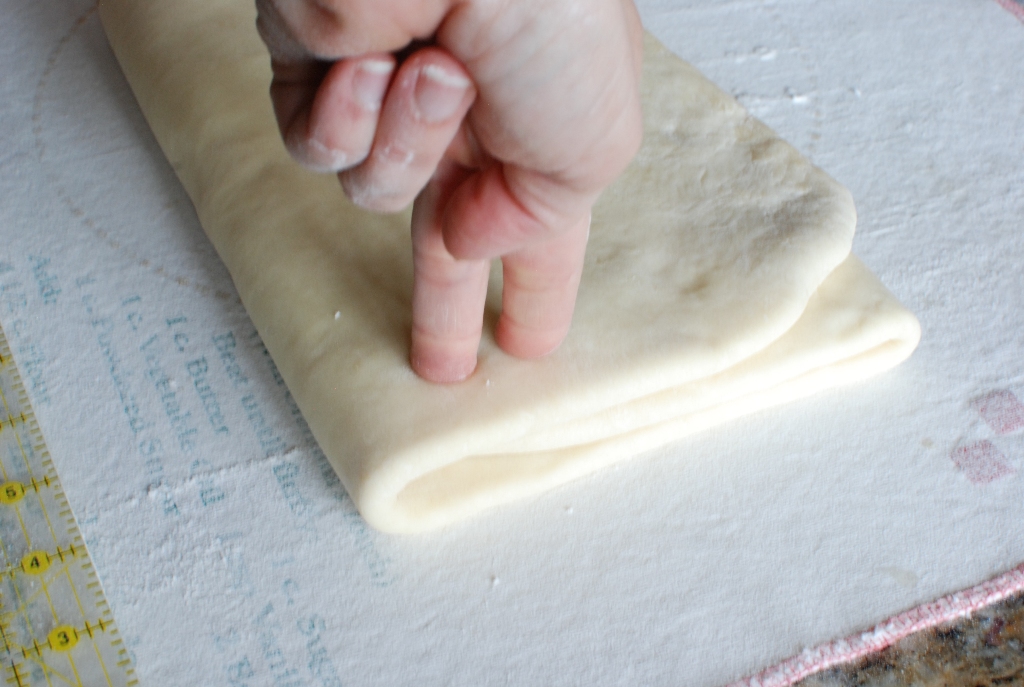
Make two finger prints in the dough. Signifying you have complete 2 turns of rolling the dough.


Cover with plastic wrap and return to the refrigerator for another 45 minutes.

After 45 minutes, remove the dough from the refrigerator and repeat the process.

Roll dough into a 10 x 22-inch rectangle. Remember we are still being VERY gentle. Do not force or rip the dough. Gently, very, very gently roll the dough.


Fold on the left…ya you have the routine down now.
Return to the baking sheet, cover with plastic wrap and return to the refrigerator overnight.
That completes day 2. Not too bad?
Day 3:
The creation of the Pain au Chocolat

You will need:
1 egg, beaten
2 tablespoons of milk
semi-sweet chocolate chips
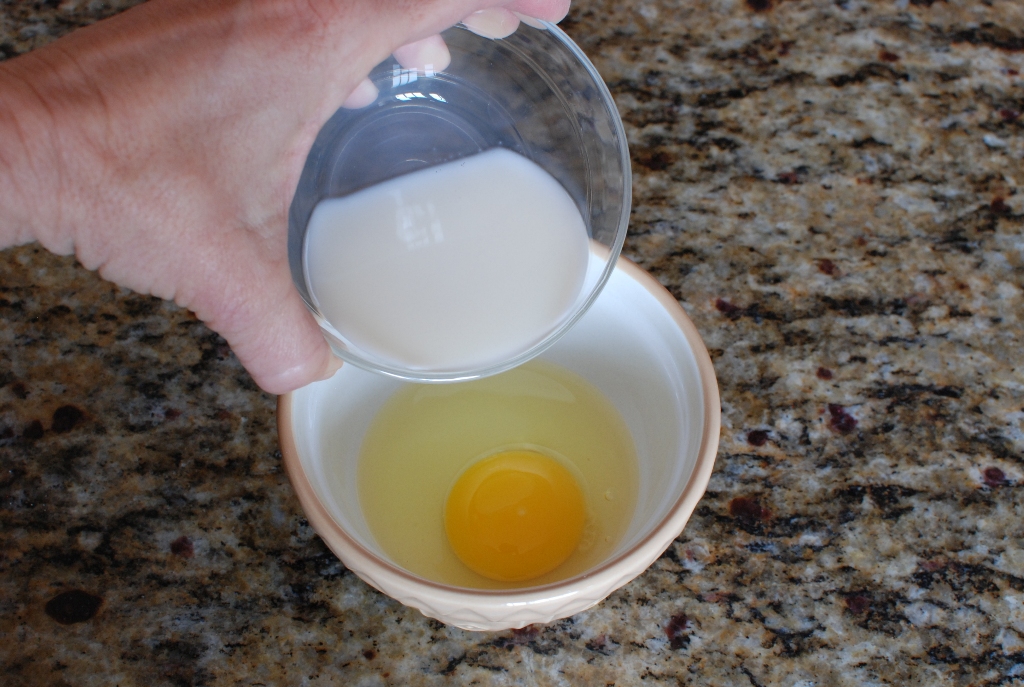
Add the milk to the egg.

Mix together with a fork.
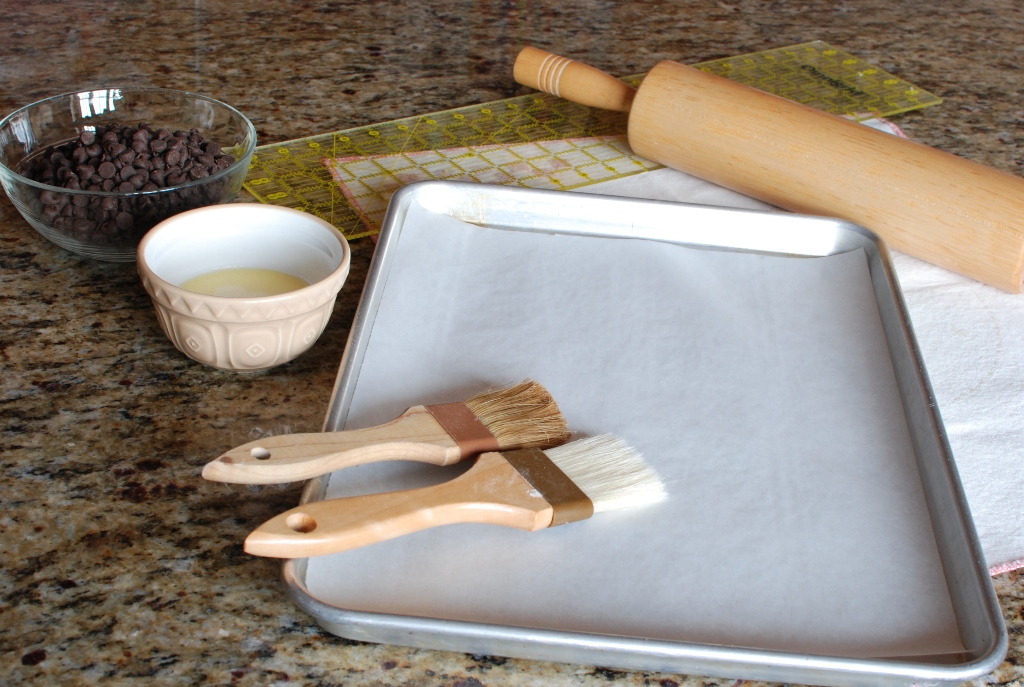
Pull everything out…the rolling pin, ruler, pastry brushes, 2 baking sheets lined with parchment or lightly greased. Let’s begin.

Remove the dough from the refrigerator.

Place on a lightly floured surface.
Ever so gently begin to roll the cold dough. Roll the dough into a 28 x 12-inch rectangle. This will take some time. Don’t rush it. You still do not want to press or rip the dough. Keep that butter well hidden. Just keep rolling, and rolling and rolling….
Yes. You will feel this tomorrow in your biceps and shoulders. It’s a great upper body workout.
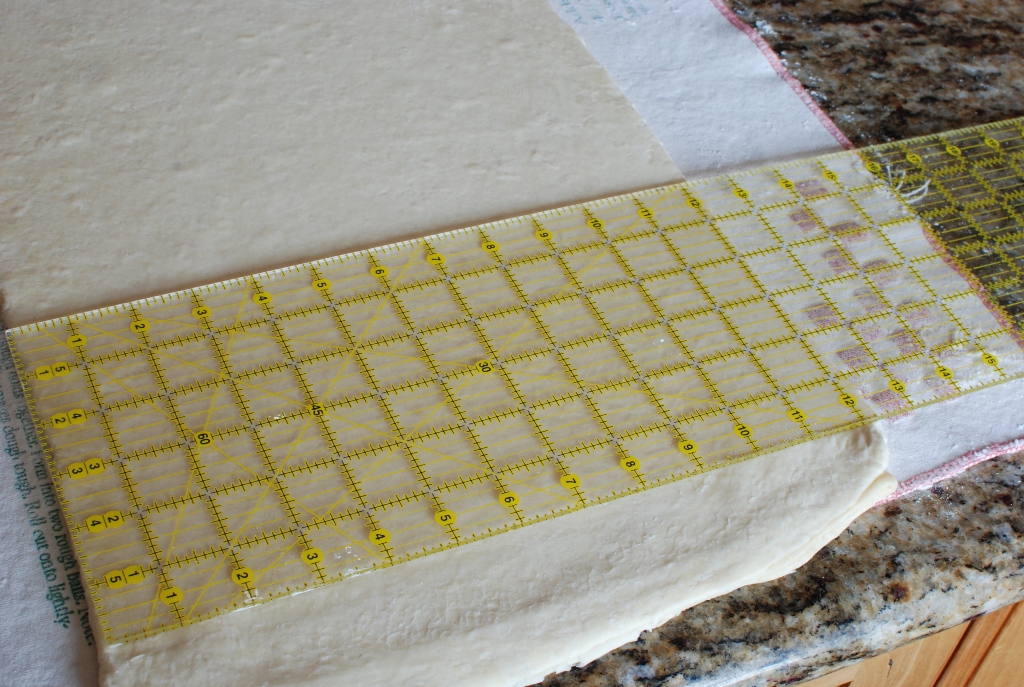
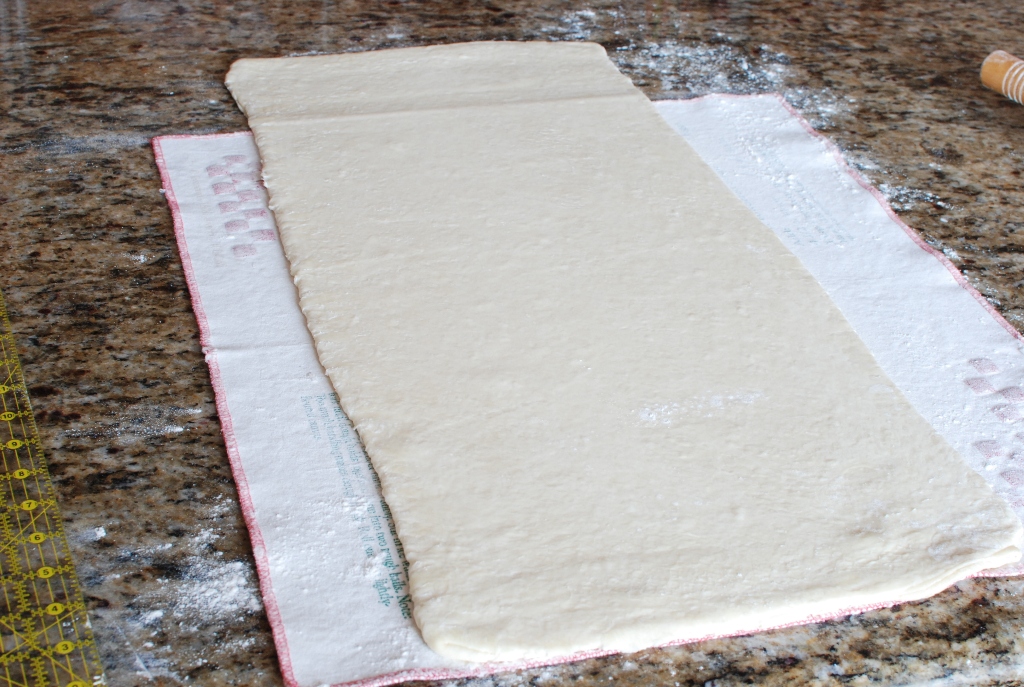
I did it. Well…it’s close enough…not exact, but close. As you roll the butter will begin to soften
that’s why I decided the size was close enough because the butter was starting to soften. We want
to keep the butter cold and firm.
ONCE again brush off the flour.

Cut three strips that are 4-inches wide.
I’m using a pizza cutter. You can use a knife.

Whoops…that’s ok. Just a little swerve there…no big deal.

Now cut each long strip into 7-inch long piece.

You will ONLY have twelve pieces of dough. Yes all of this work for just a dozen heavenly pain au chocolat.

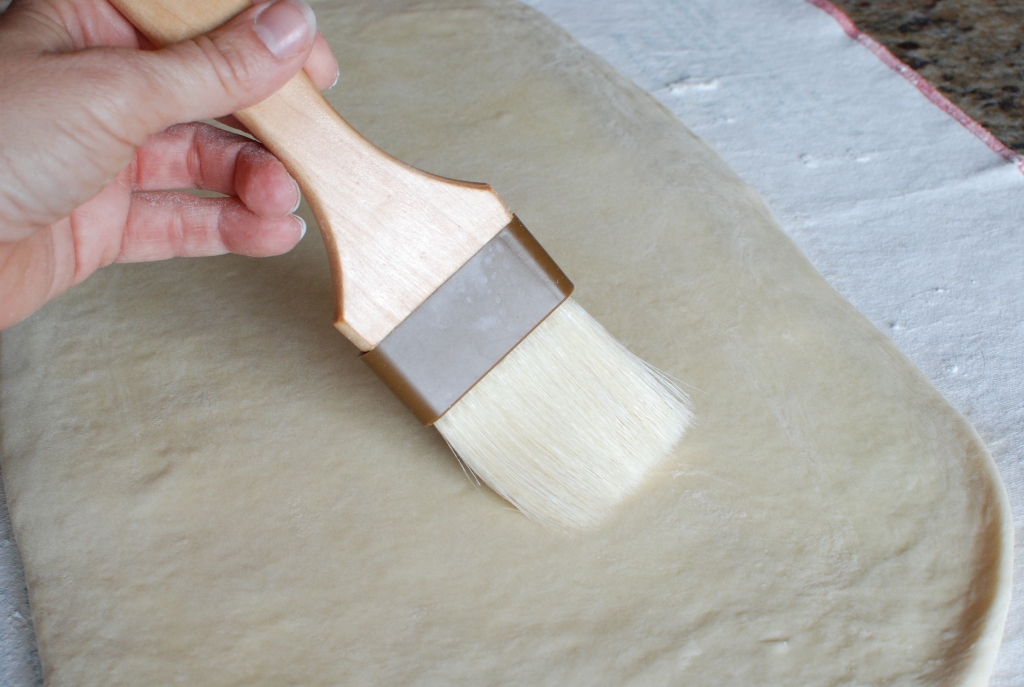
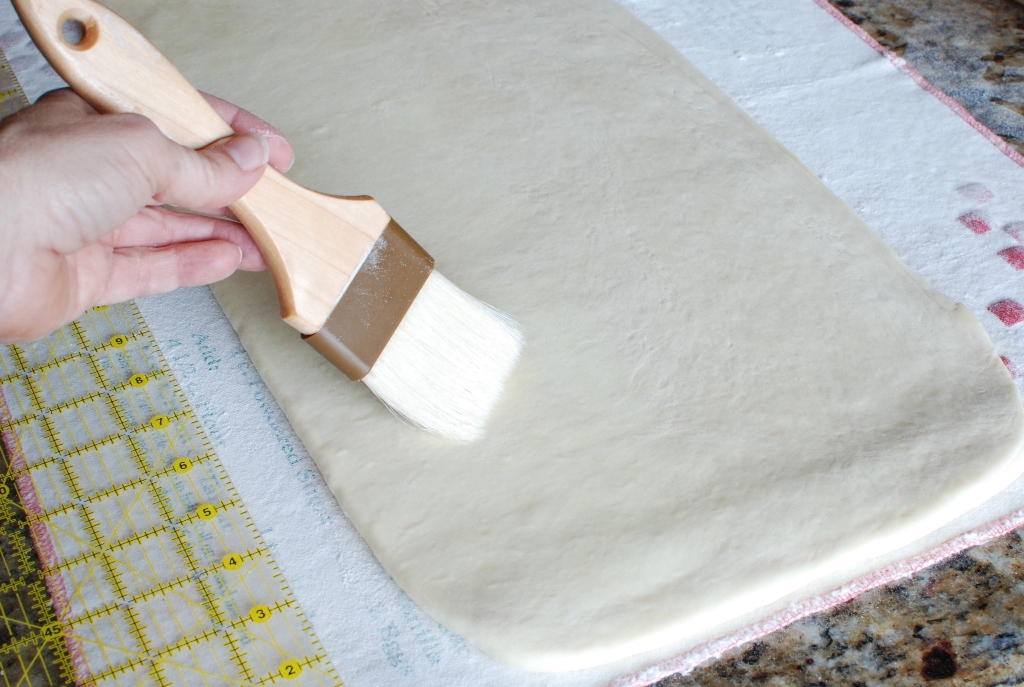
Brush each piece with the egg wash.
SAVE THE REMAINING EGG WASH. YOU WILL NEED IT TOMORROW. COVER AND REFRIGERATE WITH THE ROLLS.

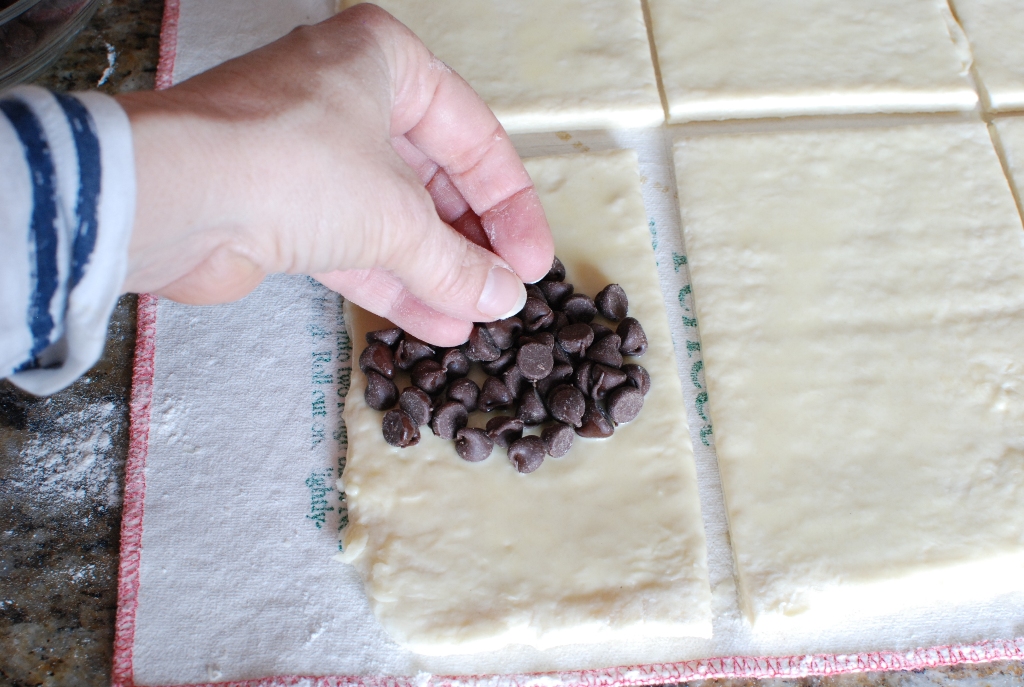
Fill only the center third of the dough with chocolate chips. About 2 tablespoons.
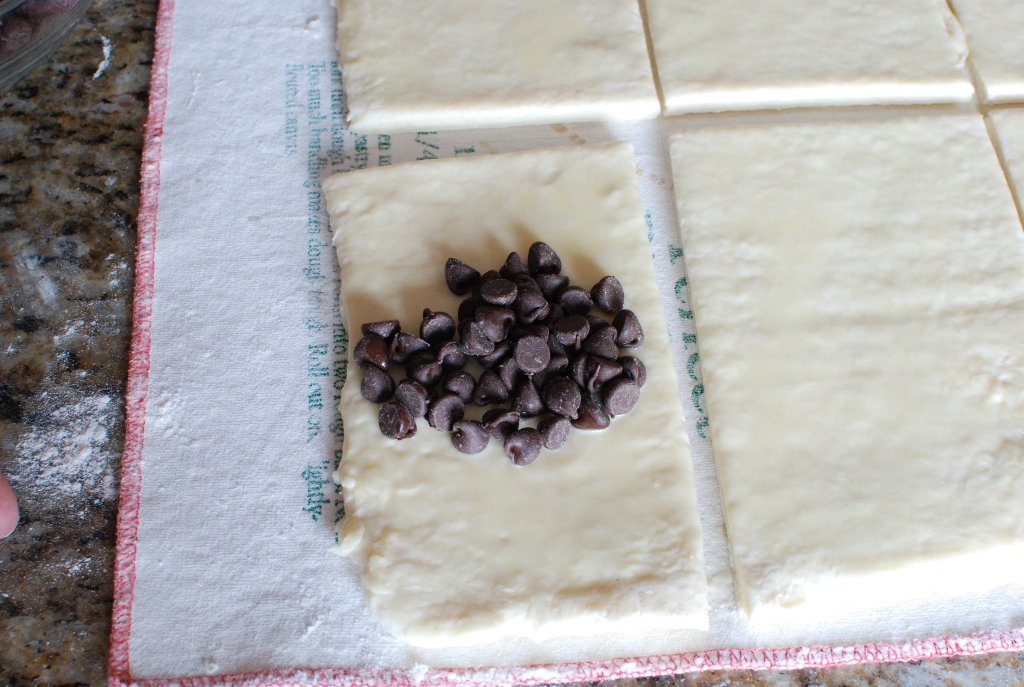

Fold down the top third over the chocolate chips.

Press down on the dough.

Fold the lower third of the dough up over the top third.

Press again.

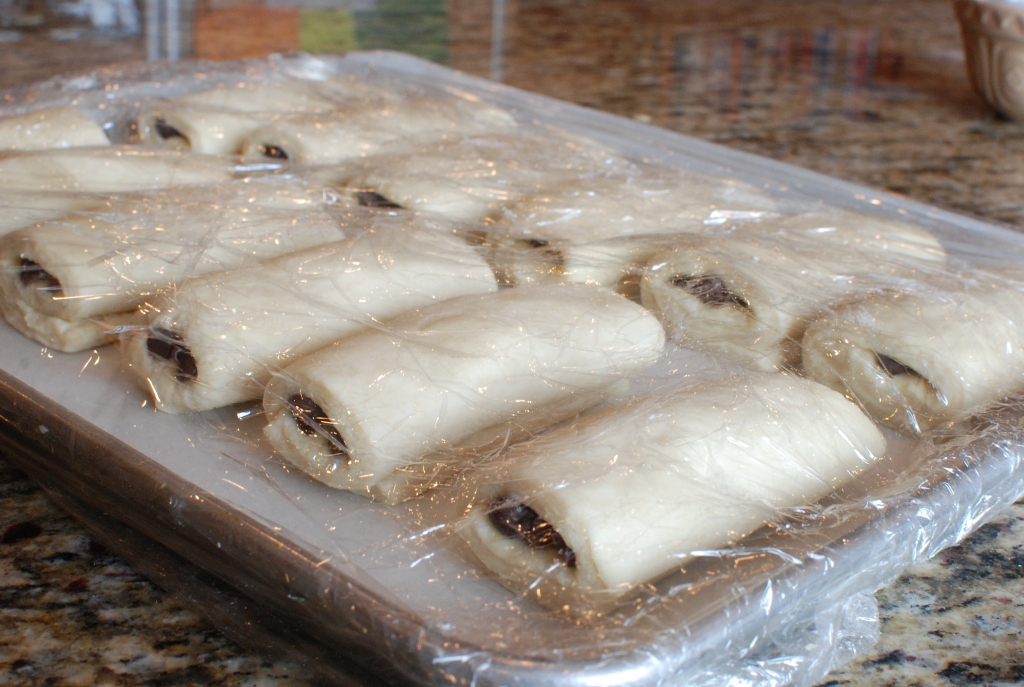
Place on a baking sheet. Repeat the process until all of the pieces of dough have been filled with chocolate chips and folded.

Brush of any excess flour. Cover with plastic wrap and return to the refrigerator over night.
DAY 4:
Baking Day!!!!
Remove the pain au chocolat from the refrigerator.

I hope you saved the extra egg wash. You are going to need it now.

Uncover the dough.
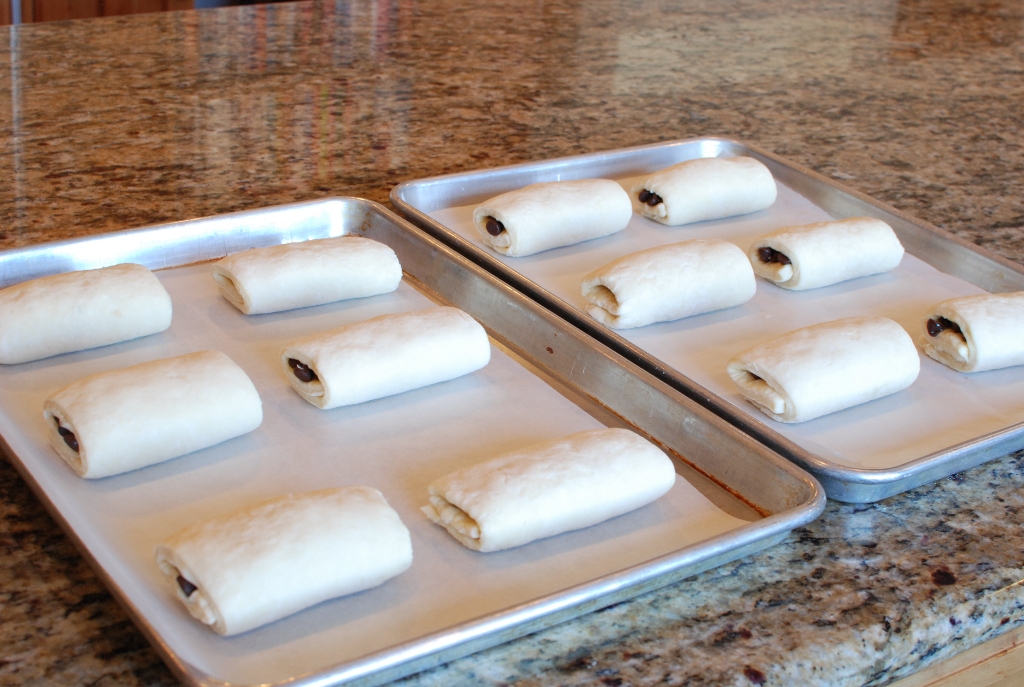
Place only 6 rolls to a baking sheet.

Brush the tops and sides with egg wash.
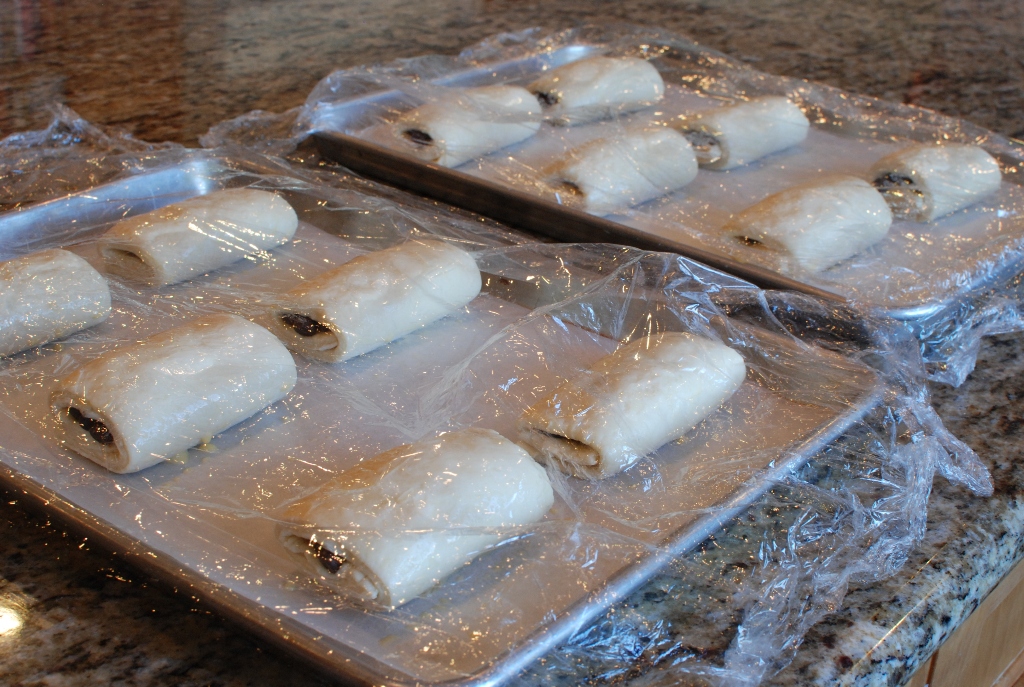
Lightly spray the plastic wrap with a non-stick spray such as PAM. Lightly cover the dough and allow them to rise for 3-5 hours. The time depends on how warm your house is.

Ever so gently uncover the dough.

I like to press the dough with my finger. If it feels like a marshmallow, that means it’s time to bake.
Place the pain au chocolat in a preheated 375 degree oven and bake…

Bake for about 20 minutes or until golden brown or until you just can’t stand it anymore because your mouth is watering from the smell of buttery bread baking.

Hot homemade Pain au Chocolat. Who needs Paris??? ME!!!!
Pain au Chocolat
Croissant dough:
1/4 cup warm water
1 tablespoon active dry yeast (Not instant or rapid rise)
4 cups unbleached all-purpose flour
1/4 cup sugar
1 tablespoon salt
1/4 cup butter, at room temperature
1 cup cold milk
1 1/2 cups cold unsalted butter
egg glaze:
1 egg
2 tablespoons milk
filling:
12-oz semi sweet chocolate chip
To make the dough, place the water in a small bowl, sprinkle with yeast. Dissolve and let rest undisturbed for about 10 minutes.
In a large mixing bowl, combine the flour, sugar, and salt. Pinch off small pieces of the 1/4 cup of butter, sprinkle them over the dry ingredients. Rub in to the flour by hand until they are almost fully dissolved. Stir in the yeast mixture and add it to the flour mixture. Add the cold milk.
With a wooden spoon, mix the wet and dry ingredients just until evenly combined and all dry spots have disappeared. The dough will be of medium stiffness. like a moist bread dough. The dough may also be mixed in an electric mixer fitted with a dough hook; just be careful not to over mix it or it will become too elastic to roll out.
Turn the dough out onto a lightly floured surface and gently knead for about 1 minutes. Place the dough on a floured baking sheet and cover with plastic wrap. refrigerate the dough overnight.
To roll in the butter, remove the butter from the refrigerator. Leaving the butter in its wrappers, with a wooden rolling pin pound each stick lightly but firmly on all four sides until softened. Unwrap the sticks and join them together. On a lightly floured surface, using the rolling pin, mold the butter into a flat block measuring 5 x 5 -3/4-inch. Work quickly, making sure the butter is soft, but still cold. If it gets warm, return it to the refrigerator for several minutes.
Remove the dough from the refrigerator, place it on a lightly floured table, and roll it into a 12 x 6-inch rectangle.
Place the cold butter on the right half of the dough, then fold the other half of the dough over the butter. Pinch the edges to seal.
With the folded edge on your left, roll the dough out lengthwise so that it measures 22 x 10-inches. Next, fold the bottom third up and the top third down. The is the beurrage.
Cover the dough, place it on a baking sheet and refrigerator for 45 minutes.
For the turns, remove the dough from the refrigerator and place it on a lightly floured surface. Position the dough so that the folded edge running the length of the dough is on the left. Make sure the edges are still sealed. roll the dough out length wise so it measures approximately 22 x 10-inches. Fold the dough in thirds, beginning with the lower third, as before (you have completed one turn.)
Place the dough on the baking sheet. With your finger make one small indentation on an edge of the dough to indicate one turn has been made. Cover and refrigerate for 45 minutes. Repeat this process 2 more times. Doing three turns. Return the dough to the baking sheet and refrigerate overnight.
To make Pain au Chocolate:
Whisk together the egg and milk. Line a baking with parchment paper.
Roll the croissant dough out to a 28 x 12-inch rectangle. Cut tht dough into three 4-inch strips. Cut each strip into 7-inch long pieces. Brush each piece with egg wash. Sprinkle with 2-3 tablespoon of chocolate chips onto the middle third of each piece of dough. fold the lower third over the chips and the upper third over that. Gently press or seal with your fingers. Repeat this process with the rest of the dough. Place seam side down on a baking sheet. Cover with plastic wrap and refrigerate overnight.
Line two baking sheets with parchment paper and divide the pastries between them, leaving approximately 2inches between each one to allow space for rising. Brush them with the left over egg glaze and let rise until they are puffy and feel like marshmallows.
Preheat oven to 375 degrees. Place the baking sheets on the center 4rack in the oven and bake for approximately 20 minutes, or until golden brown.
I have made your wonderful croissaNts several times now. They always come out delicious, and the House smeLls spectacular! Thank you for your detailed pictures and instructions.
Thank you so much for commenting. I’m thrilled you like the recipe. I agree the smell of croissants baking is amazing!
My grandmother gave it to me. She was an avid quilter and I think she hoped I would be too. Instead I use it in the kitchen. Most fabric or quilting stores carry them. I bet you could even find it on Amazon. It is 24 inches long and 6 inches wide. It's a great tool with many uses.
HI, Thanks for the recipe! Where did you get this ruler for baking?
I'm not sure if you are still posting comments, but I wanted to add my experience. I made up the dough last night. Today I tackled the butter/dough rolling out extravaganza. It was pretty much a disaster from the start! I don't think I worked the butter enough at the start. When I started to roll out the dough, it clumped and broke through the dough. It was pretty discouraging, but I figured it'd push on. I rolled and folded it many, many times until the butter was finally incorporated in the dough. Since I figured this was a failure anyway, I decided to proof and bake them today. To my surprise…they turned out amazing! They were puffy and flaky and filled with buttery chocolate goodness. So if anyone else is having problems, persevere and they will likely turn out great! And, you can shorten the process – significantly – and still get an amazing result.
Thank you so much for sharing this information. I talked with a pastry chef and he told me that using European butter will help with the clumping butter problem. I haven't tried it yet, so I can't report if it works or not. Anyway you had success and shortened the time. Bravo!
I just discovered this, and I'm going to give it a try! I might have to cheat, though and do it in three days, not four. I can do everything over a Friday, Saturday and Sunday, but don't have time to bake on Monday since I work all day. So I might just forgo the last overnight in the fridge. Maybe put it in the fridge for some of Sunday and then later in the day, take it out, let it rise after forming and bake them.
Thank you for this tutorial. It takes away the "anxiety" and makes the steps less overwhelming.
Thank you, but I have to admit it does seem overwhelming, but doable and so worth it.
the recipe at the bottom say 2 tablespoons of butter for the egg wash, in the pictures it's milk? i am guessing it"s milk
thanks for letting me know. I appreciate everyone correcting my poor proof reading skills. I have corrected the error.
I made this for my mother on French mother's day this year- they were absolutely amazing!! Thanks for the recipe.
Thanks for sharing your success. You have a lucky mother and you must be a fabulous baker.
I started mine yesterday. Day 2 just complete!! I am making them for a culinary project. First time making anything like this though. I am wondering is the dough supposed to rise somewhat overnight in the fridge or stay the same???? because I am sure mine are not really doing anything .( i guess they wouldn't really rise in the cold anyway, but maybe puff up?) just worried they won't turn out and rise on the final day. I do work with yeast a lot though not is this type of recipe. Day 1 when I added the yeast it seemed fine. Thanks for any help.
The dough will puff up slightly overnight, but not much. You should be ok, just allow for a good 4-5 hours finally rising time. I have gotten up at 3 a.m. before and put them out at room temp so they have time to rise and be warm for breakfast. I'm anxious to hear about your final results. Good luck.
Thank you! good thing I wake up early 🙂 I will let you know how they turn out.
SO excited! The good things in life are worth waiting for
Hi Janet, thanks for all the step by step pictures you post here, it helps a lot for a newbie like me.. Never bake a bread before.. As i wrote this comment, i just finished my day 3 steps. I wonder why does my dough doesn't look as smooth as yours and the butter keeps on peeping out of the dough? I do hope it taste as good as yours, as i can see the layers showing perfectly on each as i cut it through.. And how do you maintain the rectangular shape as you rolled the dough? Thanks..
Hi Shirleen, Laminating dough can be tricky. You are one brave sole, but you can do this. My first attempt at rolling in butter (laminating) I had the same issues you are having. I talked with a local pastry chef and he said if I used European butter I wouldn't have the problem of the butter breaking through the dough as much. Well, European butter isn't always available in my neck of the woods and when it is it is pricey. Try using a lighter touch. I know that sounds impossible because it's quite a workout to get he dough to cooperate once it is cold. The chef mentioned the use of a tapered rolling pin in rolling out. Do the best you can at this point. I'm pretty sure the layers and being created and once cooked they will be fabulous. Be patient with the dough when rolling. It will eventually loosen up. Once the gluten relaxes the rectangle will stay…somewhat. It has a mind of its own and loves to shrink up. If the dough just won't cooperate, just go ahead and get it as close to the shape as possible, then cut and shape into the pain au chocolate. I hope this helps in anyway.
Hi Janet, updates on the progress.. As i lives in London, Ontario, i thought it will takes a lot of time waiting for the dough to rise.. So i left the dough outside the fridge since 9 pm last night, and it was very fluffy and feels like marshmallow at 8ish this morning.. I've baked it and yes it does taste good, but i think because of the rolling problem i had on day 2 the layers doesn't really show as goid as yours.. But i don't careas long as it taste good.. Thanks again Janet,, 😉
I bet your pain au chocolat was wonderful. Next time it will be perfect.
Hello Janet
Just found your website by searching for a no knead bread. I am German and I am living in France, people often bring pain aux chocolats or croissants in the office. I have never heard anyone doing them themselves, I am quite impressed about the effort you have made with these lovely photos to show how to do them.
Thanks, even I won't try this one, but I will get back to your no knead bread.
Best regards, it is amazing what people bring onto the web from all over the globe
Margarete
If I lived in France, I wouldn't make my own pain aux chocolat either. In Utah, it's rare to find a fabulous pastry. So on rare/ special occasions I will make my own. Thank you so much for your comment and I'm happy to know you are making crusty bread.
As I'm french, I love croissants and pains au chocolat, our favorite breakfast on week-ends. I make them often : it's really much-more better when they are home-made. But, did you know that you can make a lot of this dough, cut it in parts, and keep in in the deep-freezer ? Once necessary, put it 2 or 3 hours in the fridge, then use it as a fresh made dough. If you want, have a look to my croissants and pains au chocolat on my blog "Les mains dans la farine" : http://wp.me/p35WvX-O
And… i love your blog and put it in my favorite blogs roll 😉
Thank you for sending me the link to your blog. Vous êtes un boulanger extraordinaire. You should come teach classes in my kitchen. I have so much to learn from you. Merci beau coup. You are so kind.
It's a dream for me coming to visit the States… May be one day ?? And then, we could organize an american-french cooking session ? Ooooh, it would be so funny !!!
My dream is to travel all around France not just Paris. I do love Paris, however. My grandfather was killed in Normandy and I would love to visit there someday. Let's plan a day of baking…before I die 🙂
We should to plan it ! But I live far from Normandy : I live near to Montpellier, in the south of France, on the mediterranean coast (but half an hour from the sea)…
I don't think they do the "whisk-away-weekends" anymore. Too bad I had so much fun. The Essex Inn has cooking classes. Here is the link: http://www.cookingschoolsofamerica.com/vtculinaryresort/index.php?page=calendar
LOVE your blog, omg everything is amazing. I was looking up the NECI courses, and can’t find a weekend program for enthusiasts. Do you have a link to where we could sign up /look up the course you did/type you did??
I was in Paris many years ago and had these warm from the oven in a little bakery there. They were so incredible…the most amazing thing I had ever eaten. Nothing has ever compared. So I tried to keep my hopes down so as to not be disappointed as I made these and took my first bite. Amazing! Divine! I was back in Paris again. I gave them to my children and husband and told them to close their eyes and they would be back in Paris, too! Thank you for the amazing recipe and instructions. You are an amazing cook and I appreciate you sharing your talents.
Thank you so much for your comment. You must be an amazing baker to create pain au chocolate that compares to those found in Paris. They are a little effort, but so worth the time. Merci
Thank you SO much for posting this – I made it for Christmas and it was my first venture into the world of pastry (I don't do anything the easy way 🙂 ). Your instructions and pictures allowed me to be as successful as one would expect first time around. I am DEFINITELY making these again! Thanks again.
Wahoo! Thanks for a great success story. Keep up the fabulous baking.
Hello! I have a few days coming up when I might be able to devote time to this endeavor. It's been on my bucket list for some time. Quick question … have you made these with another filling, say, almost paste, by chance. That's my absolute favorite and would love to try it. But, given the time to make them, don't wan to risk messing up too badly. Thanks!
You can totally use almond paste instead of chocolate. They are divine with almond inside. I brush the tops with egg then sprinkle sliced almonds on top the give them a little dusting of powder sugar after they cool. Gorgeous. Good luck.
Quick question: do you add all the butter (the 1.5 cups) all in the first round? Then the second and third rounds, you are merely rolling it out and folding back up? Thanks!
Yes, you add all of the butter the first round. You have it correct. Then just rolling the dough out the 2nd and 3rd time. This creates all the wonderful layers in the croissant.
Thanks! Can't wait to give it a try!
The wonderful layers, as you say, are named "pâte feuilletée", here in France. And the special dough for croissants and pains au chocolat, also with these wonderful layers, is called "pâte levée feuilletée"… So, you know nearly everything about french croissants and pains au chocolat ! 🙂
I wish I new everything I need to know about french croissants. I would love to have you in my kitchen to teach me many cooking classes.
Thank you, Janet ! But I'm not a professional, only a mum who's really "passionnée" (fond of or addict ? I don't know) and who like baking for her children and husband. If you want, I can ask yiu some tips about your american recipes, and you about our french ones… ? Have a nice day
Hi Janet,
This is my first time making any type of pastry, and am on day 1, but abit worried the dough looks dry compared to other bread i have made before. It came together but was not elastic at all. Is it normal? Or maybe i got thr flour measurement wrong? I used scoop and sweep rather than spoon and sweep. Should i add milk at this stage ? I just put it in the fridge. Thank you so much. Dora.
I'm so sorry I just noticed this comment. I try to check daily, but scanned over it. I hope I'm not too late. Now I'm curious as to how the pastries turned out. The dough IS stiff and a bit dry. The gluten will begin to loosen up and become more pliable. However if the dough is too dry, it can be difficult to roll out. I always use the scoop and sweep method myself. I make sure to loosen up the flour by stirring it in the container first. Let me know how your pastries turned out.
Hi Janet, i ended up proceeding per your recipe and the dough came out ok the next day and perfectly rollable, easy to work with and never stuck to the counter at any stage! The pains/croissants turned out awesome, flakey and all, just baked them yesterday! Very happy with the result. Thank you for the great recipe. A small modif i did was to flatten the butter into a thin square sheet in the beginning (a method i saw on youtube) and refrigerate before laminating. That seemed to make rolling the dough relatively manageable. Thanks again!
Hi Janet!
Thank you so much for this recipe. Breaking it down into individual steps with pictures is tremendously helpful for people like me that don't have much experience in kitchens and have difficulty figuring out if everything "looks right."
I do have a couple questions if you would be kind enough to help:
First, I have had some trouble keeping the butter inside the bottom side of the dough when I roll it out. It stays in the edges just fine, but it seems like the dough gets too thin to support the butter underneath and I end up having to use a lot of flour on the counter to keep it all together. Any suggestions on how you hold it together?
I'm also wondering how thick in inches the final sheet of dough should be. Since the amount of flour that ends up going into the dough always seems to vary from the 4 cups the recipe calls for, I think it might be too thick, even when I roll it out to 28 inches. Do you try to make it as thin as possible, or is there a target thickness you are going for?
Hi Greg, I talked with a local pastry chef and he gave me a few ideas. He said to use European butter like Plugra for rolling in because it spreads better with the roll in. I have had the same problem you have had. I still muscled through the butter seeming to be chunky in between the layers of dough and the butter breaking through the dough. When that starts to happen put the dough back into the refrigerator for a few minutes. He also said that he uses a tapered french rolling pin. It says that it rolls better, more even and smoother. Who knew? Sometimes the dough doesn't cooperate and it seems hard to get it into the rectangle. I have never paid attention to the thickness to be honest. I'm more concerned about the size 12 x 28-inch rectangle. I hope I have answered all of your questions. Feel free to email me at simplysogood@hotmail.com If you have more questions. Good luck.
Thank you so much Robin. Great tip on the rise time for day 3. I'll try it. You must be an excellent baker. Way to go!
Thank you for this wonderfully detailed recipe. My husband and I completed our first run this morning. The instructions are perfect!
In reading through the postings, I note your response to the freezing question. We are experimenting with freezing four, just before the final rise in Day 4.
Another tip: We let two (that had just completed the Day 3 instructions) rise overnight on a cold counter near a cold window, beginning at about midnight; by 7:00 am the next morning, they had risen perfectly. They baked up perfectly and were utterly delicious!
Thank you again for such an expertly explained set of instructions.
Dear Janet, i'm soo glad that i found your page, and it is truly simple and good. I made some of the recipes and must say they was delicious. Today i'm preparing to make this one. Lets hope it will turn out ok. 🙂
You have to let me know how it turns out. I'd love to hear. You can do it!
They turned out delicious! I think my sketchy dough set me back–it never was as soft as yours looks to be in your photos, and the insides weren't as flaky as pain au chocolat at a cafe. but they tasted great. Thanks!
I bet they were fabulous. Congratulations! I hope they were worth the 4 days of work.
Day three done. I am very excited for tomorrow morning. my measurement was a bit off–28 by 14 or so, and when i cut them for some reason i couldn't get an exact 4×7 rectangle. Also needed to keep dusting the bottom of the dough with flour, as that was the only way to keep the butter from leaking out. but i have 12 croissants in the fridge right now, awaiting their moment in the sun tomorrow! wheee! this has been really fun! my shoulders are hurting from all that kneading though.
Thanks again for the step by step instructions! i will let you know how tomorrow morning goes.
Take pictures. I can't wait to see your awesome pastries.
It's day two! I am about do start this pounding-cold-butter-into-sketchy-dough part. my dough needed more milk than the one cup, but that's always the case when i try to make dough; i think i am baking challenged.
You're not baking challenged. You're a baking Queen! If you have problems, it's probably due to your climate or flour. You are going to rock these croissants.
Okay Janet. I am embarking on this four-day recipe! wish me luck and thanks for the awesome pictures and step-by-step directions.
You can do it!!! Please let me know how great your pain au chocolate turns out.
375 Degree in celcius or in fahrenheit?
Fahrenheit. Sorry.
Nope they still came out the same way. When baking it kind of baked in a pool of its own butter.It may have just been a problem with the butter poking through at some points throughout the process? I have a dinky rolling pin so it takes longer to roll out. I'm also kind of picky when it comes to texture so it might just be me. My nephews loved them though 🙂
I talked with a local pastry chef regarding what the problem could be. He thinks that it's more than likely the butter coming through the dough that caused the problem. He told me that many butters have the addition of water (who know) He only uses European style butter. I have used butter from Costco and had the recipe work great. He, also, suggested using a tapered dowel type rolling pin. He said that it rolls out the dough without much effort. If the butter seems to be coming through the dough, refrigerate until the dough is not so soft. I hope this helps. They are so much work and now I know why they charge over $3.00 each in a bakery. Best of luck.
I appreciate this recipe for its concise instructions and absolutely amazing photos. However after baking the first batch and having the bread come out completely soggy, I have to say this may be my first and last time using it unless the second batch that I put in without letting rise at the end comes out better. Thanks anyway though.
I'm so sorry to hear that. I have never had that problem before. I have made this recipe many times. It's too much work for a failure and definitely not worth your effort to have them fail. I wish I knew what went wrong. I hope the next batch is a success. The last rising should not be the problem. Let me know the outcome. I'd love to help.
I'm so happy that I've found your blog. The instruction is very clear and comes with pictures! I've tried this Pain Au Chocolat recipe few days ago. Mine didn't look as beautiful as yours but it tasted really good. Thank you!
Thay turend out delicous, oh i'm soo happy!!! Thank you soo much, for the time and the pacient to show uss in steps!
Oh my gosh… these look like the chocolate croissant thingy you can buy at Panera. I have an addiction to those things. This recipe seems challenging, but I do believe I'm going to give it a try. Thanks for sharing a beautiful recipe.
A little labor intensive, but soooo worth it. I hope you try the challenge.
Hi – I have just discovered your blog and enjoy your clear, detailed advice and photos to show 'how it SHOULD' look!
I have noticed you use and recommend using a pastry cloth. Where did you purchase your cloth – It would be good if you could say the make/brand and if it is still available to buy?
I hope to have a go at your Pain au Chocolat ….. Have you thought about making French Macarons?
Louise – Stansted and Grantham, United Kingdom
Hi Louse, The pastry cloth that I use is basically canvas fabric. I purchased this from a local kitchen store years ago and have since made my own by purchased canvas from a fabric store and washing it. It works just as well. You could even serge the edges to prevent the fabric from fraying.
French Macaron's are on my bucket list. They are so temperamental. I have taken classes on how to make them, but live at 5,000 feet above sea level. Who what will work for my altitude may not work for your altitude. I will play with them and see if I can master them enough to teach others how to make them. It's so nice to hear from someone "across the pond". I have pure British descent and very proud of it. Thank you for your kind comments.
On day two of making these.. you can see the butter through the dough and it's broken through in places.. but it's definitely cold enough :/ hopefully it'll turn out okay, I've bragged to my co-workers that I'm bringing these in on Tuesday haha!
That's ok. Keep it going. Every now and then I have the exact same thing happen to me. The finished product is always impressive. Your co-workers will praise and adore you forever. Let me know how the pain au chocolate turns out. I'll cross my fingers for you.
I just baked my test run, the "flawed" ones, if you will. And they turned out great! Waking up at… 2am to let the dough rise for the ones I'm taking to work tomorrow. This is my first time trying to make pastry and I wouldn't have been able to do it without your step by step directions. Thank you!!
I sure hope your co-workers appreciate all of your hard work. They will be bowing in your honor…if not they should be. Just send them to this post so they can see what you have been through for the past 4 days. They will realize you are one great pastry chef and friend. Congratulations!
I think you could leave these in the refrigerator for 24 hours without any problems. IN FACT. You could put them in the freezer. When completely frozen put in a covered container or plastic bag for up to 4 weeks. Remove from freezer, place on cookie sheet and let thaw for about 5 hours. Bon chance.
Merci beaucoup!
I am going to try and make this for my French class's final presentations. I love the step-by-step pictures, but I have a question. Is there a certain amount of time that is too long for the pain au chocolat rolls to be left in the fridge before baking? Thanks! (:
I just made these.Cheat version though!I did all steps in a day.And baked a trial batch earlier and it tasted wonderful!!thank you for the amaziing recipe!=)
I need to try this in a day. Actually I need to STOP making these because I can't stop eating them! Thanks for your helpful comment.
I LOVE LOVE LOVE LOVE these!!! My stomach is growling just reading this post ….. if I ever find myself with some more spare time, I am totally making them … if not, let me know when you make them next & I will come & stalk you 🙂 j/k …. love your blog!
I went to pastry school in France, it is possible to do it in a day… if you have the time. We made a batch of those and plain croissants almost every day.
I wish I had gone to pastry school in France. The recipe I have says that you can refrigerate for 5 hours, but prefers overnight. It certainly makes a long process. How many times do you roll in the dough??
Definitely a recipe/technique for the avid baker, as you say. I'm sooooo tempted to begin this today. Should be done in time for Easter! And i have the week off… Thank you for the amazing step-by-step photos. I LOVE that plastic measuring tool you have. I've never seen one before. Where can I find one and does it have a special name? Do these treats freeze well? How do you store them–that is, if they aren't eaten up within minutes ; )
Begin today and you can have them for breakfast on for Easter. I have gotten up at 3:00 a.m. to put them out for a final rise. Crazy. I think the tool you are talking about is a ruler used for quilting. My grandmother was a quilter and gave it to me. I think I was supposed to use it for quilting instead of baking. You can pick one up at a fabric store. They freeze great in a plastic container or ziplock. Just remove them to thaw. That way they will stay crisp. To re-crisp them I just put them in a 300 degree oven for a few minutes. It worked…then they were gone.
SOS Janet we are trying to roll this out and the butter is everywhere! Please give us some advice! We just finished day 2 and our dough does not look the same!
Sounds like the butter softened way too much. The best thing is to return it to the refrigerator until the butter hardens up a bit. I hope I got to you in enough time. The dough and butter need to stay cold.
I just stumbled upon this recipe. It looks incredible! I just finished the kitchen and can't wait to start cooking. Bread is on the top of my to do list. This recipe just became my first project. Thanks for the inspiration
A new kitchen? Lucky you! I hope you love it.
Wow! Thanks Heidi and Janet for all the banter re Crio Bru. Yes, I knew I could buy it off the internet, but wanted to get my french press at the WS outlet first, on our way to UT. I plan on bringing home Cavalla and Coca River and definitely the Crio Beans. Can't wait. Is this the best cooking blog or what?!?! I've learned so much.
You are seriously my best friend 🙂
Coca River and Cavalla are my favorite as well. I purchased a Cavalla that was a dark roast and it was very strong. At first I didn't like it, but it really grew on me. You HAVE to try the Crio Beans. Oh my. That's all I asked for my birthday and I received about 6 bags…That was a month ago and I just opened my last bag. If you like dark chocolate, they are the greatest fix. I don't know if it's coincidental or not, but I haven't had a cold or the flu this year. I keep telling my husband it's because of all the antioxidants in the Bru. He just laughs.
I've made croissants and danishes in 2 days, but I like how you broke the process down even further. I've never heard of making them in 4 days, but I imagine this extended way lessons the stress and heightens the enjoyment of making laminated dough. Everything looks fabulous!
I think that 2 days would be nice. Especially when I forget to start them for a special event in four days and forget. They can be a lot of work. I really appreciate your comment. thank you.
I have found the more rises that are very slow and in the refrigerator heightens the flavor of the dough. I often take 3-4 days to make Challah bread. Give it a try both ways and then have a taste…the buttery flavor is so much more intense.
Guess what I had for breakfast this morning? Pain au Chocolate with Crio Bru. Divine. Don't worry I'll leave a few bags on the shelves at Harmon 🙂
I'm a friend of Peggy's. My daughter and I both drool over your blog, but she is going to die over this recipe. With the exception of fresh strawberries, I don't think there is a food she loves more than Pain au Chocolat! I foresee much rolling in my kitchen as Nana plays with the grandkids and Mama lovingly bakes.
I hate that you bake all these amazing foods when I am not home.
I'll save you some my dear.