• Skip to primary navigation
  • Skip to main content
  • Skip to primary sidebar
  • Skip to footer

Simply So Good

  • Home
  • About
  • Recipes
  • Contact
You are here: Home / Recipes / Cakes and Cupcakes / Old Fashioned Devil’s Food Cake with Boiled Icing

Old Fashioned Devil’s Food Cake with Boiled Icing

March 5, 2021 2 Comments

215 shares
  • Share
  • Tweet
Jump to Recipe Print Recipe
Lit candle on top of Old Fashioned Devil's Food Cake with Boiled Icing

This late 19th century Devil’s Food Cake with Boiled Icing was often served by my Grandmother.  Her rich, yet simple, chocolate devil’s food cake is slathered with vanilla-scented boiled icing that is so soft and fluffy.  

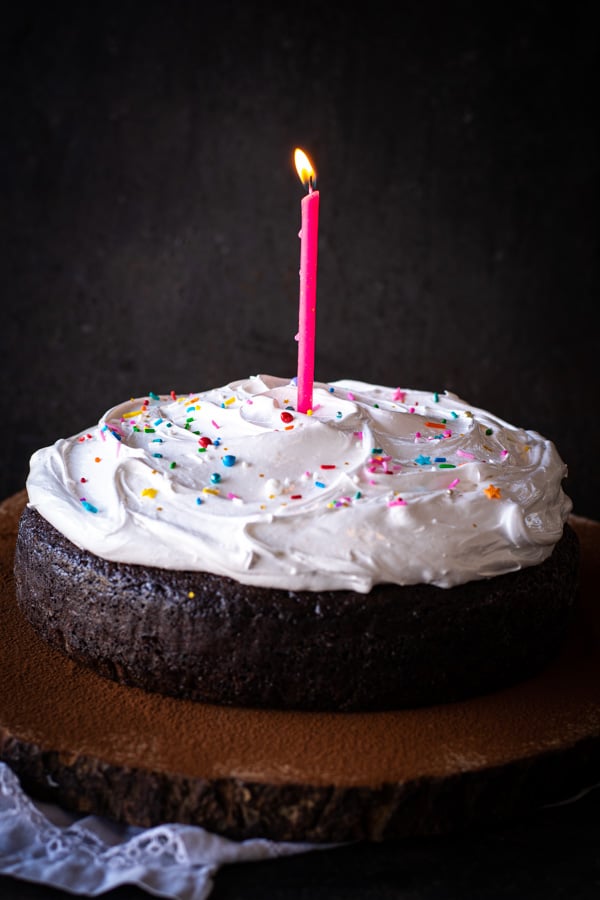
This is a fun and rustic version of that original three layer cake.  Happy 111th birthday to my grandmother who inspired me in the kitchen.  

What is Devil’s Food Cake?

Devil’s food cake is richer, darker, and fluffier thanks to the use of cocoa powder and a bit of extra baking soda and is generally baked with butter instead of oil.  According to Baking Illustrated, the Devil’s Food Cake was the result of a time when fancy names for cakes were the norm: the late 1900s. Allegedly, it was the only cake name to survive that era and make it to our modern times. This type of cake was called such because of the deep rich color of the cake.

How to Make Devil’s Food Cake

11
33
Devil's Food Cake
44
55
77
99
66
88
1010
  1. Preheat oven to 350℉. Grease and flour or line with parchment a 10-inch round cake pan with 3-4 inch sides.  Set aside. 
  2. Sift together flour, soda, and salt.  Set aside.  
  3. In a large mixing bowl cream butter, cocoa, and sugar for 3-4 minutes. 
  4. Add eggs one at a time and vanilla and beat until smooth and creamy.  Scrape down the sides and bottom of the bowl.
  5. Add sour cream and mix until smooth. Once again scrape down the sides of the bowl.
  6. The mixture will look smooth and creamy.
  7. Add flour mixture and mix just until blended. 
  8. The mixture will be thick and smooth.
  9. Slowly add boiling water and beat until smooth. 
  10. Pour into prepared pan and Bake in a preheated 350℉ oven for 45-50 minutes or until cake springs back when lightly touched.  Cool in the pan for 5-7minutes.  Invert the baked cake onto a cooling rack and cool completely.

What is boiled Icing?

Boiled icing is also known as 7-minute Icing or Italian Meringue.  Boiled icing is a fluffy white cake frosting that is made by gradually pouring a hot sugar syrup over stiffly beaten egg whites. The eggs are beaten constantly until the mixture is smooth and satiny and flavor with vanilla. It’s best used fresh right after it is made.  You’re going to love it!

How to Make Boiled Icing

11
55
Boiled Icing
44
55
77
99
66
88
  1. Remove the eggs from the refrigerator so they will be at room temperature when ready to use.
  2. In a small heavy saucepan, combine the sugar, cream of tartar, and salt. Stir the mixture to combine evenly; add the water being very careful not to leave any sugar crystals on the side of the pan.
  3. Over medium heat, bring the mixture to a boil. Do NOT stir.  Continue to cook until the syrup reaches the softball stage or 240°F on a candy thermometer.
  4. Remove from the heat and allow it to set while beating the egg whites.  
  5. Beat the egg whites and vanilla in a large, wide bowl until they form soft peaks. Be sure to use a wide bowl so that you have enough room to beat the frosting while you are adding in the sugar mixture without pouring it into the beaters.
  6. Once the eggs are at a soft peak, begin to slowly pour the boiled sugar mixture into the egg whites Pour the mixture along the side of the bowl while beating the two together.
  7. Optional:  Pour mixture into a heat-safe measuring cup with a spout to make pouring the syrup into the egg whites easier.
  8. Make sure to pour the sugar mixture in a slow steady stream off to one side and continue to beat the frosting the entire time. Do not pour the sugar mixture into the beaters. To incorporate it into the egg whites, move the beaters back and forth into the area where the sugar mixture has been added.
  9. Once all of the sugar mixture has been added Beat until the frosting is thick enough to form stiff peaks and resembles marshmallow cream.


Round chocolate devil's food cake on a wooden board with a whisk of boiled icing dripping off.
Spatula spreading boiled icing over top of chocolate cake
Large pile of boiling icing on top of a round devil's food cake
Boiled icing on chocolate cake with sprinkles on top
  • The icing is now slightly warm and makes a beautiful peak on the top of the mixing whip.  Yum 🤤
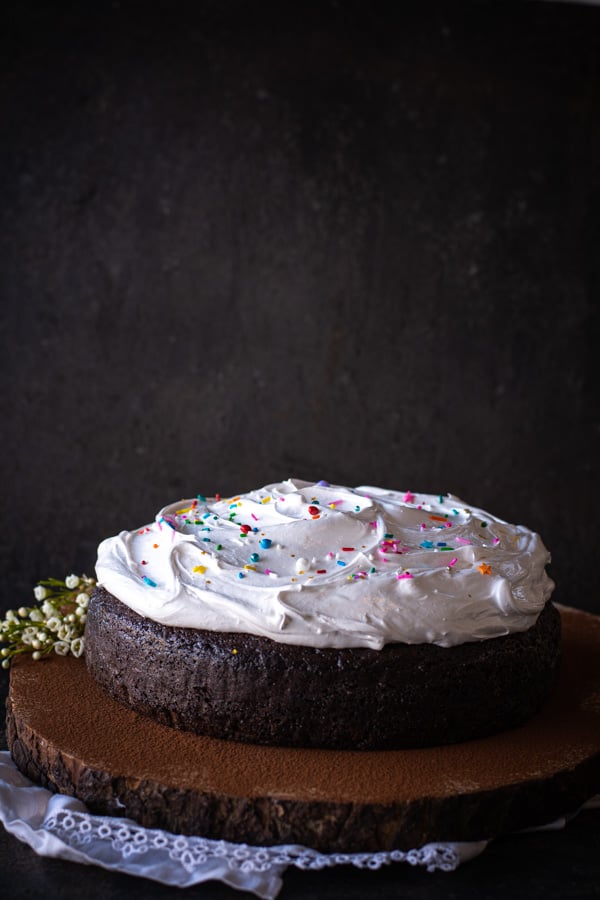
  • Mound the warm icing in the center of the large 10-inch cake that has completely cooled.  
  • Using an off-set spatula smooth and swirl the icing over the top of the cake within a 1/2-inch of the sides.
  • Toss on a few colorful sprinkles for a fun festive cake.

Baking options Old Fashioned Devil’s Food Cake with Boiled Icing

  • Chocolate cake can be baked in a 9 x 13-inch baking pan.
  • 2 8-9 inch round baking pans.
  • 1 10-inch round baking pan with 3-4 inch sides.
  • Yes!  Even a bundt pan.  

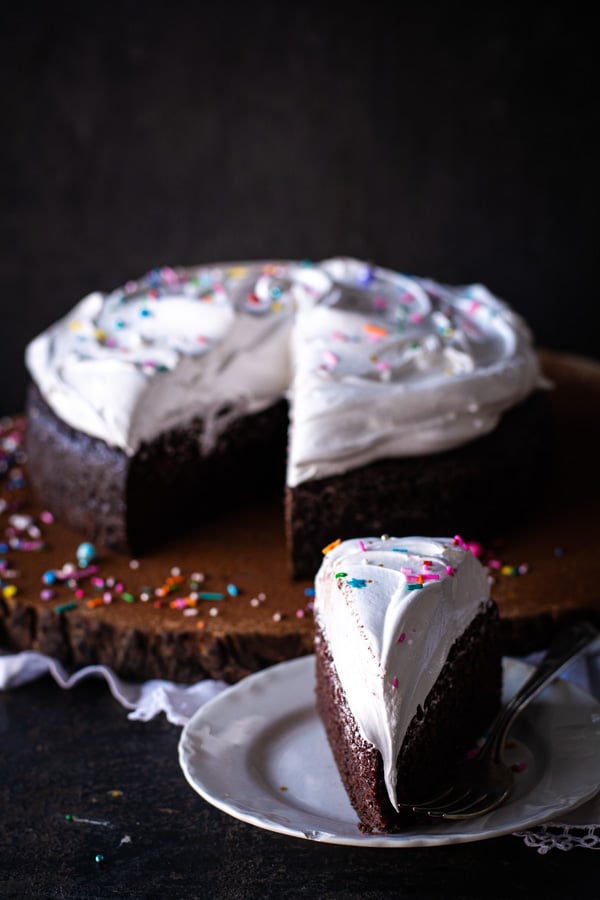
How to Slice Through the Boiled Icing.

When the icing is fresh, it is very easy to slice through.  Run a large butcher knife under hot water, wipe dry, then slice through the icing and cake. In order to get fresh clean slices, continue to run or dip the knife into hot water with each slice.  The hot knife will slice through the icing just like butter.

One layer of cake = extra thick icing ❤️

Lit candle on top of Old Fashioned Devil's Food Cake with Boiled Icing
3.84 from 12 votes
Print

Course Dessert
Cuisine American
Keyword 7 minute Icing, boiled icing, chocolate cake, Devil's Food Cake
Prep Time 1 day 15 minutes
Cook Time 45 minutes
Boiled Icing 20 minutes
Servings 12 slices
Calories 365 kcal
Author Janet Barton

Ingredients

Devil's Food Cake

  • ½ cup butter softened
  • 1 1/3 cup sugar
  • ¼ cup cocoa preferable Dutch processed
  • 2 eggs
  • 1 teaspoon vanilla
  • ½ cup sour cream
  • 2 cups flour
  • 2 teaspoons baking soda
  • 1 teaspoon salt
  • 1 cup boiling water

Boiled Icing

  • 1 1/2 cups sugar
  • 1/2 cup hot water
  • 1/4 teaspoon cream of tartar
  • pinch salt
  • 3 egg whites
  • 1 teaspoon vanilla

Instructions

Devil's Food Cake

  1. Grease and flour a 10-inch cake pan with 3-4 inch high sides. Set aside. Sift together flour, soda and salt. Set aside. In a large mixing bowl cream butter, cocoa and sugar for approx. 3 minutes. Add eggs and vanilla and beat until smooth and creamy. Add sour cream and mix until smooth. Add flour mixture and mix just until blended. Slowly add boiling water and beat until smooth. Bake in a preheated 350 degree oven for 40-45minutes or until cake springs back when lightly touched. Cool in pans for 10 minutes. Invert to a cooling rack to cool. Bake cupcakes for 18-20 minutes.

Boiled Icing

  1. 1. Remove the eggs from the refrigerator so they will be room temperature when ready to use.

  2. 2. In a small heavy saucepan, combine the sugar, cream of tartar, and salt. Stir the mixture to combine evenly; add the water.

  3. 3. Over medium heat, bring the mixture to a boil, stir continuously until it is clear. Allow the mixture to boil until it reaches the soft ball stage or 240°F on a candy thermometer.

  4. 4. Remove from the heat and allow it to set while beating the egg whites.

  5. 5. Beat the egg whites and vanilla in a large, wide bowl until they form soft peaks. Be sure to use a wide bowl so that you have enough room to beat the frosting while you are adding in the sugar mixture without pouring it into the beaters.

  6. 6. Once the eggs are at a soft peak, begin to slowly pour the boiled sugar mixture into the egg whites Pour the mixture along the side of the bowl while beating the two together.

  7. 7. Make sure to pour the sugar mixture in a slow steady stream off to one side and continue to beat the frosting the entire time. Do not pour the sugar mixture into the beaters. To incorporate it into the egg whites, move the beaters back and forth into the area where the sugar syrup has been added.

  8. 8. Once all of the sugar syrup has been added, beat for 7 minutes until the frosting is thick enough to form stiff peaks.

Recipe Notes

Baking Pan Options:

  • Chocolate cake can be baked in a 9 x 13-inch baking pan.
  • 2 8-9 inch round baking pans.
  • 1 10-inch round baking pan with 3-4 inch sides.
  • Yes!  Even a bundt pan.  

Tips for slicing through boiled icing:

When the icing is fresh, it is very easy to slice through.  Run a large butcher knife under hot water, wipe dry, then slice through the icing and cake. In order to get fresh clean slices, continue to run or dip the knife into hot water with each slice.  The hot knife will slice through the icing just like butter.


Nutrition Facts
Amount Per Serving
Calories 365 Calories from Fat 99
% Daily Value*
Fat 11g17%
Saturated Fat 6g30%
Trans Fat 1g
Cholesterol 53mg18%
Sodium 477mg20%
Potassium 100mg3%
Carbohydrates 65g22%
Fiber 1g4%
Sugar 48g53%
Protein 5g10%
Vitamin A 336IU7%
Vitamin C 1mg1%
Calcium 24mg2%
Iron 1mg6%
* Percent Daily Values are based on a 2000 calorie diet.

You May Also Love

lemons by a lemon olive oil cake with pressed flowers
overhead shot of strawberry iced cake with strawberries on top
Layered Carrot cake with slices cut
Devil’s Food Chocolate Cake


Share this:

  • Click to share on X (Opens in new window) X
  • Click to share on Facebook (Opens in new window) Facebook

Related

Filed Under: Cakes and Cupcakes, Dessert Tagged With: birthday cake, boiled icing, chocolate cake, devil's food cake, italian meringue

Previous Post: « Paratha Flatbread
Next Post: Horchata Ice Cream »

Reader Interactions

Comments

  1. Katie mcbride says

    September 28, 2024 at 10:58 pm

    I’m looking to make this memorable cake for a birthday party. Would it be possible to make the devils food cake part in advance? If so, how far?

    Reply
    • Janet Barton says

      October 20, 2024 at 9:34 pm

      Yes, this cake freezes great.

      Reply
3.84 from 12 votes (12 ratings without comment)

Leave a Reply Cancel reply

Your email address will not be published. Required fields are marked *

Recipe Rating


This site uses Akismet to reduce spam. Learn how your comment data is processed.

Primary Sidebar

About Me

Janet Barton

Hi I'm Janet and this is where I share my delicious made-from-scratch seasonal recipes that I make at home for my family every day.

I believe cooking from scratch, using unprocessed and whole foods is an important part of healthy eating. My goal is to help you create amazing recipes by providing easy step-by-step photos and instructions.

Read More »

Trending Recipes

  • No-knead Crusty Bread in a Dutch oven No-knead Crusty Bread

  • Several chocolate drop cookies on white background Chocolate Drop Cookies

  • Wooden board with chocolate cookies with half chocolate icing and half vanilla icing Chocolate Half Moon Cookies

  • Glass of almond milk with 2 gray striped straws on wood board with container of almond milk in background Quick Homemade Almond Milk

  • Rustic Strawberry Rhubarb tarts

  • pink iced heart sugar cookies Sour Cream Sugar Cookies with Cream Cheese Frosting

  • Lemonade and raspberry lemonade in tall glasses Old Fashioned Lemonade

  • fried ice cream with spoonful taken out with honey and berries Fried Ice Cream

  • Homemade Buttermilk Ricotta

  • Slices of No-knead Partially sliced Green Chile Cheddar Bread No-Knead Green Chile Cheddar Bread

Latest on Instagram

simplysogood

🍋 I teach you how to cook from scratch
🍒 Follow simple step-by-step recipes
🫐 A lover of fresh, seasonal, & local ingredients

Fresh Herb Crockpot Turkey Breast with Brown Butte Fresh Herb Crockpot Turkey Breast with Brown Butter Pears is perfect for a smaller but still impressive Thanksgiving dinner. This easy recipe features a boneless turkey breast coated in homemade herb butter and "roasted" in a slow cooker, then served with a creamy cider herb gravy and sautéed browned butter pears....

https://www.simplysogood.com/fresh-herb-crockpot-turkey-breast-with-brown-butter-pears/
These strawberry rhubarb crumble bars will take yo These strawberry rhubarb crumble bars will take you straight to dessert paradise! 🥰⁠🍓
.⁠
Sweet-tart love in every bite, they’re the perfect treat for sunny days and cozy nights. Grab a bar and let’s indulge in this fruity delight!⁠
.⁠
Give this recipe a try by clicking the link in my Instagram bio, where I post step-by-step photo instructions!
⁠
#rhubarbseason #homemadewithlove #dessertclub #strawberryrhubarb #strawberryrhubarbpie #strawberrycrumble #strawberryrhubarbcrumble
Baking up some homemade magic with my no-knead Lem Baking up some homemade magic with my no-knead Lemon Rosemary Gruyere bread!
•
This recipe is as easy as pie (or should I say bread?), bringing the flavors of tangy lemon, fragrant rosemary, and oh-so-melty Gruyere to life. 🍋🍞🌱
•
Click the link in my bio to read through these helpful tips that will make your homemade bread a melt-in-your-mouth success!

#homemadebread #nokneadbread #gruyerebread #lemoncheesebread #cheesebread #homemadecheesebread
Starting the day off right with these indulgent no Starting the day off right with these indulgent no-knead brioche morning buns! 🤎 There’s just something about the buttery, flaky brioche and the sweet cinnamon swirl that makes mornings extra special.
•
The base dough recipe for no-knead brioche morning buns is a buttery no-knead dough that is refrigerated overnight. The chilled dough is very easy to roll, fill, slice, and bake.
•
So go ahead, treat yourself to something delicious and let these buns brighten up your day! 

The recipe link is in my Instagram bio!

#MorningTreats #BriocheLove #SweetIndulgence #cinnamonsugar #cinnamonandsugar #morningbuns
No fancy Ice Cream Maker — no problem! 🍦🍨 No fancy Ice Cream Maker — no problem! 🍦🍨 This no churn Strawberry Raspberry Ice Cream recipe is quick and easy to make without an ice cream maker in only 10 minutes.
•
Simply blend together a mix of frozen strawberries and raspberries with vanilla ice cream and raspberry sherbet for a rich, fruity, and creamy dessert that tastes homemade! 🍓
•
Give this recipe a try by clicking the link in my Instagram bio, where I post step-by-step photo instructions!

#nochurnicecream #homemadeicecream #strawberryicecream #raspberryicecream #kidfriendlyrecipes #simplerecipes
These chewy peanut butter bars have been a family These chewy peanut butter bars have been a family favorite for decades! Peanut butter cookies layered with chocolate and a delicious peanut butter glaze! 🥜🍫
•
Trust me, your family will LOVE them!
•
Click the link in my bio to read through these helpful tips that will make your peanut butter bars a melt-in-your-mouth success!

#peanutbutterbars #peanutbuttercookies #pbbars #peanutbutterchocolate #peanutbutterlover #pbandchocolate
Start your day off on a flaky note with these skys Start your day off on a flaky note with these skyscraper buttermilk biscuits!
These melt-in-your-mouth treats are the perfect indulgence for breakfast, brunch, or anytime you’re craving something buttery and delicious.
•
So go ahead, treat yourself to these heavenly delights and savor every flakey, buttery bite with me!
•
The recipe link is in my Instagram bio!

#butterybiscuits #homemadeisbest #breakfastindulgence #brunchgoals
Sharing my famous Lemon Curd Recipe! 🍋🌼💛 Sharing my famous Lemon Curd Recipe! 🍋🌼💛 The one that everyone says I should sell at farmers markets — nah! I’ll just share the recipe with you all instead!
•
I love lemon curd, and use it for so many things!!
🍰 Layered in a cake
🍦 Swirled into ice cream
🍪 Smashed between cookies
☀️ Filled inside scones

The possibilities are endless!! Give this recipe a try by clicking the link in my Instagram bio! And if you’d like the recipes for my other lemon curd inspired goodies, they’re all linked in my Instagram stories!

#lemoncurd #lemoncurdcake #lemoncurdicecream #lemonicecream #lemondessert #lemoncurdrecipe
Have you ever tried an olive oil cake!? 🍰 They Have you ever tried an olive oil cake!? 🍰 They are incredibly soft and moist — you gotta give it a try!
•
This citrus olive oil cake recipe features a tart lemon curd filling and a rich mascarpone frosting. Then we gently add flowers for beautiful decoration. It is an impressive looking and mouth-watering dessert that’s perfect for any special occasion! 🍋🤍🌼

Recipe is linked in my Instagram bio!

#oliveoilcake #oliveoilcakes #lemoncurdcake #mascarponefrosting #mascarponeicing
Follow on Instagram
  • No-knead Crusty Bread in a Dutch oven No-knead Crusty Bread posted on September 19, 2018

  • Several chocolate drop cookies on white background Chocolate Drop Cookies posted on May 20, 2024

  • Wooden board with chocolate cookies with half chocolate icing and half vanilla icing Chocolate Half Moon Cookies posted on April 5, 2024

  • Glass of almond milk with 2 gray striped straws on wood board with container of almond milk in background Quick Homemade Almond Milk posted on June 3, 2020

  • Rustic Strawberry Rhubarb tarts posted on April 12, 2019

  • pink iced heart sugar cookies Sour Cream Sugar Cookies with Cream Cheese Frosting posted on February 8, 2025

  • Lemonade and raspberry lemonade in tall glasses Old Fashioned Lemonade posted on June 22, 2018

  • fried ice cream with spoonful taken out with honey and berries Fried Ice Cream posted on May 4, 2025

  • Homemade Buttermilk Ricotta posted on April 15, 2013

  • Slices of No-knead Partially sliced Green Chile Cheddar Bread No-Knead Green Chile Cheddar Bread posted on August 20, 2024

Footer

Featured on

The Daily Meal Logo The foodgawker-logo reddit Logo BuzzFeed Logo halfbaked Harvest Logo Browneyed Baker Logo FOOD52 Logo University of Washington Logo sheknows Logo

Copyright © 2025 Janet Barton
Privacy Policy


Loading Comments...
 

    Rate This Recipe

    Your vote:


    A rating is required
    A name is required
    An email is required

    Recipe Ratings without Comment

    Something went wrong. Please try again.