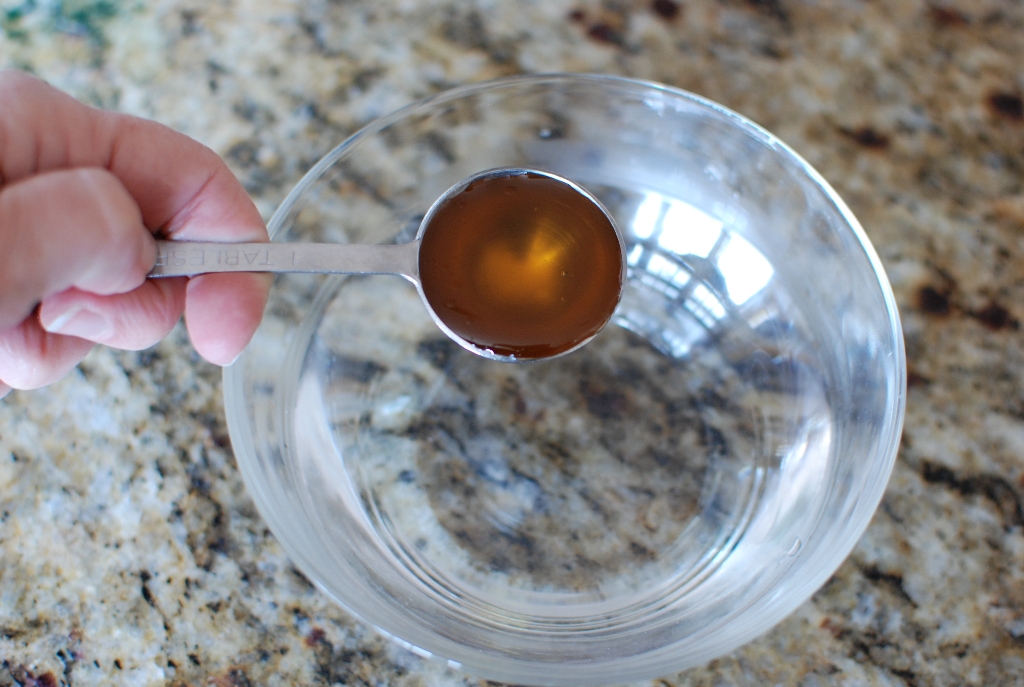
• Skip to primary navigation
  • Skip to main content
  • Skip to primary sidebar
  • Skip to footer

Simply So Good

  • Home
  • About
  • Recipes
  • Contact
You are here: Home / Recipes / Breads and Rolls / Grilled Pita Bread

Grilled Pita Bread

April 6, 2011 Updated July 22, 2017 4 Comments

212 shares
  • Share
  • Tweet
I’m boycotting the weather in Utah.  Saturday it was 70 degrees, Sunday we had 9-inches of snow.  Yesterday it was back up to 70 degrees.  Forecast…more snow.  Ugh.
I use my outdoor gas grill year round.  I just brush off the snow and turn it on.
I have decided that I am ready for summer foods from the grill.  Goodbye comfort food of winter.  I love you, but it’s time for a new season – a lighter season.  
Yes.  It is possible to grill flatbreads right on the grill.  I’ll show you how.

For this Pita bread you will need:  white unbleached flour (I always use this flour), whole wheat flour, honey, salt, yeast, warm water and olive oil.
In a small bowl add 1/2 cup warm water and 1 tablespoons honey.

Sprinkle the active yeast on top of the warm water and honey.

Whisk in the yeast until dissolved in the warm water.  Set aside for a few minutes to allow the yeast to begin to foam up a bit.  If your yeast does not foam after 10 minutes, it probably should be thrown out and purchase some new fresher yeast.

In the bowl of an electric mixer, add the flours.

Add the salt.

Add the olive oil.  Attach the paddle attachment or dough hook.  Which ever you prefer.  Mix in the oil for about 2-3 minutes.

Add the dissolved yeast and warm water.

Add the remaining cup of warm water to the flour.

Mix until the dough forms a soft ball.  
Lightly oil a large bowl.

Transfer the dough into the oiled bowl.

Cover bowl with a towel and let rise for about 1 hour.

When the dough has risen to double it’s original size, remove the the bowl.

Cut the dough in half.

Cut the dough into quarters.  Then into eight equal balls.

Shape into round balls of dough. You will notice I have 12…don’t ask.

Cover and let rest for 15-30 minutes.

The rounds balls of dough will be about double in size.

Press each ball of dough into a flat disc with your fingers.

Using a dowel or rolling pin roll the dough into an 8-inch circle.

A perfect circle is optional.  I don’t fuss too much on this.  Ryan does…I don’t.

I pre-heat my gas grill to about 400 degrees then turn the heat to low.  Lay the pita’s directly on the grill grates.  Close the lid for about 1-2 minutes.
Option:  You can cook the pita on a hot griddle on your stove top.

Each pita will puff up into a pillow.  Flip over.

Grill the other size for another minute or so.  If you have hot spots on your grill, you may want to watch closely.  I have a “Weber” grill. Love it. I wouldn’t buy anything else.  Mine is several years old and still grills consistently without hot spots.  No.  They did not pay me to say that.  I’m a Weber grill lover.
Place a towel over a plate then layer the cooked pitas.  Wrap in the towel to keep them warm.
If I were you, I’d eat one hot off the grill.  No one needs to know.
Cut the pita in half, when ready to use.
I think I rolled this pita a little thin.  I’ll make the rest a bit thicker.  You choose how you would like your pita bread.  


Grilled Pita Bread
2 tsp. active dry yeast 
1 tablespoon honey
1 1/2 cups warm water
2 cups unbleached all-purpose flour; more as needed
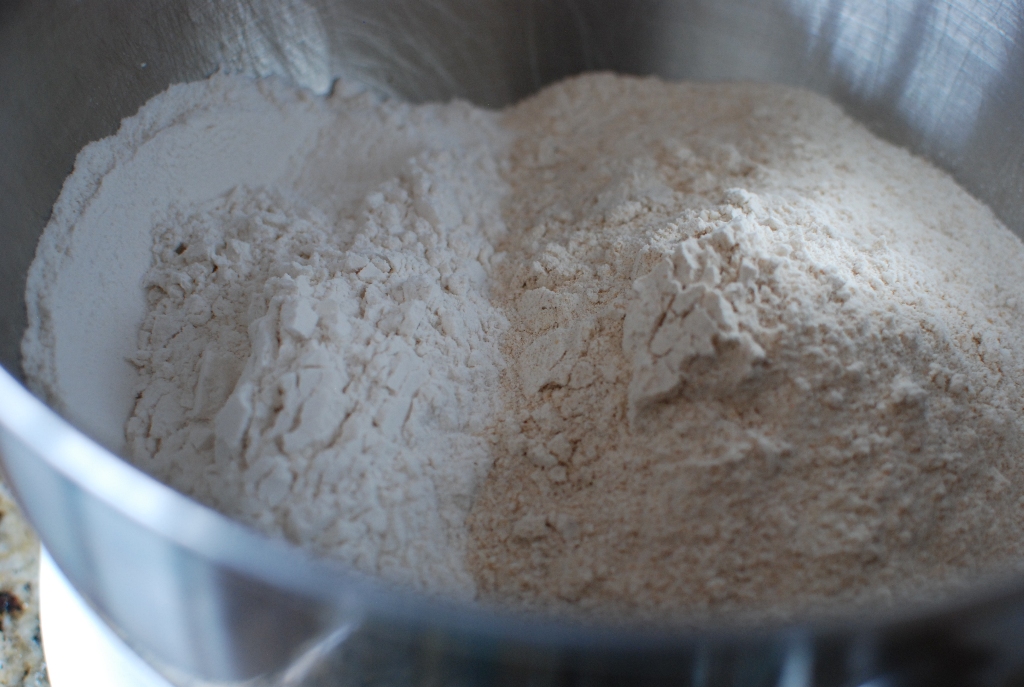
1 1/2 cup  whole-wheat flour
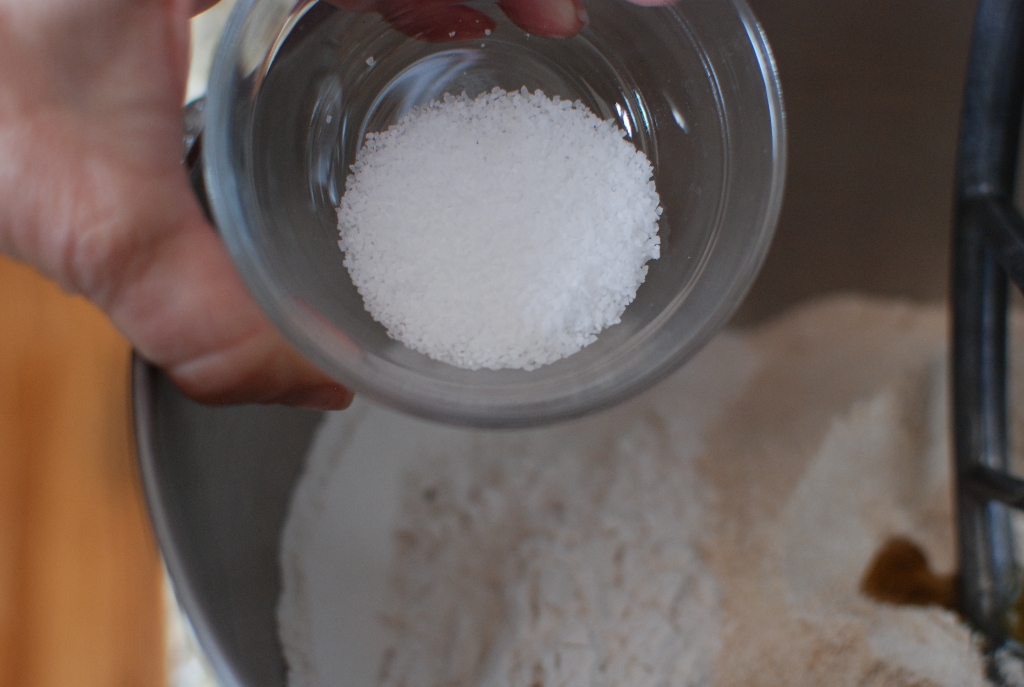
1-1/2 tsp. kosher salt
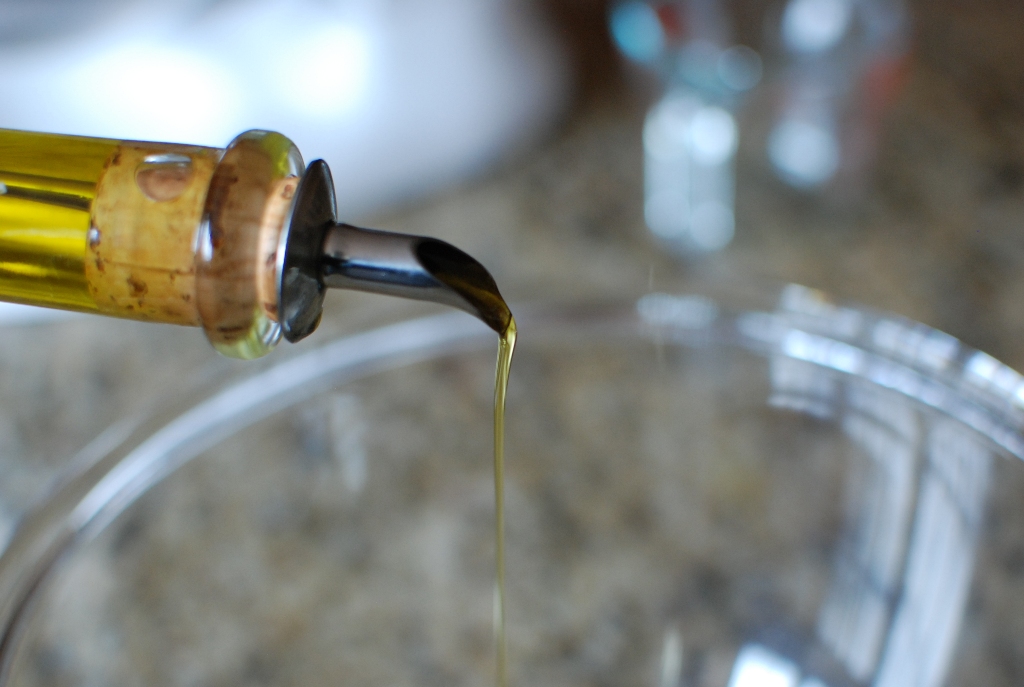
2 Tbs. olive oil; more for the bowl 
In a small bowl, mix the honey with 1/2 cup lukewarm water and stir in the yeast. Let sit until the yeast has started to foam, 2 to 3 minutes.

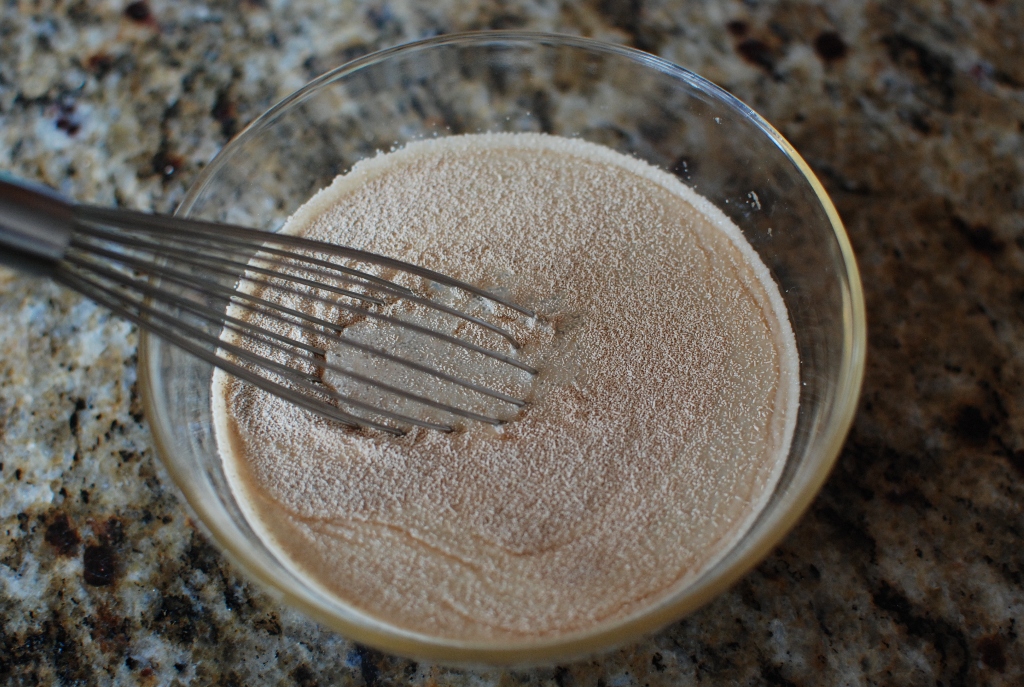
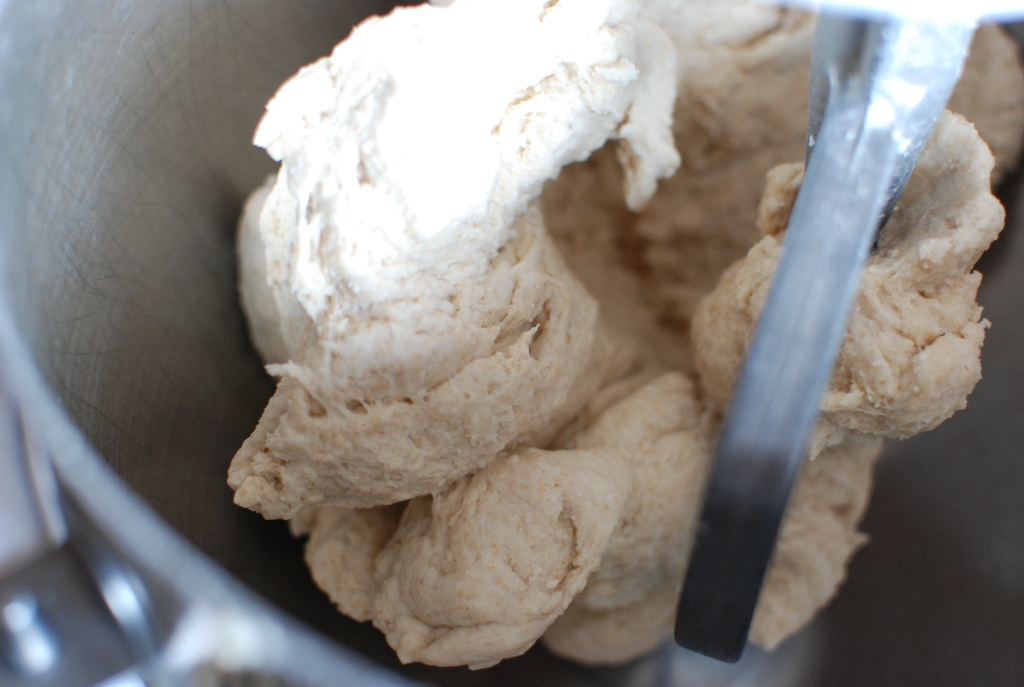
Put both flours and the salt in the bowl of a stand mixer fitted with the dough hook. With the mixer running on low speed, mix in the olive oil until fully incorporated, about 2 minutes. Add the yeast mixture and 1 cup lukewarm water and mix until fully incorporated, 2 to 3 minutes more. Raise the speed to medium and knead the dough until it comes away from the sides of the bowl and forms a ball that is smooth, elastic, and no longer sticky, 4 to 5 minutes. If the dough seems too wet, add more all-purpose flour, 1 tsp. at a time. Raise the speed to medium high and continue to knead for 5 minutes. Oil a medium bowl, transfer the dough to the bowl, and roll to coat it with the oil. Cover with plastic wrap and let rise in a warm place until doubled in size, about 1 hour.

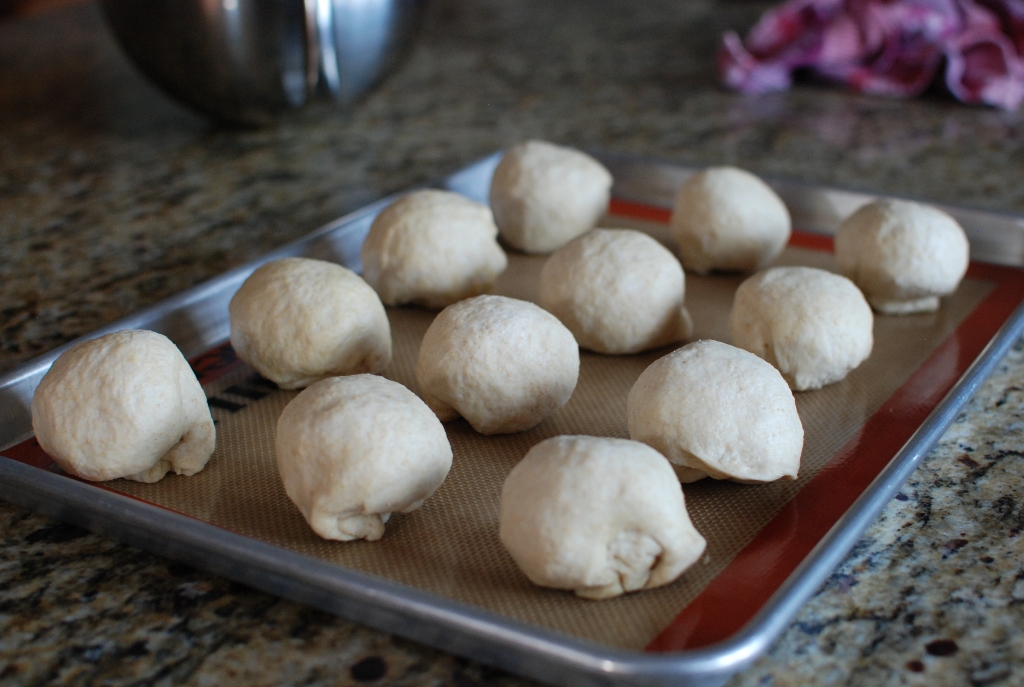
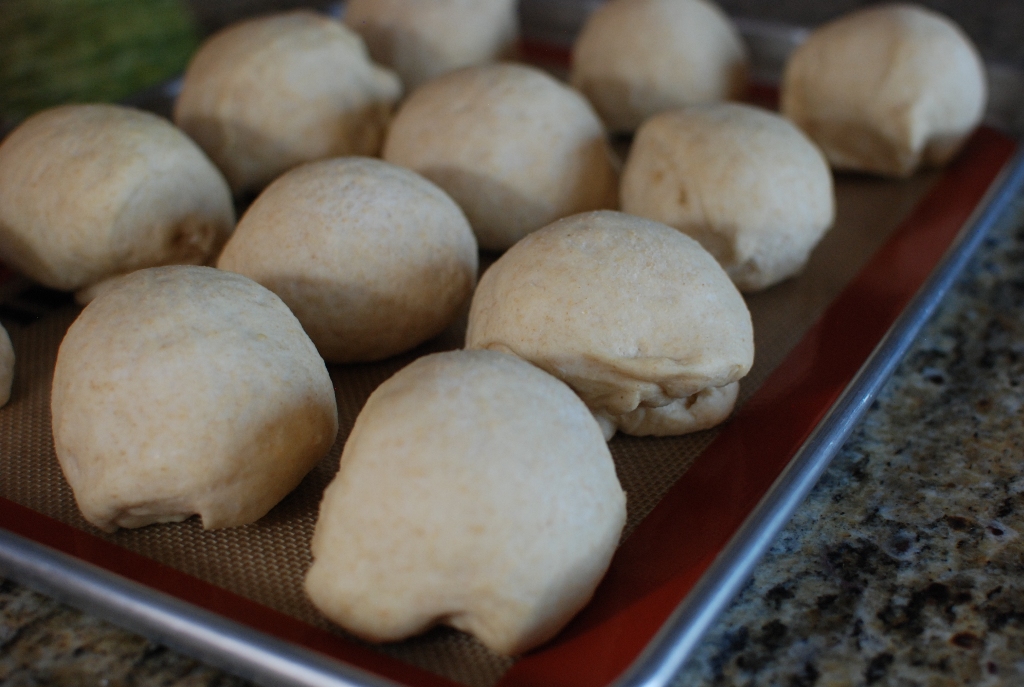
Turn the dough onto a lightly floured surface and knead two or three times to remove any air bubbles. Form into a log and divide it evenly into 8 pieces. Form each piece into a ball and then roll into disks about 1/4 inch thick and 6 inches in diameter. Lightly oil two rimmed baking sheets. Put the disks on the baking sheets, cover with plastic wrap, and let rise until just doubled in thickness, 30 to 45 minutes.

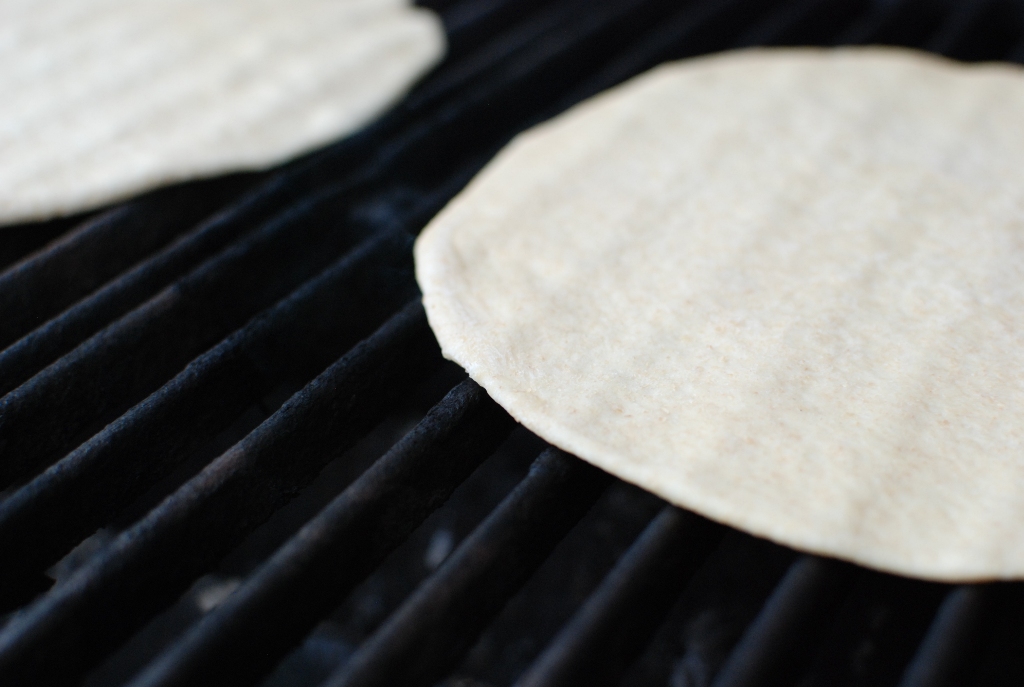
Prepare a medium-high gas grill fire, leaving one burner off, or prepare a charcoal fire with a hot zone and cool zone by pushing the coals to one side of the grill.

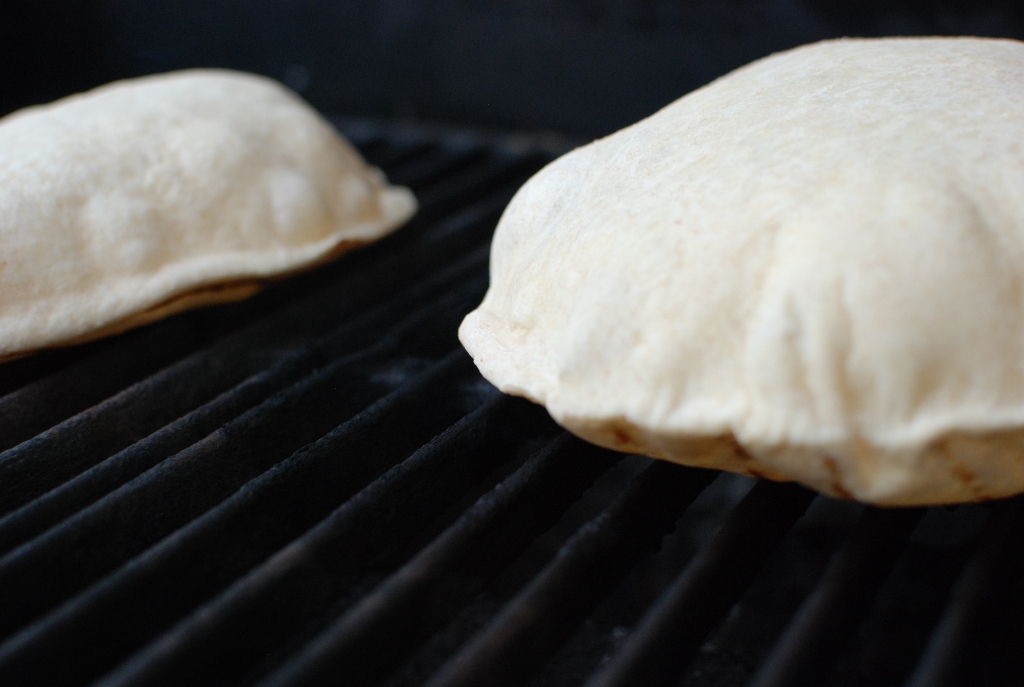
Brush a cast-iron griddle or skillet lightly with olive oil and put it on the grill over the cool zone. When very hot, cook the pitas in batches on the griddle until starting to brown, 2 to 3 minutes. Flip and continue cooking until lightly golden on the bottom and the pitas are cooked through, 2 to 3 minutes more. Cool on a wire rack. If stuffing, cut the pitas in half and carefully separate the layers with a fork.

*the recipe is from Fine Cooking July 2010.  You probably noticed that I varied my prep a bit from the original recipe.

Print recipe
Enjoy the pita bread filled with grilled meat and vegetables with a dollop of Greek yogurt.

Share this:

  • Click to share on Twitter (Opens in new window)
  • Click to share on Facebook (Opens in new window)

Related

Filed Under: Breads and Rolls Tagged With: flour, grilled, pita bread

Previous Post: « Marshmallow Peeps
Next Post: Grilled Flank Steak Pita’s with Cucumber-Yogurt Sauce »

Reader Interactions

Comments

  1. eeping says

    December 17, 2014 at 9:10 am

    Thanks. Does this work in an oven?

    Reply
    • Janet Barton says

      December 17, 2014 at 12:50 pm

      Yes it does. It works on a griddle on the stove top as well.

      Reply
  2. Janet@simplysogood says

    April 6, 2011 at 11:26 pm

    Why thank you, Chef Tess.

    Reply
  3. Chef Tess says

    April 6, 2011 at 10:58 pm

    Brilliant on the grill my dear! I love it!!

    Reply

Leave a Reply Cancel reply

Your email address will not be published. Required fields are marked *

Recipe Rating


This site uses Akismet to reduce spam. Learn how your comment data is processed.

Primary Sidebar

About Me

Janet Barton

Hi I'm Janet and this is where I share my delicious made-from-scratch seasonal recipes that I make at home for my family every day.

I believe cooking from scratch, using unprocessed and whole foods is an important part of healthy eating. My goal is to help you create amazing recipes by providing easy step-by-step photos and instructions.

Read More »

Trending Recipes

  • No-knead Crusty Bread in a Dutch oven No-knead Crusty Bread
  • Lemonade and raspberry lemonade in tall glasses Old Fashioned Lemonade
  • Slices of No-knead Partially sliced Green Chile Cheddar Bread No-Knead Green Chile Cheddar Bread
  • Kalamata olive fouggase on marble with dipping sauce Kalamata Olive and Rosemary Fougasse with Fresh Herb and Pepper Dipping Oil
  • large jar of spicy sweet pickles with habanero peppers and onions Spicy Sweet Refrigerator Pickles
  • Several chocolate drop cookies on white background Chocolate Drop Cookies
  • green Witch Finger Cookies standing in a black bowl Creepy Witch Finger Cookies
  • Tree cut out sugar cookies with green icing and golden sprinkles Butter Dream Sugar Cookies
  • baked no-knead pumpkin harvest bread with a cinnamon stem in the middle. white and orange mini pumpkins in background No-Knead Pumpkin Harvest Bread
  • Glass of almond milk with 2 gray striped straws on wood board with container of almond milk in background Quick Homemade Almond Milk

Latest on Instagram

simplysogood

They are back! I anxiously await hatch green chili They are back! I anxiously await hatch green chili season. Finally my local grocery store is now roasting them. 

So naturally I buy them in bulk. Then clean them up a bit and store them in my freezer just so I can make this bread all year. 

Out of all the crusty bread recipes I have created over the years this is probably one of my favorites. 

I love the smoky heat of the green chilies combined with sharp white cheddar cheese

Link in bio. 

#hatchgreenchilies
#crustybread
#greenchilies
Crispy on the outside, soft and tender on the insi Crispy on the outside, soft and tender on the inside. These fun zucchini corn fritters are addicting little bites using this season’s fresh Garden harvest. 🌽🌽

Fresh corn cut right off the cob and shredded garden zucchini folded into a light batter  Did I mention the chipotle lime dipping sauce? 🤤

You can whip these babies up in 30 minutes or less?

#cornfritters  #zucchini #summerharvest
I have always been afraid of making sorbet because I have always been afraid of making sorbet because I never knew just how much sugar to add to the recipe. 

Then I found this little tip!!

Drop a clean, uncooked egg into the sorbet mixture.  If the egg sinks to the bottom, more sugar syrup is needed.  

Slowly drizzle and stir in more syrup until the egg begins to float to the top of the mixture.  

You only want a quarter size of the egg showing.  Once you see this much of the egg, you have added enough of the sugar syrup.  Remove the egg and save it for baking a cake.  

Why do this test?  Well if you don’t add enough sugar syrup to the base, the sorbet will be icy and more like a granita.  

If you add too much syrup, the sorbet will be more like a slush and not form a nice shiny scoop.  
Who knew? 🤷🏼‍♀️
This is one BEETiful PEACHy wrap. Beets and peach This is one BEETiful PEACHy wrap.  Beets and peaches go with everything…am I right? 
#lovebeets #beets #peaches🍑
Happy Father’s Day to all you great dads out the Happy Father’s Day to all you great dads out there! Click the link in my bio for this double rootbeer ice cream float!
Happy Spring🌷 Here are some of my favorite Spri Happy Spring🌷 Here are some of my favorite Spring recipes.  I hope you love them. 

Link to the recipes in my bio.
What fun no-knead bread flavor combinations have y What fun no-knead bread flavor combinations have you tried!?
•
Share in the comments below for us all to try!
Are you making sugar cookies this Valentine’s Da Are you making sugar cookies this Valentine’s Day? 💝 I have been receiving so many questions regarding what sugar cookie is best to use. Click the link in my bio for a sugar cookie guide full of everything you need to know about baking sugar cookies.
Fluffy white chocolate icing is a silky smooth, me Fluffy white chocolate icing is a silky smooth, melt-in-your-mouth icing. It is satiny, less sweet, and quite unusual. I think you’re going to love it!
Load More... Follow on Instagram

Footer

Featured on

The Daily Meal Logo The foodgawker-logo reddit Logo BuzzFeed Logo halfbaked Harvest Logo Browneyed Baker Logo FOOD52 Logo University of Washington Logo sheknows Logo

Copyright © 2022 Janet Barton
Privacy Policy