
The dough is the same recipe as the No-Knead bread and the Crusty bread that I have already posted.
I’ll go through the quick process again.
You will need:
3 cups all-purpose flour
1 3/4 teaspoons kosher salt
1/2 teaspoon yeast
1 1/2 cups water (cool to room temperature. It doesn’t need to be warm)
For the topping:
Extra-virgin Olive Oil
Sea salt (love Maldon)
Fresh rosemary

Place the 3 cups of flour in a large mixing bowl.

Add 1/2 teaspoon yeast.

Add 1 3/4 teaspoons kosher salt.

Whisk to blend.

Pour in 1 1/2 cups water all at once.

Stir.

Stir just until the flour is absorbed. No need to knead…just leave it just like this photo above.
Cover the bowl with plastic wrap and walk away. Do not refrigerate the dough. Leave it out at room temperature for 12 – 18 hours. Trust me…just walk away and leave it.

After the dough has set for 12 – 18 hours it will be all bubbly and super sticky. That means it’s perfect.
Right now go an preheat your oven to 450F.

Cover an 8 x 8-inch square pan with olive oil. Use as the best extra-virgin olive oil that you can afford. Yes, it does make a difference in the overall flavor of the focaccia. I use about 1/4 – 1/3 cup.
I know it’s a lot. Not to worry. The dough will absorb the oil and create the most delicious crust.

Just cover the pan.

Scoop the dough out of the bowl.

And drop it immediately into the pan with the gallon of olive oil.

Using your fingers gently press dimples into the dough. There is no need try to stretch it or make it fit completely into the pan. Work the dough as little as possible. As I press the dough I dip my fingers into the olive oil so the oil fills in to the little dimples.

I know…it looks like a ton of olive oil. Go with it.

Chop a spring of fresh rosemary.

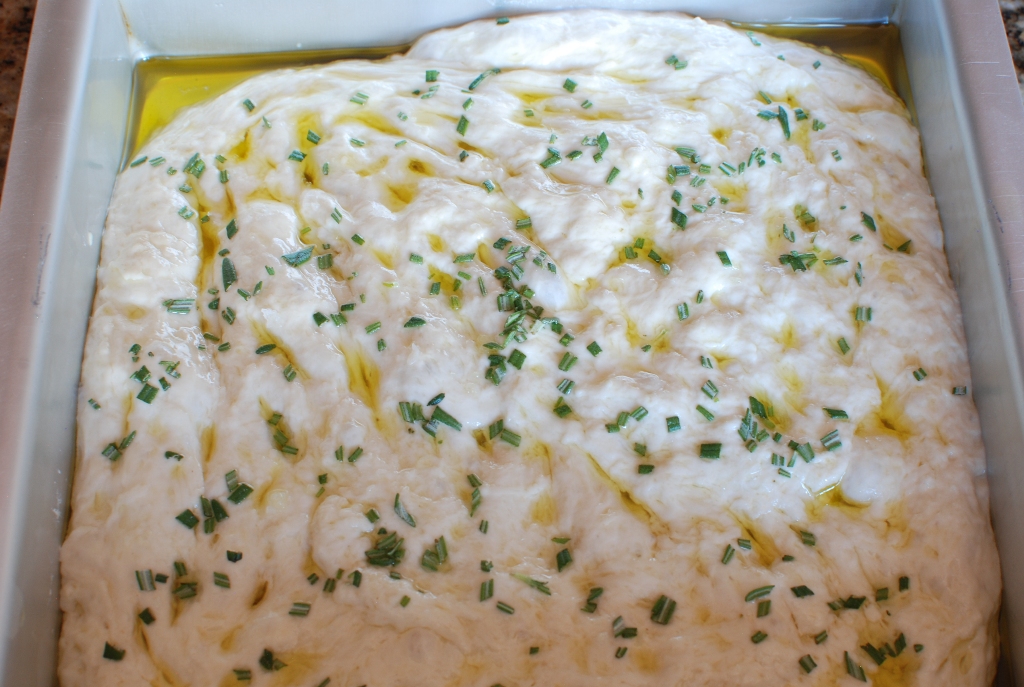
Sprinkle over the top of the dough along with some coarse sea salt. I love Maldon salt. It’s like flaky crystals. It’s a fabulous finishing salt. Amazon is a resource for Maldon sea salt, if you can’t find it in your local stores.

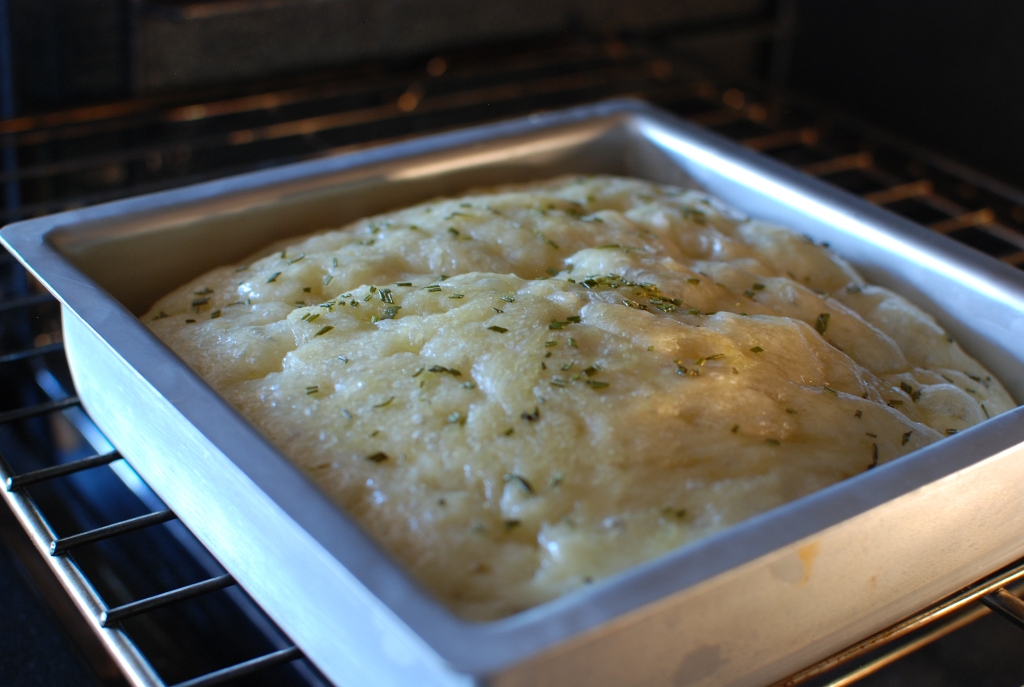
Cover the pan with aluminum foil. Let the focaccia sit while the oven is heating.

Place in a preheated 450 degree oven. Bake for 20 minutes.

Remove the foil.
Bake for an additional 20 minutes.
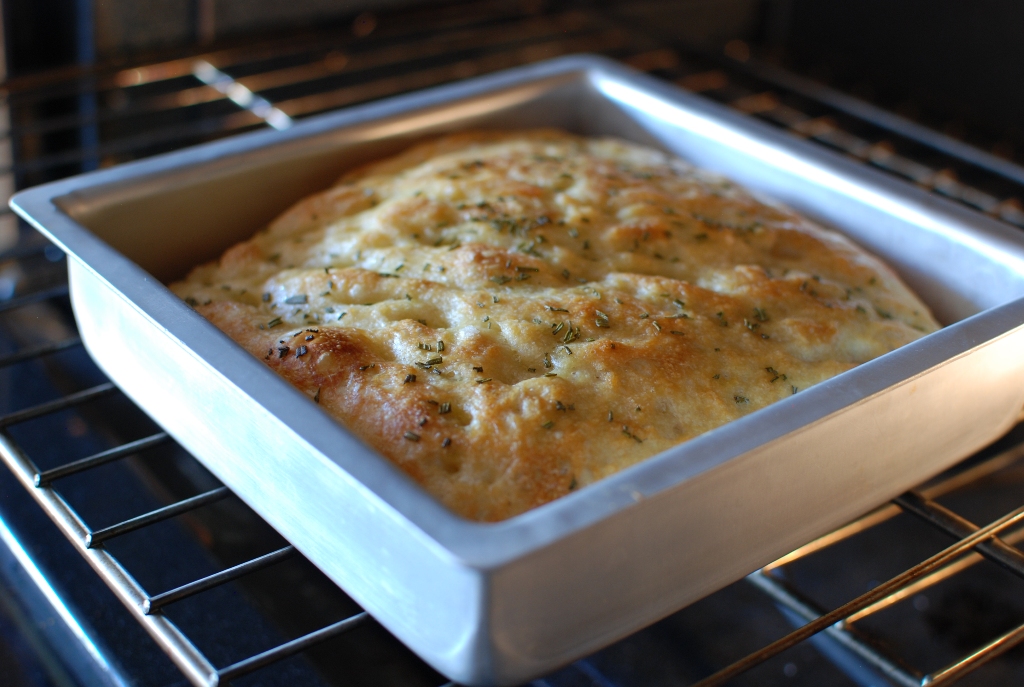
Or until golden brown. Immediately remove from the pan.

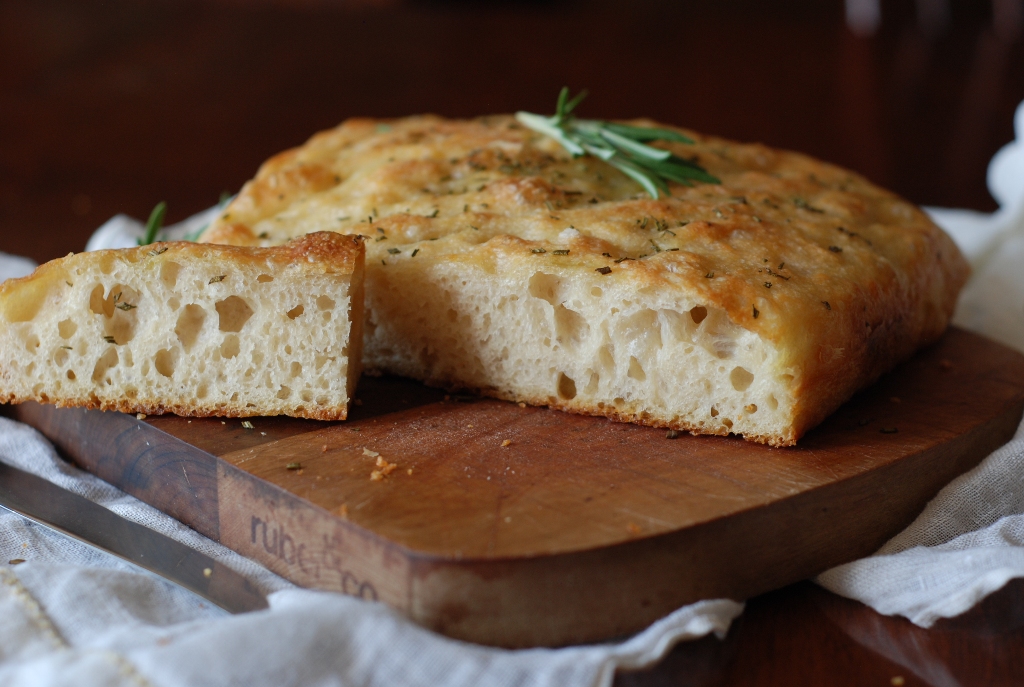
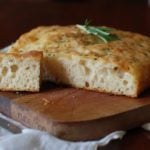
Serve on a cute kitty cutting board.

Notice the texture and the large holes.

Just look at the bottom crust. The dough absorbed all of the olive oil. It’s so crisp. So addicting.
Don’t stop with rosemary and sea salt. Create your own 5 minute Focaccia. I’m thinking Kalamata olives.
No-knead Focaccia Bread
Ingredients
- 3 cups all-purpose flour
- 1 3/4 teaspoons kosher salt
- 1/2 teaspoon yeast
- 1 1/2 cups water cool to room temperature. It doesn't need to be warm
For the topping:
- Extra-virgin Olive Oil
- Sea salt love Maldon
- Fresh rosemary
Instructions
-
In a large mixing bowl combine flour, yeast and salt. Stir in water. Mix just until the mixture forms a ball and the flour has absorbed the water. Do not over mix. Cover with plastic wrap and let stand for 12 - 18 hours.
-
When ready to bake, heat oven to 450 degrees. Cover the bottom of an 8 x 8-inch square pan with extra virgin olive oil. Scrape dough out of the bowl (it will be very sticky) directly into the prepared pan. Press dimples into the dough with finger tips. Sprinkle with fresh rosemary and sea salt. Cover tightly with aluminum foil and bake for 25 minutes. Remove foil and bake for an additional 20 minutes or until golden.
-
Makes 1 8 x 8-inch focaccia.
This recipe tastes amazing. So easy, too!
Just wondering why my bread always sticks to the bottom of the dish? I used the 1/3 cup of oil! Ive made it 3 times now and tried different dishes, each time they stick! Would parchment paper work?
Like many, i’m sure, I decided i want focaccia “TODAY”, and was sad that I didn’t have the 12-18 hours recommended in this recipe. But I decided to YOLO it anyway with only 4 hours of time to let it sit. It Still turned out fantastic! If anyone gets turned off by the long rest because they dont have the time, I recommend trying it anyway. And next time you can try for the full resting time for an even better focaccia.
Hi “Billy”! Thank you for your great advice for a quicker focaccia. Happy baking!
Hello, can you use sourdough starter or discard? If so, how much and would you reduce the yeast? I love the taste of sourdough and thought you might be able to put it in.
Yes, you can use a sourdough starter. I’m not sure about the discard, but it might be worth a try. I have not tried using sourdough starter with the focaccia but in the no-knead bread, 1/2 cup starter works great. If your starter is active enough you shouldn’t need to add yeast. I have noticed that many sourdough no-knead recipes still incorporate a series of folds just as you would if making a sourdough loaf. I know that many of the comments I have received using sourdough just let the dough set and bubble without the folds. I’ll be anxious to hear how your focaccia turns out.
Hello,
I am really looking forward to trying this, i was sent the recipe by a friend with rave reviews!
Compared to the bread i usually make, This has a small amount of yeast. Just cuRIous, will the dough rise mUch over the 12 Hours or mostly just get sticky?
Thank you for sharing!
Yes! Just 1/2 teaspoon and the dough should look bubbly on top after 12 hours of rising. The dough can rise for 12-18 hours with great results. I hope you give it a try.
Wow – my second recipe from your blog and it’s another winner! I love Ace Bakery in Toronto and this Focaccia is very close to their loaf. I had to use a 9″x9″ square pan so it is probably a little flatter but it came out perfectly with 20 min covered and 20 min uncovered. Really fabulous. Thank you! PS I don’t seem to be getting notified when comments are answered?
I don’t know why you aren’t receiving notification. I generally have to approve a comment, but your comments come up as “approved”. Oh well. I’m thrilled the focaccia was a success. Isn’t that olive oil crust delicous?
This was my first atte at making Focaccia. Eve in the faMIly loved it. Can i substitute With whole wheAt flour?
I’m so thrilled your family liked the bread. Wheat flour absorbs the water differently than white flour. You would actually use LESS water. I would try making the recipe with 1/2 white flour and 1/2 whole wheat pastry flour. Whole wheat pastry flour isn’t quite so dense in a bread. That will be a good starting point, then you can adjust from there. Let me know your results.
Worked like a charm!!! I like whope wheat version even better than the original. Thank you for suggestions… my soN cant seem to have enough of it!
Wahoo!!
Why did my dough smelled and tasted strong? Besides it was very tight inside… Mine didn’t have those “air bubbles” in the middle, it was soft, just compact and heavy. What might I done wrong?
Let’s talk this through, Maria. Here are a few things to take note of. After mixing the dough ingredients together, the dough should not look dry at all. No dry flour spots. Flour brands are not created equal. Sometimes you might have to play with the flour you are using. If the dough appears stiff or a bit dry, add a bit of water to loosen the dough up. After the overnight rise, the dough should look wet and bubbly. When transferring the dough into the prepared pan, gently release it from the bottom of the bowl and let in just fall into the pan. You should see visible signs of bubbles under the dough. With oiled fingers, gently press fingerprints into this wet dough. I hope these tips help. Please let me know if you try the focaccia again. I’d love to hear about your results. Don’t hesitate to contact me through email. simplysogood@hotmail.com
Silly question… If I add something like olives (which sounds amazing) then I assume I add them as I’m mixing the dough, and not after it’s risen for the 12-18 hours, is that right? I have the original recipe cooking in my oven right now, can’t wait for it to be ready!! Thank you!!
Yes, add anything in during the mixing time. It’s too hard to distribute when the dough has already risen. I bet your facaccia is amazing with olives. Brilliant idea.
The rosemary salt version worked great for me and tasted good. I had a hot oven since its gas, so i wojld do a couple minutes under for the final 20. But did get crispy and browm bit some hard.
but i WOULD defInitely make again. If i did dairy free cheese would i add that to the dough as well? Thanks
I’m thrilled you tried the focaccia recipe. I have never worked with non-dairy cheese. I have used cheddar cheese in making the focaccia and it worked quite well. The only issue is keeping the cheese on the inside of the dough. It is prone to burning on the bottom from the high heat. Please let me know how the non-dairy works out.
I did try thos with asiago cheese. I forgot to add to the dough so i added it to bottom of dough, put in pan, then microplaned more in top. Tasted great! However it did get extra crispy in parts(almost bunrt). I haven’t tried the dairy free cheese yet, but did microplane asiago cheese into the dough on my next try. I put it in the fridge to rise over night because ot had the cheese in there. Mistake! Dough ddint rise. So i put it in the sun because its warm here today. But didnt rise after 3 hours. Im going to put in a differnt bowl(not as cold) and preheat oven and see if it rises on the oven. Then try this boiled water method i saw on you tube. Put boiled water in pan next to bread and raise temp evrry hour until risen. Any other tips to help it rise?
Oh, my god…. this is absolutely amazing! Thank you so much for the recipe, i can’t wait to bake it again, to bake it for others, to share the recipe, etc.!
So fabulous and so easy. I’m so glad you love it.
Great Recipe: may I suggest as a topping, a light brushing of tomato paste, and super thinly sliced onions.
I just have one basic doubt. If you say 3 cups of flour. How much would that be in grams? Generally 1 cup=250grm..
Amazing bread and I'm going to try this for first time. Love your blog and the way you have posted step by step pictures.. Very inspiring and mouth watering!!! Thanks for the post and making baking easy.
I thought 1 cup of flour by weight = 120grm which would be 360 grams by weight.
The focaccia is great. I made a double batch for a bridal shower and it was gone in a flash. Best of luck Thanks for your kind words. Happy baking.
Try it with feta, garlic, pine nuts, and olives (variety of your choice, but do try green). Yummy! Thank you for the inspiration!
Oh yum! Thank you, Patty. I'll make it this weekend. I just need a few kalamata olives and I'm set!
If you add a couple Ts of ground flax seed to the dry mix, it isn't murder getting it out either (on the contrary, it's smooth sailing).
🙂
I was skeptical…..how could bread be so easy??? But now I am A TRUE BELIEVER. I used a metal pan and a ton of olive oil, so no sticking. Definitely going to try adding garlic next! (And did someone mention cheese, jalapeños, and bacon? Sign me up!)
I say YES to cheese and jalapenos. Thanks for the great idea. I'm going to make it soon.
WOW did my batch stick to pan (metal) have been making 5 minute bread for a number of years with great success. I really want this to work–so I am going to try parchment cut to fit bottom of pan before the "gallon" of olive oil. Have 3 days before I want to serve this so have more time for trials. Love the flavor.
Oh I'm so sorry it stuck. That's no good. The parchment should solve your problem. I love the aluminum foil that has a non-stick surface. It's awesome. It would work as well. Good luck.
If you spray the pan with PAM or your favorite spray before you add the olive oil it won’t stick
Brilliant.
I am so glad I finally took the time to go through more of your recipes. I have been making your crusty bread now for a couple of years and people think I am a baking genius. I have dough sitting on my counter for tomorrow morning right now, I might use it to make this instead. I am making mussels tomorrow and can't wait to dip this in the juice!
Oh my goodness. This would be perfect for sopping up that wonderful broth.
Made this recipe on the weekend for a brunch, it was a total hit! Everyone was raving about how good the bread was … should have made two! Thanks for the great recipe.
Thanks for your comment, Michelle. I agree, with making two batches. The first time I baked one, it was gone in minutes.
Since trying this recipe last week, I've made three loaves. I added garlic to the rosemary (turned out so well, I made it again the next day) and then one with bacon, cheese and jalapeno. I am obsessed. It's so easy to make and yet so incredibly delicious.
I agree and I love the cheese, jalapeno. I'm going to have to try that for sure. Thanks for sharing your great ideas.
Making this bread for the 2nd time and it is DELICIOUS and SO easy to make. It is very addictive because it's so easy and delicious. I think about it all the time.
I completely agree.
from Honduras
devil of a time getting bread out of pan dangerous too poured off bit less than 1/4 cup hot oil
used Pyrex baking dish
have been baking no knead bread for 4 years but in covered pot routine.
will enjoy the results a bit later
I tried your recipe and the focaccia turned out fantastic! Thank you!
Great to hear. Thank you so much.
And drop it immediately into the pan with the gallon of olive oil. This must be a typo?
Been making Jim Lahey's no knead bread for a long time so looking forward to this variation
No typo. I was only kidding. It only seems like a gallon.
I figured so but was very curious. I made it in a pyrex pan and once I got it out we really enjoyed the texture and flavour. It was totally stuck so will use metal next time. I also changed the recipe a bit as I used 1/4tsp yeast as per Mr Lahey's recipe. Appreciate your time putting this blog together
Oh shoot. I'm sorry the bread stuck. Thanks for your tips and comment they are so much appreciated.
Making this as we speak, probably the 15th recipe I've made off here. Everything is always so amazing. I put my dried rosemary and a bit of turmeric right in with the flour… Wish me luck.
I was completely skeptical about the crunchy crust and the giant holes in the bread, but holy wow! We did the same thing you did. Devoured it while it was still hot. I can't wait to make it again!!!
I give my first effort at this a B-; not bad I guess for the first time ever I've baked with yeast. I'm in the middle of my second effort and these are two modifications I'm making: add oil directly to dough, and only 2 Tbsp (this is per a Sicilian pizza recipe I found). Then instead of 25 minutes with foil and 20 without, the other way around, hoping for more browning on top.
The main reason I give my first effort a B- was that it was a bit tough. I don't think I over worked the dough when mixing, but maybe I manipulated it too much when putting into the pan, in an effort to spread it evenly? I did the same thing again so we shall see.
Long story short, thanks so much for posting this – I'm making it a second time after just 10 days so I do like it. And now you've inspired me to make homemade Sicilian pizza too.
I'm sure you will have the recipe mastered in no time. There really is no right or wrong way. It just depends on your flour, altitude and humidity where you live. Sicilian pizza sounds fabulous.
After baking I put the bread under the broiler for just a couple of minutes, and the resultant golden brown crust addresses any "toughness" issues I had, particularly when slicking. I just think because it wasn't sufficiently crusty on top, the knife didn't have anything grab onto. I'm giving this effort an A though I'm taking it to a pot luck so maybe I should let them be the judge. By the way if you google or use wikipedia you will see that Sicilian pizza is in essence "focaccia with toppings" — here's the recipe I intend to try: http://www.seriouseats.com/recipes/2011/12/sfincione-sicilian-new-years-pizza-with-bread.html Thanks again for posting this!!
Made this tonight to enjoy with friends and it was great! I forgot to make the dough last night, so I raised it for 4-6 hours in a warm oven (preheated to 170, turned it off, put the bowl of dough in). It ended up quite a bit taller than pictured, probably because of the short rise, but it came out beautifully. I used a glass pan and it stuck despite the gallon of olive oil, ha! Nice metal pan next time, I think. I sprinkled with minced garlic, chiffonade basil, Himalayan pink salt, and red pepper flakes. Served with this: http://foodinjars.com/2013/03/guest-post-green-tomatoes/ both blitzed into a tapenade and made as directed. Heaven!!!
Your focaccia sounds amazing. I need to get some Himalyan Pink salt. The green tomato relish looks fabulous. Thanks for sharing your ideas. They are always great!
Thank you!
Hi, would I be able to leave the dough out for more than 18 hours? Thanks!
Sure. My dough sat out for 24 hours.
Lovely recipe and photos. Would it be possible to make just half the portion? Would I need to cut down the amount of yeast then? Thanks so much!
Yes. Reduce the yeast to 1/4 teaspoon. Good luck.
can i use bread flour
I think so.
Hi dear,
i m first time visiting your blog, your focacia is inviting me to grab whole lot. please clear one thing that if we are using normal yeast then still we need not to use warm water to proof it.
visit me any time.
It is probably a good idea to proof the yeast in warm water if you are not using a quick rising brand.
I used a stoneware pan and the bread totally got stuck to the bottom 🙁 is there any way to prevent this? maybe wait for the bread to cool instead of trying to take it out right away? the crispy part was delicious even though i had to scrape it off the pan!
I'm assuming the pan was unglazed? I wonder if the stoneware soaked up the oil? Do you think that could have been possible? You could try putting parchment paper down, but the oil will probably soak underneath. I'm sorry I'm not much help, but I haven't used stoneware very much.
This again looks very tasty! I must try! Greetings from Germany.
I love hearing from Germany. Thank you so much.
Would this work well in a square glass pan? I don't own a metal one, but I would love to try this!
Absolutely. Just make sure the glass can take the heat. You can always lower the temp by 25 degrees. Good luck.
You make baking bread look SO easy Janet! I haven't tried one of your bread recipes yet but will definitely do so soon. This looks delicious!
Ok, Heather. It's time to try at least ONE of my recipes. Baking is SO easy. that's why I put up the step-by-step photos, so you can learn. Start with this focaccia. You will be queen in your home. Then try something simple, like cookies.
I have been spoiling the kids all summer with either bakery bread or homemade bread and this will be perfect to quickly whip up over the weekend for back-to-school lunches next week. Another wonderful looking recipe! Thank you 🙂
What lucky kids. This focaccia would make great sandwiches. I hope you love the focaccia.